How to Setup PSWindowsUpdate and UpdGUI to Get Rid of Windows Update Annoyingness
Enter PSWindowsUpdate, combined with UpdGUI - a powerful open source combination that puts you back in control.
Table of Contents
Windows users are all too familiar with this annoyance. You're engrossed in your work when Microsoft's infamous update pops up, demanding an immediate reboot. Or worse, you're stuck in a loading screen at the most inconvenient time while Windows 'prepares' updates that may or may not work. Traditional Windows Update has a reputation for being annoying, unreliable, and completely out of your control.
But what if there was a better way? Enter PSWindowsUpdate, combined with UpdGUI—a powerful open-source combination that puts you back in control. This setup turns the frustrating Windows update experience into a truly manageable one, giving you granular control over what gets installed and when.
Setting up PSWindowsUpdate and UpdGUI
Control updates with this simple setup
Launching this powerful update management system requires just a few simple steps. The whole process takes about 5 – 10 minutes and does not require any special software other than PSWindowsUpdate and UpdGUI.
Before we continue, if you've taken steps to gain more control over Windows updates, you may have figured out how to stop Windows updates indefinitely. Since this setting requires the Windows Update Service, you should only use the Pause updates option in the settings panel, as disabling this service can disrupt your system.
Install the PSWindowsUpdate module
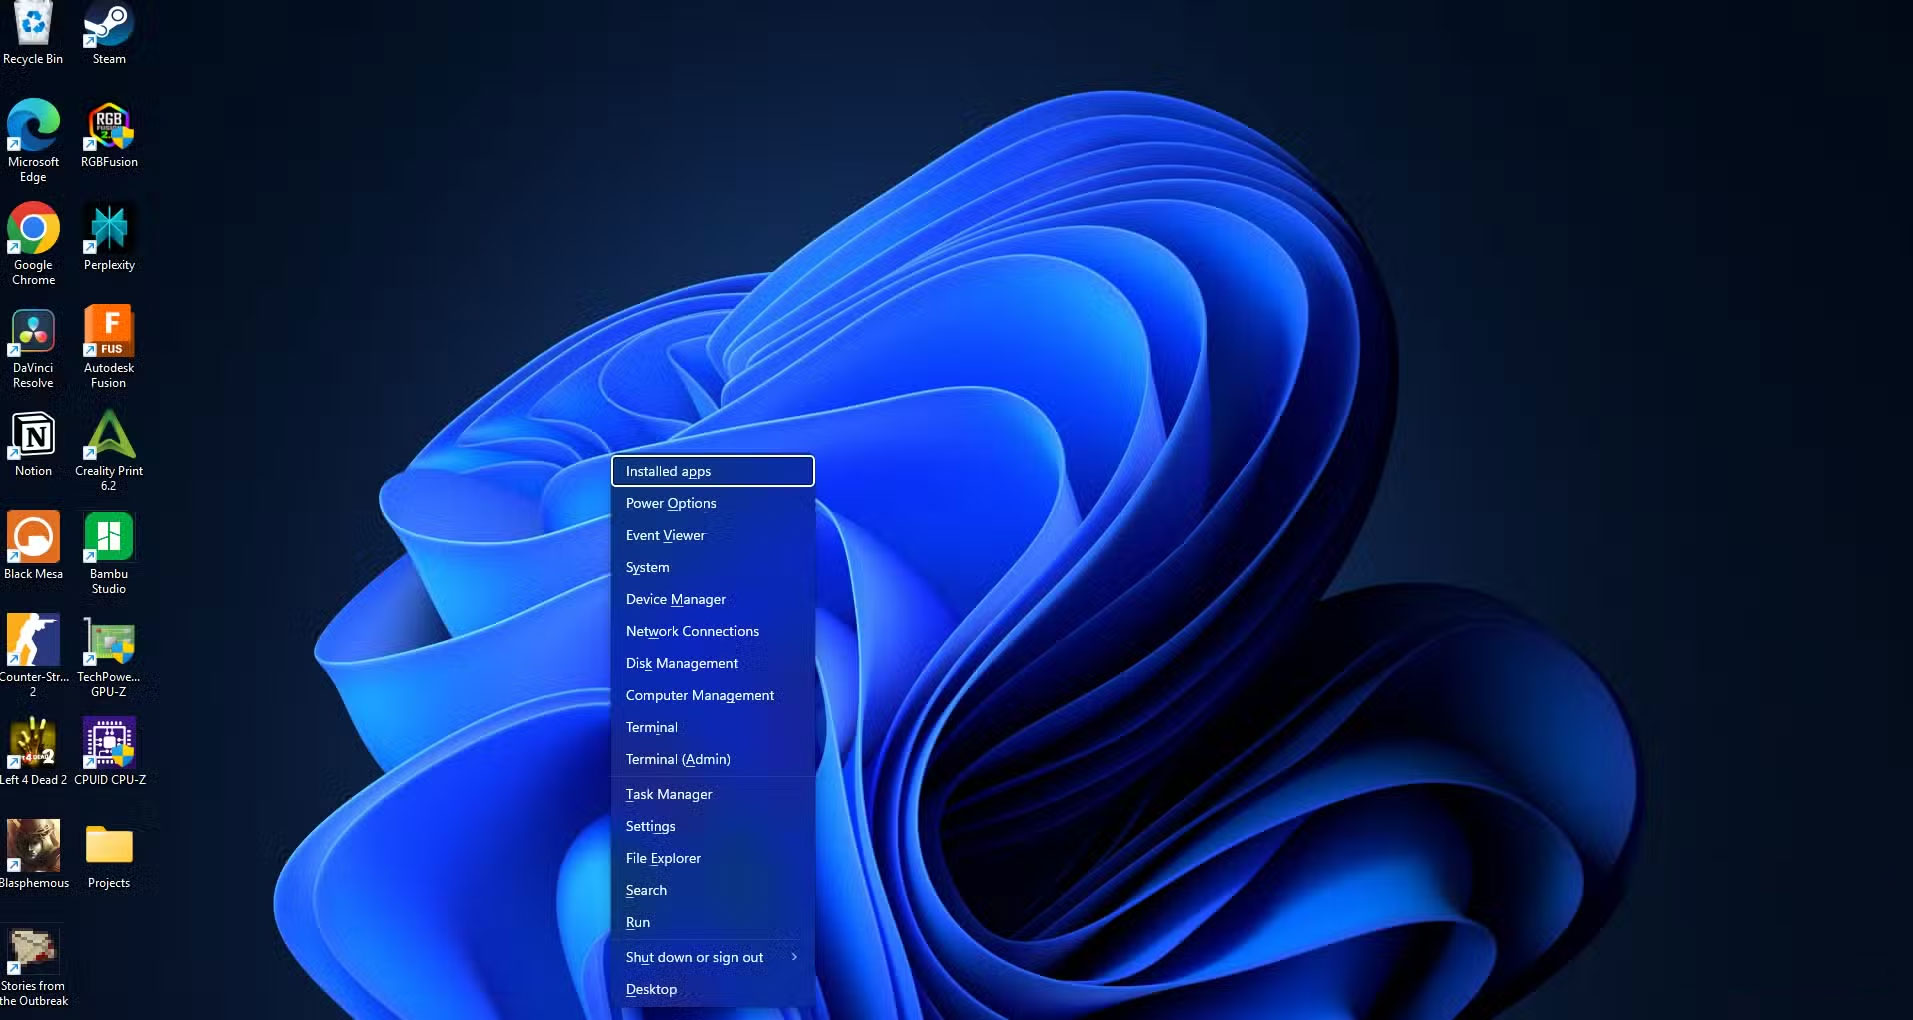
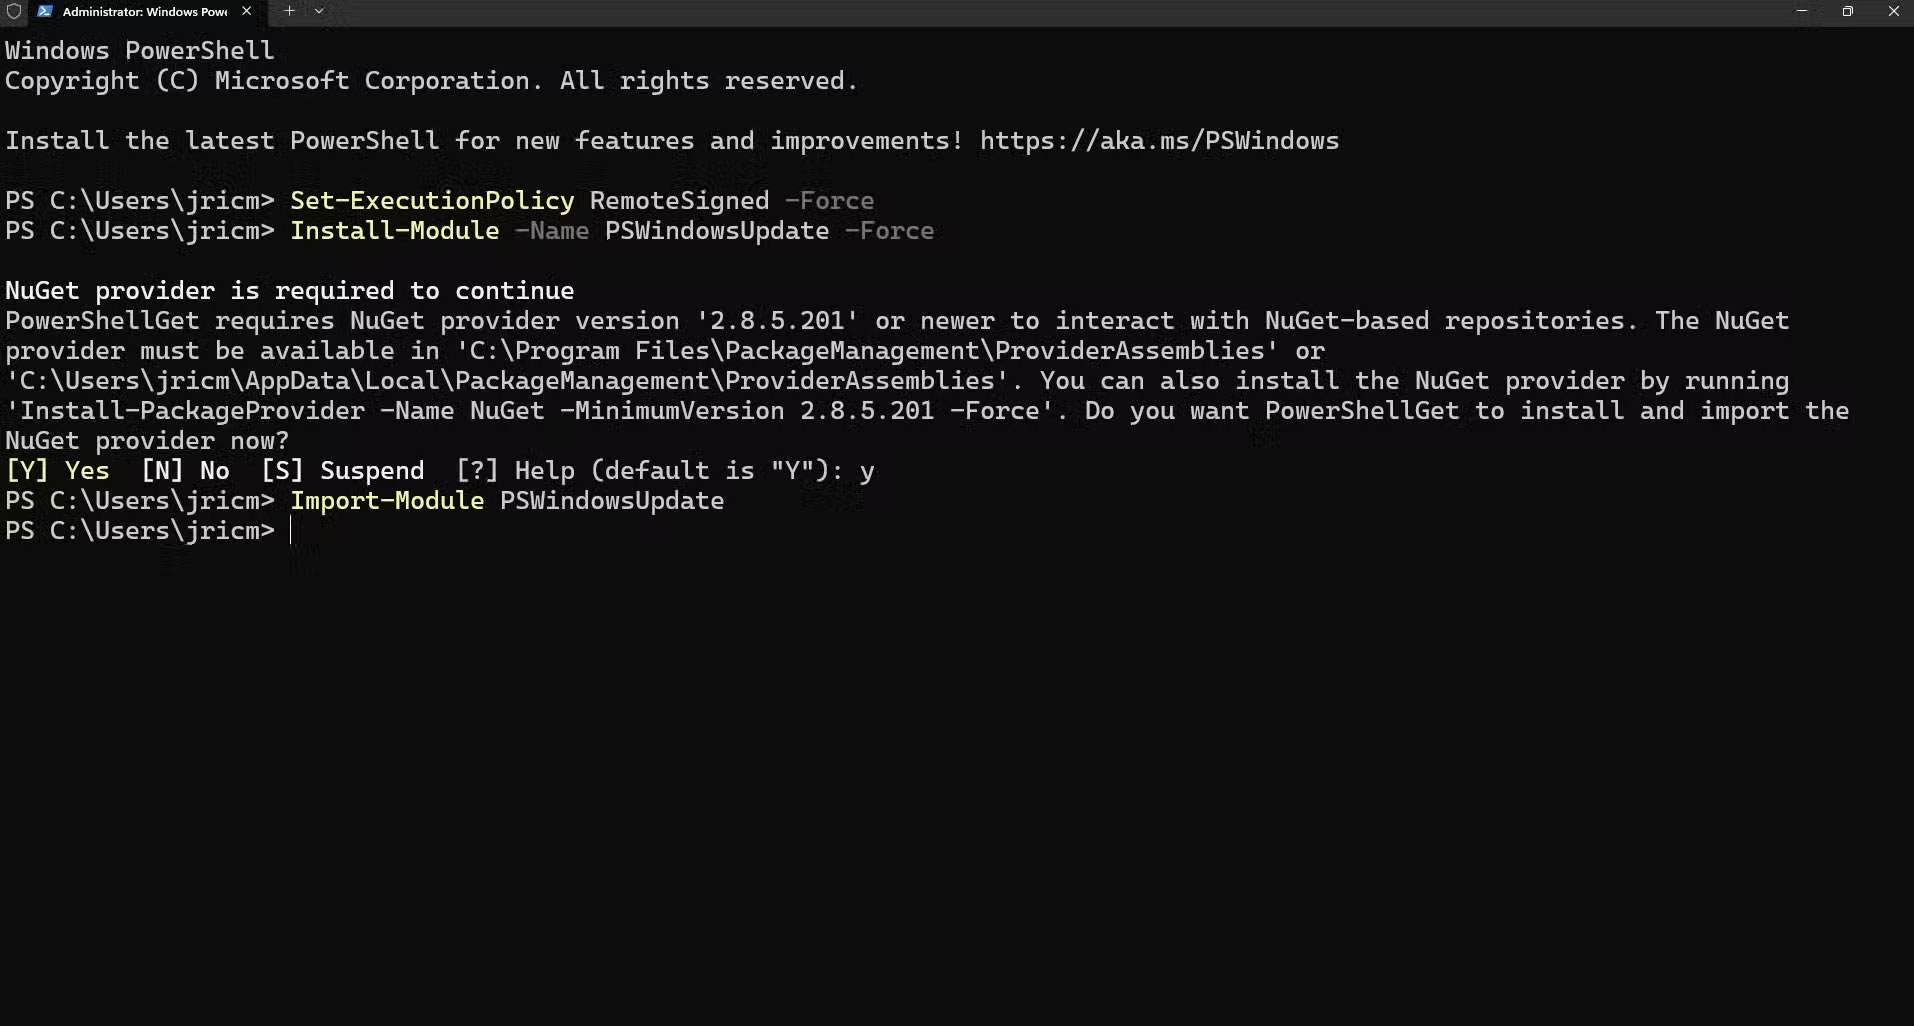
Start by opening PowerShell with admin rights by pressing Windows key + X to access the hidden Windows Start menu and clicking Terminal(Admin) . Alternatively, you can also right-click the Start button and search for "PowerShell" and press Enter . Once opened, enter this command:
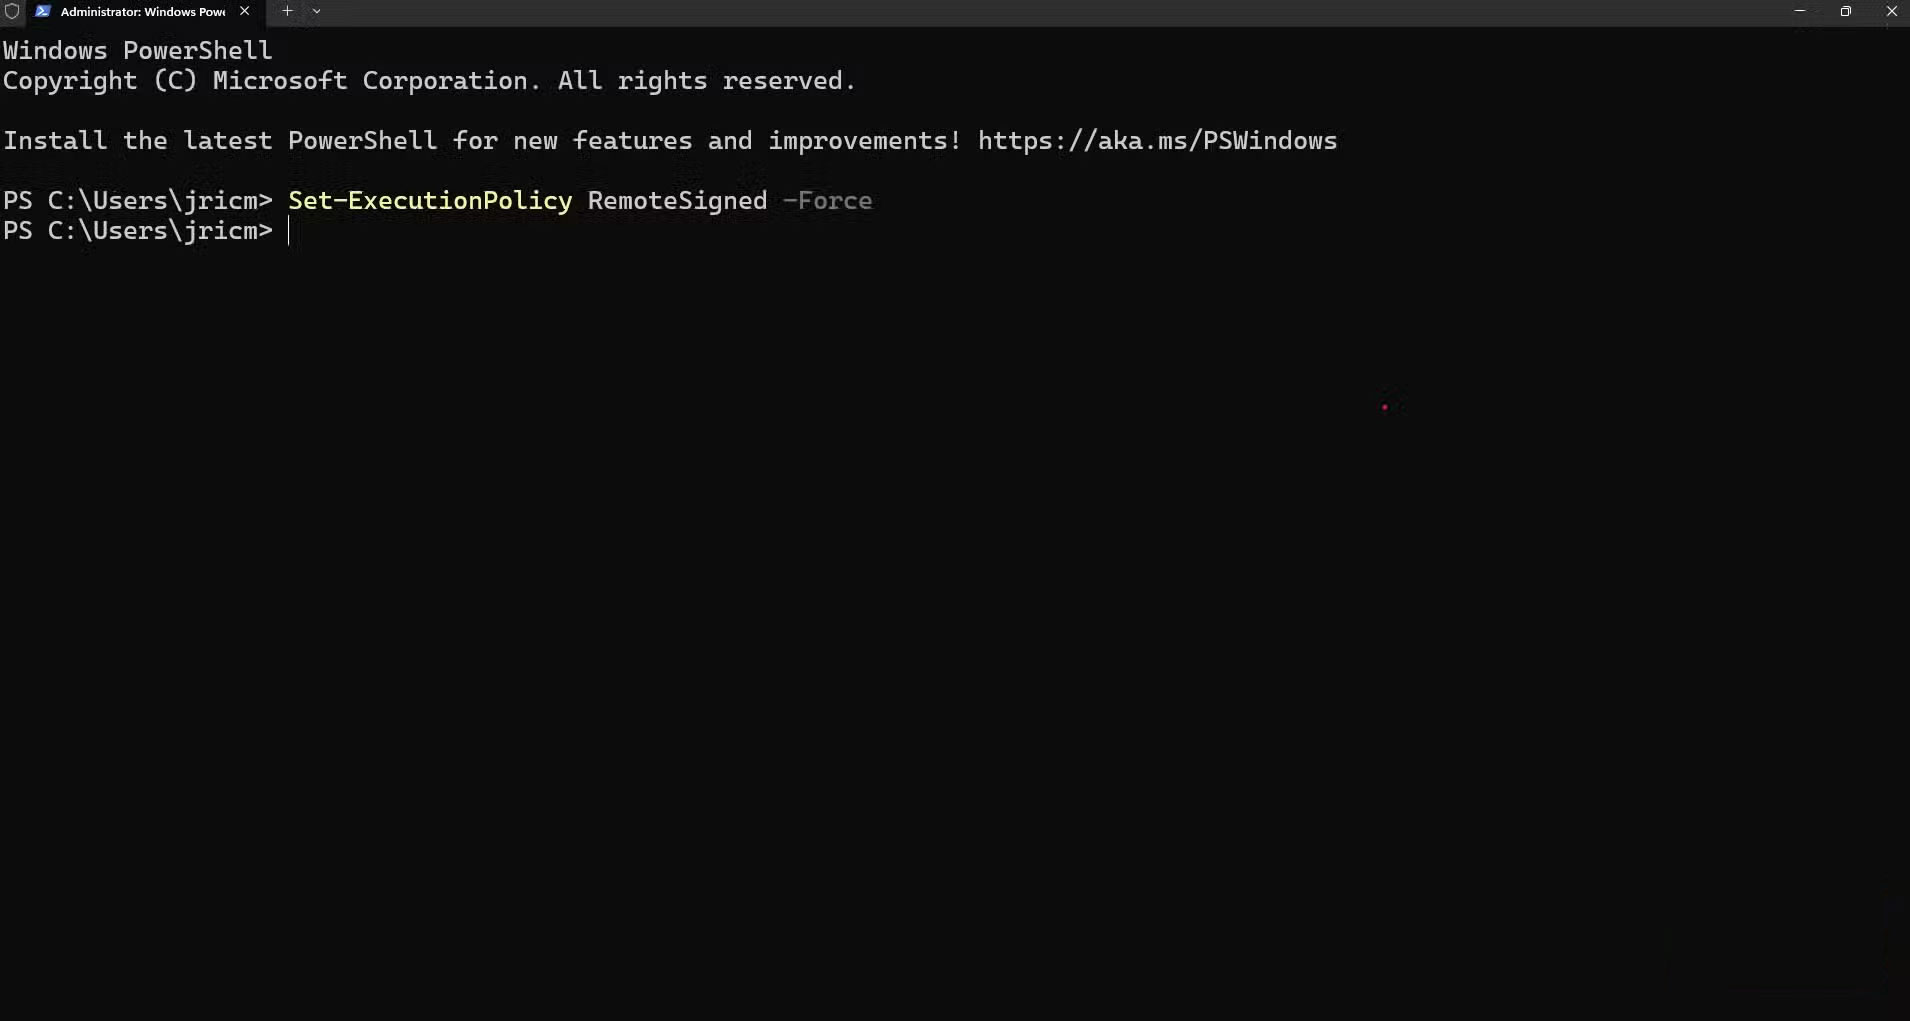
Set-ExecutionPolicy RemoteSigned -ForceThis change ensures the PSWindowsUpdate module can function properly while maintaining security for other scripts.
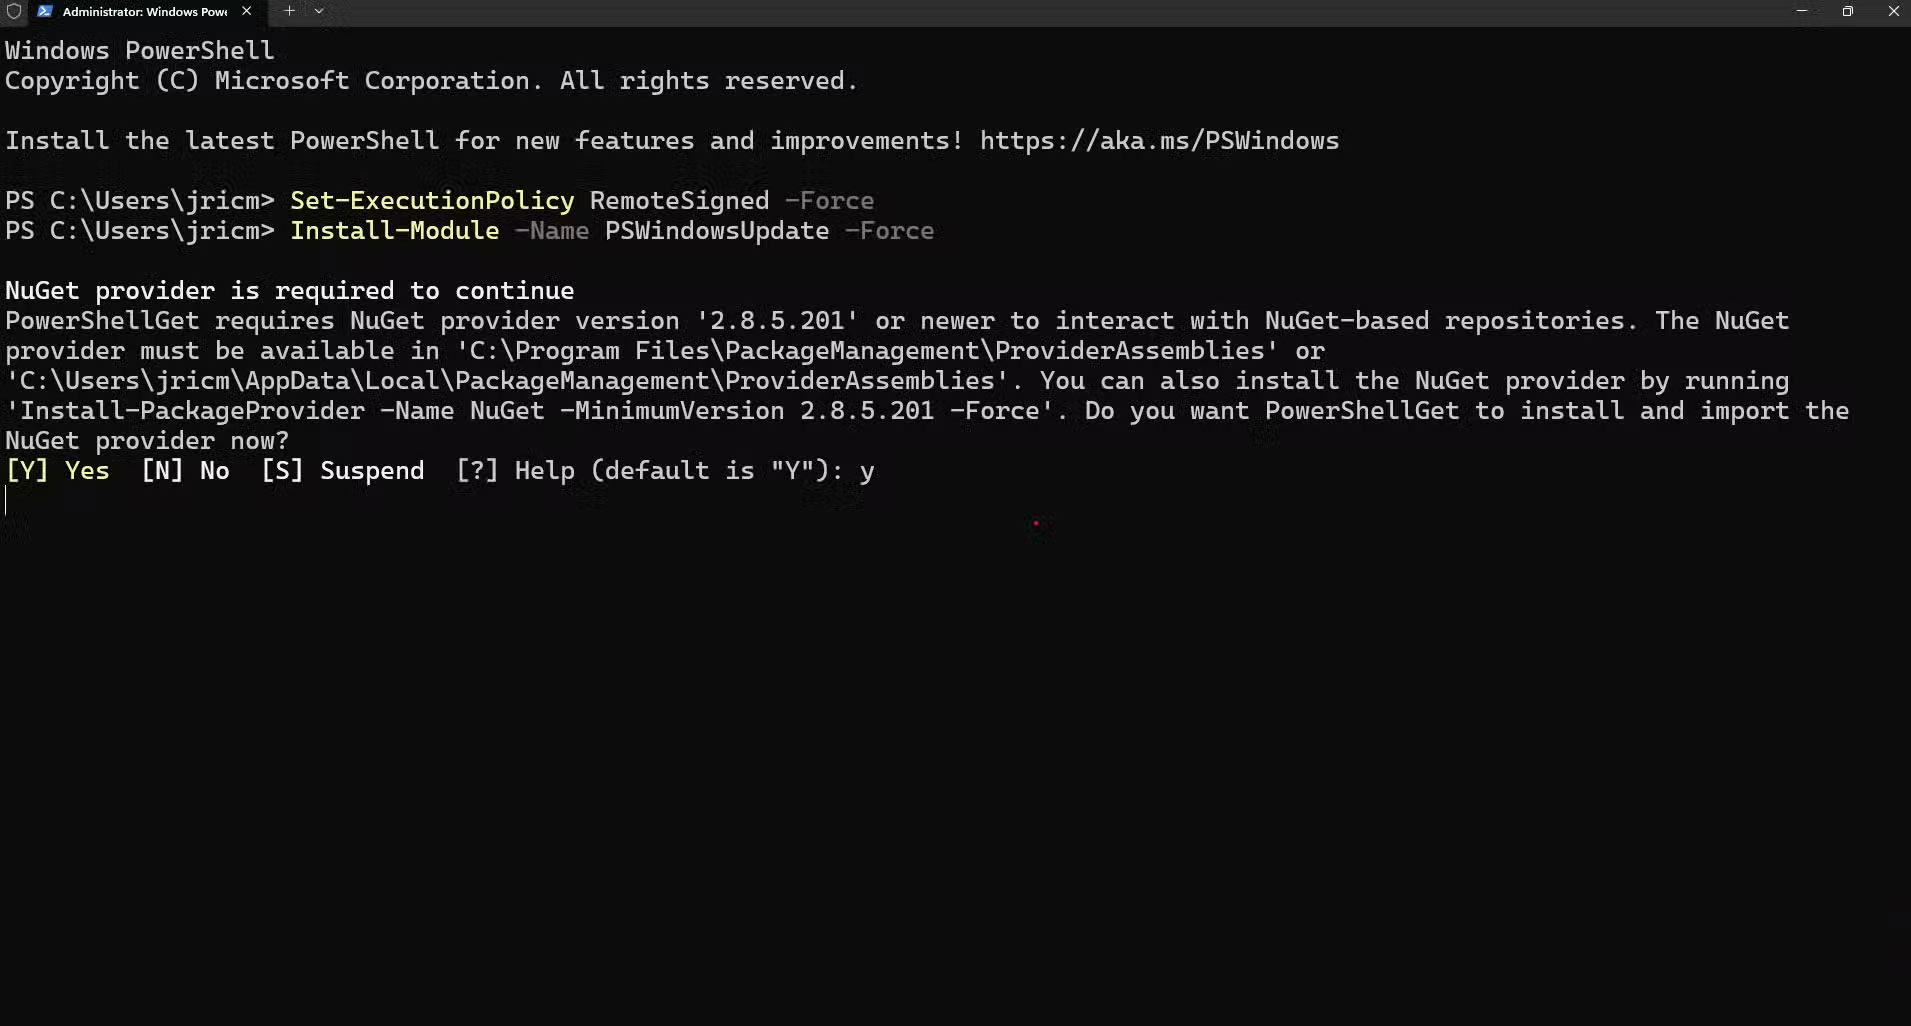
Next, install the module using:
Install-Module -Name PSWindowsUpdate -ForceThis command will download the module from Microsoft's PowerShell Gallery and install it automatically. When prompted to install from an untrusted repository, type "Y" to continue. The PowerShell Gallery is an official Microsoft repository, so this warning is more of a formality than a real security concern.
Once installed, import the new module with the command:
Import-Module PSWindowsUpdateThis command will load all the update management commands into your current PowerShell session. You can then verify everything is working correctly by typing:
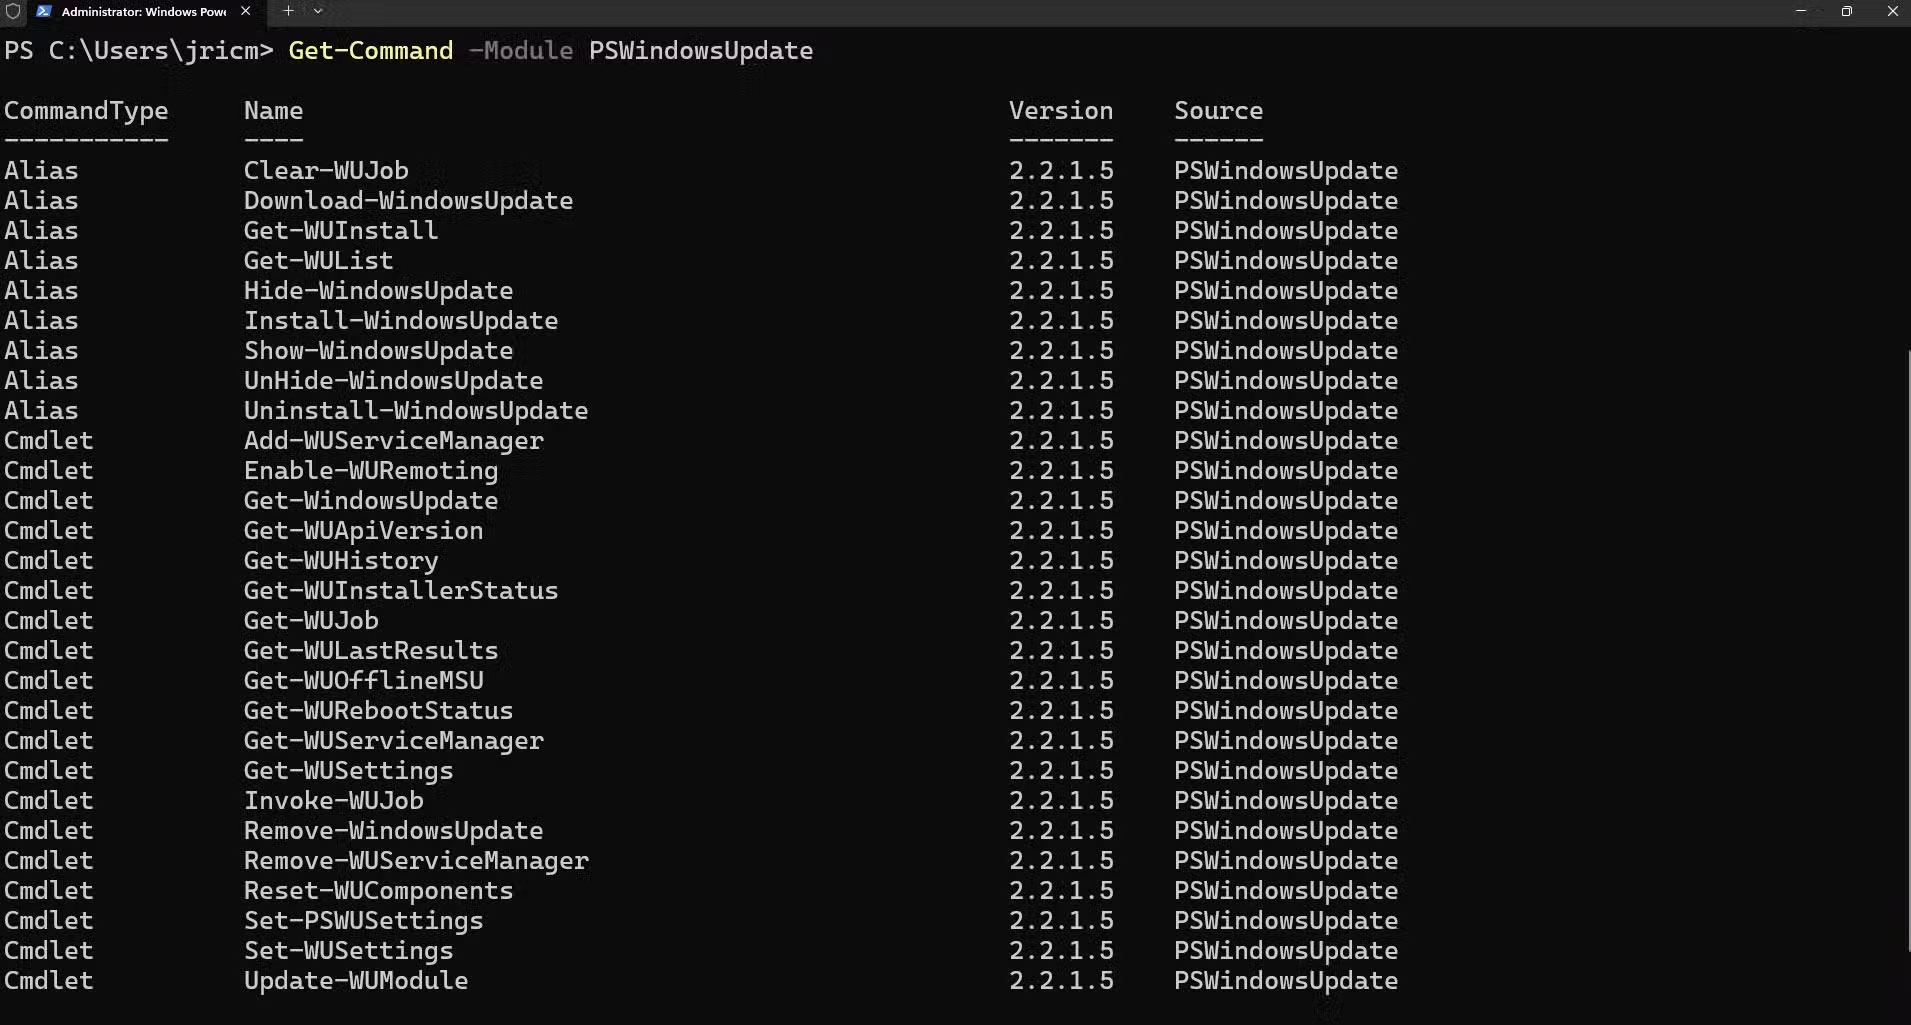
Get-Command -Module PSWindowsUpdateThis command will display a list of all available commands for PSWindowsUpdate. Once confirmed, you can now use the module using the PowerShell command line interface. If you prefer to use a GUI instead of a terminal, try pairing PSWindowsUpdate with UpdGUI.
Prepare UpdGUI
UpdGUI acts as a graphical interface that makes PSWindowsUpdate easily accessible to everyone. Download the latest version from the official GitHub repository . The tool is integrated as a single PowerShell script , making installation as simple as downloading and running.
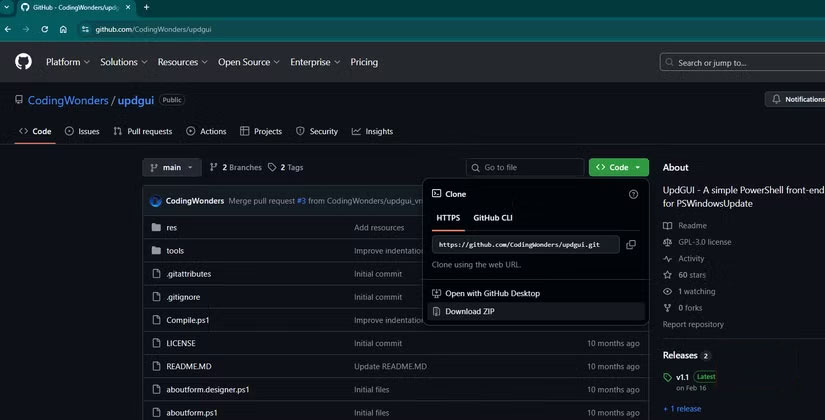
Place the updgui.ps1 file in a convenient location, such as your Documents folder or Desktop. You don't need to install anything or modify any system files. This script is one of those portable Windows tools that can be stored on a USB drive for easy access on the go. Just make sure you have admin rights when opening it in PowerShell.
Before running UpdGUI for the first time, check your PowerShell language mode by entering this command in the PowerShell admin window.
$ExecutionContext.SessionState.LanguageMode
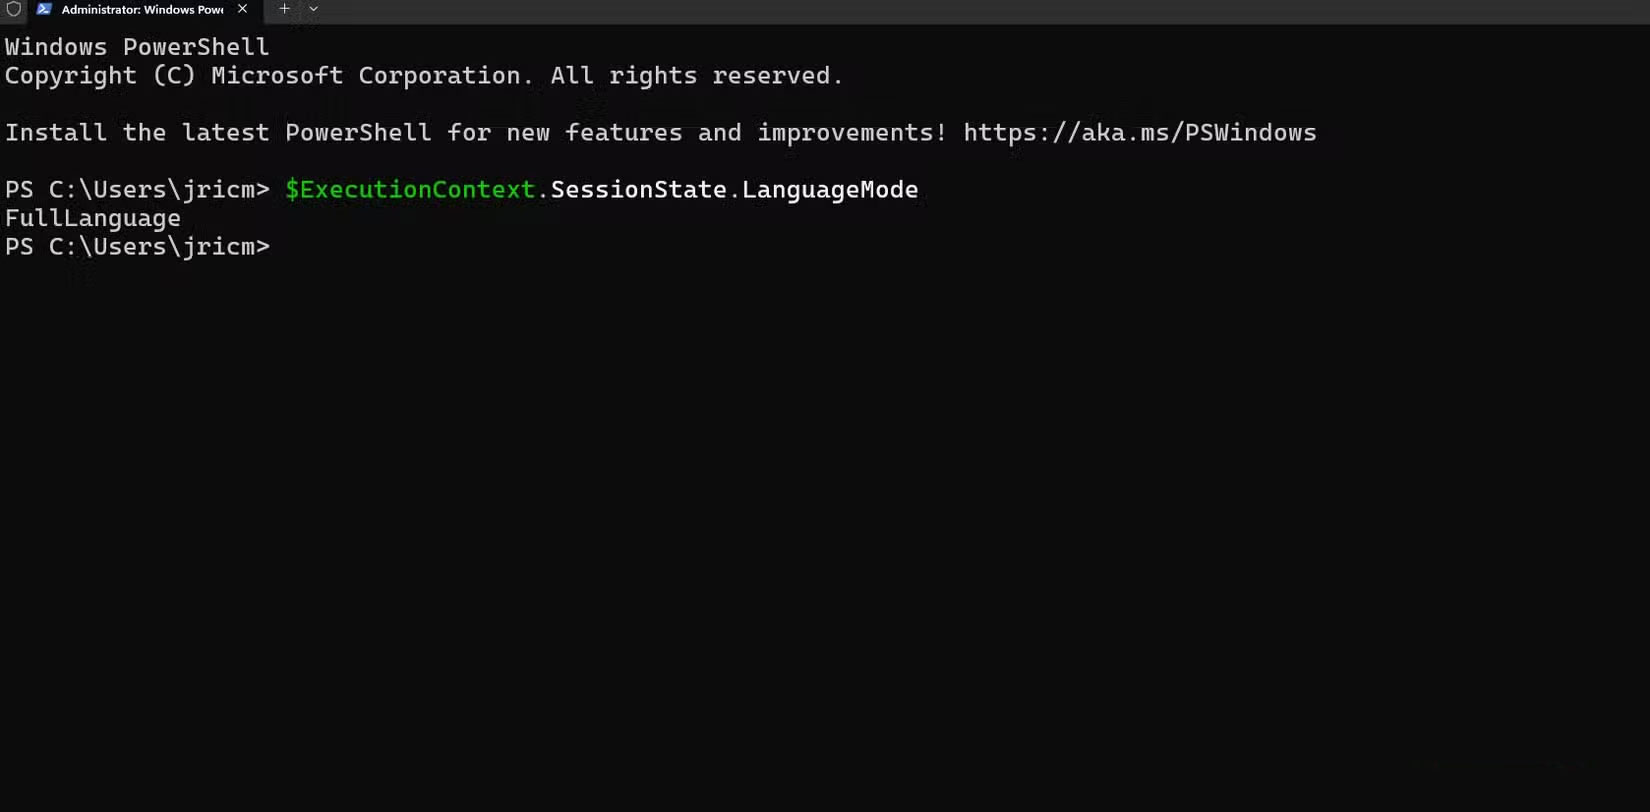
The output should show "FullLanguage" for UpdGUI to work properly. If it shows "ConstrainedLanguage" , you will need to adjust your system's PowerShell execution policy.
Easy to use setup
Once everything is installed, you have two powerful ways to manage Windows updates. The command line method offers maximum flexibility and automation potential, while the GUI offers point-and-click simplicity.
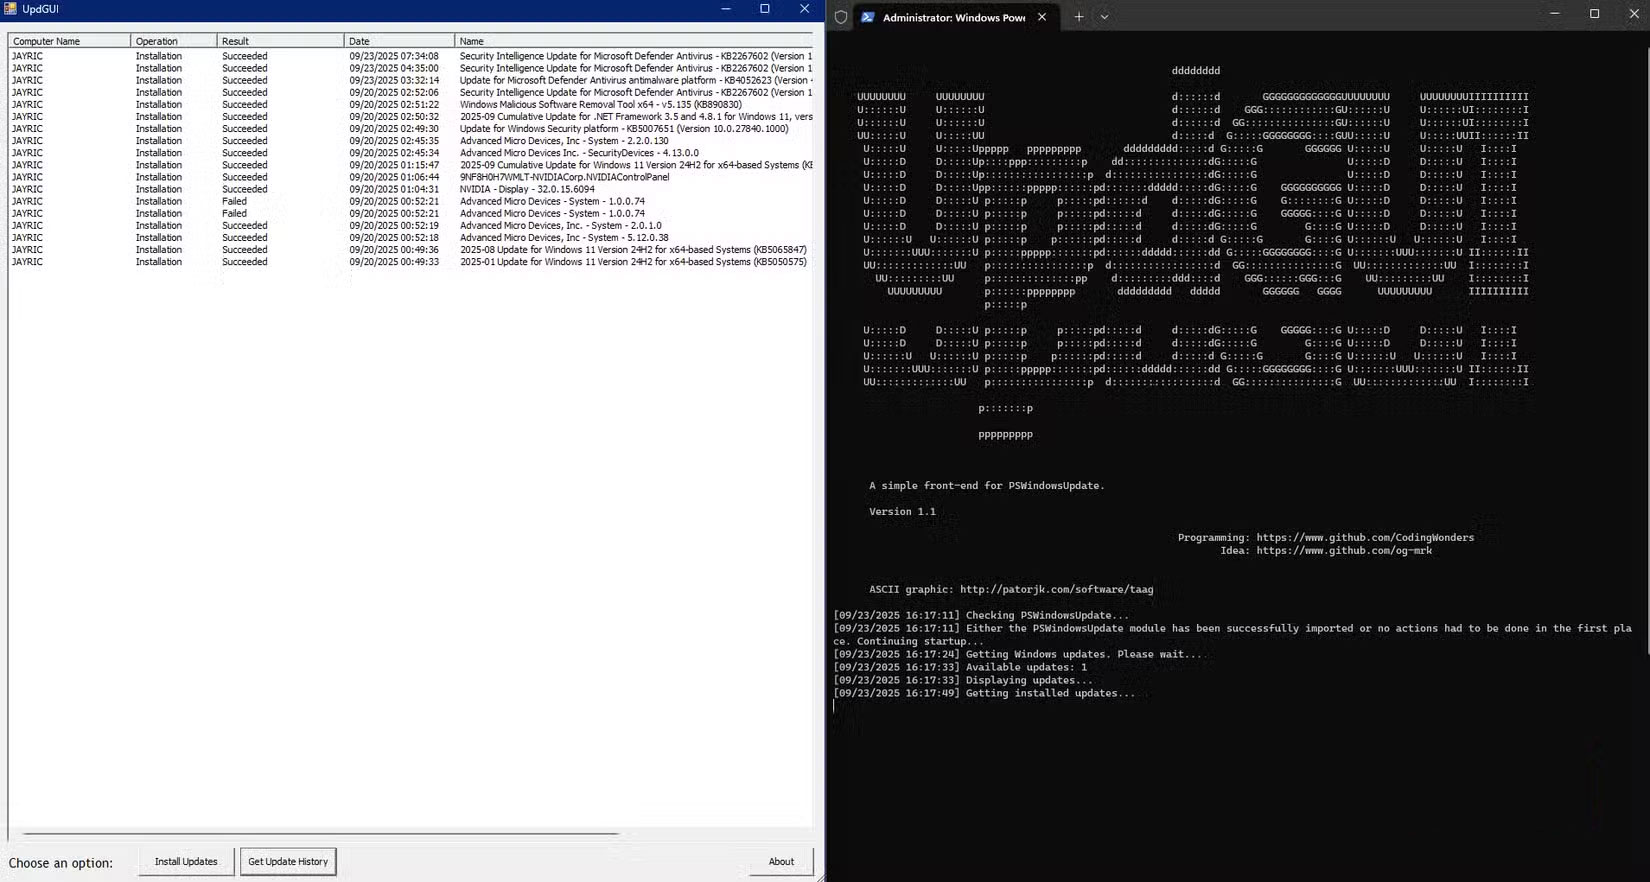
Working with the GUI interface
Launch the tool by right-clicking on updgui.ps1 and selecting Run with PowerShell or open it from an admin PowerShell session in the UpdGUI folder using:
.updgui.ps1
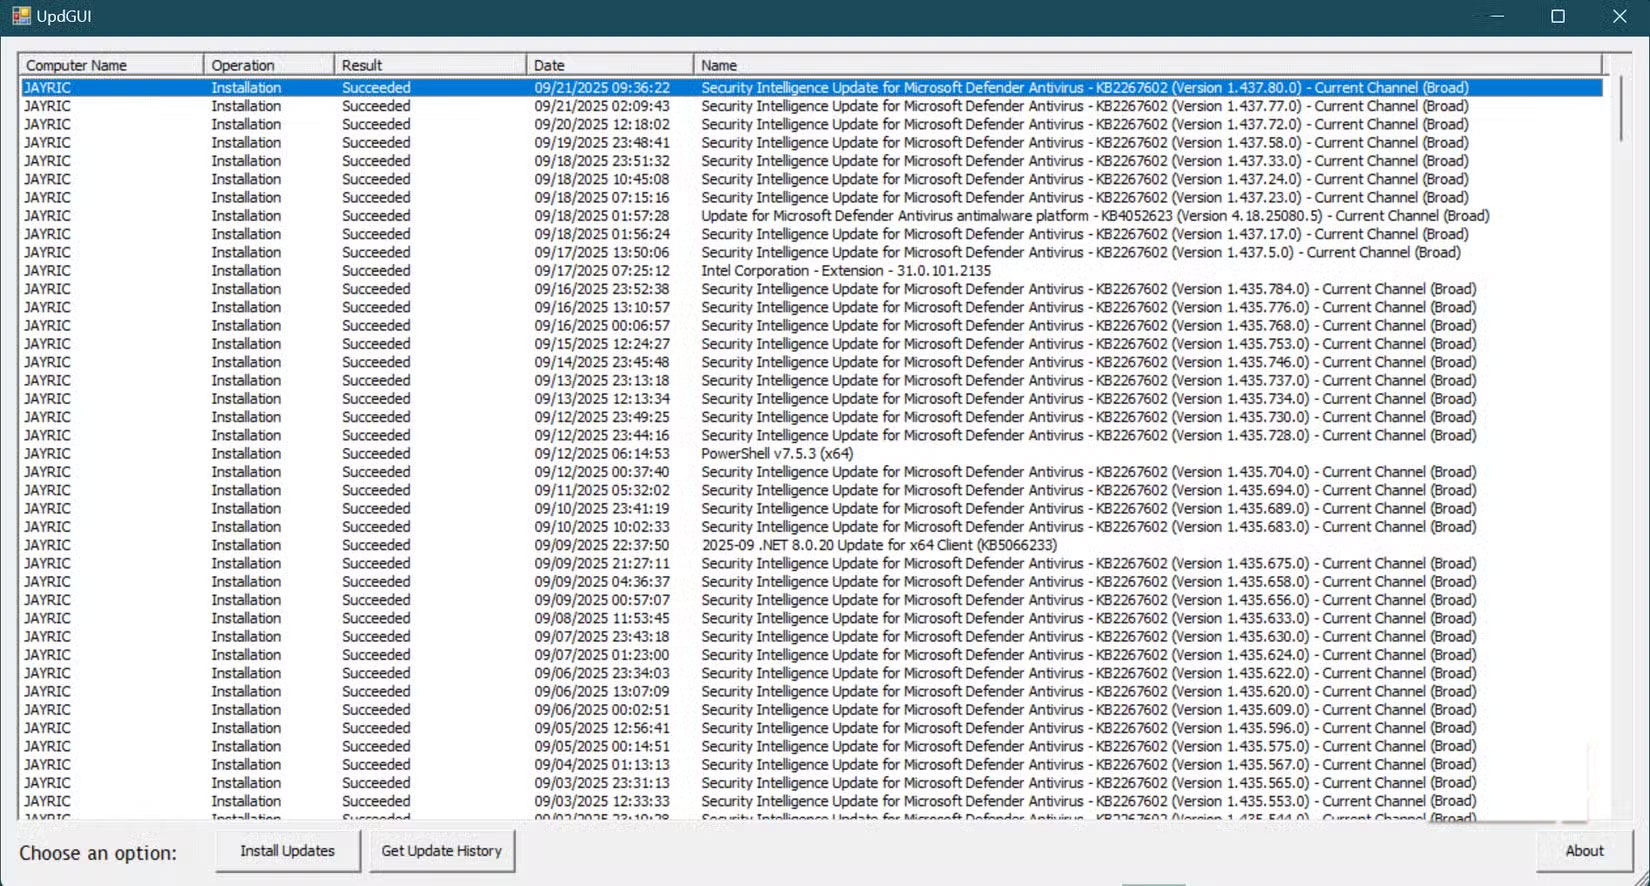
The interface displays the update history and available updates in a neat list format with checkboxes next to each item. You can quickly see the title, size, and importance of the update. Select the updates you want to install by checking their boxes, then click the Install button to start the process.
Using PowerShell commands
The command line interface excels at both simple tasks and complex filtering scenarios. For a basic update check, use:
Get-WindowsUpdateThis command provides detailed information about each update, including its size and the components it affects.
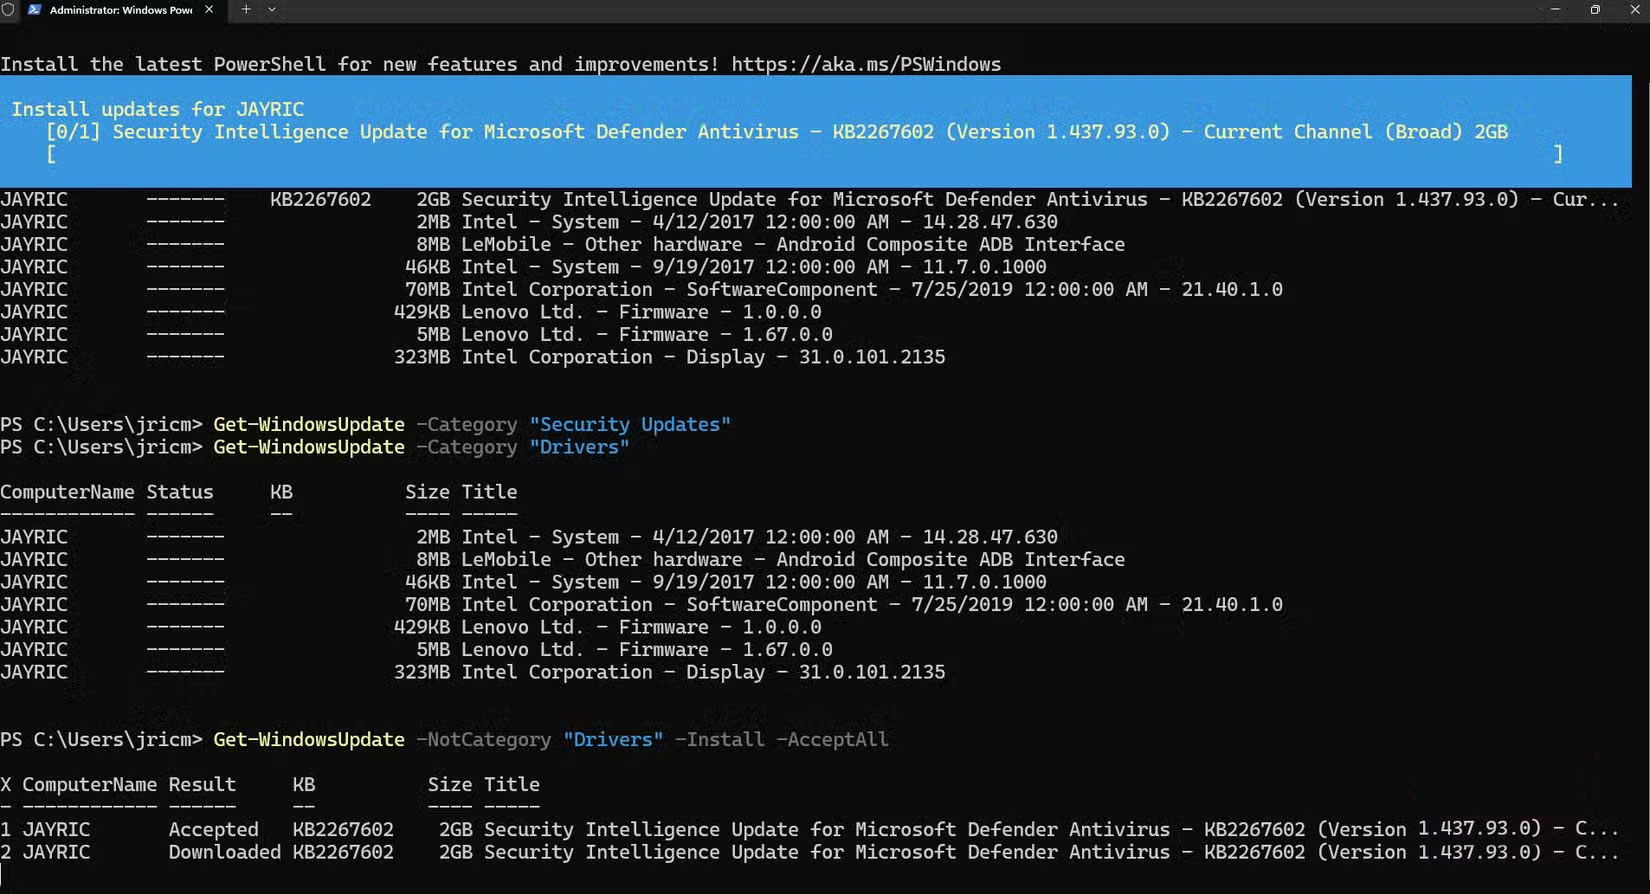
But not all updates are created equal. Sometimes we just want the updates that are essential for smooth and secure operations. For security updates, you can use:
Get-WindowsUpdate -Category "Security Updates" -Install -AcceptAllThis command ensures your system stays protected from known vulnerabilities without the stability risks of other types of updates.
For driver updates, use:
Get-WindowsUpdate -Category "Drivers"This command displays available hardware updates before you install them. Some driver updates improve performance, while others may cause compatibility issues with specialized hardware or software. Be sure to update when it's convenient for you.
When you are ready to install all updates except drivers, use:
Get-WindowsUpdate -NotCategory "Drivers" -Install -AcceptAllThis helps prevent hardware compatibility issues and ensures that security patches are installed promptly.
Was this article helpful?
Your feedback helps us improve.
Related Articles
 How to initial setup Windows Server 20195 minutes read
 Steps to initially set up a new SSD on Windows 104 minutes read
 AMD confirms Radeon GPU driver update can damage Windows setup, users note2 minutes read
 Instructions for creating Windows shortcuts Update on Windows 103 minutes read
 How to set up VS Code with WSL 2 on Windows 10/115 minutes read
 Turn off the Win 10 update, stop Windows 10 from updating automatically8 minutes read
Reader Comments 0
Sign in with email or Google to join the discussion.