Table of Contents
Learn how to turn off beta updates on iPhone with clear steps, practical tips, and troubleshooting guidance for a reliable result.
How to turn off beta updates on iPhone
Step 1
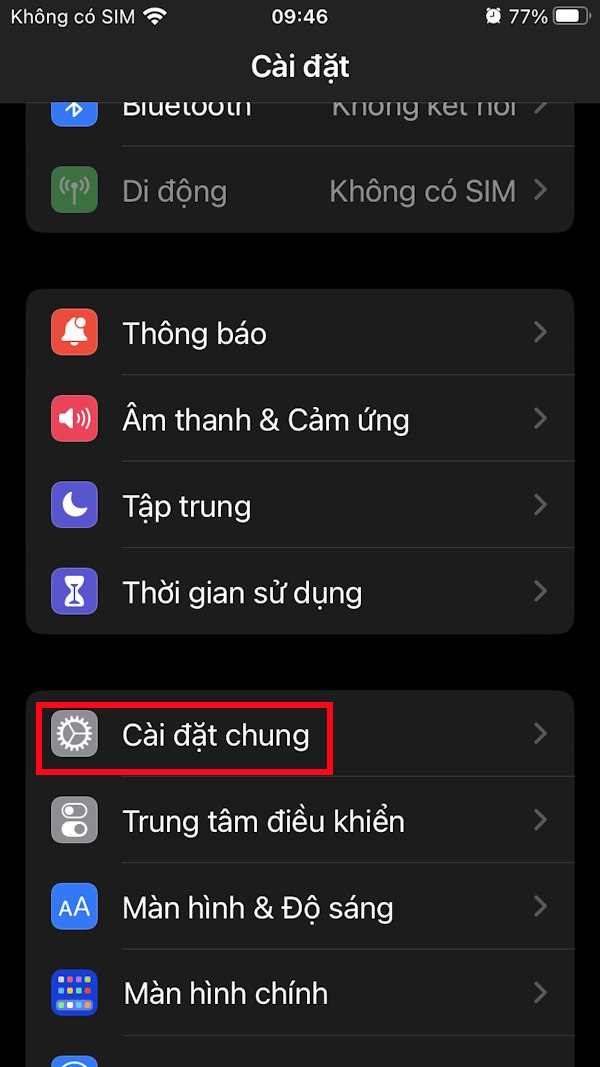
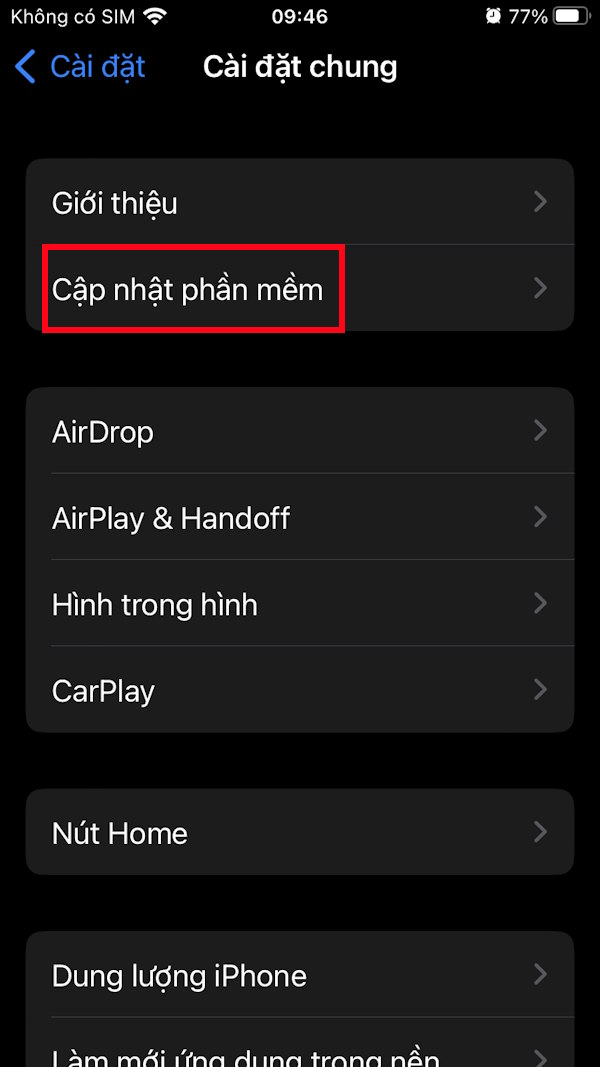
Users tap on Settings, then select General Settings . Next, they choose Software Update to make adjustments.
Step 2
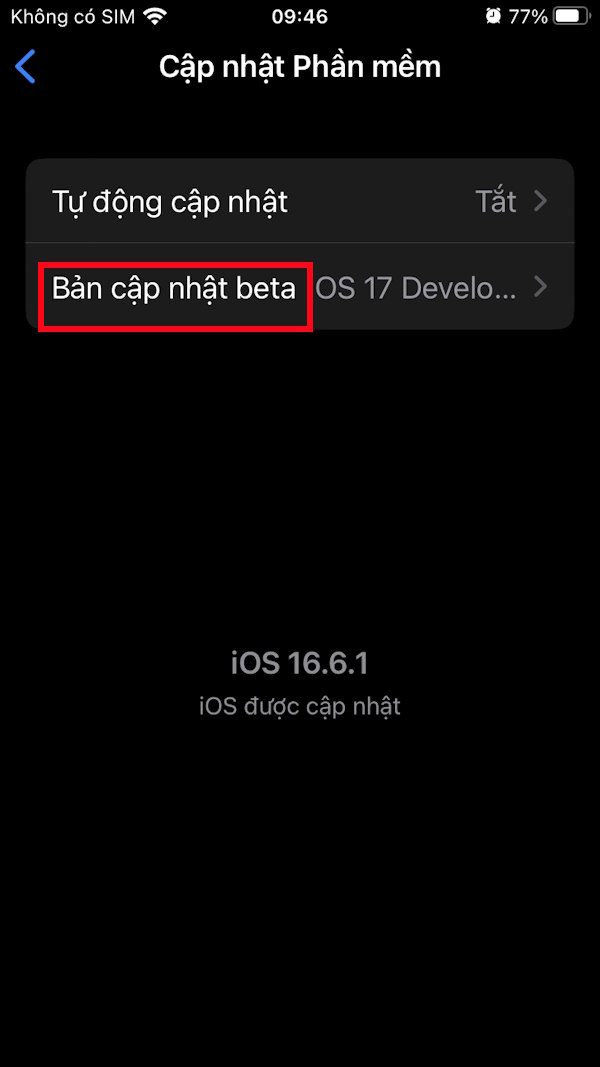
In the iPhone's software update settings, select Beta Update to proceed.
Step 3
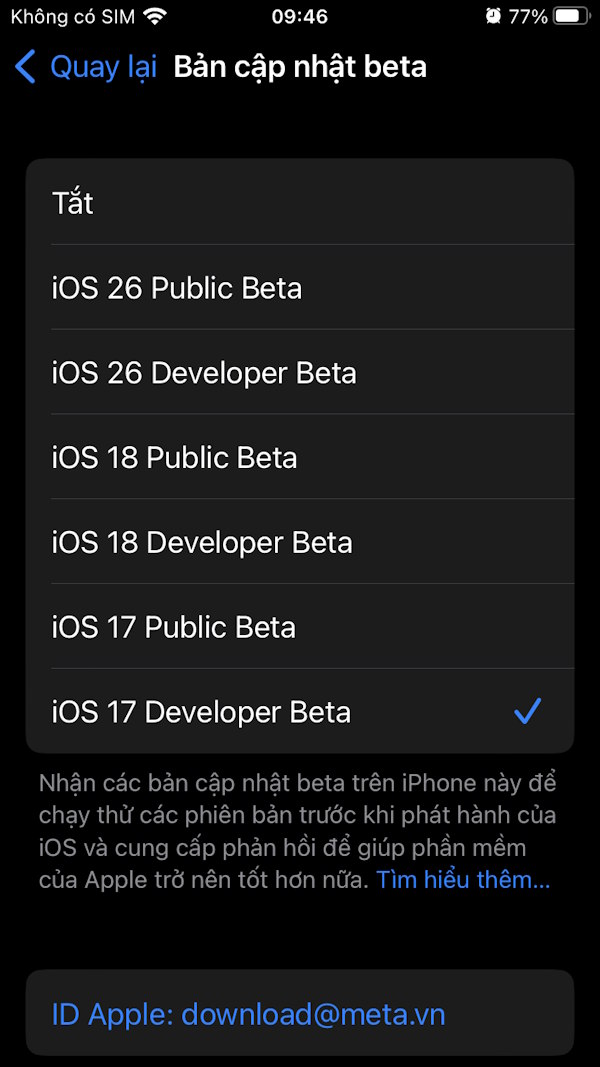
This displays a list of beta updates on your iPhone. Here, users can tap the "Turn Off" option to disable beta updates on their iPhone.
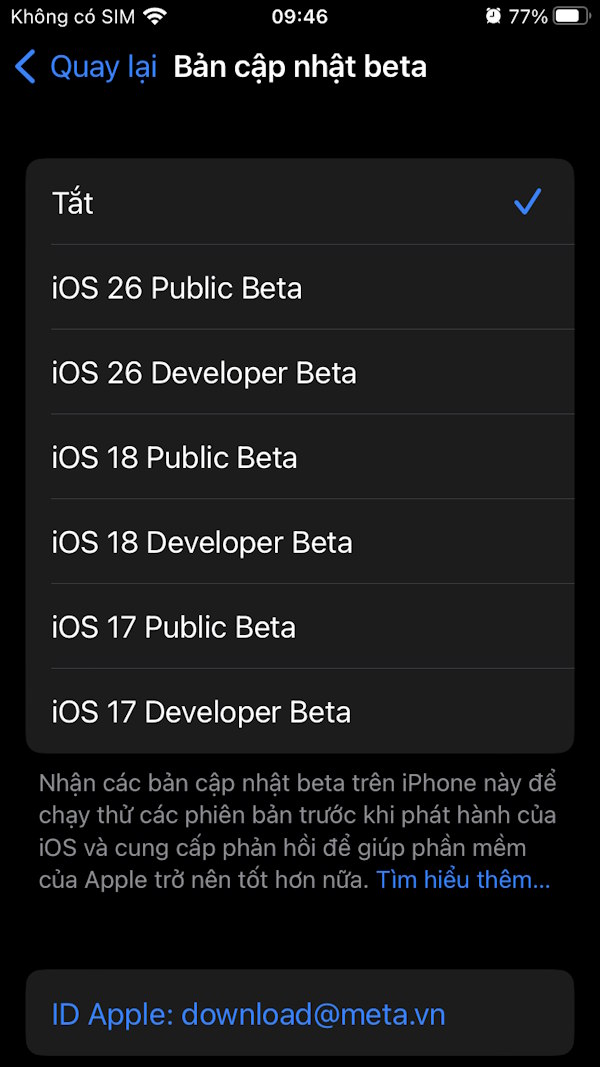
How to exit beta updates on iPhone
If you want to stop receiving beta updates for your iPhone, you first need to unsubscribe from the device.
After disabling beta updates on your iPhone, you need to access the link below to exit the beta operating system update program.
- Unsubscribe from the iPhone beta update program.
After leaving Apple's beta update program, you will stop receiving emails and will no longer be able to send feedback through Feedback Assistant. Additionally, beta updates will no longer appear in the iPhone's Software Updates section.
When a new version of the iOS operating system is released, you need to install it via Software Update on your iPhone.
Final Thoughts
Use this guide as a practical checklist for how to turn off beta updates on iphone. Work through the steps in order, verify each result, and adjust the options to match your needs.
FAQ
What do you need before following this How to Turn Off Beta Updates on iPhone guide?
Review the required tools, accounts, settings, or materials mentioned in the article. Learn how to turn off beta updates on iPhone with clear steps, practical tips, and troubleshooting guidance for a reliable result.
What are the main steps for how to turn off beta updates on iphone?
Follow the sections in order, especially How to turn off beta updates on iPhone, Step 1, Step 2. Complete each step before continuing and verify the result as you go.
What should you do if the process does not work as expected?
Recheck the prerequisites, update the relevant app or service, review the settings, and repeat the step that caused the issue. Use any troubleshooting notes included in the guide.
Related Articles
 List All New Changes in iOS 13 Beta 44 minutes read
 Check Out the Speed and Battery Life of the Official iOS 12 with iOS 11.4.1 on iPhone 5S, iPhone 65 minutes read
 How to Turn Off 'Feature' Slow When Bottle Battery for iPhone Runs4 minutes read
 iOS 17.1 Fixes the Problem of Saving Photos on the iPhone Screen Explained4 minutes read
 Compare the Speed Between iOS 12 Beta 1 and iOS 12 Beta 8 on iPhone 6S3 minutes read
 iOS 26.1 Beta 2: What You Need to Know3 minutes read
Reader Comments 0
Sign in with email or Google to join the discussion.