Table of Contents
To share a Mini World: CREATA map, open the Start or My Worlds list, select the map, choose Upload, assign an accurate type or genre, and confirm. Wait until the map cover displays an Uploaded status. A local save protects progress on the current device; uploading is the step that enables online sharing and multiplayer features.
The screenshots below show the older Mini World: Block Art interface. Current versions use the name Mini World: CREATA and may place the controls differently, but the same workflow—select, describe, set visibility, upload, and verify—still helps identify each stage.
Before uploading a map
- Save and test the map locally, including spawn points, objectives, and exits.
- Back up important work before converting an old map or making major changes.
- Use an account you control; the guide to creating a Mini World account explains the account basics.
- Remove personal information, private messages, and copyrighted material you do not have permission to publish.
- Decide whether the map should be public, private, or shared only with a specific group.
1. Select the map from My Worlds
From the main screen, open Start, My Worlds, or the current equivalent.
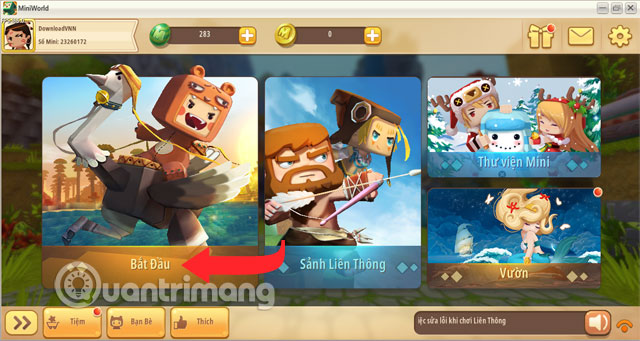
Choose the map and open its settings or management menu.

In the current official workflow, this screen includes an Upload button. The older client used a Share Map icon:

2. Add a clear title, description, and category
Write a title that tells players what the map is, not a string of unrelated keywords. Use the description to explain the objective, supported player count, important rules, and any controls that are not obvious.
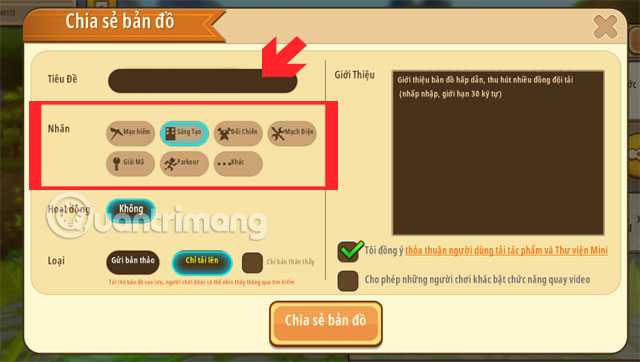
Select the closest map type or genre. Accurate classification helps players understand whether the map is survival, parkour, battle, puzzle, role-play, or another experience.
3. Choose visibility and permissions
The old interface offered upload and private-view options:
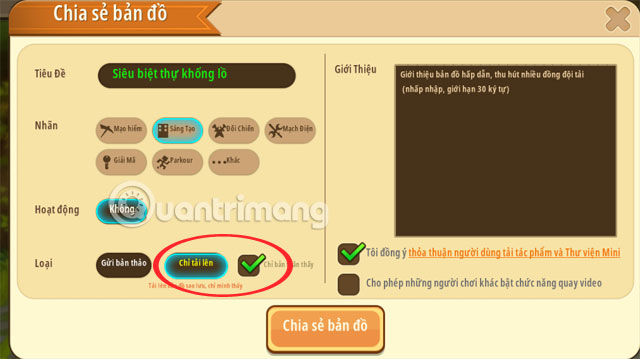
Read every current visibility label before confirming. A public upload can be searched and played by other users. A private setting may keep the work visible only to you or to permitted players, depending on the current client.
Also review permissions for recording, remixing, downloading, or sharing to a group. Do not enable a permission merely because it is selected by default.
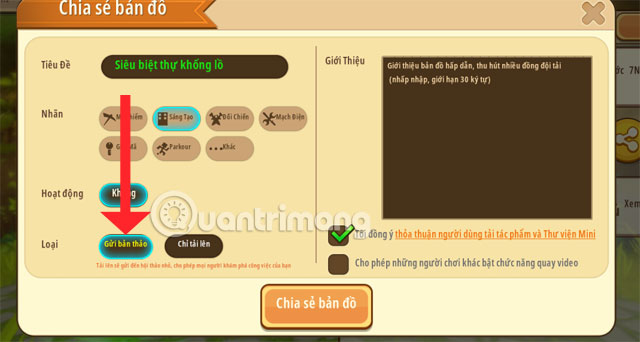
4. Upload and wait for completion
Select Upload or Share Map, then confirm. Keep the game open and the network stable while resources are transferred.

The official Mini World guide says the process is complete when the map cover shows a green Uploaded mark. Do not assume the map is online merely because the progress bar disappeared.
For the current three-step interface, see the official Mini World: CREATA upload guide.
5. Update an uploaded map
An uploaded map may show an update or reshare icon after you make changes:
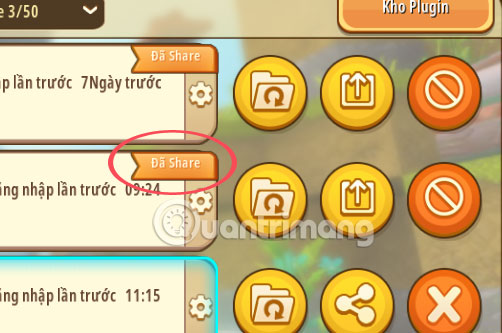
Open it, review the title, category, permissions, and version notes, then upload the revised resources. Test the update separately when possible; replacing a working public version with an unfinished edit can disrupt players.
6. Find your published work
In the older client, published maps were listed in Mini Library:
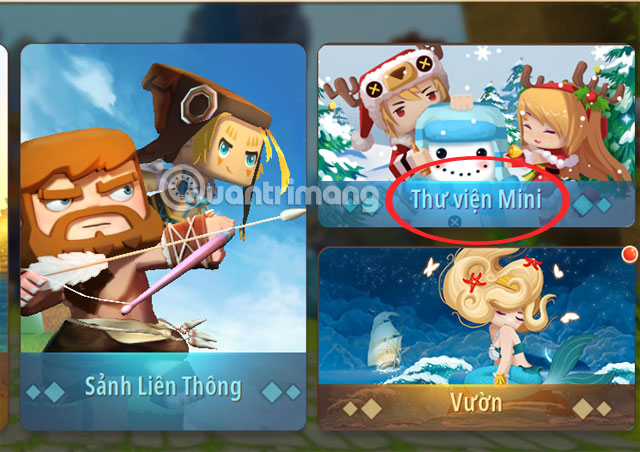
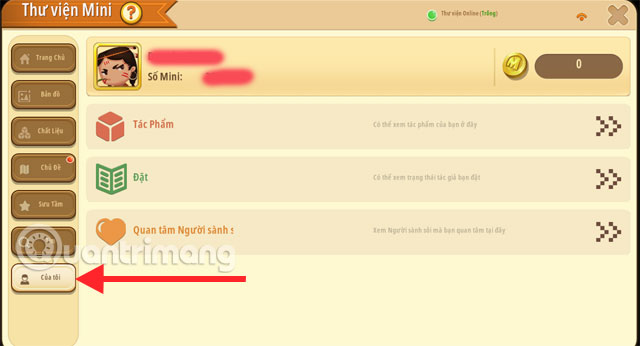
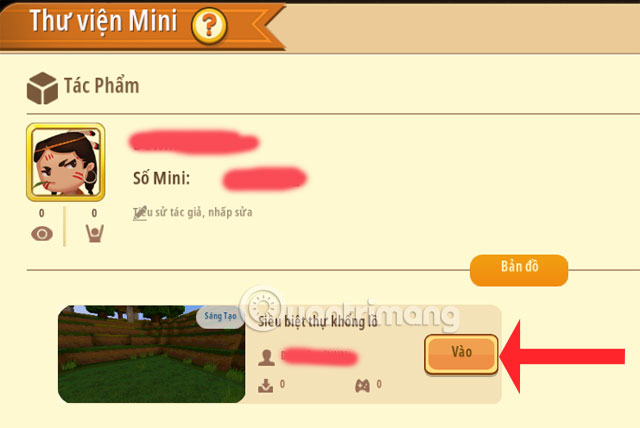
Open My and then Works, or use the current profile/creator area.
Confirm that the correct cover, title, author, visibility, and version appear. Open the published listing from another account or ask a trusted friend to test it if the map is meant to be public.
Improve the listing before making it public
- Cover: show the map's main scene or objective without covering it in tiny text.
- Title: describe the experience in plain language.
- Description: state the goal, player count, and rules.
- Tags: use only relevant genres and mechanics.
- Testing: verify spawning, checkpoints, scoring, and multiplayer behavior.
Mini World's current creator documentation allows a screenshot cover and, after the required developer level, a custom cover. Follow the size and format limits displayed by the client rather than relying on an old screenshot.
Fix upload problems
The Upload button is missing
Confirm that the map is saved under your account, the game is updated, and the map type supports uploads. Some developer features require an account status or creator workflow, but a basic upload is also required to enable multiplayer on supported maps.
The upload stops or fails
Check the connection, reduce oversized custom resources, save locally, restart the client, and retry. Do not delete the local world until the uploaded copy has been verified.
The map is uploaded but cannot be found
Check visibility, moderation or review status, title spelling, and the creator's Works list. A public developer map may need review before it appears broadly.
Friends cannot join
Confirm the map is uploaded, create a room with the intended privacy setting, and share the correct UID or room information. If players are earning or spending Mini Beans in maps, the Mini Beans guide explains the currency separately.
A successful share is not just an upload button: it is a tested local save, accurate listing, deliberate permissions, completed upload status, and a published version that another player can actually open.
Related Articles
 How to Configure the Mini World Block Art Configuration4 minutes read
 How to Adjust Configuration in Mini World Block Art - Customization3 minutes read
 How to Earn Mini Beans and Get Free Gifts in Mini World: Block Art7 minutes read
 How to Enter the Code in Mini World Block Art5 minutes read
 How to Change Vietnamese Language on Mini World Block Art4 minutes read
 How to Create a Playroom with Friends in Mini World Block Art6 minutes read
Reader Comments 0
Sign in with email or Google to join the discussion.