This guide explains how to open the Hosts File with Admin Rights - Apply to Open the File, with clear steps, practical tips, and important checks before you begin.
This notification makes it impossible to edit them. These files are usually files that are in the Windows Supported operating systems or in systems of important software.
In this article I will guide you how to use the full Admin rights to edit system files, important files. By the way, I will show you how to edit file attributes to hide or lock them - do not allow editing.
I. Use the Admin rights to edit the file system
When it comes to Admin rights, it is probably obvious for you to do everything with your computer, but there are still files that have admin privileges turned off, these files are mostly system files, in order to Make sure your Supported operating systems is operating in a prescribed manner, avoiding errors.
Below is an image of me trying to edit a Windows file system called host with Notepad.
The notification window appears : You do not have permission to open this file. See the owner or the file or an administrator to obtain permission.

The following freetuts will guide you how to regain admin rights to edit your Windows system files.
Step 1: Right-click the file you want to edit -> Select Properties here, for example, I will host the file.

Step 2: Select the Security tab in the top toolbar -> Select Users (ADMINUsers) -> Click Edit.

Step 3: Select ALL APPLICATION PACKAGES -> Check the Allow column for Full Control.

Step 4: Select ALL RESTRICTED APPLICATION PACKAGES -> Check the Allow column for Full Control.

Step 5: Select Users (ADMINUsers) -> Check the Allow column for Full control.

Step 7: Select Yes.
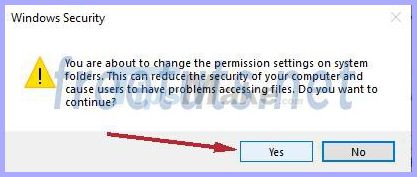
Step 8: Click OK to complete the ADMIN hijacking process. From now on you can edit this file system with different text software like Notepad, Microsoft Word.
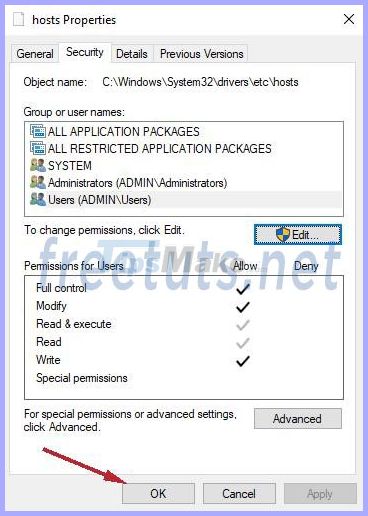
Above is a guide to gain administrative rights to edit Windows system files, wish you success.
II. Ways to change properties of File, Folder
1. Instructions to change the properties of the file to edit the file system
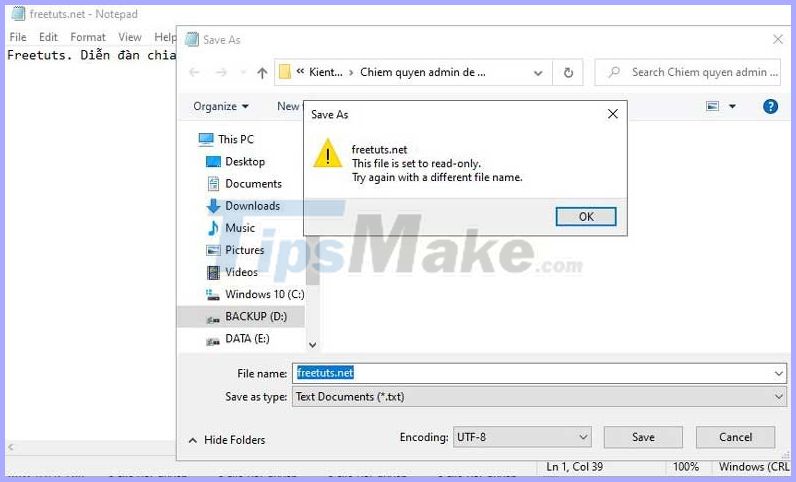
For system files, this is usually the default setting Read-onlythat you cannot edit. A typical example is when trying to edit the host file, this error is very common.
The following error message appears: This file is set to read-only. Try again with a different file name.
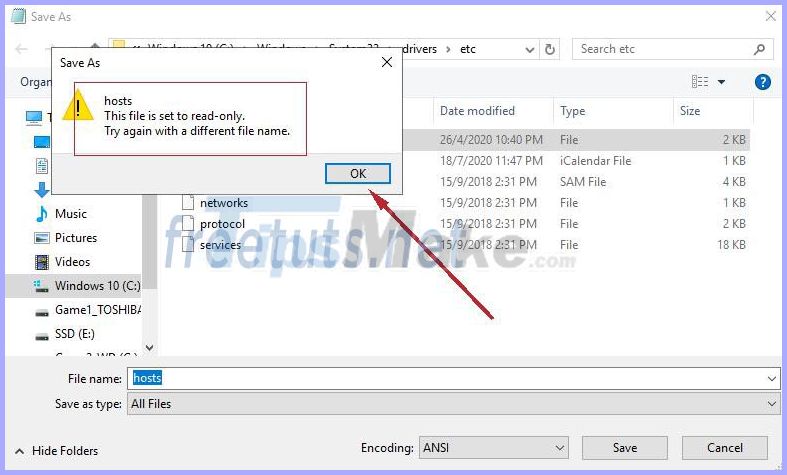
Simply to be allowed to edit these system files, we just need to turn off the Read-only property and done.
A. Instructions for turning off the "Read Only" attribute. Read-Only
Step 1: Right-click the file you want to edit and select Properties
Step 2: Uncheck Read-only -> OK is done.
The figure below is an example of a Windows file host. Located in the path: Windows / system32 / etc
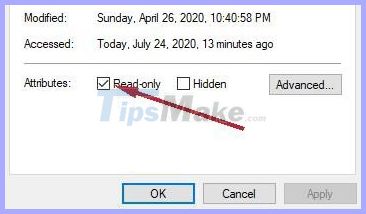
After performing the above step and an error still appears when correcting the file system, go back to Section I , the possibility is that you have not been granted Admin rights.
B. Instructions for activating the "Read Only" attribute - Read-Only
With this property we can temporarily lock files that do not allow editing. The way to do it is too simple, just do the opposite of the steps above in section A.
Step 1: Right-click the file you want to lock -> Select Properties
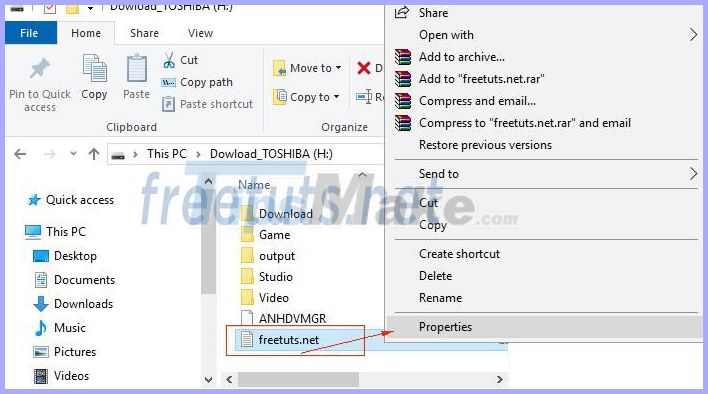
Step 2: Check the Read-only -> Select OK.
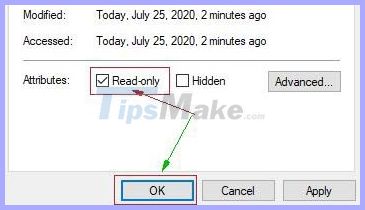
Done now the file cannot be edited until you leave this mode.
2. Instructions to change properties to hide files and folders.
Do you have important files and folders and want to hide them for protection and long-term storage?
Simply change the properties of a folder or file with a few simple steps. No need to install apps or messy programming at all.
A. Folder hidden guide - Set the hidden mode for folders
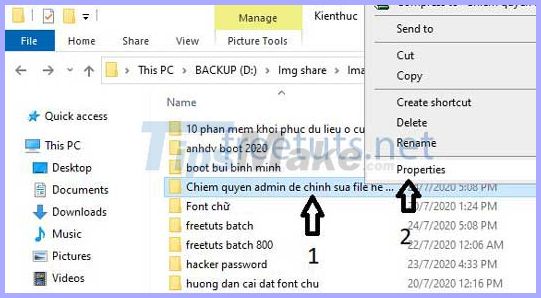
Step 1: Access the file, the file needs to change its properties then right-click and select Properties
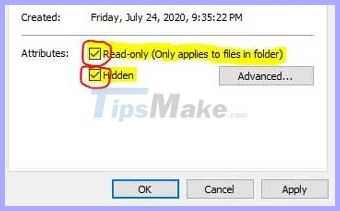
Step 2: As soon as the Properties window opens, we are allowed to select the properties of the folder in the Attributes section:
- Read-only: Only allowed to read
- Hidden: Hide it
I will try and test both options at once to show its effect.
Select both items -> Click Apply
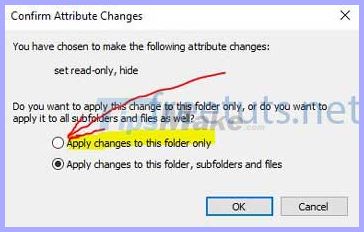
Step 3: The Confirm Attribute Changes window appears. Here we have 2 options:
Apply changes to this folder only: Only applies to the currently selected folder
Apply changes to this folder, subfolders and files: Apply this attribute to both the root folder and subfolders + internal files.
Here I only apply to each folder only -> OK to continue
Step 4: Below is the image after we have successfully hidden the folder.
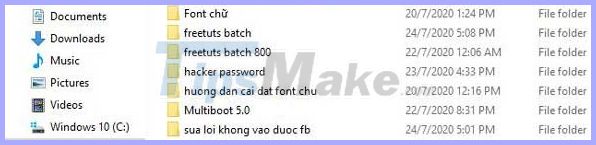
B. Instructions to display hidden folders. To make the hidden folder appear, follow these steps:
Step 1: Click View in the top toolbar. Select Options
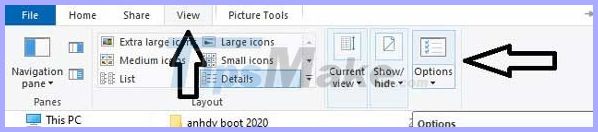
Step 2: Folder Options window opens. Go to the View tab in the top toolbar -> Check " Show hidden files, folders, and drives " -> Click OK.
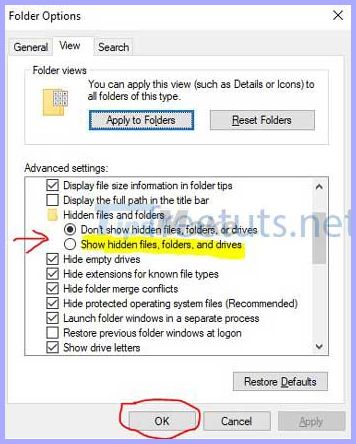
Now we have permission to view the hidden folder (Hidden)

If you want to unhide, we just need to redo the steps above, but uncheck the Hidden item is finished
With the simple instructions above, you will certainly be easier to edit file system files, be more proficient in properties to hide / lock folders and files.




Reader Comments 0
Sign in with email or Google to join the discussion.