Table of Contents
This guide explains how to manage data on iPhone with documents 5 using a clear, step-by-step process. It also highlights the settings and checks that can help you avoid common errors.
To search the data file management application on iOS devices, Documents 5 is an option suitable for all users' needs. Application in addition to helping you control all data from text, images, videos,. available on iPhone, but also many other useful features.
You can use Documents 5 to read document files like PDF very professionally, especially the ability to transfer data from one folder to another, including transferring to iCloud cloud storage. With this feature, you can easily select songs from iCloud to create live ringtones for iPhone using GarageBand. Here's how to use Documents 5 to move data on iPhone
How to use Documents 5 on iPhone
- Download the iOS Documents 5 app
Step 1
First of all, you download the Documents 5 app for iOS device according to the link above and start the app. In the first interface, the box enter the email address to receive new information to appear, you can Press Later To skip. Soon there is a list of folders on Documents 5, like iCloud, Photos, iTunes Files,.


Step 2
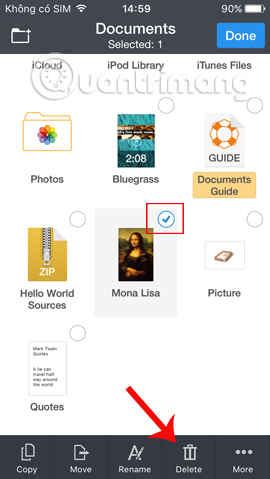
To proceed with moving files, editing or deleting files, we will click The Edit button To the right on the same interface. Next, click the folder, file to copy (Copy), move (Move), edit the name (Rename) or delete (Delete) at the option below the interface.


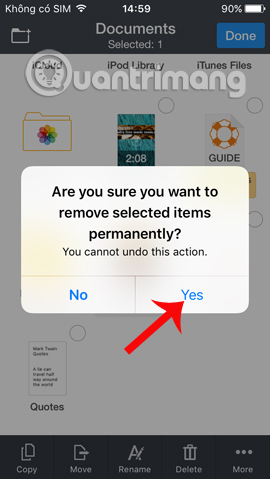
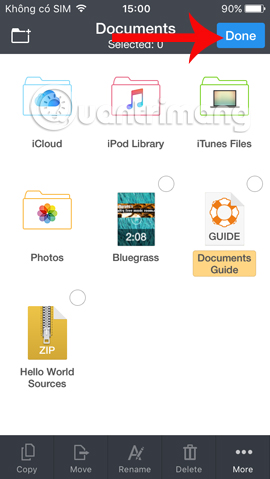
For example, I will delete the image file. Click the file and then select Delete below. You will then be asked by the app to be sure of your operation, click Yes . Finally click Done In the top right corner to return to the main interface.
Step 3
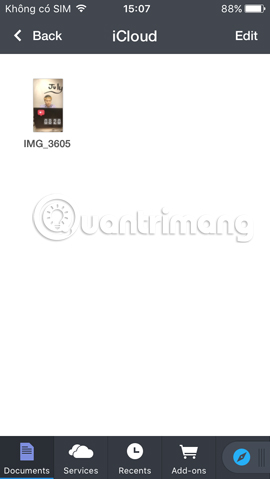
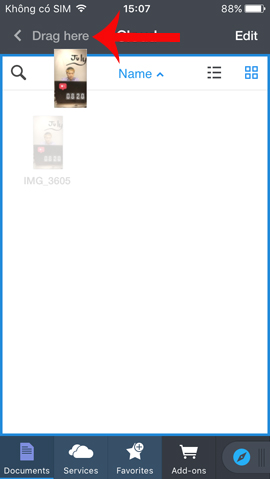
To move files from iCloud cloud storage folder to another folder, in addition to clicking Copy in the options list as above, users can also Hold and drag and drop . You just need to press and hold the file and then drag up the Drag here Button to move the file to any folder.
Step 4
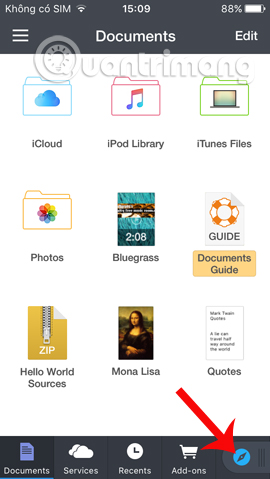
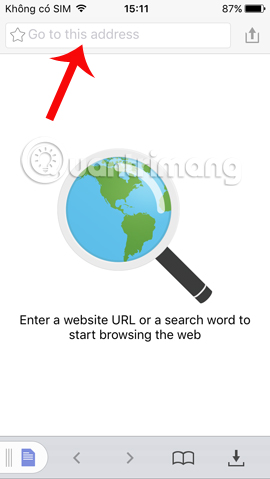
In addition, Documents 5 also has many options when we browse the web on the app. First of all, at the main interface of the app, click The Safari icon In the bottom right corner of the interface. Enter The website address To access the address bar.
Step 5
At the website interface, we can click The star icon To create a bookmark for the page. then press Done To save the bookmarks to the list.


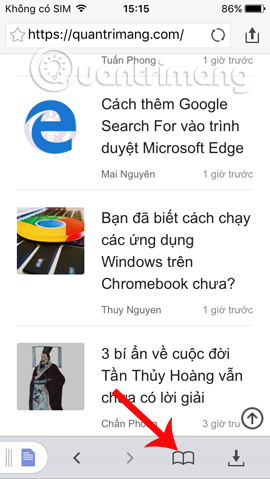
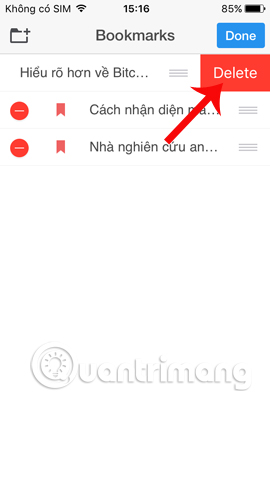
Now when needed to review the bookmark list, click The book icon . The bookmark list appears shortly thereafter. You can click Edit And select Delete To delete the link saved in the Bookmarks section

Step 6
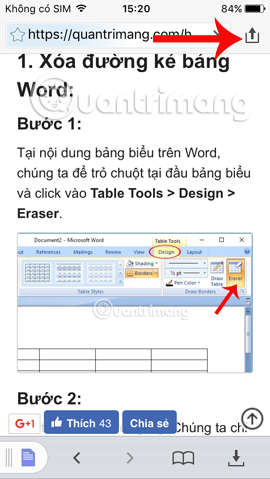
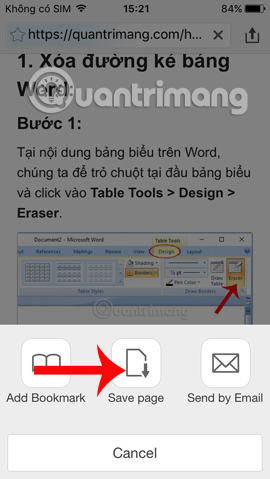
Also, when needed to save any website on Documents 5 is also very simple. At the website you want to save, click The icon in the right corner of the interface . Then click the Save page Option in the dialog box below.
Step 7
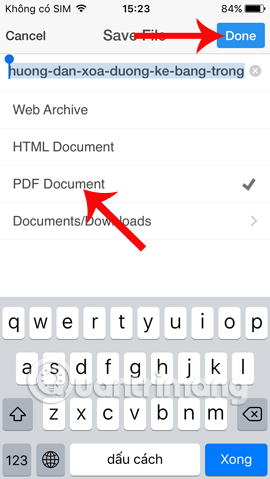
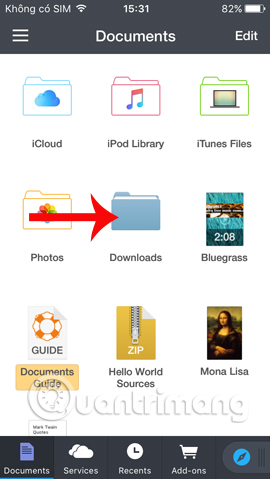
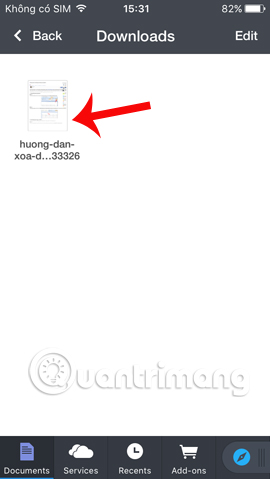
Appearing the format to save the content of the website, in this article, select PDF Document . Finally click Done To save. By default the file will be saved in The Downloads folder On the main interface of Documents folder management 5.
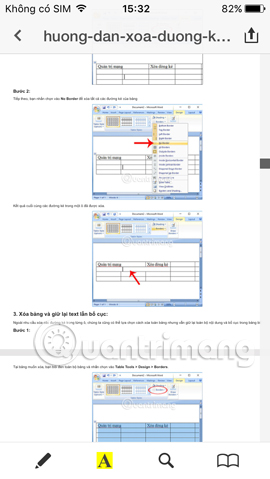
We can view the content of the saved website in PDF format easily.
Above is how to use some of the features of the Documents 5 application on iPhone, with the ability to move files from one folder to another, save web content in PDF data format. Managing and customizing data on iPhone has become simpler with the Documents 5 app.
Hope the above article is useful to you!
FAQ
What should I prepare before I manage data on iPhone with documents 5?
Review the requirements in the guide, confirm that your device or software is compatible, and save important work before changing settings related to manage data on iPhone with documents 5.
Why might manage data on iPhone with documents 5 not work as expected?
The most common causes are incompatible versions, missing permissions, incorrect settings, or an interrupted internet connection. Recheck each step and restart the app or device when appropriate.
Can beginners follow these manage data on iPhone with documents 5 steps?
Yes. Follow the steps in order, avoid skipping confirmation screens, and compare your interface with the screenshots because labels may differ slightly between versions.
Related Articles
 How to Manage Iphone Data on Windows with Icarefone5 minutes read
 How to Delete All iPhone Data When the Device Is Lost3 minutes read
 How to Print Content from iPhone and iPad6 minutes read
 Convert Data Between iOS Device and Computer Easily with Iotransfer7 minutes read
 Applications Scan Documents to PDF on iOS4 minutes read
 How to Turn Dropbox on Iphone into a Document Scanner5 minutes read
Reader Comments 0
Sign in with email or Google to join the discussion.