Table of Contents
This practical guide explains how to install and use the scanner with clear steps and useful context. It also covers common requirements, potential problems, and the details that can help you get better results.
How to Assemble and Install the Scanner
- Take the machine out of the box and check the attached accessories.
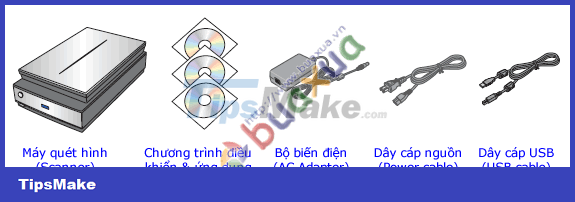 Accessories included with the scanner
- Unlock the scanner head guard, which is used to help keep the scanner in place during transport. Depending on the machine, the position of the lock may be on the side, below or behind the machine.
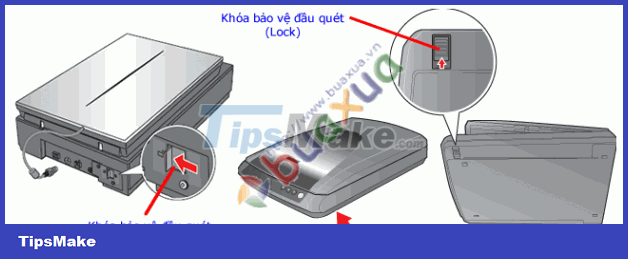 Unlock scanner head protection
- Plug in the power to the machine but do not turn on the machine. If the device uses USB power, there will be no power adapter and no need to plug in.
 Plug in the power of the scanner
- If the machine has the function of scanning images from film, then plug the cable of the machine cover.
 Plug in the cover cable
- Insert the CD/DVD-ROM containing the program into the drive, the installation program will run automatically. If the installation program does not run automatically, open the CD/DVD drive, find the setup.exe or setup file and double click on it to run it.
 Insert the CD/DVD-ROM containing the program into the drive
- Depending on the installation program, there will be different parameters, but usually there will be the following options:
- Scanner Driver : Scanner driver program, required. - Scanner Utility : Attached utility programs to support image processing. - ABBYY FineReader OCR : A program that supports recognition and helps convert text in the form of images to editable text. - User's Guide : User's Guide.
- You can click Custom to choose to install only what is needed, or click Install to install all.
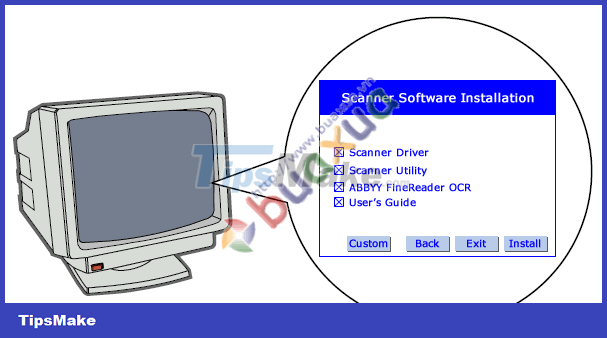 Install the scanner driver
- The program will install and will ask you to plug in a USB cable to connect the scanner to the computer.
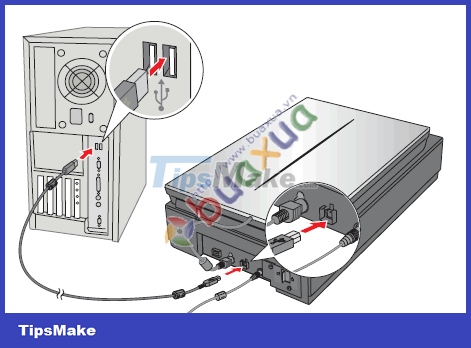 Connect the scanner to the computer
- Press the On/Off button to turn on the machine.
 Turn on the power switch on the scanner
- If you do it right, the program will continue to install and you may be asked to insert all the CDs/DVDs in the drive one by one if necessary. After the installation is complete, the program will ask to restart the computer, please let the computer restart.
How to Use the Image Scanner
- Open the lid of the machine and face down the surface of the image or document to be scanned, close to the glass. The direction and position of the image or document must be in the correct position marked on the machine, this position is usually marked with an arrow or a zero. After placing the correct position, close the lid of the machine.
 Put the image in the scanner
Here you will have 3 ways to perform the scan, choose one of the 3 which is convenient for you:
1 / Double click on the image scanner program icon located on the Desktop to run it.
2 / Press the Start button located on the image scanner.
 Press the Start button located on the image scanner
3 / Open a certain image processing program and select the scan command.
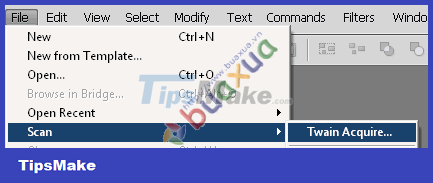 Scan images in FireWork
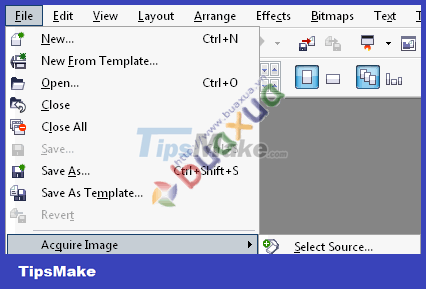 Scan images in CorelDraw
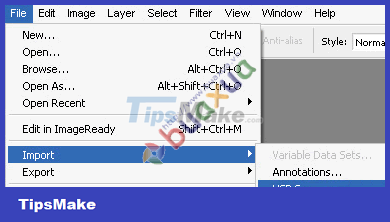 Scan photos in PhotoShop
Normally, the machine will automatically scan images according to the default settings available. If you don't want to, press Pause on the program's window or the Esc key on the keyboard to switch to manual scanning mode, with this mode you can change the scanning parameters arbitrarily such as zoom in, zoom out, increase or decrease the resolution, adjust the color.
- In any case, you will need to see the instructions for use in the accompanying documentation before using it.
- Depending on the machine, there will be different accessories.
- With automatic scanning modes, the scanned image will be saved to the program's default folder, you can change this folder.
- If scanning from image processing programs (3rd method), the scanned image will be displayed right in the window of this program and you need to save (Save) the image.
Conclusion
Understanding Install Scanner makes it easier to compare options, avoid common mistakes, and apply the information in this guide more effectively. Review the relevant requirements before making changes or choosing a solution.
FAQ
How do you install and use the scanner?
Follow the steps in this guide in order, confirm the required settings or tools, and verify the result before making additional changes.
Is it safe to install and use the scanner?
It is generally safe when you follow the recommended instructions, use trusted tools, and avoid changing settings you do not understand.
What should you do if the process does not work?
Recheck the requirements, restart the device or application when appropriate, and review each step for missed settings or compatibility issues.
Related Articles
 Some Tips with QR Scanner Feature on iOS 115 minutes read
 How to Install Canon Lide 120 Scanner4 minutes read
 How to Install and Use a Vulnerability Scanner in Linux5 minutes read
 How to Choose a Scanner11 minutes read
 4 Best Barcode Scanning Apps for Android5 minutes read
 How to Use the Built-in Virus Scanner on Chrome5 minutes read
Reader Comments 0
Sign in with email or Google to join the discussion.