To insert checkboxes into Word, you need to use Developer tab. If the Developer tab on your computer is not displayed on the Ribbon, you need to perform part 1.
1. Display the Developer tab on the Ribbon
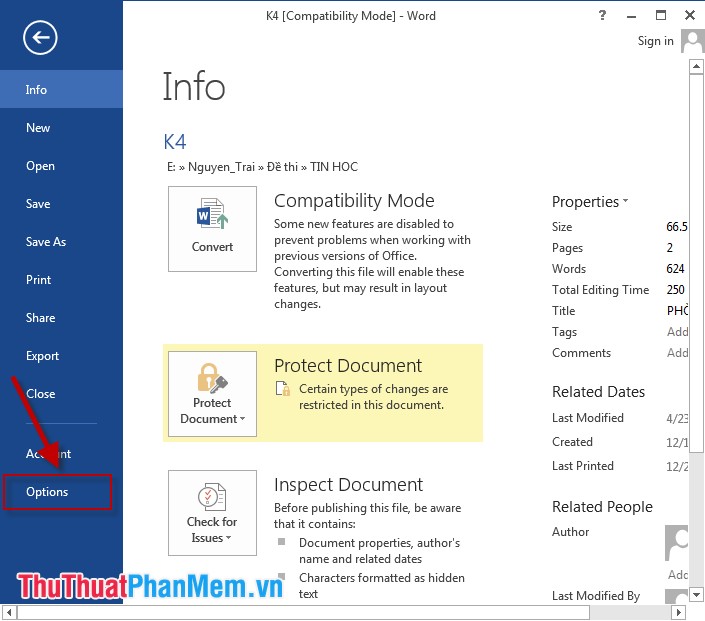
- In tag File -> Options:

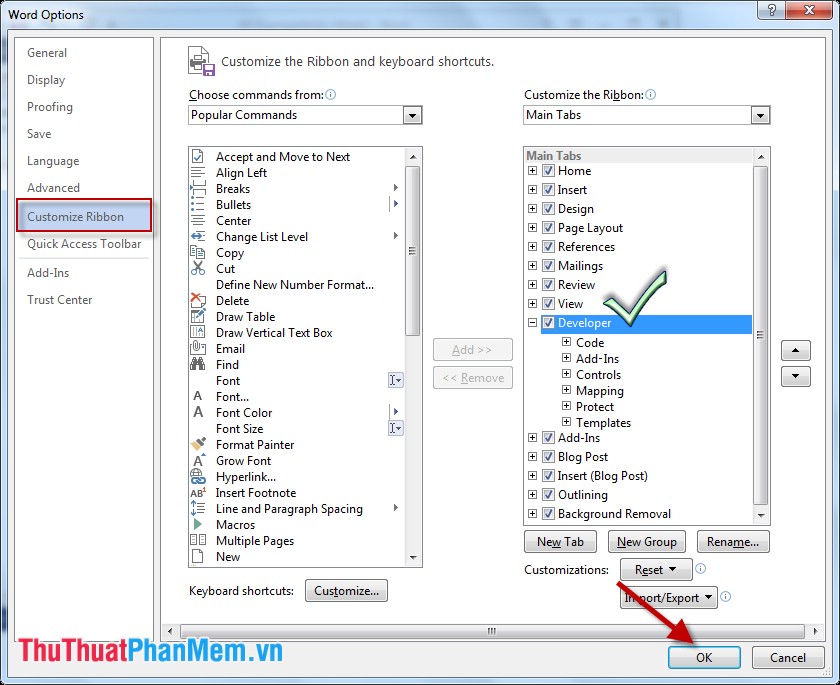
- Dialog Word Options appear choose Custom Ribbon -> move to section Main Tabs -> tick in Developer -> OK to display the Developer on the Ribbon:

2. Insert tick, checkbox
Step 1: Click the location to insert Checkbox -> Select Developer tab -> Legacy Tools -> Checkbox Form Field:
- Similarly insert the remaining options for the results:
Step 2: After inserting the Checkboxes, you cannot select and need to edit again. Select Developer -> Restrict Editing to make the following options:
- Editing restrictions section:
+ Check the box: Allow only read type of editing in the document.
+ In combobox choose Fillings in Form.
- Click on to Yes Start Enforcing Protection:
Step 3: A dialog box appears to enter a password to protect the content on the file, so that the user can select the checkbox -> click OK:
Step 4: Now you have the option to put a checkmark in the checkbox and cannot edit the content of the data file.
In case you want to edit the content, click Restrict permission -> the dialog box appears to enter the password to remove protection to be able to edit the file content:
However, this is a simple way to create checkboxes that users can check on all options.
Above are instructions on how to insert bookmarks, checkboxes in Word hoping to help you in the process of creating exam questions. Good luck!
