Ways to move image position in Word
Images inserted into Word will have different position movement options.
Table of Contents
When composing document content in Word, to clarify the content, you can insert images into Word, or insert charts into Word depending on the content required. In addition to performing content, inserting images also adds art to the document. Images when inserted can change the display position compared to the text to fit the display layout more, or according to the presentation of each person. Usually when inserting an image into Word, the image will be placed under the text immediately at the position of the mouse. However, in addition to the default position, you can move the image inserted in the middle of some text, or the image is below the text, . The following article will guide you how to read the alignment. place images in Word.
- How to separate a background from a picture in Word
- How to hide images in Microsoft Word for easier reading
- How to insert a 3D model into Word
- Ways to rotate images in Word
Method 1: Position the Word image with Position
The Position option in Word has different positions for us to choose where to display the image with the text.
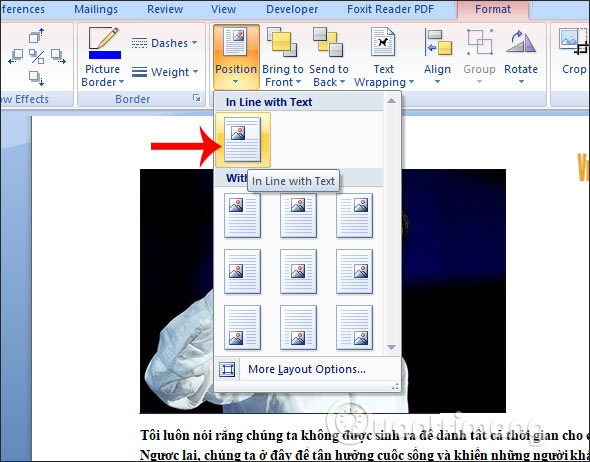
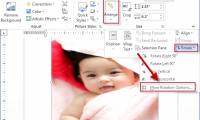
We click on the image and then click the Format tab , select Position and then select the image display position for the text.

For example, I will choose a new position for the image to split the text as shown.

To expand the position of the image selected by the More Layout Options .

Display Layout view, click the Text Wrapping tab and select a new display position for the image.

In case we want to return the image to the original default position , click on the image and select In line with Text as shown below.
Method 2: Move the image in Word with Wrap Text
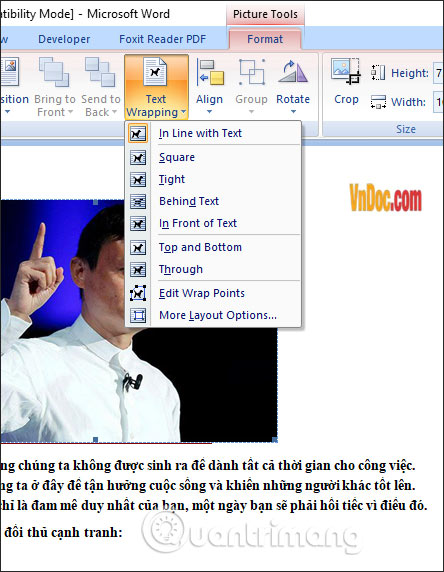
We also click on the image and select the Format tab . Then click the Text Wrapping item to select the display location for the image. Some commonly used locations for images such as:
- In the Line with Text: Display as a character format.
- Square: Text will surround the image you have inserted.
- Top and Bottom: Images are separated from above and below
- In Front of Text: Image overlays text.
- Behind Text: The image is under the text.
In each location, there are illustrations to help users easily visualize.
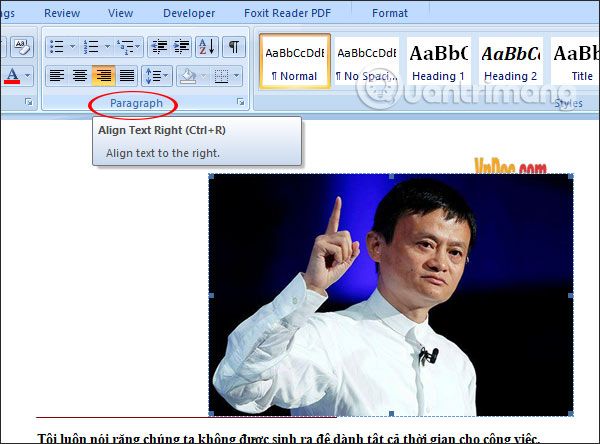
Method 3: Use Align to edit images in Word
Click on the image, then click on Home, then look at the Paragraph group and select the center, left, right for the image.
So you have 3 different ways to change the position of the inserted image in Word. If you want to display more artistic photos more nicely, then use the first two options. The third way is relatively simple, just move the image to the right, left is done.
I wish you successful implementation!
Was this article helpful?
Your feedback helps us improve.
Related Articles
 How to move photos, change the image position in Word4 minutes read
 Instructions on how to move tables in Word2 minutes read
 Rotate and move images in Word2 minutes read
 Word 2013 Complete Guide (Part 16): Image format8 minutes read
 Quickly change the location of a row in the Word 2013 table2 minutes read
 Manipulating tables in Word2 minutes read
Reader Comments 0
Sign in with email or Google to join the discussion.