Table of Contents
This updated guide examines How to Writing Vertical Letters in Word and organizes the essential facts, background, and practical takeaways in clear American English.
- How to create curved typefaces in Word
- How to rotate text in Excel
- How to create large text at the beginning of the text on Word
- Instructions for drawing arrows in Microsoft Word
Method 1: Write vertical letters in Text Box or Shapes
Step 1:
At the Word document interface, select Shapes or Text Box to frame the content. Click Insert and then select Text Box or Shapes.

If you select the Text Box then select Simple Text Box and Shapes select the square. Right-click and select Add Text to enter the text.

Step 2:
After entering the content, the text is closed in the frame and the top has a blue circle to rotate the angle of the word . You hover your mouse until the circle arrow icon is displayed.
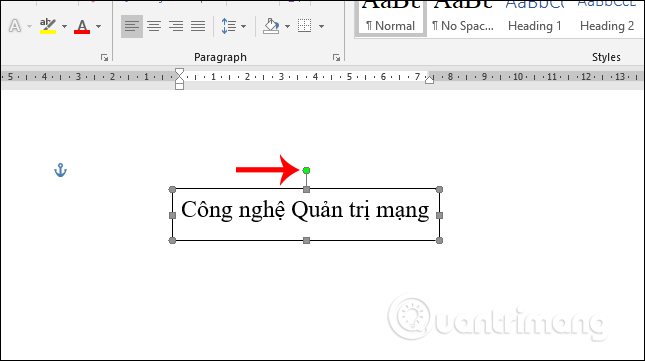
You rotate along the text in the direction you want to use for the document. The result is rotated vertically as shown below.
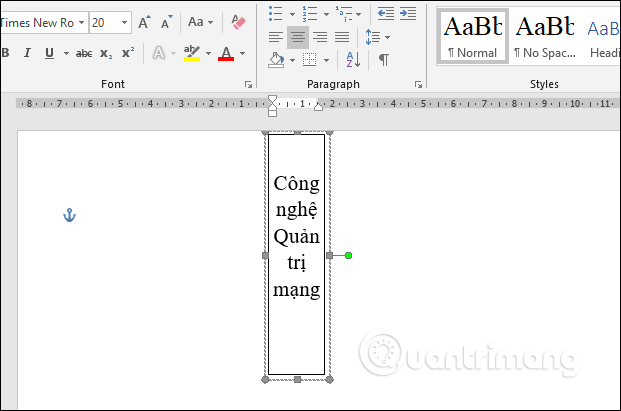
Step 3:
To lose the frame around the content , click on the content frame and select Format at the top.
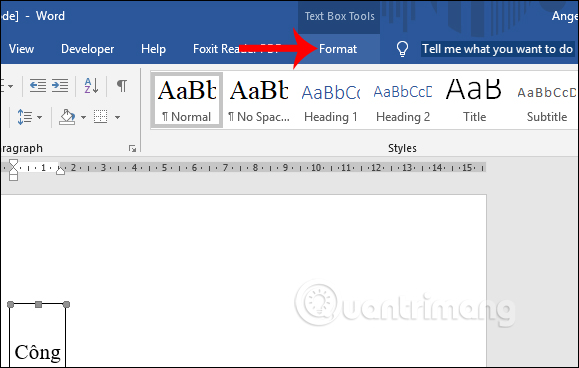
Next, select the Outline Shape and select No Outline to remove the border around the content.
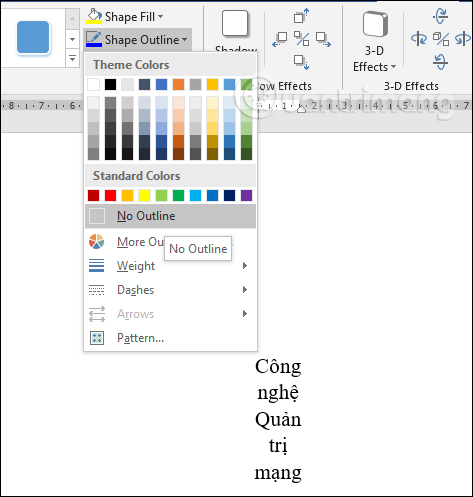
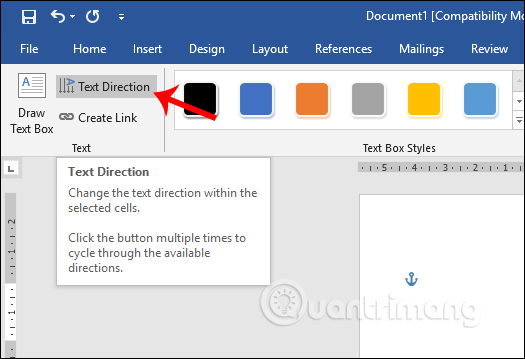
Or simply, simply select the currently used Text Box or Shape and select the Format tab. Click Text Direction to change the direction for the text.
Method 2: Use WordArt to write text vertically
Step 1:
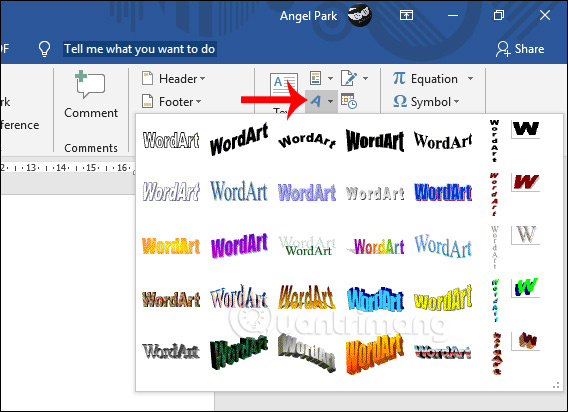
We click on Insert and then click on WordArt , select the new art font written in Word.
Step 2:
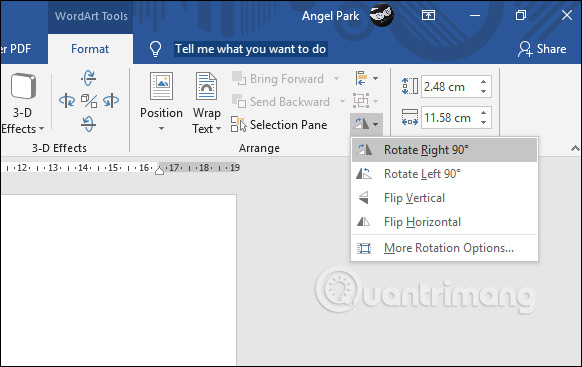
Write the text in the correct style of your chosen art. We then click the Rotate Objects icon to change the direction for the text.
There are many angles for us to rotate text. To rotate vertical text, click Rotate Left 90 or Rotate Right 90.
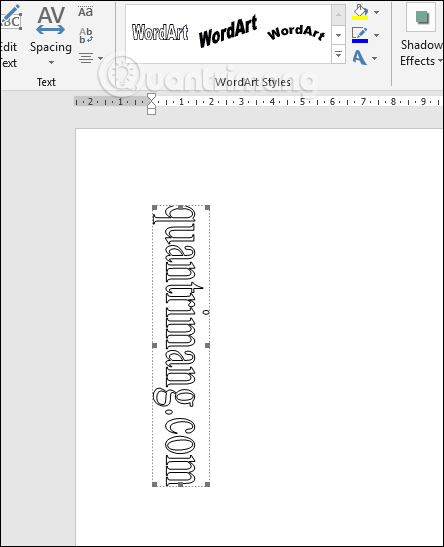
The result is rotated vertically as shown below.
Method 3: Write vertical letters in the table cell
The vertical typeface in the table cell is completely different from the upper case. You cannot use Text Box or WordArt to write text and then change the direction of the text.
Step 1:
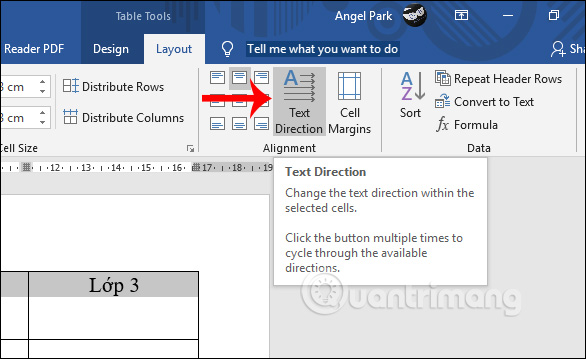
After drawing the table and entering the title of the table, we black out the content that we want to rotate. Then click on the Layout tab and click on the Text Direction item as shown.
Step 2:
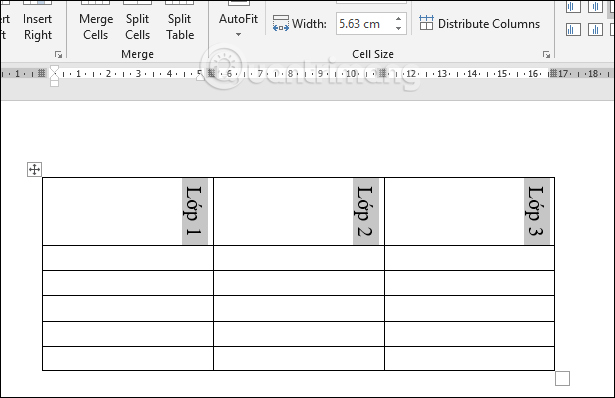
The word results in the cell have been rotated vertically.
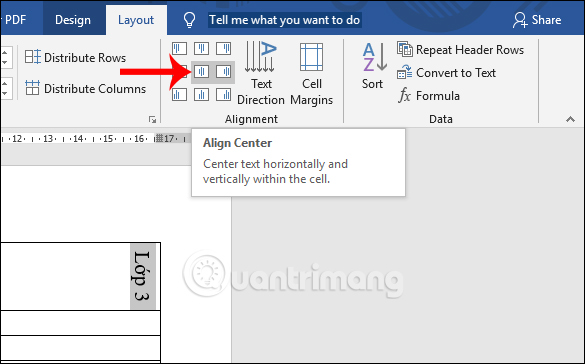
To center the text in the Word panel, click the Align Center icon in Alignment.
You can also highlight the text you want to write along in the Word table cell, select the right mouse button, and click Text Direction.
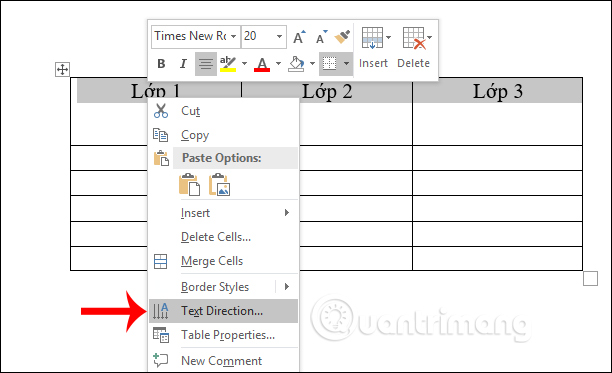
Display Text Direction - Tabel Cell interface so that we can choose the direction of rotation along the selected word.
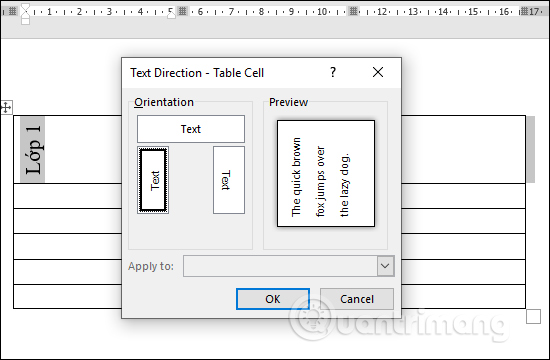
Word-oriented rotation operations for vertical writing in Word are simple and done in many different ways. Depending on the requirements when presenting the document, we choose the appropriate implementation.
I wish you all success!
FAQ
What is How to Writing Vertical Letters in Word about?
It provides a structured overview of write vertical words in words, explains the main context, and highlights practical takeaways for readers.
Why does this topic matter?
Understanding the main concepts helps readers evaluate the issue, avoid common mistakes, and make better-informed decisions.
How should readers use this information?
Use the guidance as a practical starting point, confirm details that may have changed, and follow current product, safety, or security recommendations.
Related Articles
 How to Write Vertically, Rotate Text Vertically in Word4 minutes read
 How to Fix the Error of Accent Marks When Writing Capital on Word3 minutes read
 How to Change Lowercase Letters, Uppercase Letters, Uppercase First Letter4 minutes read
 How to Rotate Any 1 Page Size Paper in Word3 minutes read
 How to Fix the Error of Typing Uppercase Letters into Lowercase Letters in Word6 minutes read
 How to Fix Missing Letters When Typing Accents in Word5 minutes read
Reader Comments 0
Sign in with email or Google to join the discussion.