How to enable Quick Machine Recovery Windows 11
Quick Machine Recovery in Windows 11 allows you to restore a computer that is having problems and cannot start.
Table of Contents
Quick Machine Recovery in Windows 11 allows you to recover a computer that is having problems and cannot start. This feature automatically searches for solutions to boot errors that your computer is experiencing, helping users to fix errors quickly and reduce the impact on your computer. Below are instructions for enabling Quick Machine Recovery in Windows 11.
How to enable Quick Machine Recovery Windows 11
Step 1:
Open Settings on your computer, then click System in the list on the left. Next, look to the side and select Recovery to access the recovery tool on your computer.

Step 2:
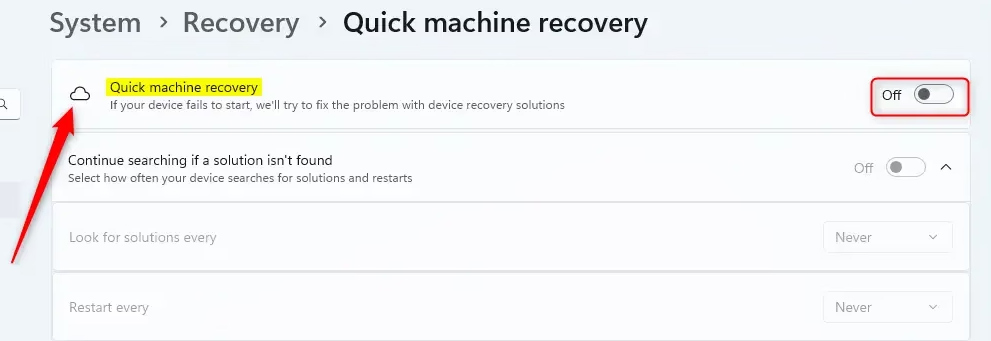
At this point the user will see the Quick machine recovery tool to proceed with the setup.

Step 3:
Now you just need to switch the mode to On in Quick machine recovery to turn it on on your Windows computer.
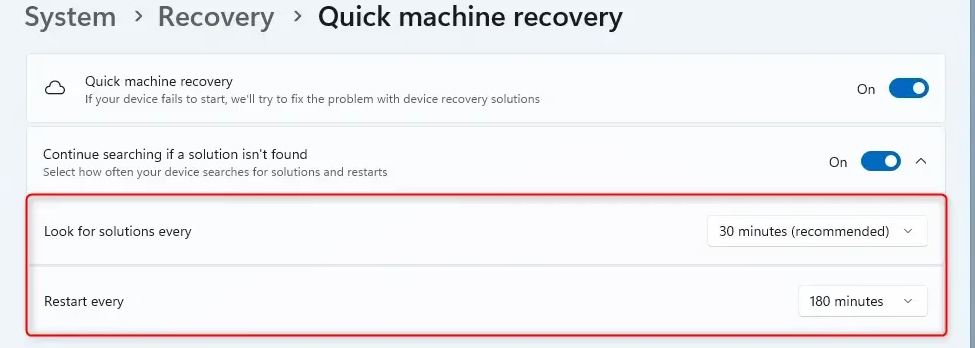
Below you will see some other settings like Continue searching if a solution isn't found. Continue to choose how often to search for solutions.
After enabling this feature, users can access the machine recovery options in WinRE.
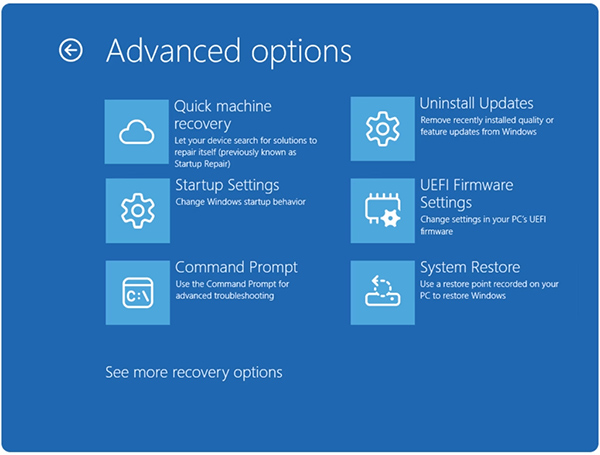
So when your computer has a problem that won't boot, Quick Machine Recovery will find the error and fix it. There are two main settings for quick recovery: cloud troubleshooting and automatic troubleshooting. Cloud troubleshooting is the process of using Windows Update to find solutions and fix problems on your computer.
Automatic recovery allows you to automate the recovery process. When enabled, the device will automatically connect to Windows Update and attempt to find a fix. If a solution is not found on the first try, the device will try again without manual intervention.
Was this article helpful?
Your feedback helps us improve.
Related Articles
 Enable / disable Windows Recovery Environment (WinRE) in Windows 103 minutes read
 How to create a virtual machine repository for Hyper-V Quick Create16 minutes read
 How to import Recovery Console in Windows XP?4 minutes read
 Use Quick Migration to move virtual machines between Hyper-V hosts8 minutes read
 How to enter Recovery mode on Android phones6 minutes read
 How to Bring Mac Quick Look to Windows2 minutes read
Reader Comments 0
Sign in with email or Google to join the discussion.