Use Quick Migration to move virtual machines between Hyper-V hosts
With Quick Migration, users can easily move an active virtual machine from a real host system through another system with a minimum downtime, while ensuring performance and performance. necessary stability. By using Windows Server Hyper-V or Windows Server 2008 with Hyper-V, along with Quick Migration, the manager can fully take the initiative.
Table of Contents
TipsMake.com - With Quick Migration feature, users can easily move an active virtual machine from a real host system through another system with minimum downtime, while ensuring Performance and stability required. By using Windows Server Hyper-V or Windows Server 2008 with Hyper-V , along with Quick Migration , managers can be fully proactive in risk situations at any time, for example As for errors in the process of upgrading and maintaining the system . these are the top criteria if you want to meet the needs of many companies, organizations or businesses today.
To use this method, you must install System Center Virtual Machine Manager 2008 and use this function to perform the migration process. When applied to Failover Cluster, Quick Migration will work on its own according to the following mechanism:
For pre-arranged system migration plans, the process will save the temporary status of the Guest Guest virtual machine (the old server's memory will be saved to the hard drive, the partition will be shared). , move the storage capacity from one physical host to another, then proceed to restore the original state on the new host. During this whole process, there will be an almost inevitable downtime, the fast or slow factor of the system depends on the amount of RAM installed for the virtual machine and the speed of the system. subsystem.
In the event of an unprepared downtime, the system cannot save the current status of the virtual machine. Instead, the virtual machines are automatically transferred to another host in the Cluster system, and the boot-start process will start from the Cold state.
Note that we do not need to set up Failover Cluster of 2 or more Hyper-V hosts to enable the Quick Migration feature to work. However, if we fail to deploy the Failover Cluster , we will not be able to handle situations where the server has problems without prior preparation plans, and the whole process will have to be done manually. If you decide to use the Failover Cluster , you must use the Windows Server 2008 Enterprise or Windows Server 2008 Datacenter operating system. Our tests only apply to the Hyper-V R2 platform, not tested or tested for the RTM version of Hyper-V, so there are some differences in the presentation. below your actual system. In addition, the author did not mention Quick Migration 's automatic Failover Cluster case, but instead moved the virtual machine from one host to another with a minimum download time.
Some points to note before proceeding:
In fact, when we want to move the virtual machine from one Hyper-V host to another, we must use the Migration option available in SCVMM. On the other hand, there are two things that need to be carefully prepared to ensure a stable migration process:
- Virtual Networks must be initialized on the new host. If not done before, the user will have to set it manually at the Settings page of the virtual machine.
- Use the same processor on both hosts. If the CPU is the same but not of the same type, we will have to adjust it via the Processor Compatibility function .
Perform the migration process:
First, open the SCVMM 2008 R2 main console , then select Virtual Machines> All Hosts, find the correct host part that the virtual machine is running.
In essence, the virtual machine part that needs to be moved doesn't need to turn off or save the active state at that time. However, you should note that the downtime period will occur several times during this entire migration process, so the account connecting to the virtual machine will experience some symptoms such as disconnection. connecting, hanging screen . for most applications, the timeout period of that program will be longer than that of downtime , so the user's account does not need to reconnect to the system.
Then, right-click on the virtual machine and select Migrate - this function will perform Quick Migration or Live Migration , based on the basic settings of the system. In this case, the author does not have the Failover Clustering , so the system will perform Quick Migration:

Select Yes at the next screen:
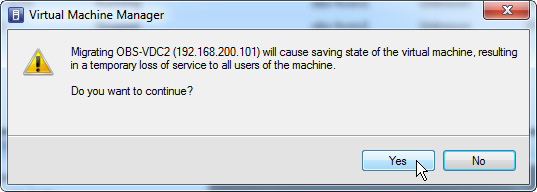
There will be some downtime during this process
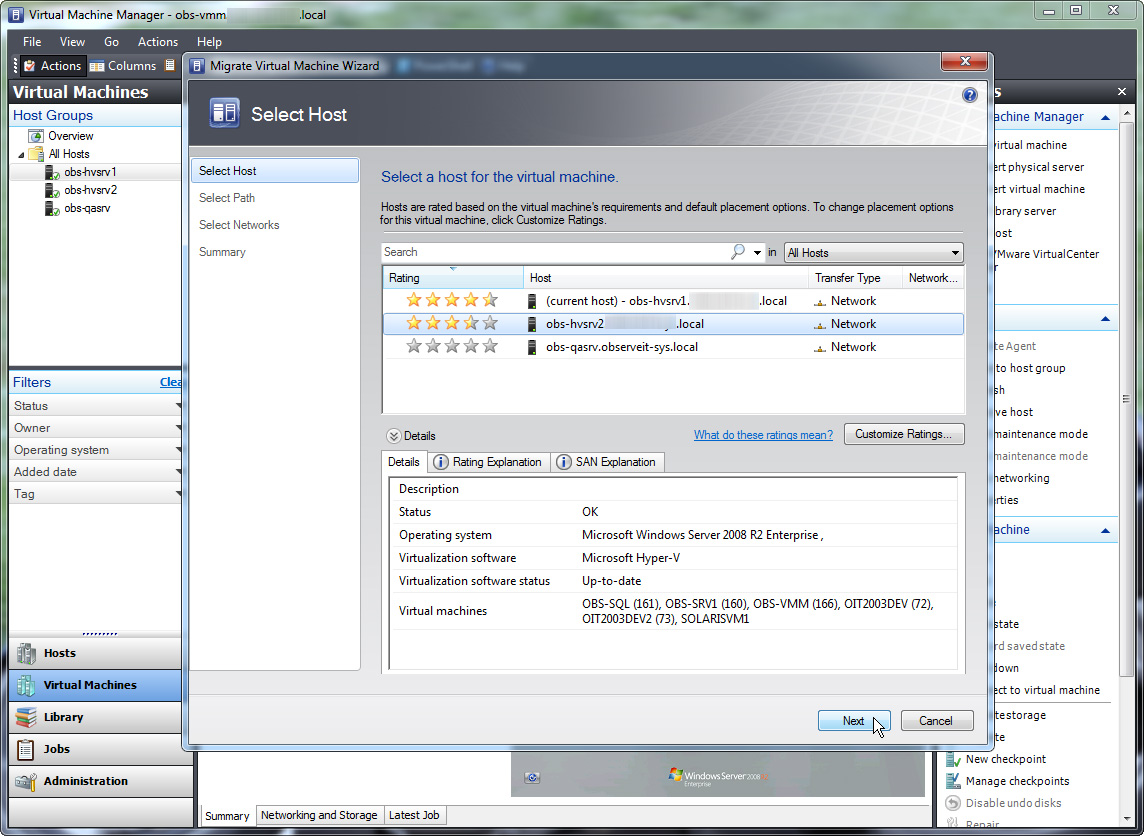
The list of all Hyper-V hosts (usually VMware ESX / ESXi ) will display, select the correct host component you need to move the virtual machine to. Note that at this time, SCVMM will automatically change or adjust the performance of the system based on the hardware configuration. Select the host and click Next :
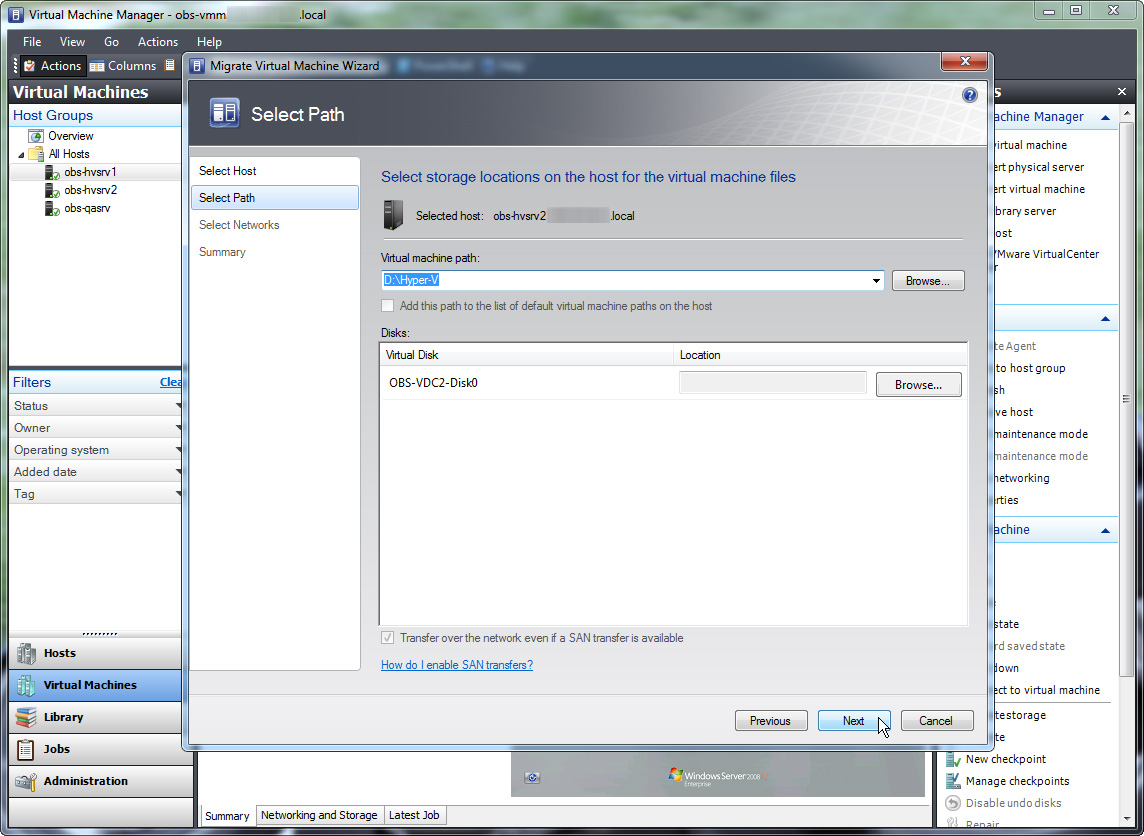
Select the path of the virtual machine on the host host, make sure you have enough free space to proceed, then click Next :
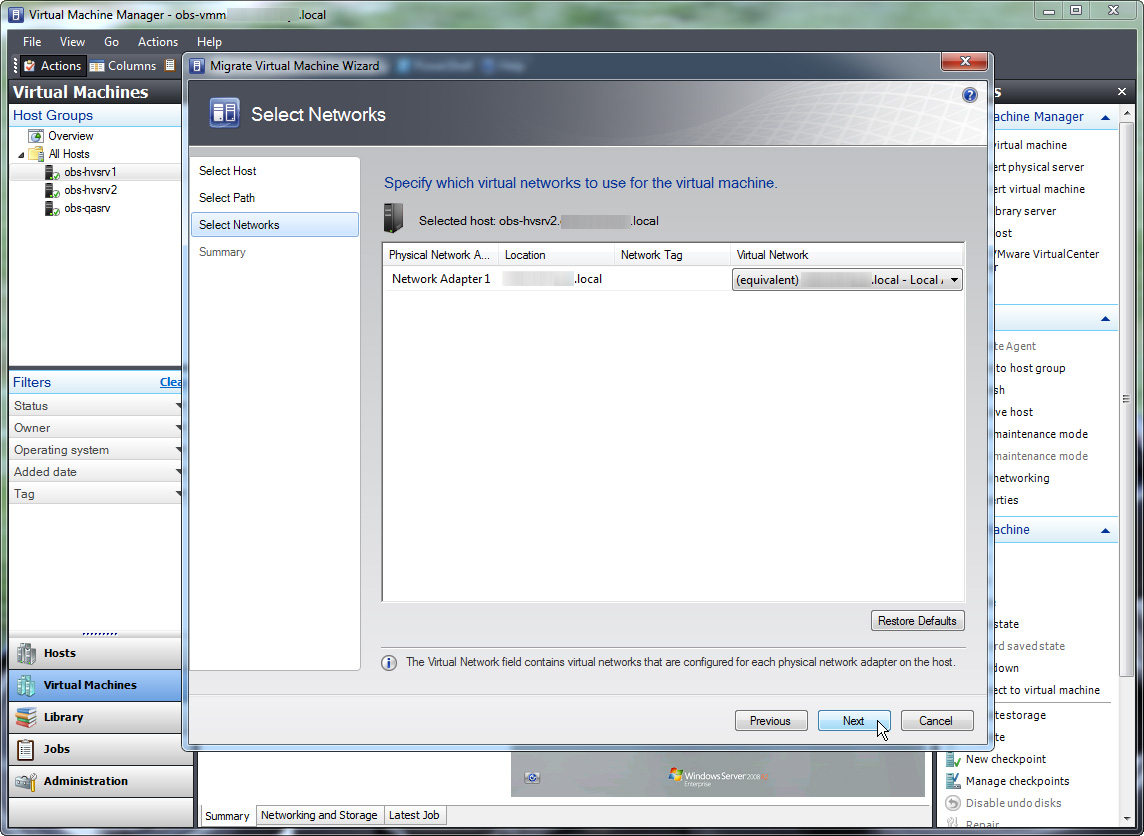
If network parameters have been set up before, they will be automatically selected. Otherwise, the user will have to do it manually. Click Next to continue:
Check all the information at Summary , press Move to start the migration process. Note that we can also copy the PowerShell code used to perform the backup. Besides, click Cancel at any time in the process to cancel the job.
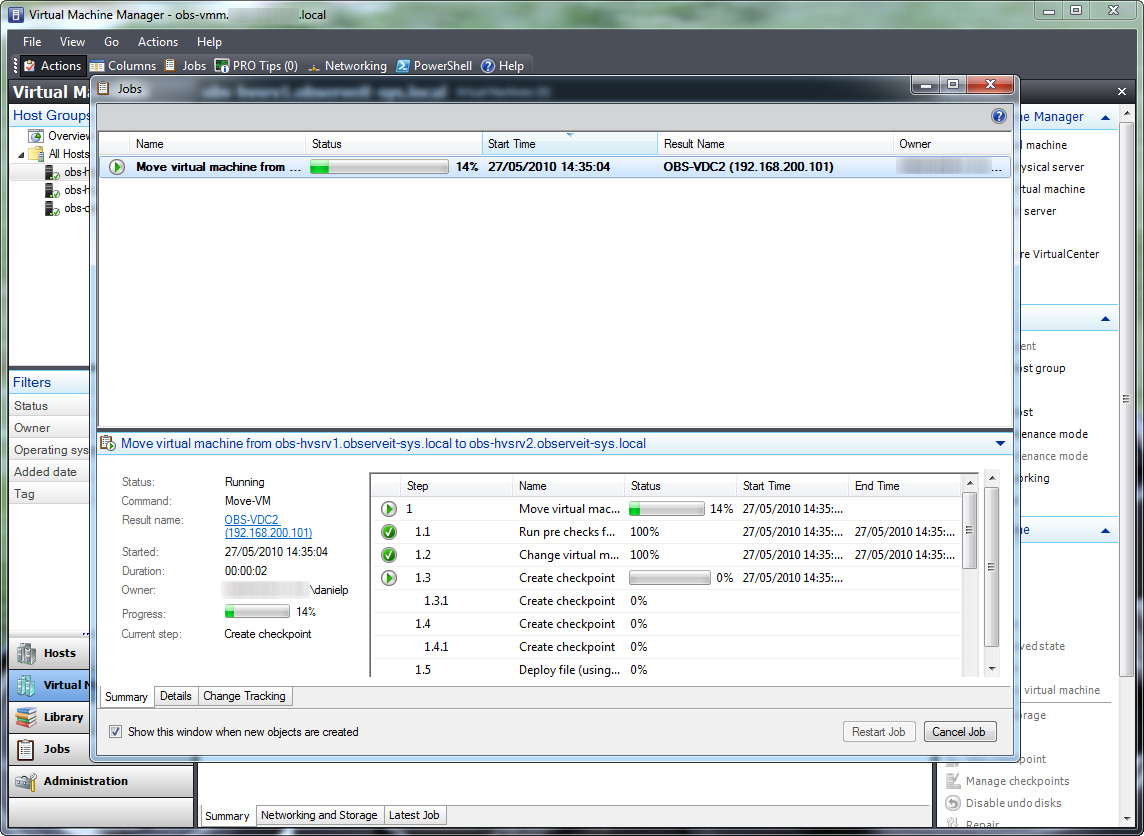
The Jobs window will tell us about the progress of the work:
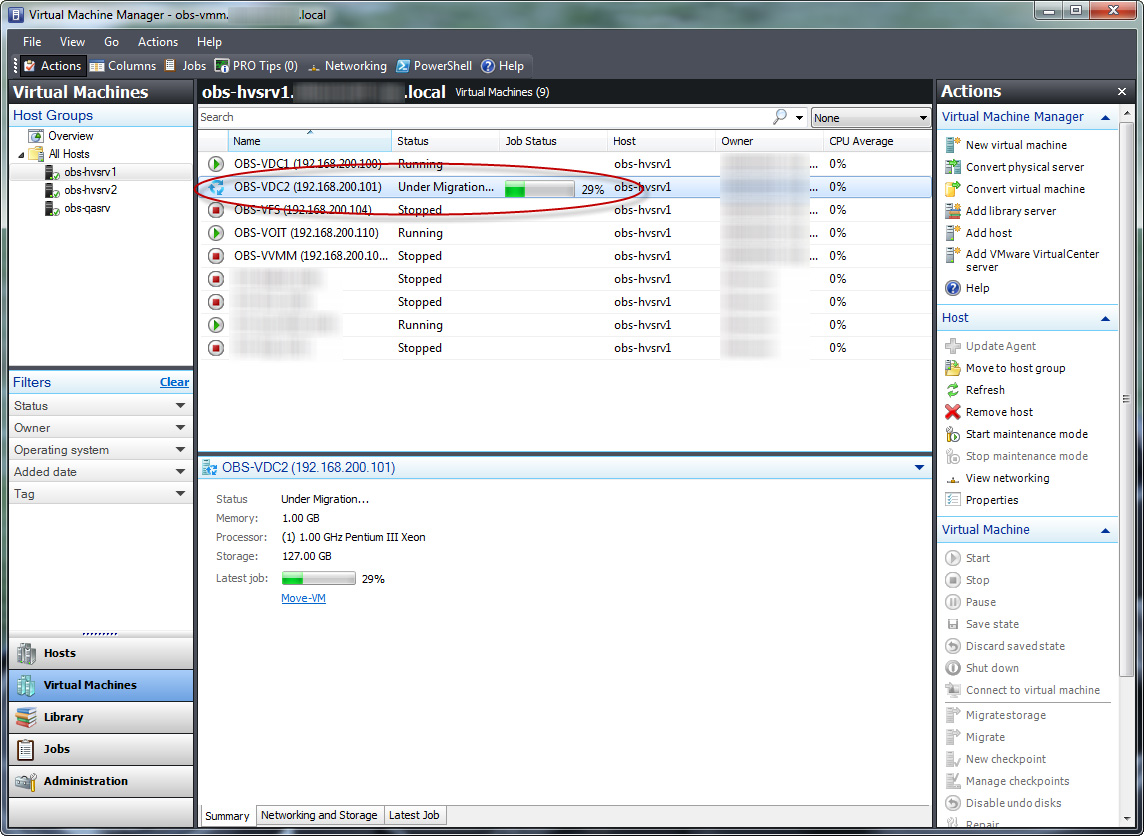
Back in the main control window of SCVMM , you can clearly see the progress bar - Progress , the current status is Under Migration:
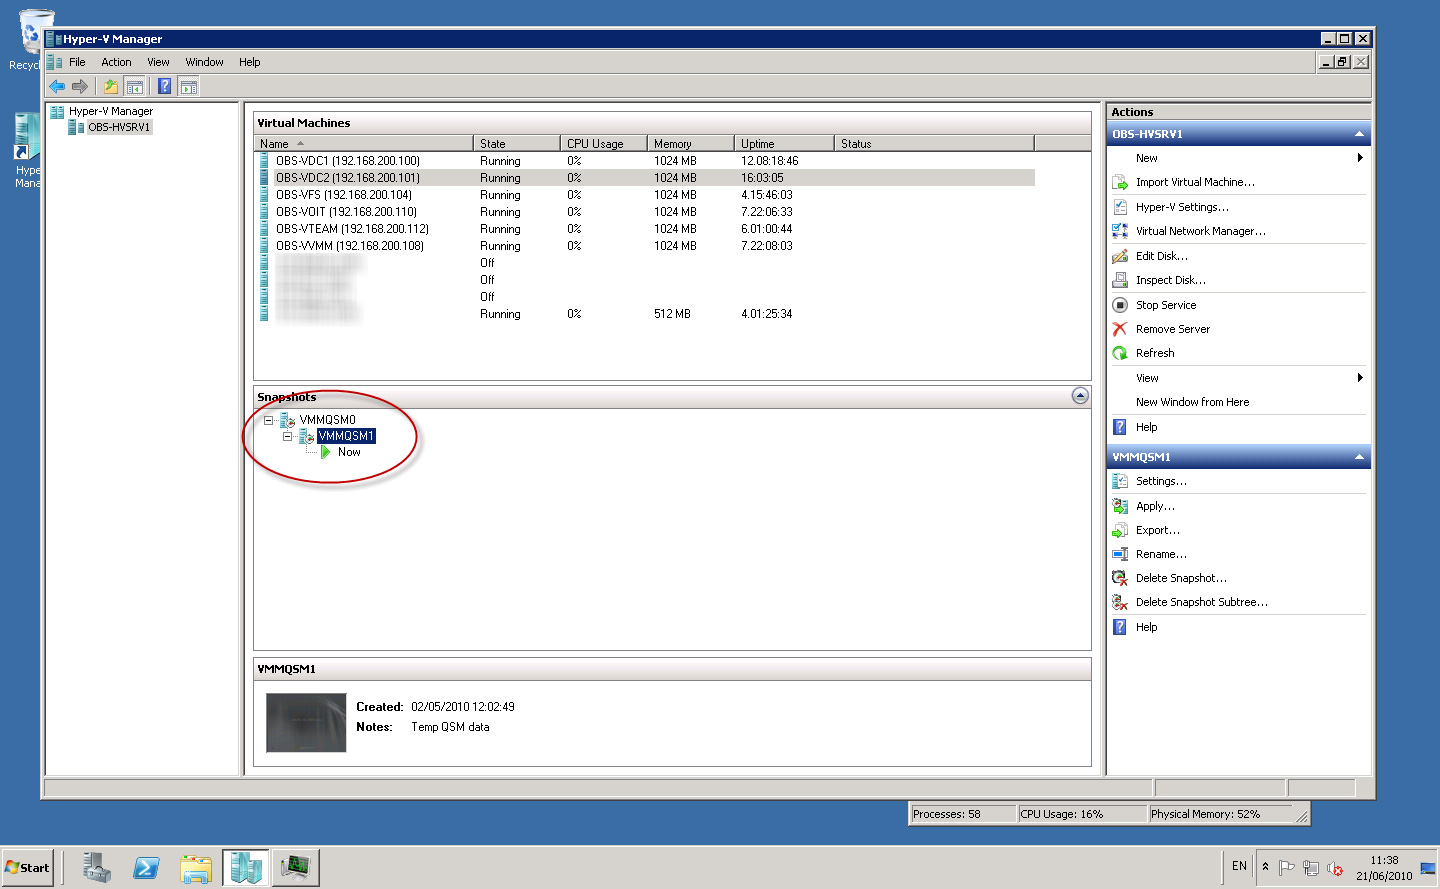
However, during this entire time, virtual machines are still operating normally without any downtime . But in fact in Background mode , SCVMM will continually create snapshots (or more precisely called checkpoints ) of the virtual machine. All information, the I / O signal of the hard drive will be temporarily recorded into the AVHD files for this snapshot. After that, the VHD files of the virtual machine will be copied to the host host, this process will happen quickly or slowly depending on the total capacity of VHD files as well as the connection speed of the network system:
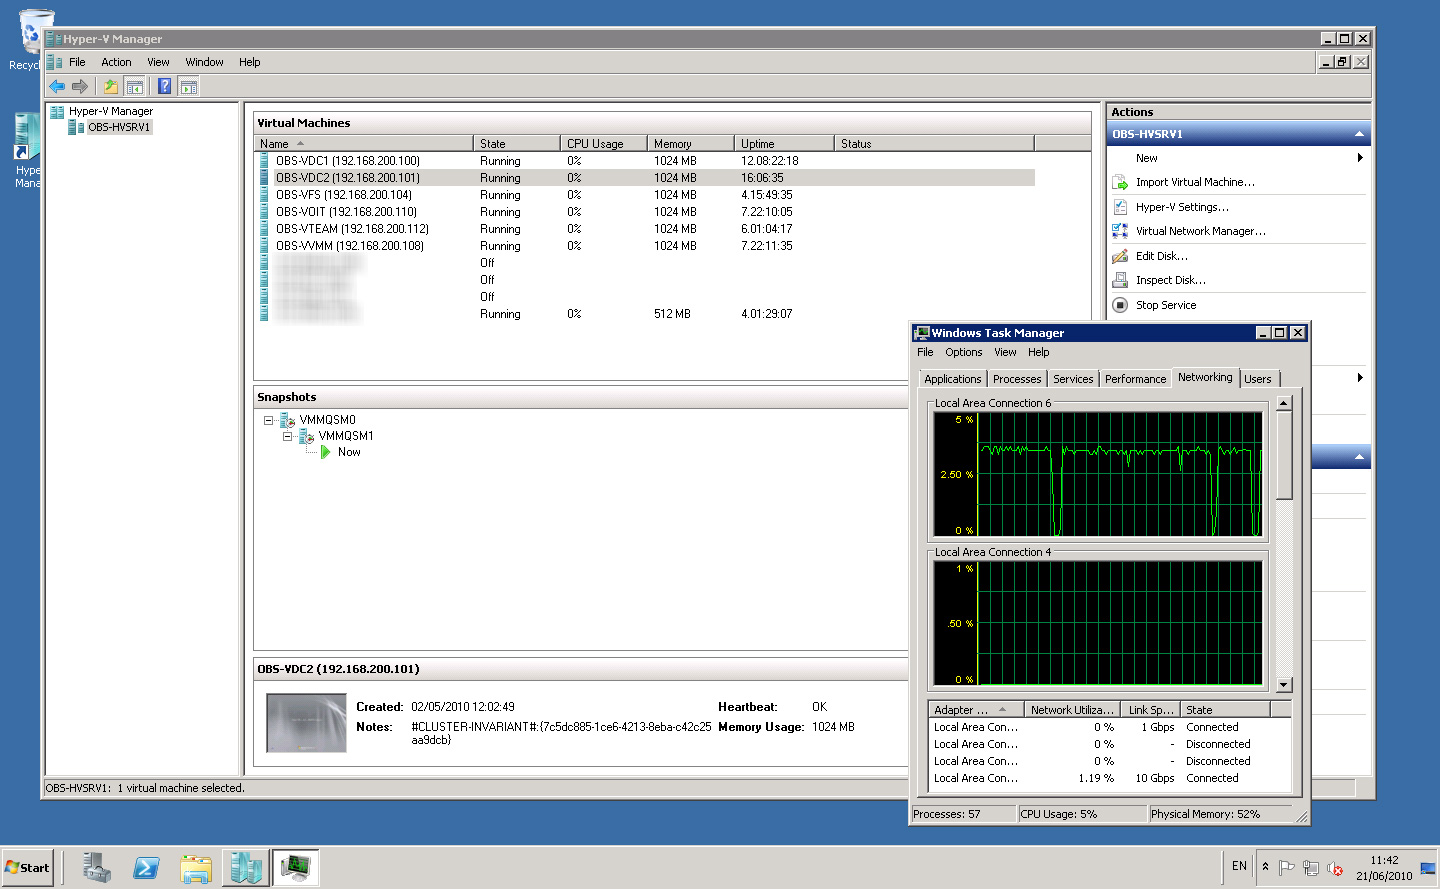
And during this time, our virtual machine is still in a normal state of operation. However, if you look at the Task Manager Network tab, you will see many tasks that are still "silently" happening:
If you use the ping function in this process, we will still receive the reply signal (unless the ICMP reply feature has been disabled in the firewall ):

When the copy process finishes, the state - the state of the virtual machine will be stored by the system, which means there will be no further changes 'written' to the AVHD file:

This information state will be sent to the host:

When this 'shipping' process is finished, we will see how the virtual machine is restored from the corresponding states :

During this time, the entire network connection of the system will be temporarily lost, when 100% is completed, everything will return to normal:

And our process is complete:

Good luck!
Was this article helpful?
Your feedback helps us improve.
Related Articles
 How to import Hyper-V virtual machines in Windows 1013 minutes read
 Create virtual machines with Hyper-V on Windows 8 and Windows 1015 minutes read
 How to export Hyper-V virtual machines in Windows 105 minutes read
 How to rename Hyper-V virtual machines using PowerShell and Hyper-V Manager5 minutes read
 How to Export and Import Virtual Machines in Hyper-V5 minutes read
 Create virtual machines in Hyper-V on Windows Server 20082 minutes read
Reader Comments 0
Sign in with email or Google to join the discussion.