Table of Contents
This updated guide examines How to Design Website Cover Images on Blogcover and organizes the essential facts, background, and practical takeaways in clear American English.
BlogCover does not require users to create an account to use, but it can also be designed. The site provides a full range of covers for users to design covers, from sizes, backgrounds, fonts, and other cover images. The following article will guide you how to design the cover page on BlogCover.
- Guide to create a website for beginners
- 6 leading website design companies in Vietnam
- How to use Weebly to create websites on phones
- How to create a website with Godaddy Website Builder
Instructions for creating cover images on BlogCover
Step 1:
We access the link below to access the homepage of BlogCover.
https://blogcover.now.sh/Step 2:
We proceed to set the cover image for our website. First of all in Properties we will see a series of attribute options for the cover image.
- Blog: Select the blog you want to create cover images that the service supports (Dev.to, HashNode, Medium).
- Width: Enter the width for the cover image.
- Height: Enter the height for the cover image.
- Format: Choose a save format for cover images.
- Border: Select the border for the cover image.
- Border Color: Choose the color for the border of cover photos.
- Border Radius: Adjust the roundedness of the cover image.
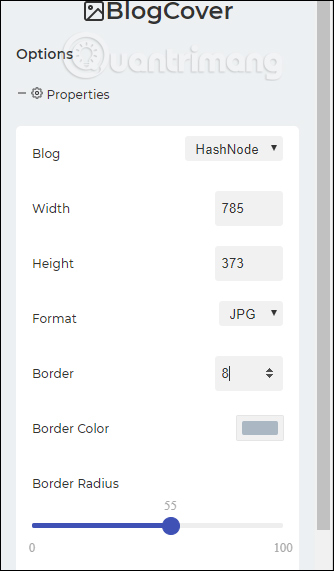
Then the cover image will have the first shape as shown below.

Step 3:
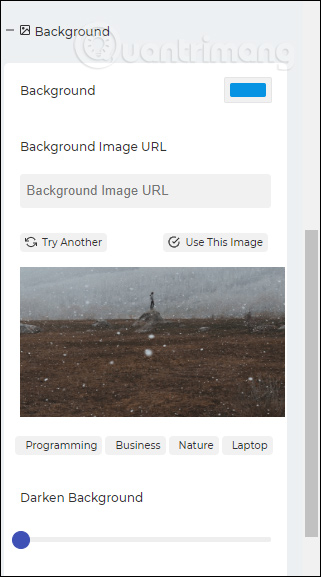
Next we choose the background image for the cover image to replace the default cover image of the site. Click on the Background section to change the wallpaper. This section also has different content settings.
- Background: Choose a different background color for the cover image if desired.
- Background Image URL: Use the background image for web covers, paste the link for the cover image to use in the box below.
- Use BlogCover's built-in background image: Below is the background image provided by BlogCover. If you want to change another wallpaper, select Try Another. If you want to use this wallpaper, select Use this image.
- Darken Background: Darken the background image.
Step 4:
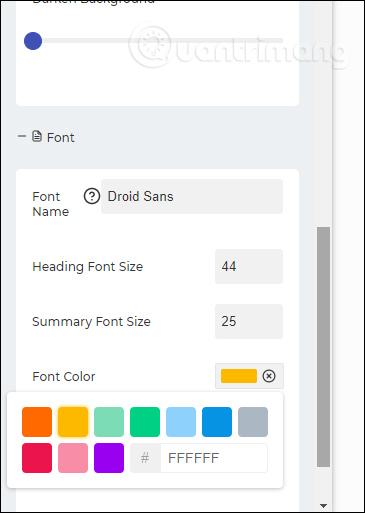
Go to Font to write the cover photo title as greetings, introductions to create attention to others.
- Font Name: Select the font you want to use. Can we enter the font name we want to use directly, or click the icon? to open the font in Google Fonts.
- Heading Font Size: Choose a size for the main headline.
- Summary Font Size: Choose a size for the extra text.
- Font Color: You choose the color for the font.
We then enter the content of the title into each specific line.
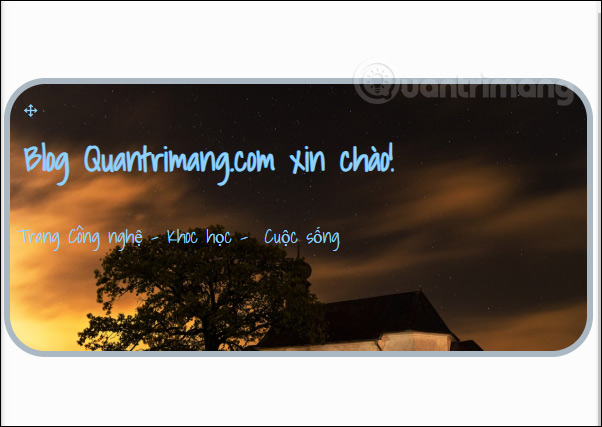
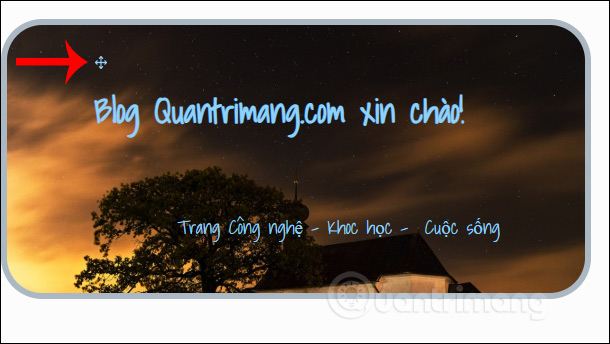
The text can be adjusted position in the cover image area , by hovering the mouse over the cross arrow icon and then move to another position where you want to put the main or secondary title.
Step 5:
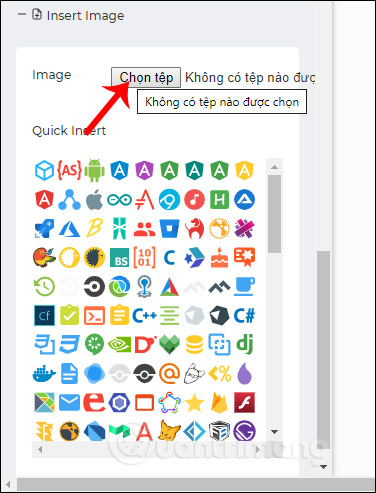
If users want to use their images to add to the cover image , in the Insert Image section , we click Choose File to upload your image.
The Quick Insert part will be the icons if needed to insert into the image.
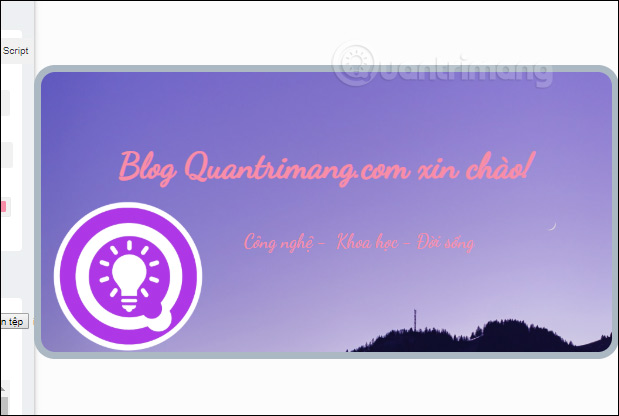
Note that if you insert an image, BlogCover automatically resizes to fit the cover image, so we will not be able to resize it.
Step 6:
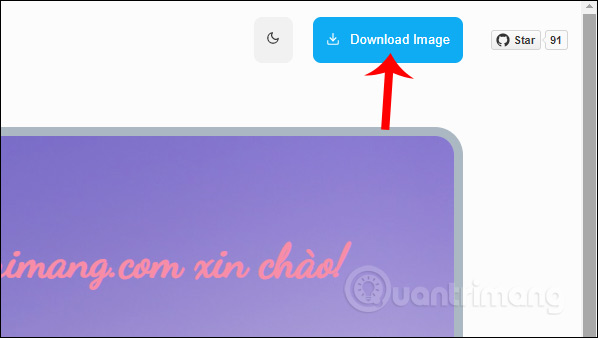
If you are satisfied with the cover image you designed, then click the Download Image button in the upper right corner to download the cover image.
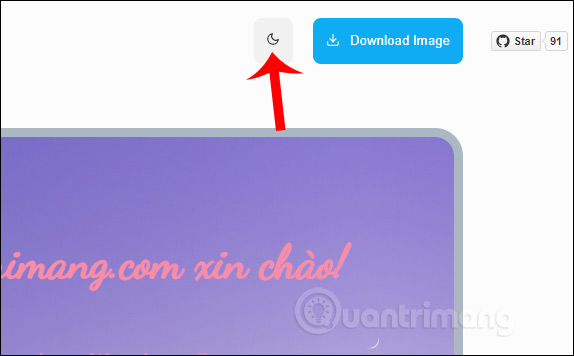
BlogCover's interface can also be switched to a black background if desired when dark mode is enabled.
BlogCover generally provides very simple, straightforward setup options when all content is classified into separate groups. Cover photos use the stock images BlogCover provides so there are more themes to choose from.
I wish you success!
FAQ
What is How to Design Website Cover Images on Blogcover about?
It provides a structured overview of BlogCover, explains the main context, and highlights practical takeaways for readers.
Why does this topic matter?
Understanding the main concepts helps readers evaluate the issue, avoid common mistakes, and make better-informed decisions.
How should readers use this information?
Use the guidance as a practical starting point, confirm details that may have changed, and follow current product, safety, or security recommendations.
Related Articles
 TOP best AI tools for website design9 minutes read
 How to Design Beautiful Cover Photos with Birdbanner: Complete Guide4 minutes read
 6 Leading Website Design Companies in Vietnam9 minutes read
 How to Create Multiple Size Images at the Same Time5 minutes read
 Facebook Cover Photo with Anime Theme: Wallpapers3 minutes read
 Instructions for Using Recraft.ai to Design Photos Online4 minutes read
Reader Comments 0
Sign in with email or Google to join the discussion.