Instructions for creating cover letters on Word
Word editing tool not only brings users the editor, edit content but also on Word we can design document cover page styles, create Word frames for different types of covers, or create covers email on Word. Envelope design options on Word are set to international standards, as the size is always the default size. Besides, this cover section also has some contour patterns for you to use for different objects, such as customers, partners or for personal purposes. The following article will guide you how to design the cover letter on Word.
- Word 2016 Complete Guide (Part 28): How to merge text, merge Mail Merge messages
- How to create text wallpaper in Word
- Instructions for attaching files in Word
- How to insert sound into Word documents
How to create and print mail covers on Word
Step 1:
At the Word interface, click on Mailings and then click on Envelopes to create the cover.

Step 2:
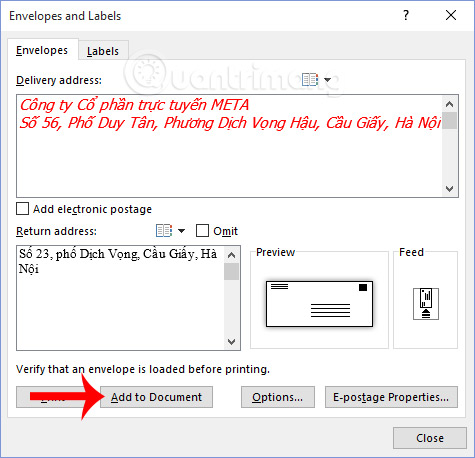
In the envelope design interface Envelope Options, users enter all the information. At Delivery Address enter the mail recipient address, Return Address to enter your address. Continue clicking the Options button . to customize the envelope size.

Step 3:
In the interface displays the user to adjust the size for the envelope . If you don't want to change the size of the mail cover, leave it blank.

Below can change the font, font for each part of the address entered in the content of the sent message.

Click on Priting Options again to reset the mail cover to print if the user needs to print. Select the orientation of inserting the paper into the printer to create the cover letter in the direction of preview in the Feed method section.

Step 4:
Going back to the interface depending on the letter cover, click on Add to Document to save the envelope design.
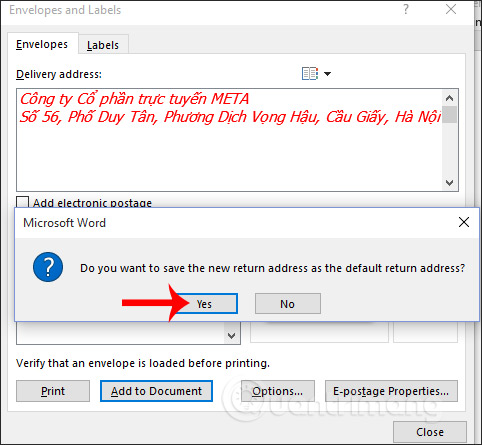
Continue to press Yes in the notification interface to display the mail cover on Word.
Step 5:
The result is the cover letter created on Word as shown below.
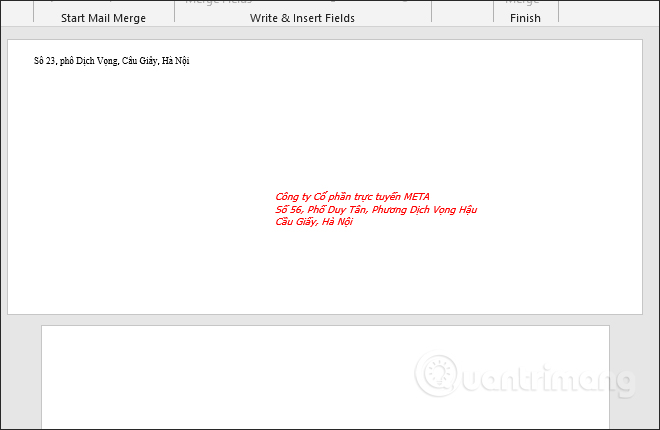
If you want to change the content of the address on the mail or other formats, we must re-enter Envelopes item in Word, enter the new content and then change Change Document to apply the new content.

Step 6:
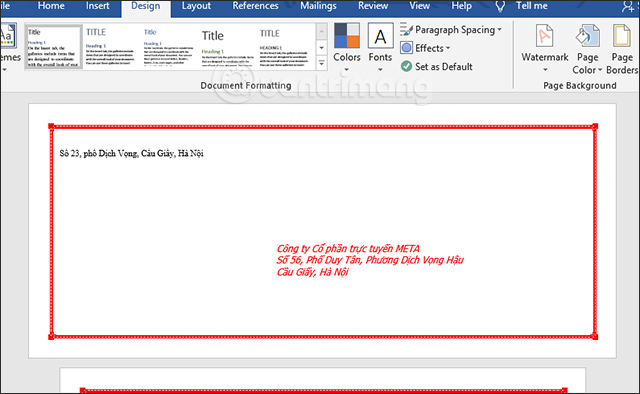
In case the user wants to add a frame to the mail cover, click on Design and then select Page Borders .
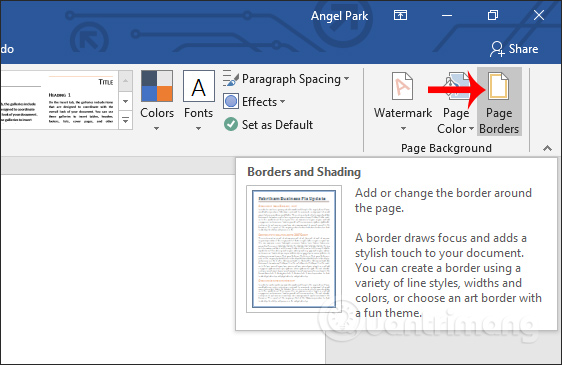
Display the interface with lots of customization for borders, including textures for frames.

The result of the user is the frame of the mail cover as shown below.
Step 7:
To print the envelope after the design has been completed, click Envelopes again and select the Print button to print.

So with the style of mail design options in Word, you can easily create the style of mail according to the idea as well as the address content available. The standard sizes of mailing styles are also provided by Word for selection. If you add a border to the cover, your printer must have a color printing mode.
I wish you all success!