How to compress photos on Windows 10 Compressor image application
UWP Compressor image application on Windows 10 helps users to quickly compress gile photos or photo folders.
Table of Contents
High quality images when shared via mail or other services will take more time when sending images with medium size. If so, users should compress the image size so the sharing process is easier. Currently there are a lot of image compression software like FILEminimizer Pictures, or online image compression website.
Windows 10 also has an image compression application like Compressor image. The application allows to compress images according to each file individually or by image folder. The process of compressing images by adjusting the size of the image is appropriate, to maintain the quality of the image. The following article will guide you how to compress images on the Compressor image application.
- Instructions to reduce the volume of photos in Photoshop
- Instructions for resizing images in Windows 10 series
- How to reduce the size of photos on Android with DeComp
- How to use ILoveIMG to edit photos online
Instructions for compressing images on Compressor image
Step 1:
Click on the link below to install the Compressor image application on Windows 10.
- Download Windows 10 Compressor image application

Step 2:
In the application interface there are 2 icons with 2 different options.The icon to the left of the screen to select the file to compress, the right icon selects the image folder to be compressed.

Step 3:
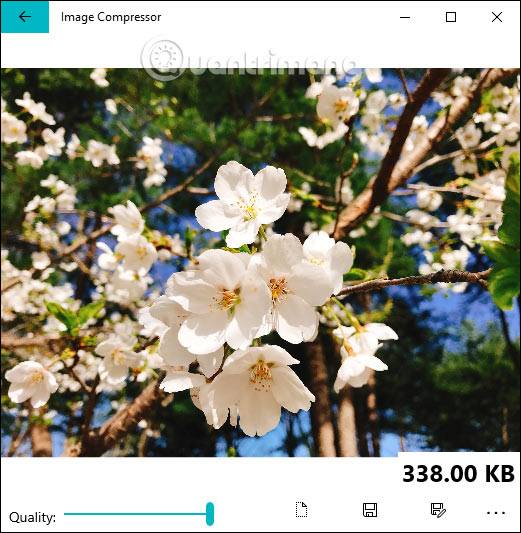
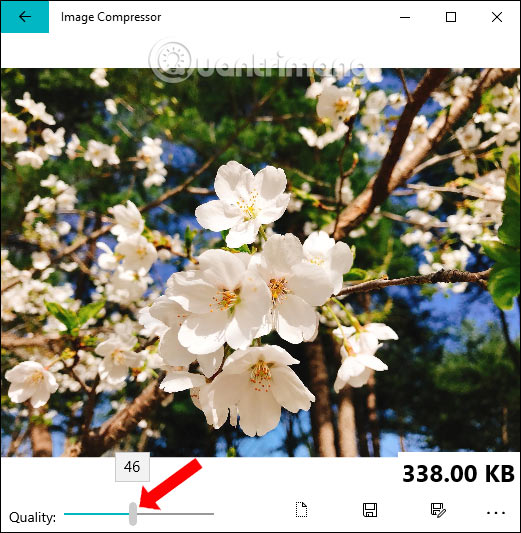
First we proceed to compress the image file. The application only allows downloading 1 image for 1 compression. Interface image after uploading Compressor image as shown below. Below is the Quality bar that adjusts the image size. The rightmost is the original size of the image. We adjust the volume control to the appropriate level.
Move to the left, the image size will decrease.
Step 4:
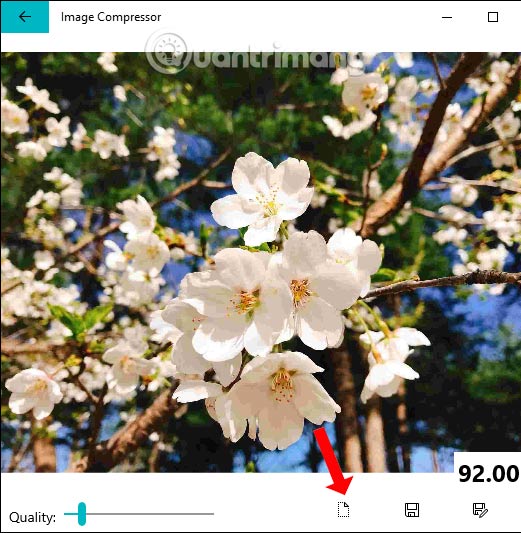
You can click the file icon to the left of the disk icon button to view the image after compressing the capacity.
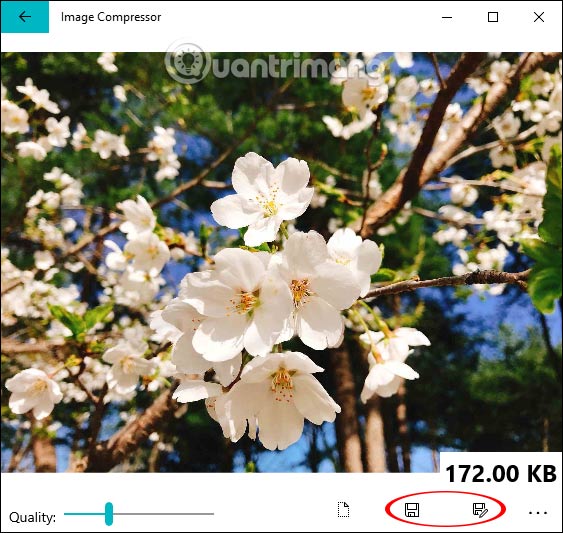
To save the image after compression there are 2 different types. With the floppy disk icon that will save the image over the original image, the floppy disk icon with an extra pen will store the compressed image in another location.
Reducing the size for the photo folder as well as when you compress images individually. When we upload the image folder to the Compressor image application, we will see the total volume of the current folder. Clicking on each image name will display the image content.

We also adjust the image folder size by adjusting the Quality bar. The Original column is the amount of uncompressed root directory image, while the Current column is the image capacity column after compression.

Using the Compressor image application is very simple, just adjust the compression level to finish if you don't have much need to reduce the image size, such as color correction and contrast. The speed of compressing the image folder size on Compressor image is also relatively fast.
I wish you all success!
Was this article helpful?
Your feedback helps us improve.
Related Articles
 Instructions for batch compressing images on Batch Image Compressor2 minutes read
 Compress photos, reduce image size with Bzzt! Image Editor3 minutes read
 How to reduce the size of photos on Android with DeComp5 minutes read
 How to use Photo Compress to compress Android images5 minutes read
 Compressor and information you need to know5 minutes read
 Reduce image size, how to compress images online for free7 minutes read
Reader Comments 0
Sign in with email or Google to join the discussion.