How to change the name on Google Meet
This article explains how to change the name on Google Meet from a web browser, Android device settings, or the Gmail for iOS app.
Table of Contents
How to change the name on Google Meet from a web browser
The fastest and easiest way to change the name on Google Meet is from a web browser, and you can do this in any web browser you use.
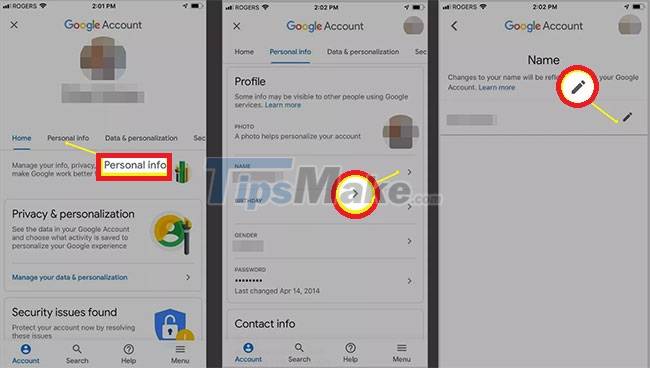
Step 1. Go to your account page on Google and sign in to your account if needed.
Step 2. Choose Personal Info from the vertical menu on the left. If you're using a mobile browser, it's in the landscape menu at the top of the page.
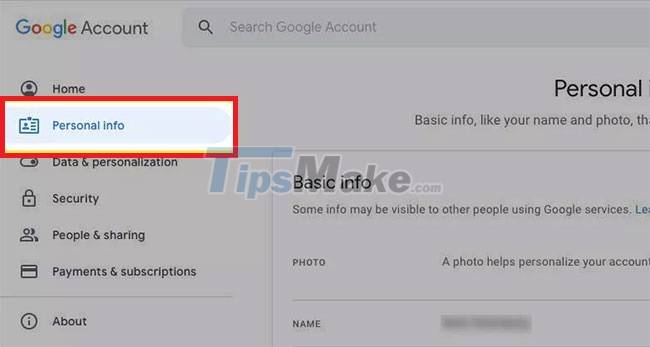
Step 3. In Name , select the right arrow.

Step 4. Enter your new first and last name in the fields provided.

Step 5. Select Save when you are finished.
Tip : To simplify the process, paste https://myaccount.google.com/name in your search bar. You will be taken straight to your Google Account name settings.
How to change the name Google Meet on an Android device
As an alternative to using a mobile browser, you can change your Google Meet name by visiting the settings of your Android smartphone or tablet.
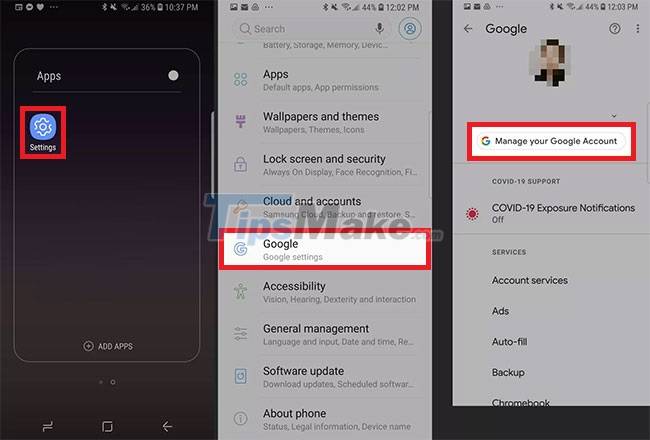
Step 1. Open the Settings app on your device (the blue gear icon).
Step 2. Scroll down and tap Google.
Step 3. Click Manage your Google Account .
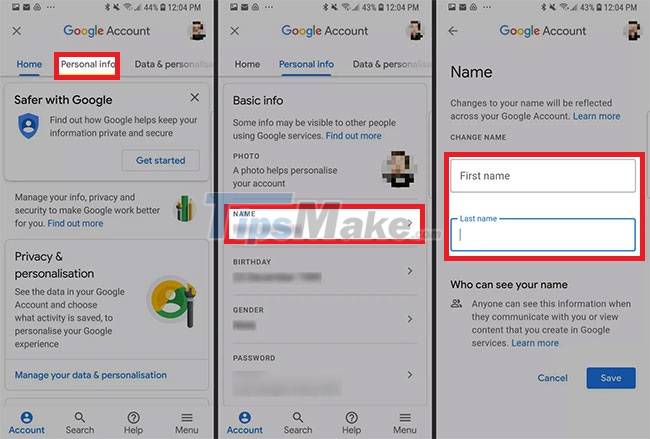
Step 4. Choose Personal Info from the horizontal menu under the name and profile picture.
Step 5. Click Name in the Basic info section .
Step 6. Enter your desired first and / or last name in the fields provided.
Step 7. Click Save when you are finished.
How to change the Google Meet name using the Gmail for iOS app
While you can't change your Google Meet name from your iOS device's system settings, you can still do this using the official Gmail app on your iPhone or iPad.
Step 1. Open the Gmail app on your iOS device.
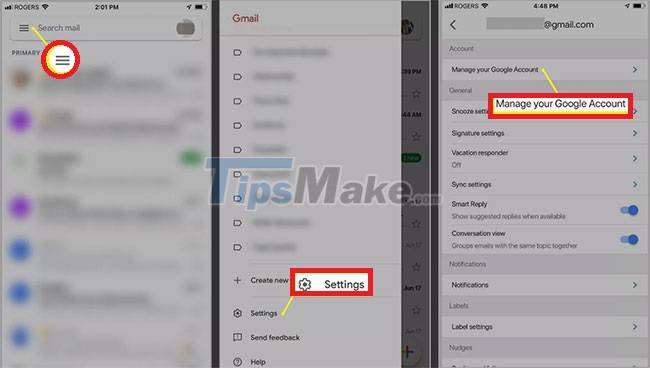
Step 2. Click the Menu icon on the top left.
Step 3. Scroll down and tap on Settings.
Step 4. Click Manage your Google Account .
Step 5. Select Personal Info.
Step 6. Click the right arrow to the right of your arrow
Step 7. Enter your new first and last name in the fields provided.
Step 8. Click Done to save.
How to add or change the nickname Google Meet
Google name fields are limited to first and last names, but you can also set a nickname (nickname) to display in Google Meet. It's a convenient way to include a middle name in your display name or let contacts know your preferred name.
Step 1. Go to your account page on Google and sign in to your account if needed.
Step 2. Click the Name row under Basic info .

Step 3. Click the pencil icon below the Nickname.

Step 4. Enter a nickname in the Nickname field .
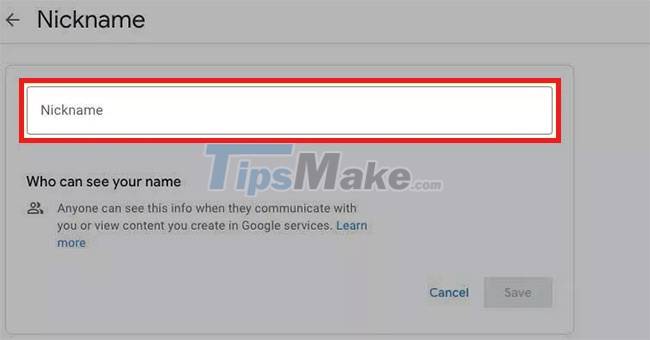
Step 5. Click Save to save.
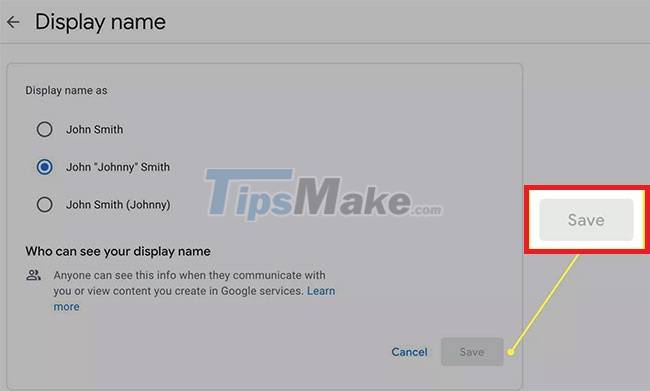
Step 6. Click Display Name As .
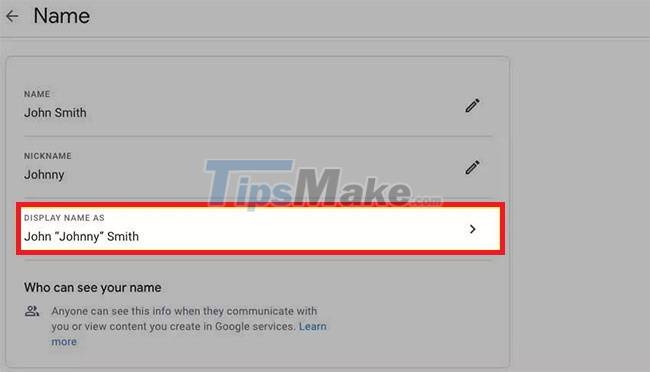
Step 7. Select one of the display name options provided and click Save.
After you set your nickname, you can choose to display your Google Meet name in the following ways:
- Last name - John Smith
- The last name 'nickname' - John 'Johnny' Smith
- Last name (nickname) - John Smith (Johnny)
Note : If you add a nickname for Google Meet, it will also be used across your entire Google account.
Hope you are succesful.
Was this article helpful?
Your feedback helps us improve.
Related Articles
 Instructions to rename Google Meet on PC and phone4 minutes read
 How to use filters on Google Meet3 minutes read
 How to change the background image in Google Meet5 minutes read
 How to return or livestream with Google Meet6 minutes read
 How to see every member on Google Meet2 minutes read
 Link download Google Meet: Free online meeting application4 minutes read
Reader Comments 0
Sign in with email or Google to join the discussion.