How to Adjust the Master Volume in Windows 7
The master volume of the computer affects all sound devices currently running in the system. For Windows 7, adjusting the master volume or system volume is very simple. Click the 'Start' button or the circle button with the Microsoft logo...
Table of Contents
Method 1 of 2:
Through the Control Panel
-
 Click the "Start" button or the circle button with the Microsoft logo on it. Usually found on the lower right of your screen.
 -
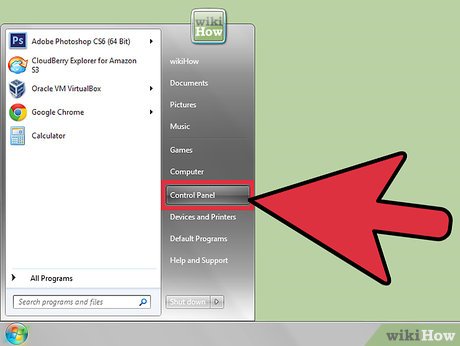 Click the "Control Panel" button in the selection on the right.
 -
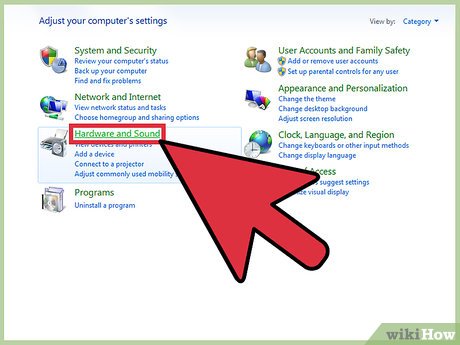 Click "Hardware and Sound".
 -
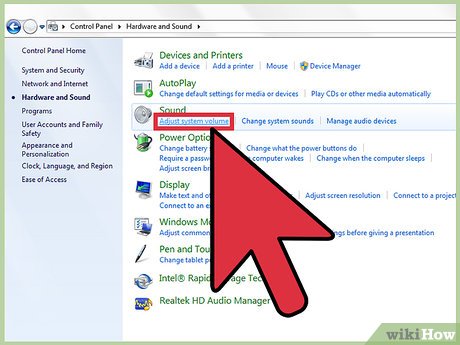 From the list, click "Adjust system volume" under "Sound".
 -
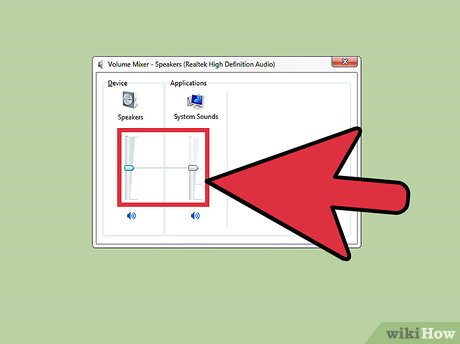 Adjust the volume to desired level.
Method 2 of 2:
Through the Taskbar
-
 Click the button that looks like a speaker. If you can't find the speaker button, try pressing the triangular button on the left. This will bring up more icons.
 -
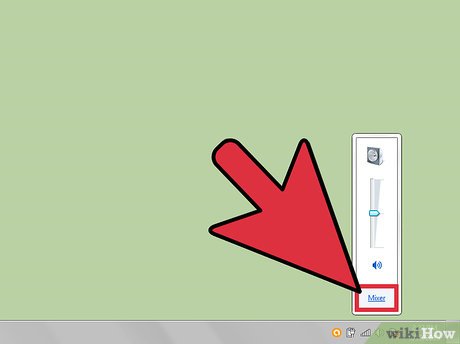 Click the "mixer" button below it.
 -
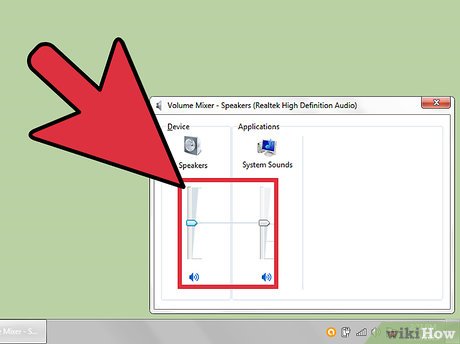 Adjust the volume to desired level.
Was this article helpful?
Your feedback helps us improve.
Related Articles
 How to adjust the volume of each Chrome tab up to 600%4 minutes read
 Ways to adjust system volume on Windows 114 minutes read
 How to change the volume of Siri on the HomePod2 minutes read
 How to set the default volume level for each application3 minutes read
 How to adjust iPhone volume via shortcut keys3 minutes read
 7 ways to fix low volume in Windows 107 minutes read
Reader Comments 0
Sign in with email or Google to join the discussion.