How to adjust the Canon 2900 printer in dark and light ink
By default, every printer will set the ink level just right, neither too dark nor too light. However, sometimes you also want your print to be darker, or adjust the color lighter, you can also change the Canon 2900 ink mode at will..
The printout will then be in a darker color than usual or be lighter. The following article will guide you to change the density level of Canon 2900 printer.
Canon 2900 printer ink color correction guide
Step 1:
First you access the Control Panel and select Devices and Printers . Next find the Canon 2900 printer want to adjust the density level and then right click, select P rinting Preferences .

Step 2:
Then display a new interface, the user click the Quality tab and then look down the Objective section, select Standard and click Details as shown below.
- Common printer errors and how to fix them

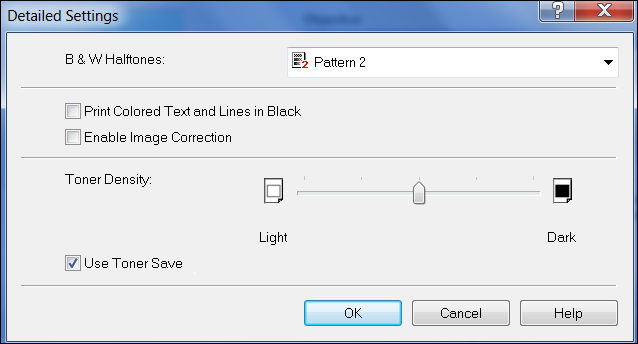
Step 3:
Now display the dialog interface for us to adjust the density level for printer ink in the Toner Density bar . If pulled towards Light, the ink will fade. If pulled towards Dark more, the ink will increase the density.
In case you want to save toner, select Use Toner Save. In addition, there will be 2 parts to set the print color:
- Printer color text and lines in black: Frame lines in the text will be darker.
- Enable image Correction: Prints a darker image or logo.