Table of Contents
Typically, a printer can serve multiple computers over a local network. To send print jobs, you need to set it up properly.
Install printer over network
Step 1: Installing the correct driver for your printer model is an important step.
Refer to the driver installation instructions for popular printer models:
- Canon 2900 Driver,
- HP LaserJet 1020 Printer Driver
- Epson LX 300 Printer Driver Disk
Step 2: Make sure both your PC and printer are connected to the same LAN, whether via network cable or Wi-Fi.
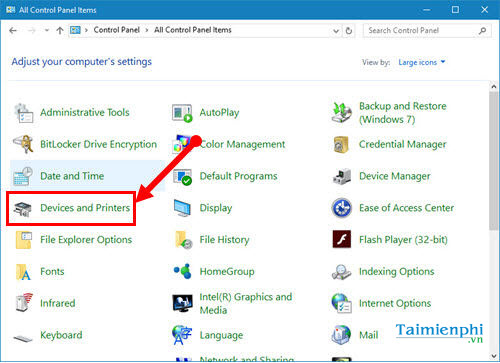
Step 3: Access Control Panel , you can refer to how to access Control Panel on operating systems
Step 4: Click on Devices and Printers
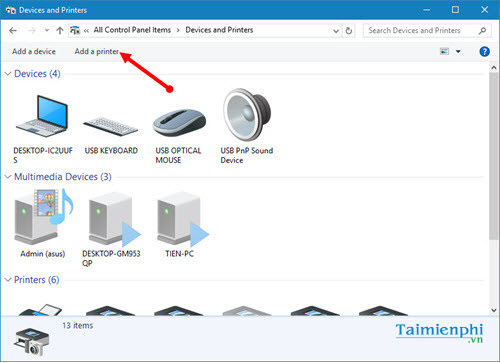
Step 5: Click Add a printer
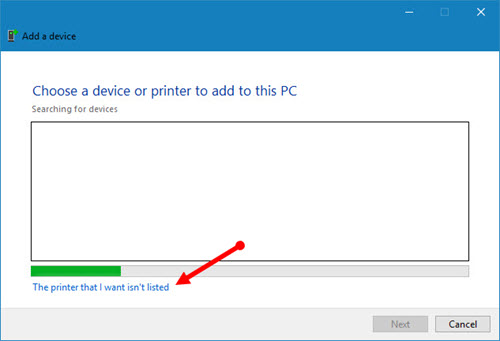
Step 6: Select The printer that I want isn't list
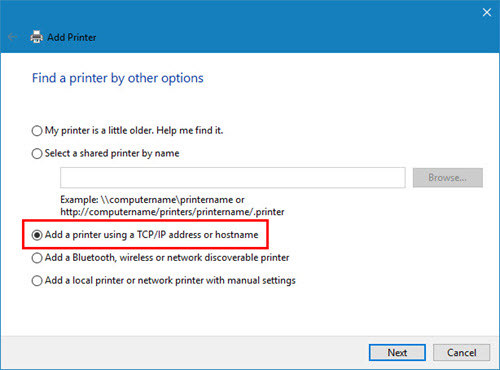
Step 7: Tick Add a printer using a TCP/IP address or hostname , then click Next
Step 8: Enter the IP address of the printer being shared and the Port, then click Next.

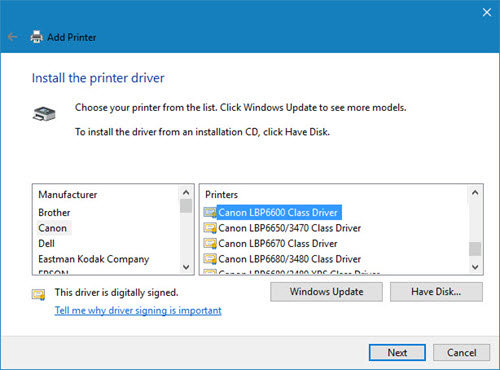
Step 9: After selecting the printer name from the available list, if the printer is too old and not displayed, click Have Disk to install the driver from an external file. Then, click Next to continue.
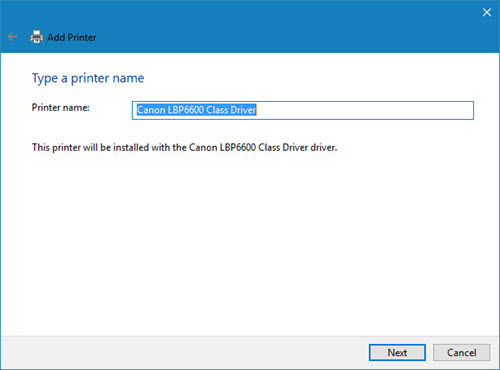
Step 10: Name the printer
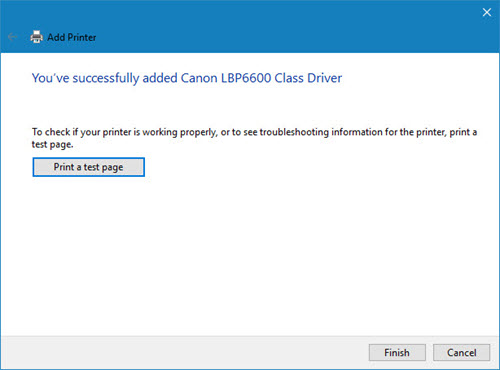
Step 11: Click Finish to finish. To check, you can place a print order right away.
With just a few simple steps, you can easily install the printer to print over the network. Make sure to choose the correct driver to avoid system errors and printing interruptions. If you print by mistake, you can cancel the print job immediately to save time and resources.
Was this article helpful?
Your feedback helps us improve.
Related Articles
 5 Best Mobile Printers of 20266 minutes read
 How to fix printer error Canon 2900 not receiving print job2 minutes read
 4 Of the Best Canon Printers to Buy Right Now7 minutes read
 How to fix print streaks, wrong colors on Canon color inkjet printers5 minutes read
 The best multifunction printer 201818 minutes read
 Instructions for installing Canon MF4720W multi-function laser printer4 minutes read
Reader Comments 0
Sign in with email or Google to join the discussion.