Error losing battery icon on Windows Taskbar 10/8/7
By default, the battery icon will appear under the Taskbar on your computer, laptop. However for some reason the battery icon disappears, then you can apply some solutions below to fix the error and restore the battery icon back on the Taskbar.
Table of Contents
The battery icon is integrated on the Windows operating system as well as other operating systems to help users grasp how much battery status your laptop is, the status of the battery is plugged in or not.
Also, when you move the mouse pointer over the battery icon, you can quickly access the Power Options, Windows Mobility Center and Adjust screen brightness functions.
By default, the battery icon will appear under the Taskbar on your computer, laptop. However for some reason the battery icon disappears, then you can apply some solutions below to fix the error and restore the battery icon back on the Taskbar.
Also, if you want to check the status of your laptop battery is at what level, you can refer to the steps done here.
![]()
1. Check if the battery icon is hidden on the taskbar
1.1. On Windows 10
Windows 10 currently has many versions, the settings on each version are also constantly changing. With Windows 10 version 1803 and above you do the following:
Click the arrow in the right corner of the taskbar, if a battery icon appears in the menu as shown, follow the steps below. If there is no battery icon in this menu, switch to items 2, 3, 4 to see how to fix it.
![]()
The battery icon is pushed into the taskbar's extra view menu
Right-click on the taskbar> Taskbar settings :
![]()
Go to Notification Area > click Select which icons appear on the taskbar :
![]()
Find the Power option> push the button in the corresponding line to turn it on, the button turns green to be:
![]()
![]()
Soon you will see the battery icon appear on the taskbar.
![]()
On older Windows versions:
Open the Settings app by pressing the Windows + I key combination or click the Settings icon on the Start Menu.
![]()
Step 2:
On the Settings window, click System (display, notifications, apps, power) .
![]()
Step 3:
Next click on Notifications and actions, then look at the right frame and click on the link Select which icons appear on the taskbar.
![]()
Step 4:
Next switch Power status to ON.
![]()
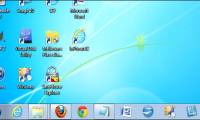
1.2. On Windows 8/7
Step 1:
Click the arrow on the Taskbar, then click the Customize option to open the Notification Area Icons window.
![]()
Step 2:
On the Notification Area Icons window, check to see if Power is set to Hide icon and notifications.
Step 3:
Reset Power Show icon and notifications by clicking the Dropdows Menu, then click OK to restore the Pin icon.
![]()
2. Scan for hardware changes
Step 1:
First open Device Manager by right-clicking on the Start button (on Windows 8.1) then clicking Device Manager.
If you're using Windows 10/8/7, open the Run command window by pressing Windows + R key combination, then enter Devmgmt.msc in the Run command window and press Enter to open Device Manager.
![]()
Step 2:
In the Device Manager window, expand the Batteries section, then right-click Microsoft AC Adapter , then click Uninstall .
![]()
Click OK if you see a warning message to continue the driver uninstallation process.
![]()
Step 3:
Next select Menu Action , then click the Scan for hardware changes option to restore the lost battery icon.
![]()
3. Fix system files
Step 1:
Open Command Prompt under Admin. To do this, enter CMD into Search box on Start Screen or Start Menu, then press Ctrl + Shift + Enter to run Command Prompt under Admin.
Step 2:
On the Command Prompt window, enter sfc / scannow then press Enter to open System File Checker.
![]()
This process will take some time to scan all system files and automatically repair corrupted files on the operating system.
After the System File Checker process finishes, you must restart your computer.
4. Use the Refresh PC feature (on Windows 8 and Windows 8.1)
Refresh PC on Windows 8 and Windows 8.1 features allows you to reinstall Windows without removing any files, settings and applications installed on the Store.
To use the Refresh PC feature, follow the steps below:
Step 1:
Move the mouse pointer to the lower right corner of the screen to see the Charm bar, then click or click Settings on the Charm bar to open the Settings Charm window.
![]()
Step 2:
On the Settings Charm window, click Change PC Settings to open the computer settings (PC settings).
![]()
Step 3:
In the PC Settings window, look to the left pane, click General to see the settings available in the right pane.
Step 4:
Here, under Refresh your PC settings without downloading files , click on Get Started . At this time, the screen will display a notification window indicating the changes that will occur during the Refresh PC.
![]()
As mentioned earlier, your personal files and settings will not be changed, the settings on your computer will be changed to their original defaults, applications from the Windows Store. will remain the same, applications installed from the drive or from the website will be removed, and the list of uninstalled applications will be saved on the Desktop screen.
Click Next to continue, if asked to insert the media installation drive, insert the drive.
![]()
Step 5:
After the system is ready, you will see as shown below:
![]()
Click Refresh to restart your computer and begin the process of Refesh your Windows computer.
![]()
![]()
![]()
![]()
![]()
![]()
Step 6:
After the Refresh process ends, you will see the Lock Screen lock screen or the Start Screen screen.
![]()
Refer to some of the following articles:
- Instructions for bringing Windows 10 back to the default 'root' installation state
- How to re-activate Windows 10 after changing the hardware?
- How to check and detect your computer RAM problems?
Good luck!
Was this article helpful?
Your feedback helps us improve.
Related Articles
 How to pin the app to the Taskbar to open it faster3 minutes read
Reader Comments 0
Sign in with email or Google to join the discussion.