The easiest way to Setup Logitech Webcam
On Windows

Place the Logitech webcam in the desired location. Depending on the model, you can attach the webcam stand to a tripod, place it on top of the screen, or fold it into a triangle to place it on a flat surface.

Plug the webcam's USB cable into an available USB port. Usually, the available USB port will be located on the side of the laptop (laptop), on the front or back of the desktop computer. After Windows recognizes that the webcam is plugged in, the drivers will be automatically installed.
If you are using an older model (or are using Windows 7 or below), the personal computer will not automatically install the driver. Go to Logitech's webcam support page, click the template, click the Downloads link on the left, then click Download Now in whatever software is available. Once downloaded, you need to double-click the installer to install the webcam.

Open the Camera app . To make it quick, open the Windows search bar by clicking the Start menu or the magnifying glass in the lower-left corner of the screen, typing camera, and then clicking Camera in the results. You will see yourself on the screen.
If you don't see yourself on screen when the Camera app is open, click the camera dial (the camera has a curved arrow on the right side of the window) to flip the camera lens.
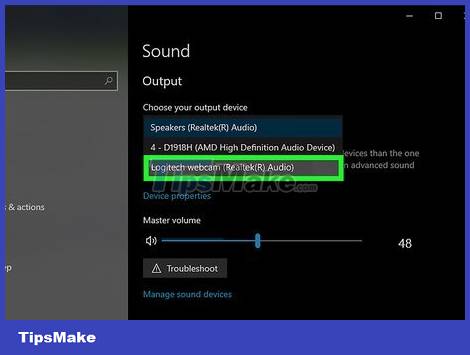
Set up the camera's microphone. Most Logitech webcams have a built-in microphone, so you don't need to use an external microphone. To ensure that the webcam's microphone is used during video calls and recordings, follow the steps below:
Open the Start menu and select Settings (gear icon).
Click the System icon.
Click the Sound tab in the left pane
Click the drop-down menu under "Input" and select the Logitech webcam.

Install Logitech Capture software (optional). If you're using one of Logitech's recent basic webcam models (like 1080P PRO, C920, C920s, C922, C922X, Streamcam, Streamcam Plus, BRIO Stream, Brio 4K Pro) and have Windows 10, you can use the software. Logitech's Capture software to take advantage of the camera's capabilities. Although not required, installing this software will be useful if you want to add Logitech filters, insert text when streaming on the web, apply video transitions, and record from multiple webcams at the same time. . How to install the software as follows:
Go to https://www.logitech.com/en-roeu/product/capture using a web browser.
Click the link DOWNLOAD FOR WINDOWS (64 BIT) and click Save to start the download.
Double-click the downloaded file (whose name starts with "Capture" and ends with ".exe").
Click Yes to allow the installer to run.
Click INSTALL LOGITECH CAPTURE and follow the on-screen instructions.
Once installed, you will find the application in the Start menu in a folder called Logitech. You can use the software to record from multiple sources, create vertical videos, tweak video playlists, live stream and overlay text.
On macOS

Place the Logitech webcam in the desired location. Depending on the model, you can attach the webcam stand to a tripod, place it on top of the screen, or fold it into a triangle to place it on a flat surface.
If you have an Apple Pro Display XDR monitor and a 4K Pro Magnetic webcam, you can attach the Magnetic Mount to the monitor. This is what allows you to adjust the camera angle up to 90 degrees.
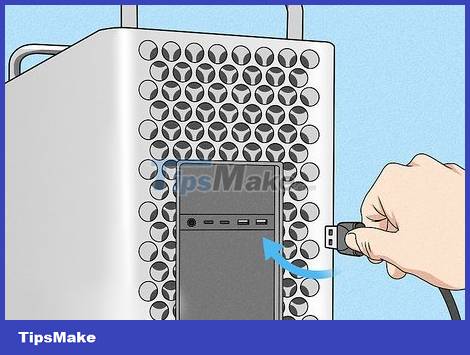
Plug the webcam's USB cable into an available USB port. Usually, the available USB port will be located on the side of the laptop (laptop), on the front or back of the desktop computer. Once the Mac recognizes that the webcam is plugged in, the drivers will be automatically installed.

Test the camera with Facetime. To make sure that the camera is properly installed, open the Applications menu and double-click Facetime. You will see yourself on the screen.
If you don't see yourself, click the Video menu at the top of the screen, then click the Logitech camera in the "Camera" section of the menu.
If you have a built-in webcam but want to use the Logitech webcam for video chatting, live streaming, and when using other applications, you may need to select the Logitech webcam in the Video or Camera settings. of the desired application each time you play or record.
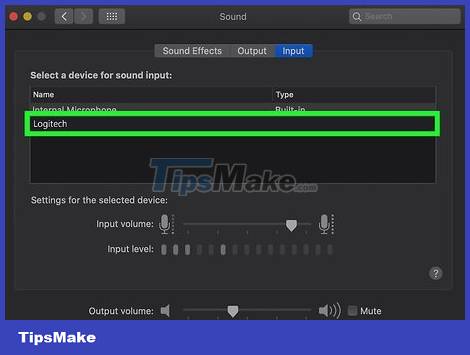
Set up your webcam's built-in microphone. Most Logitech webcams have a built-in microphone. To make sure that your Mac uses the Logitech camera's microphone when recording or playing, follow the steps below:
Click the apple-shaped menu in the upper-left corner of the screen and select System Preferences.
Click the Sound icon (speaker image).
Select the Logitech camera in the list.

Install Logitech Capture software (optional). If you're using one of Logitech's recent entry-level webcam models (like 1080P PRO, C920, C920s, C922, C922X, Streamcam, Streamcam Plus, BRIO Stream, Brio 4K Pro) and have macOS 10.14 or later, you can Use Logitech's Capture software to take advantage of the camera's features. The software isn't required, but it's useful if you want to add Logitech filters, insert text when you stream on the web, apply transitions to videos, and record from multiple webcams at once. To install the software:
Go to https://www.logitech.com/en-roeu/product/capture using a web browser.
Click the DOWNLOAD FOR MAC link. If the download does not happen automatically, follow the on-screen instructions to download.
Double-click the downloaded file (whose name starts with "Capture" and ends with ".zip").
Double-click the installer, then follow the on-screen instructions to install.
Once installed, the application will be located in the Applications folder.
Resovle problem
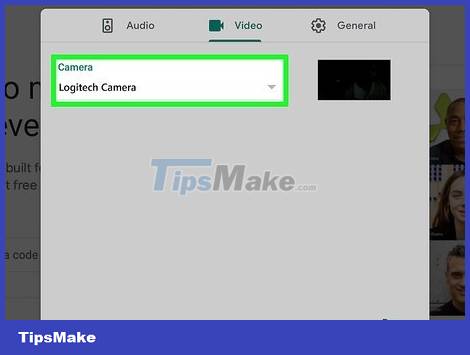
Make sure you have the Logitech webcam selected in the broadcast or recording application. If you're using an app or website to video chat with your Logitech camera (or trying to record on your computer) and don't see yourself on the camera, it's possible that software or a website is asking for permission to use the webcam. built-in. Look for the Settings or Video option in the app you're using and select the Logitech camera as your camera.
For example, if you're using Zoom, click your profile picture, select Settings, click the Video tab, then select your Logitech camera from the "Camera" menu.
If you're using Google Meet, click the Settings gear icon, select Video, select Camera, and change the camera to a Logitech camera.
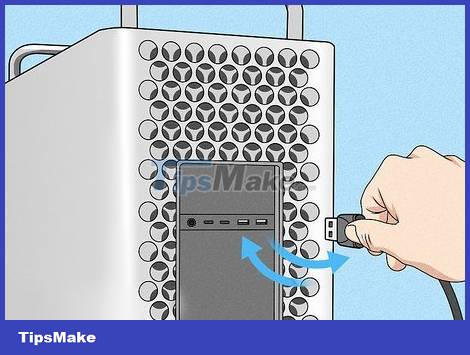
Try plugging the webcam into another free USB port on your computer if the webcam doesn't work. If the webcam's built-in LED doesn't light up when you try to use the camera in the Windows Camera or Facetime app, the USB port may be damaged. Try a different port and make sure you are not plugging the camera into a USB hub or monitor port.
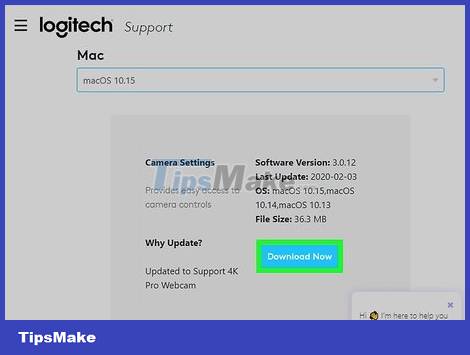
Install driver (driver) and firmware updates (a type of computer software that gives low-level control of a device's hardware) from the Logitech website. If you're having other issues with your webcam, Logitech may have made a fix available for download. To check for updates:
Go to https://support.logi.com/hc/en-us/categories/360001764493-Webcams-and-Camera-Systems using a browser.
Click the webcam template. If you are not sure about your webcam model, you can find out in the card near the USB connector accessory.
Click Downloads on the left side of the page.
Select the operating system if prompted.
Download any newly released camera software by clicking Download Now.
Double-click the downloaded file and follow the on-screen instructions to install.
You should read it
- ★ Review Logitech MX Anywhere 2S: Compact design, impressive battery life
- ★ Logitech G915 TKL keyboard review: Quality but a bit high
- ★ How to use Logitech Options to use Logitech devices more efficiently
- ★ Review Logitech K780: Keyboard versatile, sure
- ★ Review Logitech G102: An indispensable accessory for gamers