Table of Contents
This guide provides a clear, practical overview of steps to install and create virtual machine on Android, with useful context, important details, and straightforward takeaways for everyday readers.
The reason is because the application we write must be compatible with many different phone models and many different operating system versions.
Therefore, using a real phone to test is not a very feasible option, and I believe no one does.
Well, to overcome that, people have developed a tool called a virtual machine to simulate a real smartphone. You can completely test the applications you write on it, just like on a real machine.
And in this article, I will work with you to install and create virtual machines using Android Studio tool - the leading Android application programming tool today.
Note: If you have not installed Android Studio, Review this guide: Steps to install and setup Android Studio in Windows
#first. Install Android Studio software
+ Step 1: First, you create a simple Hello World application like the previous article I instructed.
=> Then, to create a new virtual machine, click on the phone icon in the upper right corner as shown below.

+ Step 2: A dialog box will be opened => you click Create Virtual Device… to start creating virtual Android machine.

+ Step 3: In this next step, you will have device options (TV, Phone, Wear OS, Table .). Here I will choose Phone (smartphone).
=> Then select a device from the list of phones with some basic parameters. To choose the default, then click Next.
And if you don't like it or because the real computer has a slightly weak configuration, you can choose Clone Device… to create a virtual machine with appropriate parameters.
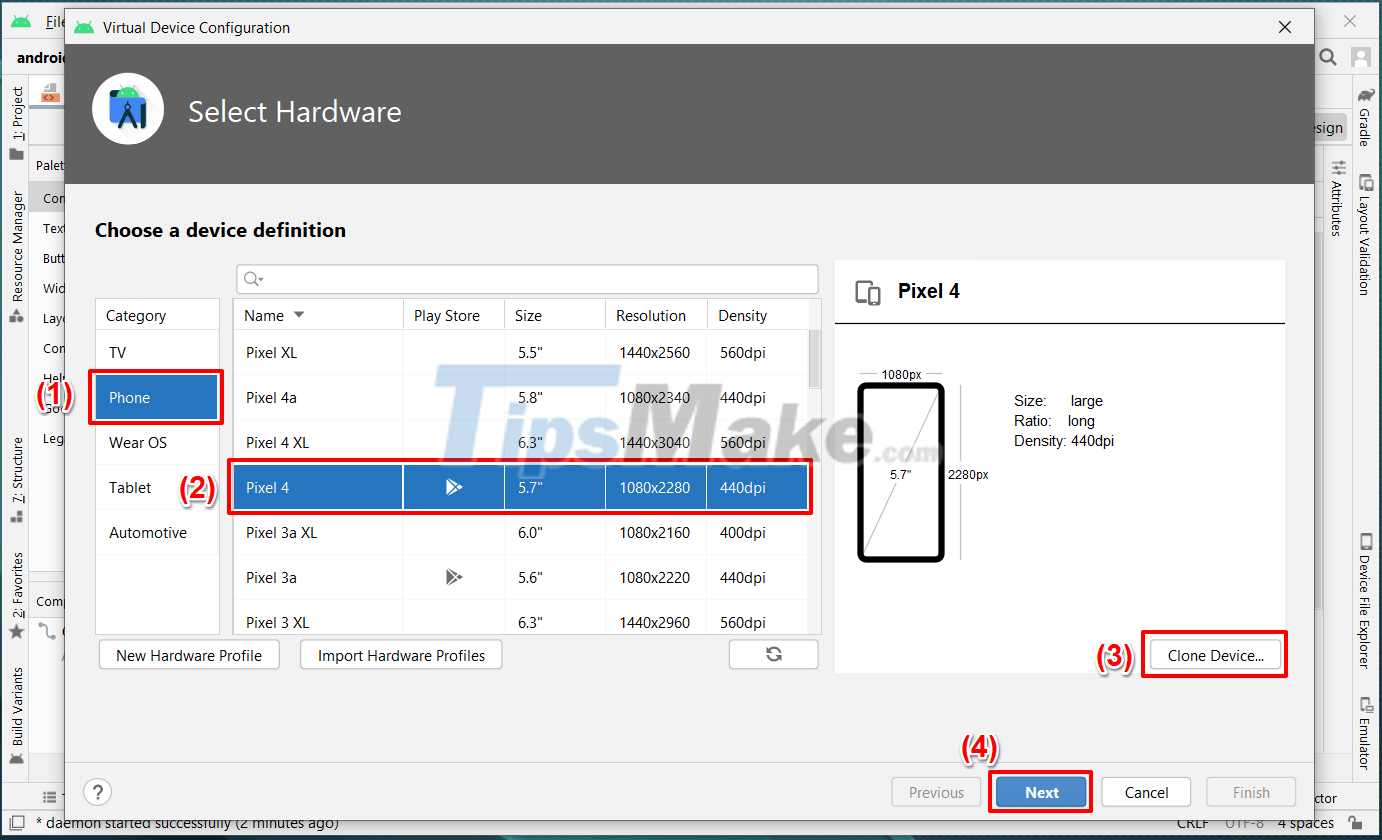
+ Step 4: Here, I choose Clone Device, so there will be a dialog box as shown below so that I can modify the parameters to suit my needs.
=> You can customize the virtual machine name, device type, screen size, RAM capacity .
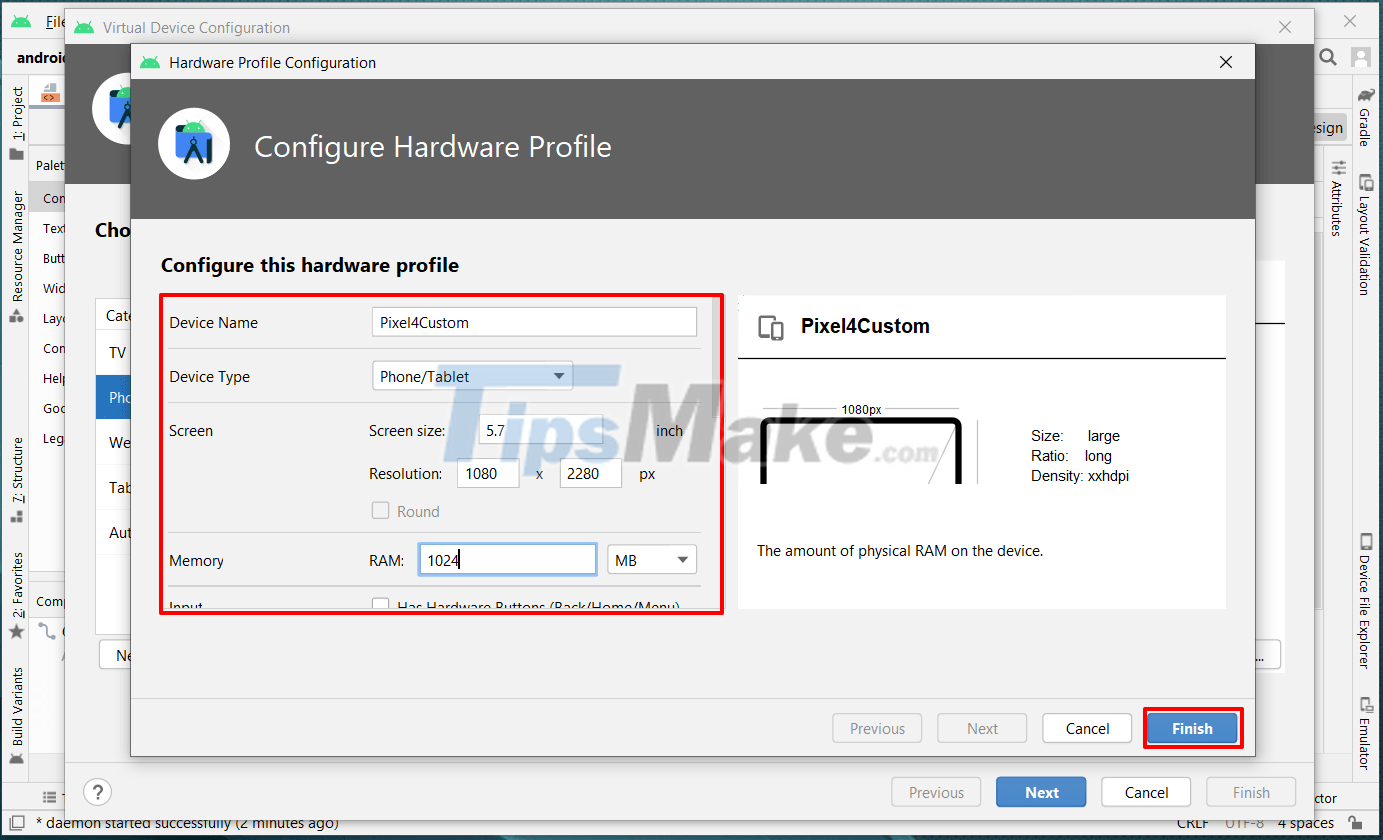
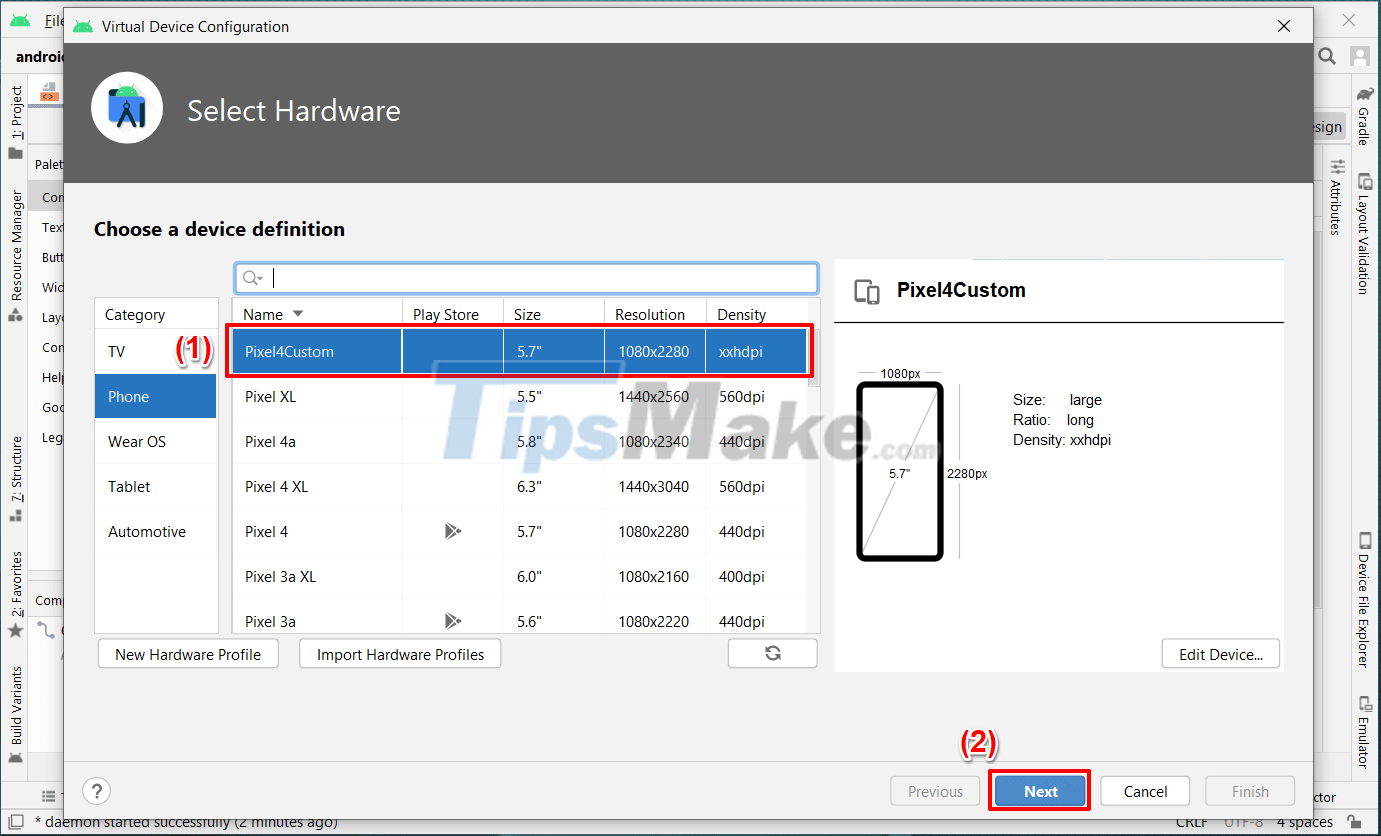
+ Step 5: After selecting the specifications in the above step and clicking Finish, the initial search screen will have the name of a new device.
=> You select the device (click on it) => then click Next to move to the next step.
In fact, each Android phone model will support a certain number of operating system (Android) versions.
You will have to choose the versions to match the majority of devices currently in use to avoid incompatibility.
Let's say here I download Oreo (API 27, Android 8.1)!

To download, select Accept => then click Next to start downloading.
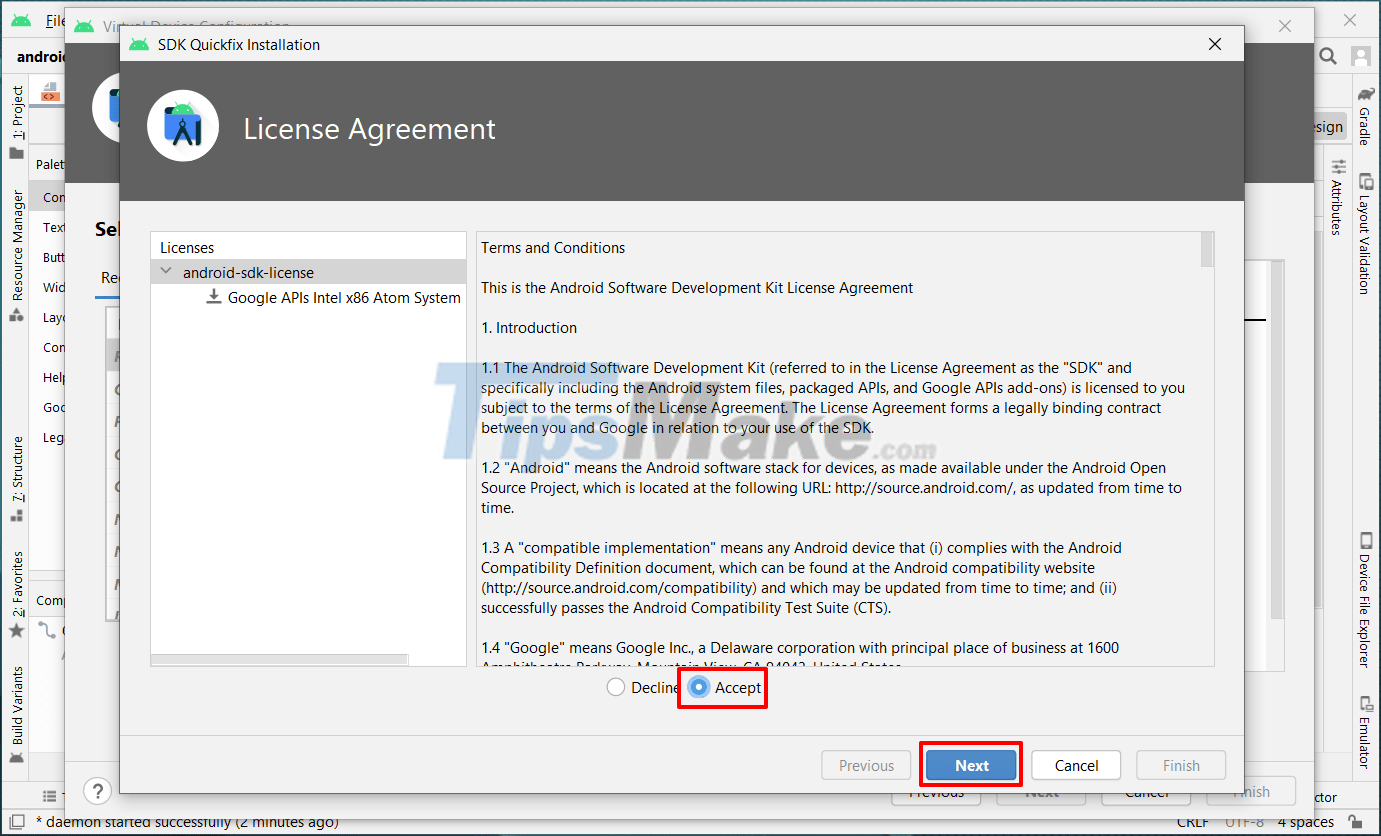
Due to the large size, the download process may take about 3-5 minutes (depending on your Internet speed and stability). After the download is complete, click Finish.
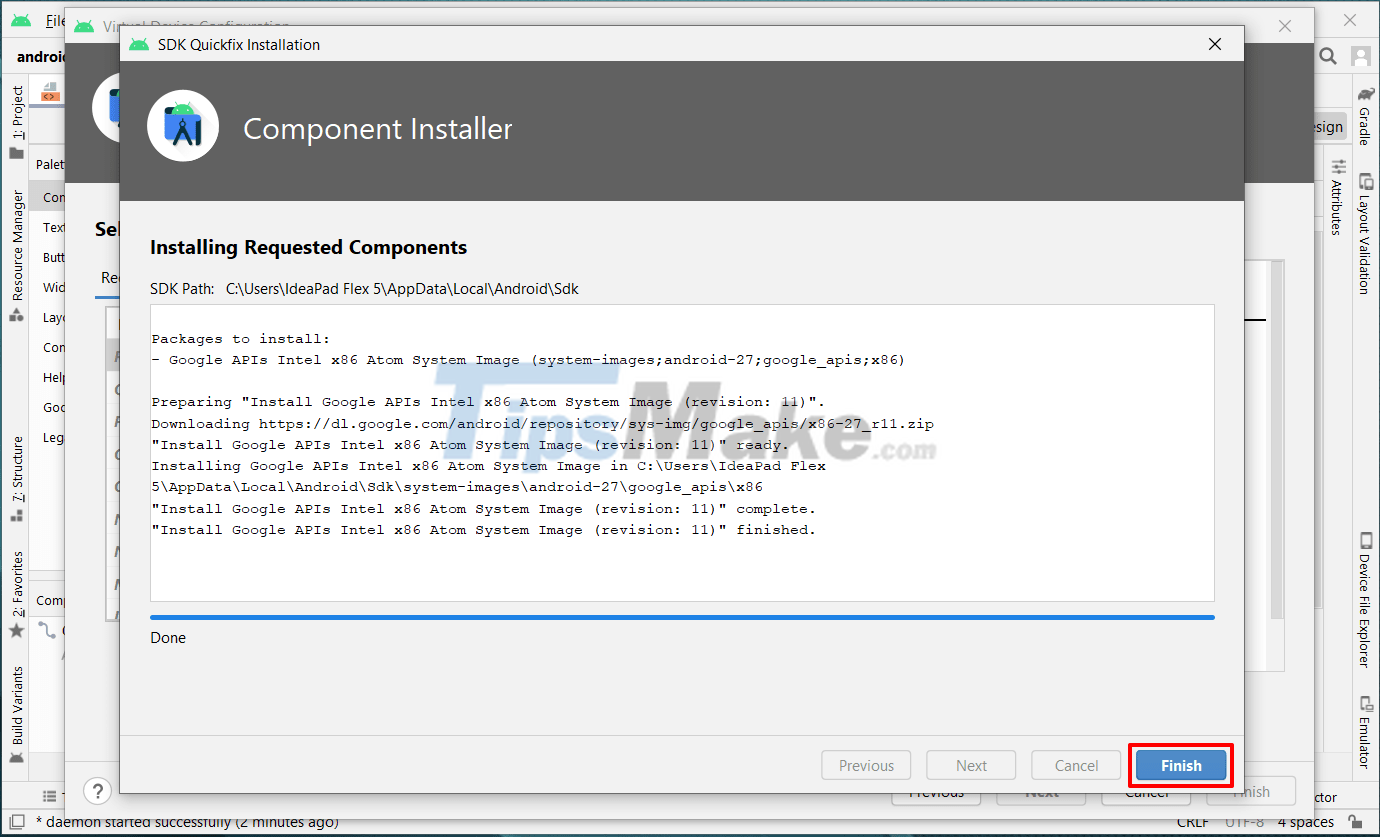
+ Step 6: Back to the previous screen we see the Android Oreo version has been downloaded successfully. Click Next to go to the next step.
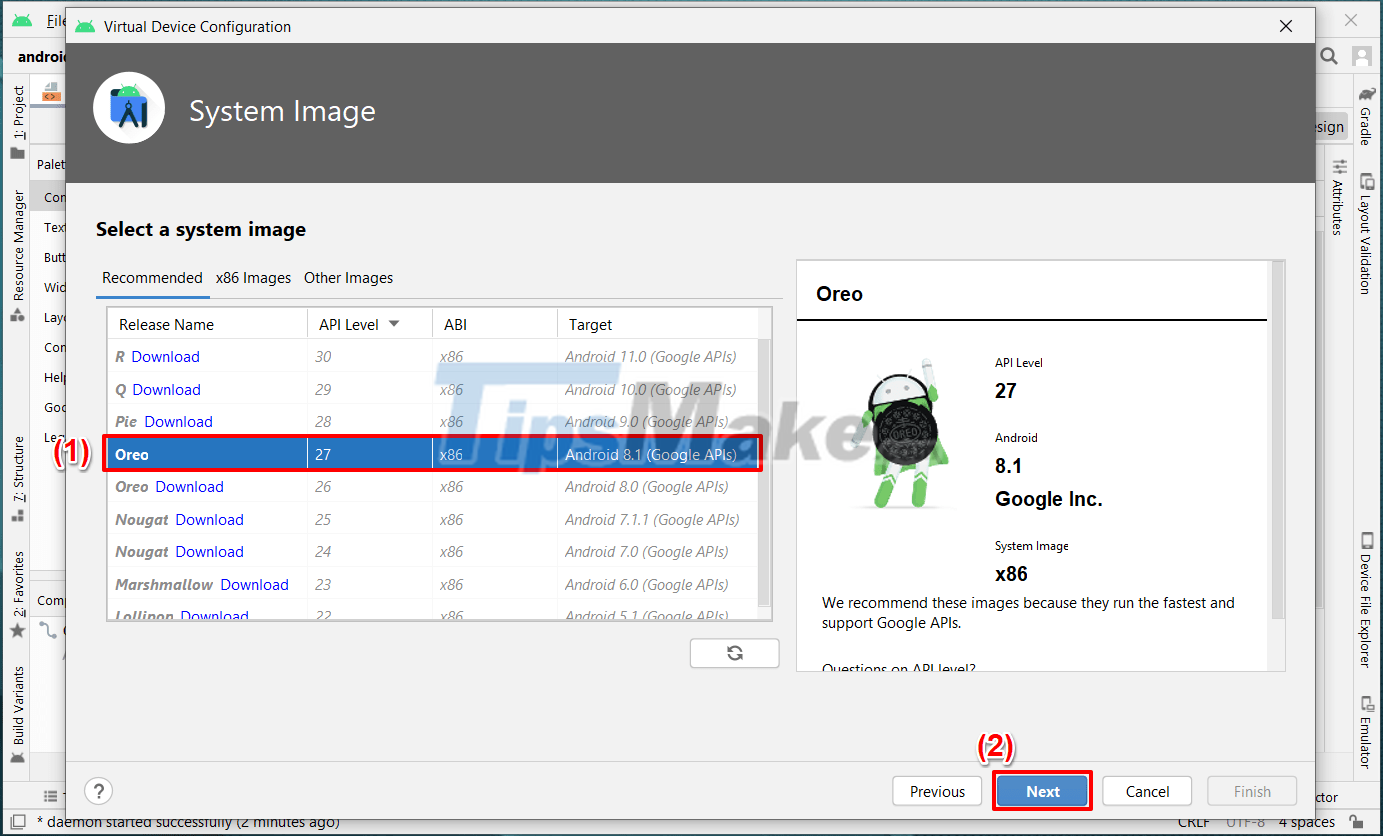
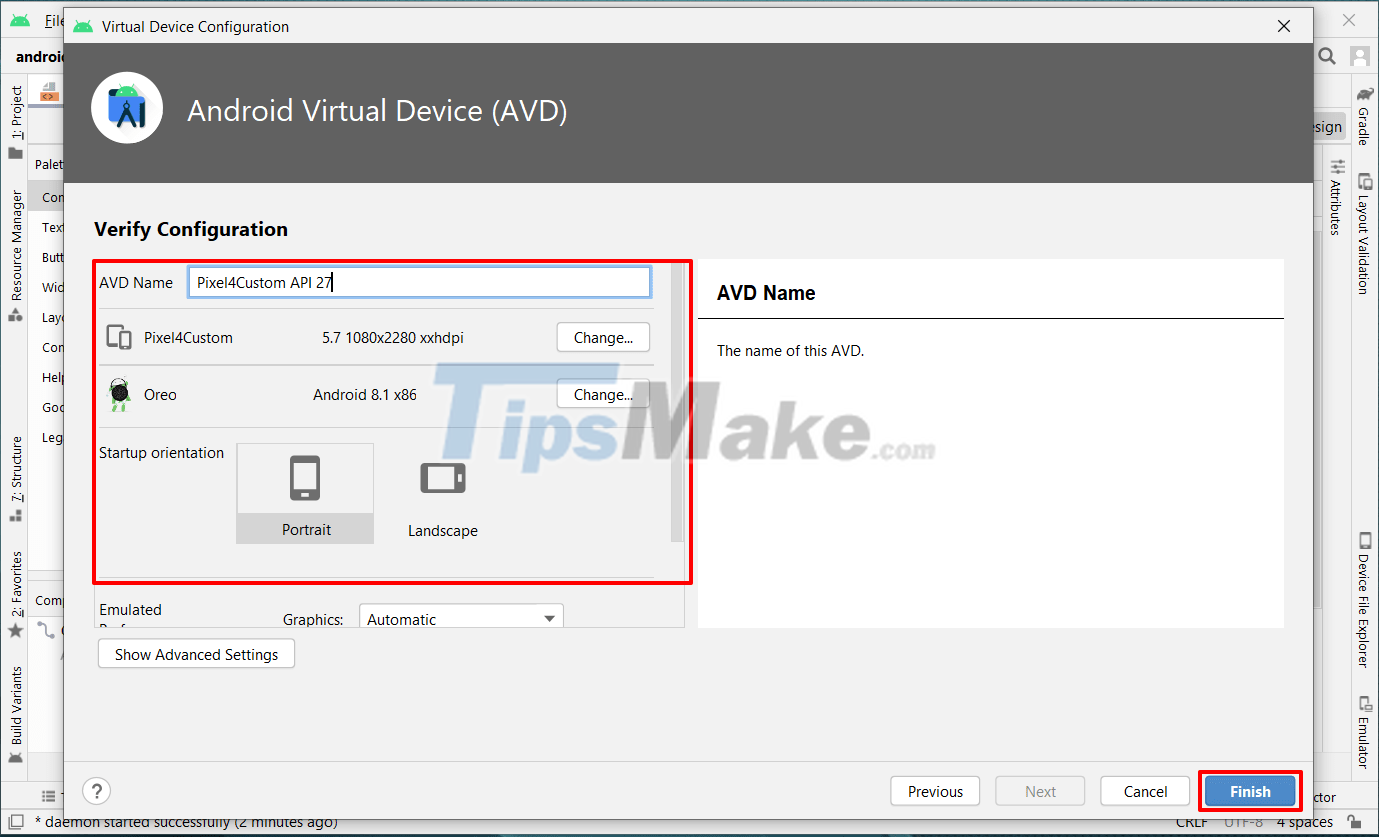
In this step, you will confirm or change some parameters => then click Finish as shown below.
#2. Run the application on the Android Studio virtual machine
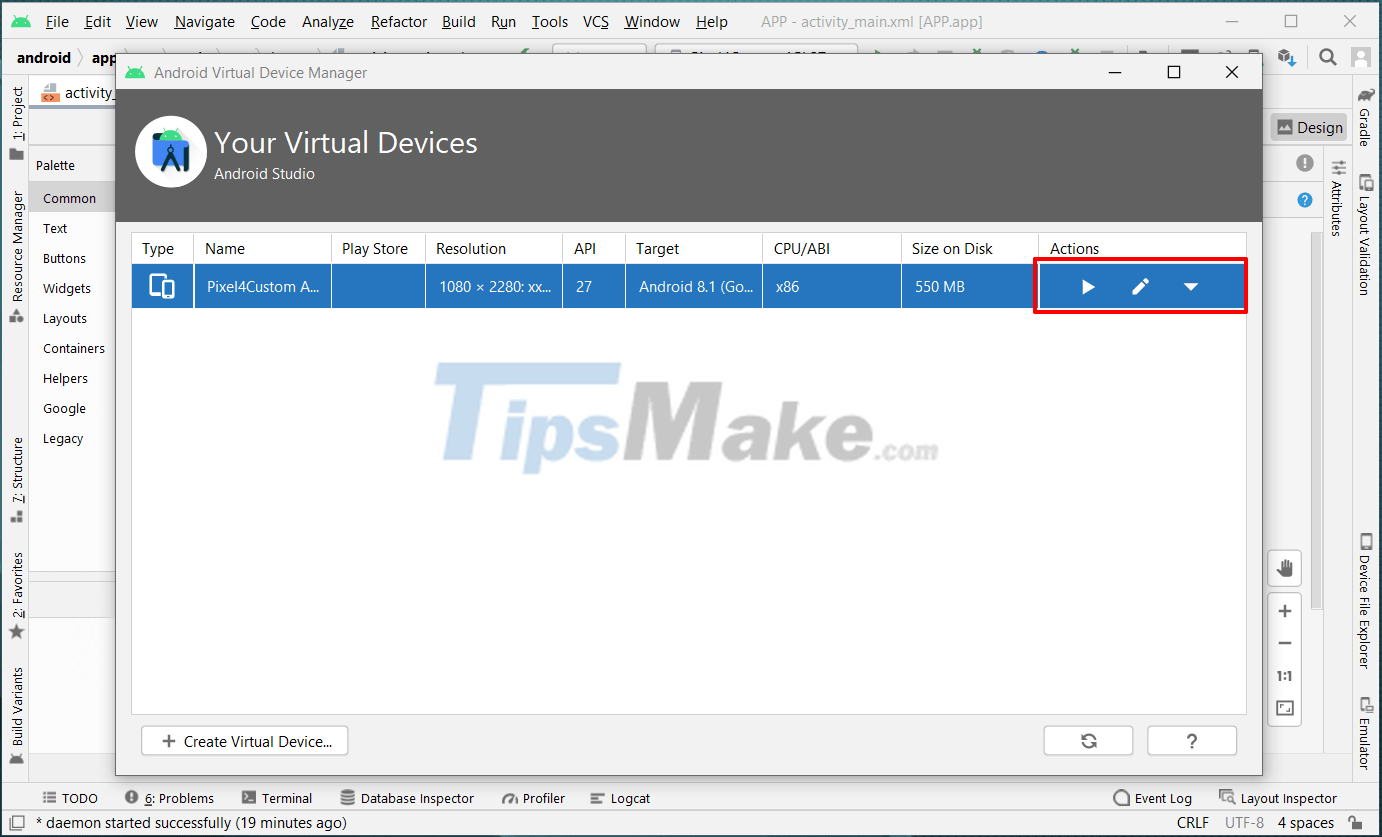
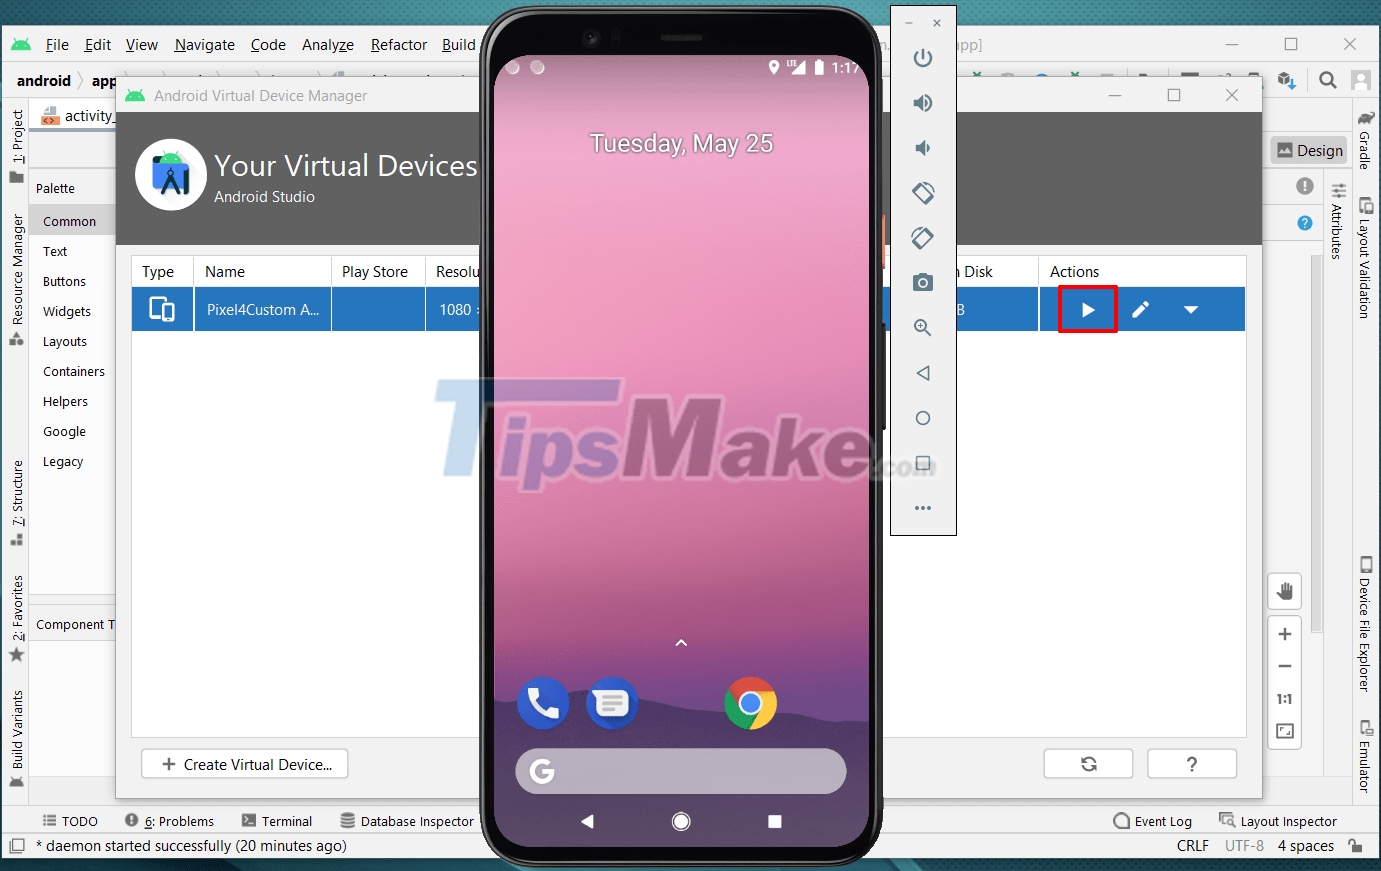
Open the virtual machine you just installed, you can see 3 basic buttons: Start (Run), Edit (edit) and Options (customize) - arranged from left to right. You click on the triangle icon (first) to run the virtual machine up.
This is the simulation of the virtual machine you choose.
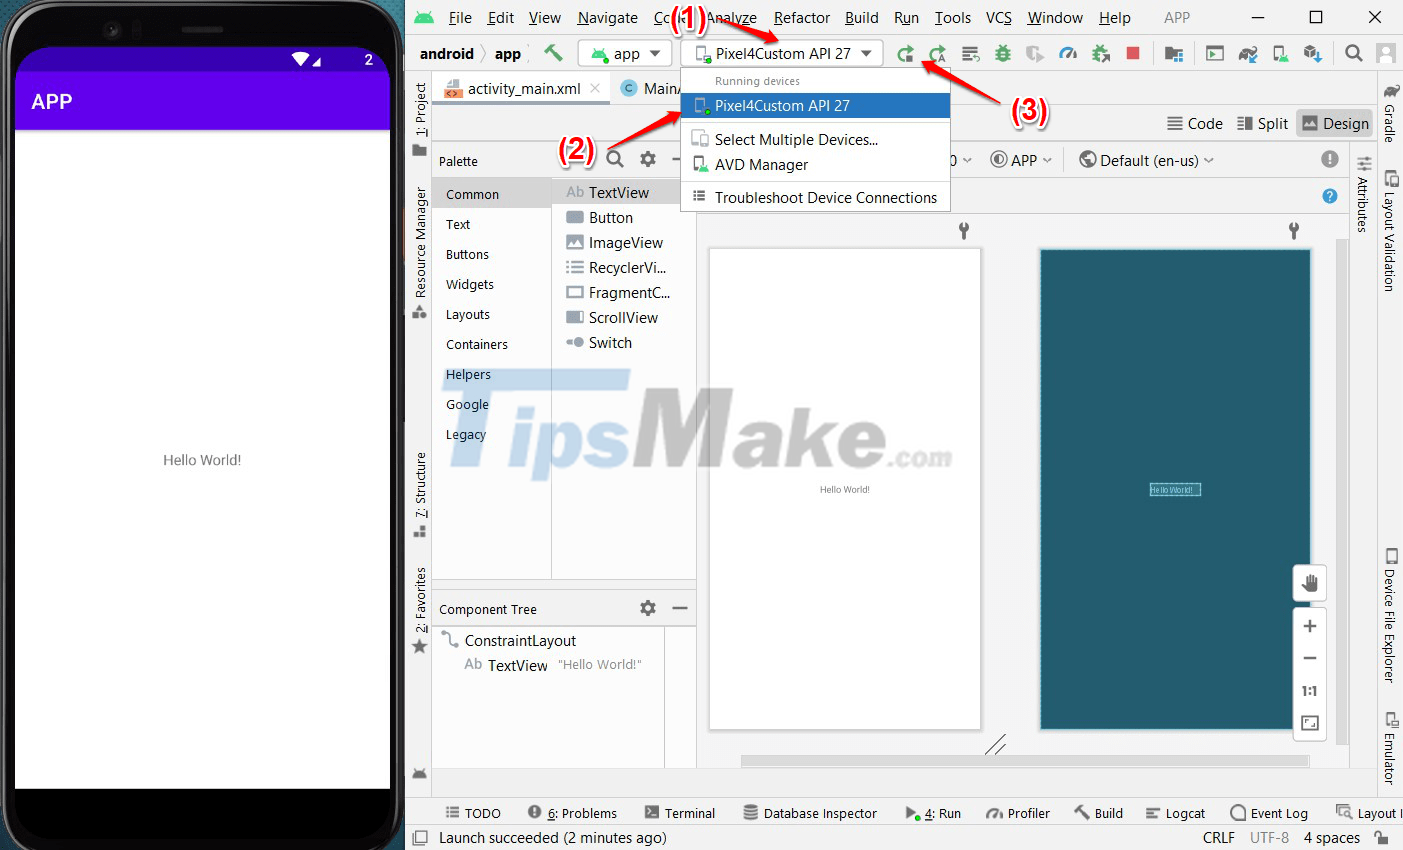
After you have started the virtual machine, you can run Project in Android Studio. Note that you must select the virtual machine first as shown below.
The program will be loaded into the virtual machine and run as an application on the real machine.
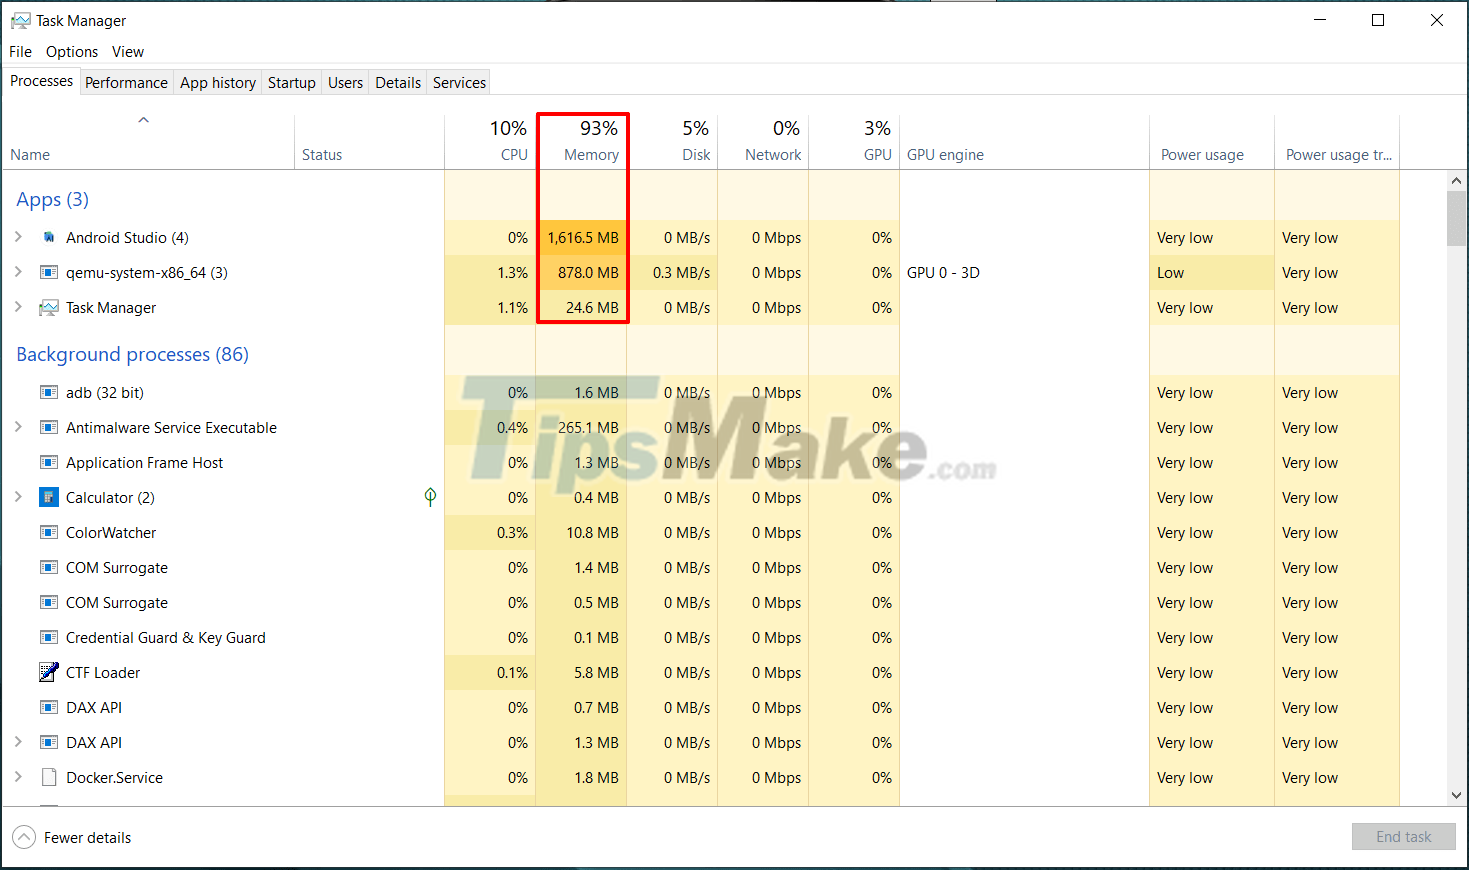
Note that Android Studio + virtual machine is a RAM-consuming 'machine', so if you have a low-configuration computer (low RAM, weak chip), you should not use Android Studio.
My machine has 8GB of RAM, but running each Aneroid Studio + virtual machine is almost gone.!
#3. Conclude
So in this article, I have successfully installed the Android virtual machine with you on the Android Studio tool to serve the programming of mobile applications.
In fact, Android Studio is a pretty heavy tool and consumes a lot of computer resources, so please consider it.
If the computer configuration is not really good enough, you should not use this tool often (may cause crash or lag) during use.
Okay, welcome to see you in the next article.
Key Takeaways
Use the information above as a practical reference for steps to install and create virtual machine on Android. Review each step carefully, confirm any requirements, and choose the option that best fits your situation.
FAQ
What does this guide explain about Steps to Install and Create Virtual Machine on Android?
It explains the main concepts, practical considerations, and useful steps related to steps to install and create virtual machine on Android without requiring advanced knowledge.
Who can benefit from learning about Steps to Install and Create Virtual Machine on Android?
This information is useful for readers who want a clear overview, practical guidance, and reliable steps related to steps to install and create virtual machine on Android.
What should I check before applying this information?
Review the requirements, confirm that your device, software, or situation matches the instructions, and back up important data before making major changes.
Related Articles
 Steps to Install and Setup Android Studio in Windows4 minutes read
 Steps to Install Windows 11 on Virtual Machine, How to7 minutes read
 What Is Android Studio?: Develop Android Application?7 minutes read
 Instructions for Fixing Errors Do Not Install Vmware Tools3 minutes read
 Steps to Create Vmware Workstation Virtual Machine on10 minutes read
 How to Create a Virtual Machine in Windows Server 20123 minutes read
Reader Comments 0
Sign in with email or Google to join the discussion.