Roblox Studio
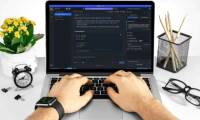
What is Roblox Studio? Roblox Studio is a freeware program that gives you the ability to create personalized video games and play other games created by the community.
Table of Contents
Available on Apple Mac and Microsoft Windows operating systems (including Windows 11), Roblox Studio boasts an interactive and templated online environment.
Roblox Studio is completely free to download. It comes with a bunch of standard functions to help users create their own experiences in the ROBLOX engine. You have basic programming commands that help manage specific sections or functions. It also comes with a set of free templates to help beginners get familiar with the environment and start creating their own games and worlds.
A Beginner's Guide to Roblox Studio
Part 1: Getting Started
1. Sign up for a Roblox account.

Follow these steps to sign up for a Roblox account:
- Go to https://www.roblox.com/ in a web browser.
- Use the drop-down menu at the top to select the day, month, and year of your birth.
- Enter the desired username.
- Enter the desired password.
- Choose your gender (optional).
- Click Sign Up .
2. Download Roblox Studio.
Use the following steps to download and install Roblox Studio.
- Go to https://www.roblox.com/create in a web browser.
- Click Log In in the upper right corner.
- Enter your username and password, then click Log In .
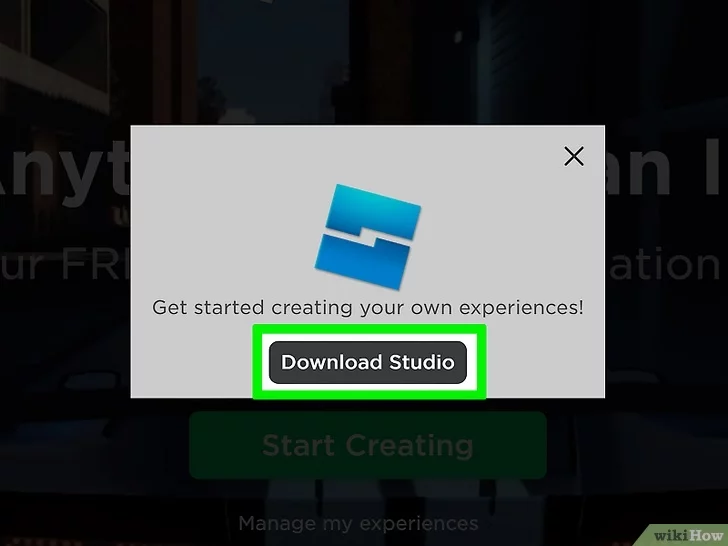
- Click Start Creating .
- Click Download Studio .
3. Open Roblox Studio.

Roblox Studio has an icon that looks like a blue square. Click Roblox Studio in the Windows Start menu or the Applications folder on a Mac to open Roblox Studio. You can also click Start Creating on the Roblox Create website to open Roblox Studio.
4. Click + New.
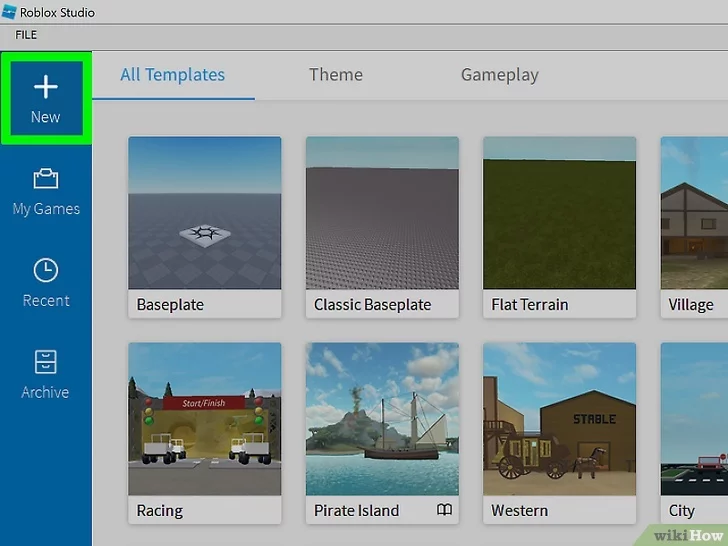
It's the icon with the plus sign in the upper right corner. This will open a blank Roblox game canvas.
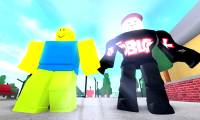
Alternatively, you can click on one of the pre-made game templates on the Roblox Studio main page. They include several game stages. It also includes a number of pre-made games, including racing games, obstacle courses (obby), arenas, loot flags, endless running games, and more.
Part 2: Import and move objects
1. Click the Home tab .
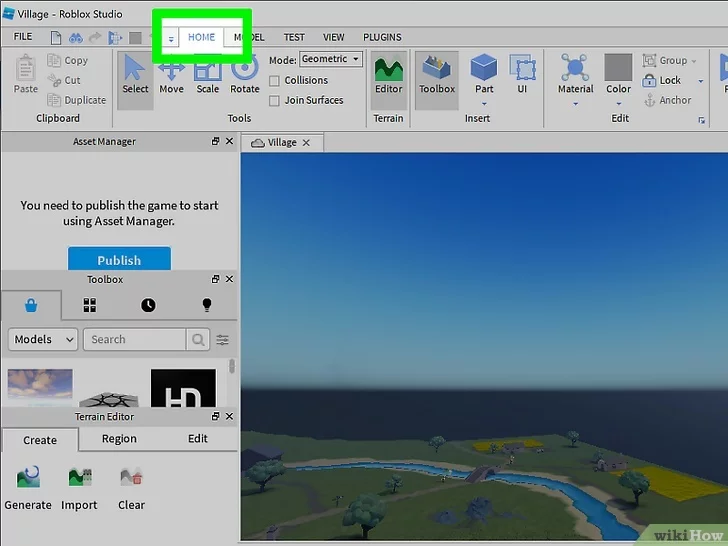
This is the first tab at the top of the screen next to the play icons. This brings up the object selection and manipulation tools in the panel at the top of the screen.
2. Click the Toolbox.
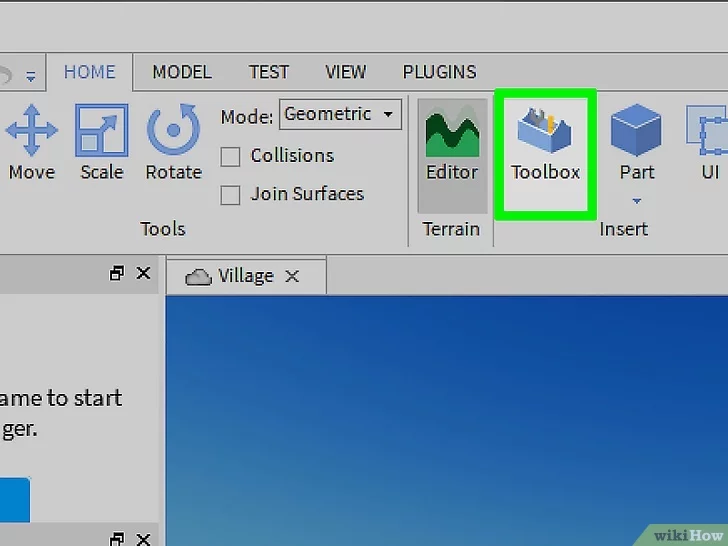
It's a tab with a Toolbox-like icon in the panel at the top. This will open the Toolbox panel on the right. The Toolbox panel may already be open by default. Make sure the Marketplace tab at the top of the Toolbox panel is selected.
3. Type the name of the object you want to add in the search bar and press Enter.
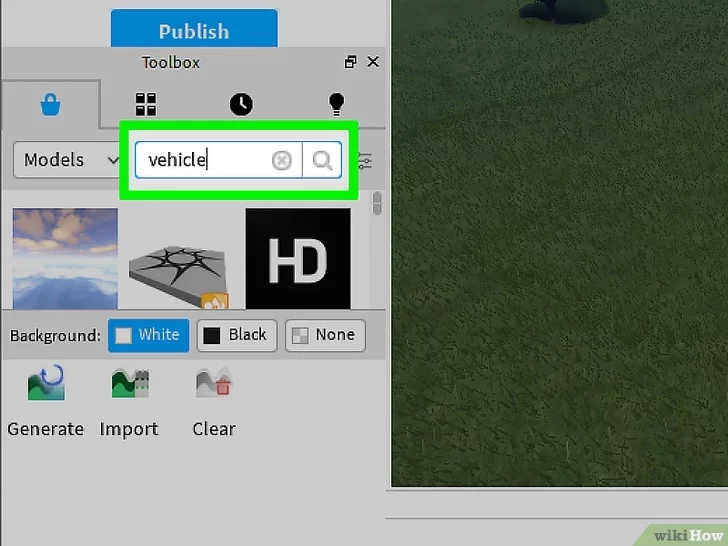
It's at the top of the Toolbox. Roblox Studio has a huge library of objects created by other users. You can search for anything including foliage, buildings, vehicles, furniture, decorations or anything.
You can use the drop-down menu in the upper left corner of the Toolbox to select the type of object you want to search. This includes models, grids, images, audio, video and plug-ins.
4. Click the object you want to add.
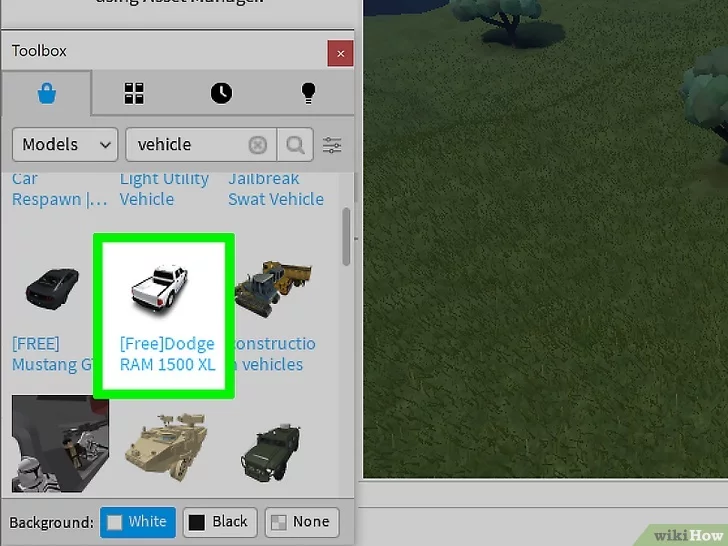
You'll see small thumbnails of each object from your search results on the Toolbar. Click an object's thumbnail, or click and drag it into your game to add it.
5. Use the Select tool to select an object.
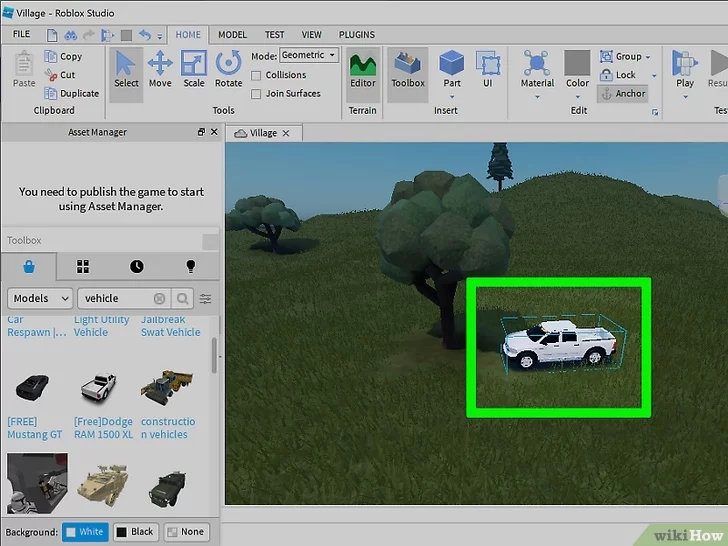
To select an object in the game, click the Select tool in the Toolbar at the top of the page. It has an icon that looks like a mouse pointer. Then click an object in the game to select it. The selected object will be surrounded by a blue bounding box. You can also move an object by clicking and dragging it with the Select tool.
If you don't see the Select, Move, Scale, or Rotate tools in the panel at the top, click the Home or Model tab at the top of the screen.
6. Press Delete to delete the selected object.
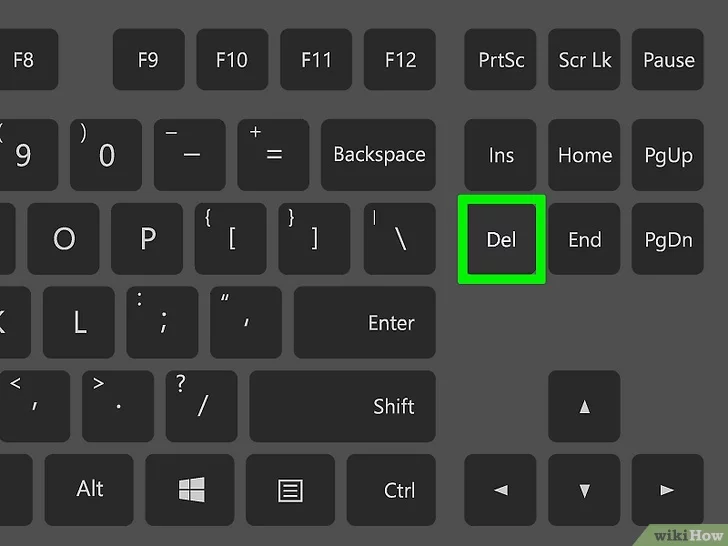
If you want to delete an object for any reason, use the Select tool to select the object and then press the Delete key to delete.
7. Use the Move tool to move an object.
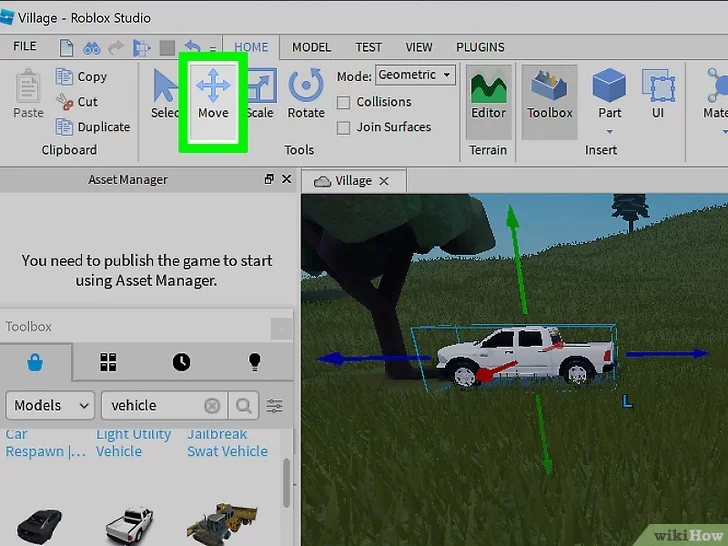
Click the Move tool in the panel at the top. It has an emblem resembling a cross with arrows on each branch. Then click an object you want to move. Click and drag the red, green, and blue arrows on all sides of the object to move the object along a specific axis.
Additionally, you can use the options in the Clipboard menu to cut, duplicate, or duplicate an object.
8. Use the Scale tool to make objects larger or smaller.
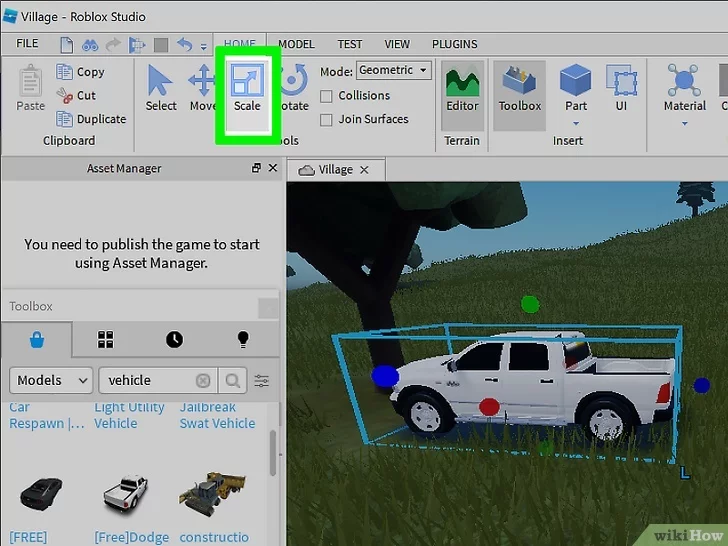
To resize an object, click the Scale tool in the panel at the top. This tool has an icon that looks like a small box inside another box. Then click on an object to select it. Click and drag one of the red, green, or ball icons on the side of each object to resize it. Some objects can be resized along a specific vertical or horizontal axis. Other objects can only be scaled uniformly.
9. Use the Rotate tool to rotate the object.
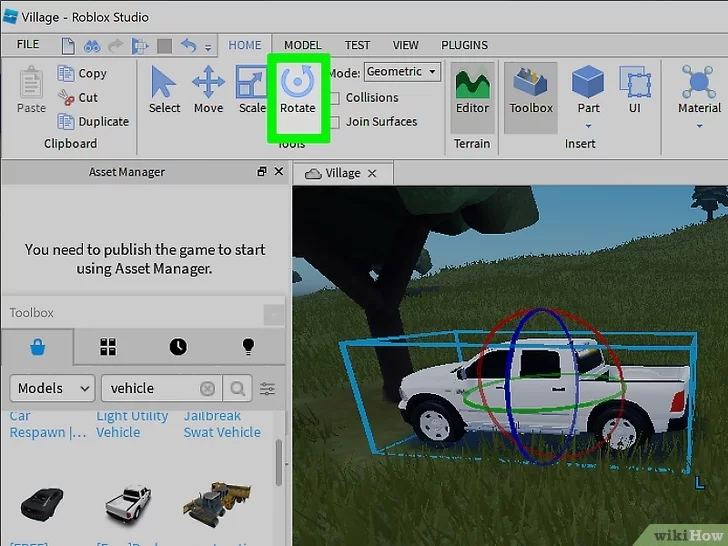
To rotate an object, click the Rotate tool in the panel at the top. It has a circular arrow-like icon at the top. Then click on an object to select it. Click and drag the red, green, or blue rings around the object to rotate it.
Part 3: Building Objects
1. Click the Model tab .
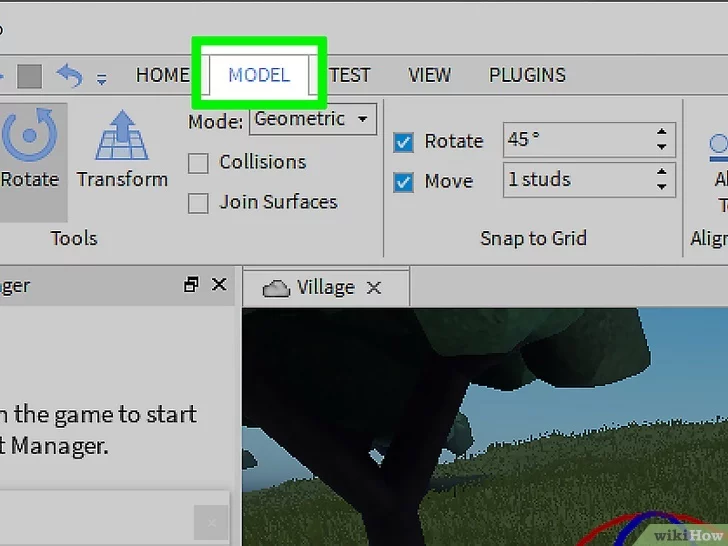
This is the second tab at the top of the page. This will bring up the modeling tools panel at the top of the page.
2. Click Part.

It has an icon that looks like a cube. This will bring up a drop-down menu that allows you to choose one of four shapes that you can use to create objects in the game.
3. Choose a suitable type.
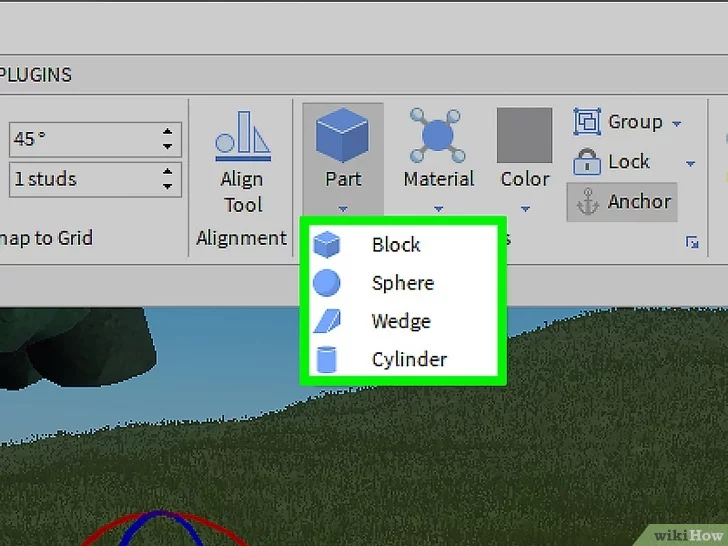
There are 4 types you can choose as follows:
- Block : This option creates a new rectangular section.
- Sphere : This option creates a new spherical object.
- Wedge : This option creates a new block with an incline.
- Cylinder : This option creates a circular cylindrical object.
4. Use the Move, Scale and Rotate tools to edit a part.

You can move and edit parts with the Move, Scale, and Rotate tools. The Scale tool affects different parts in different ways. The following examples will show you how the Scale tool works:
- The Scale tool can be used to scale any edge of a part. This allows you to create a rectangle of any size you want.
- A sphere can only be scaled uniformly with the Scale tool. You cannot make any side bigger than the other.
- The Scale tool can be used to change the tilt angle on the Wedge. You can also edit the length of the incline.
- The Scale tool can be used to make the circle larger or smaller, as well as make the sides longer or shorter. It cannot be used to turn a circle into an ellipse.
5. Use the Union tool to join the pieces together.
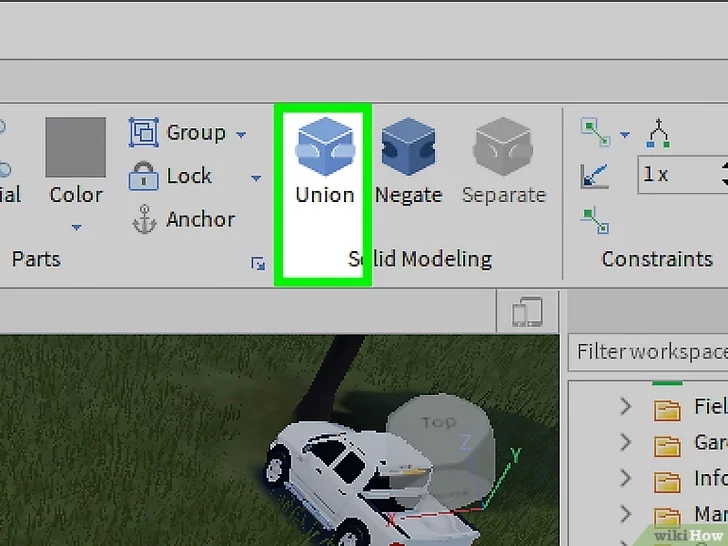
When you have two or more parts, you can use the Union tool to join them together into a shape. The Union tool has an icon that looks like a cube in the Shape Modeling section of the panel at the top. Use the following steps to join the two parts together:
- Hold down the Shift key and click on the parts you want to merge.
- Click the Union button in the panel at the top.
6. Click Separate to separate the sections.
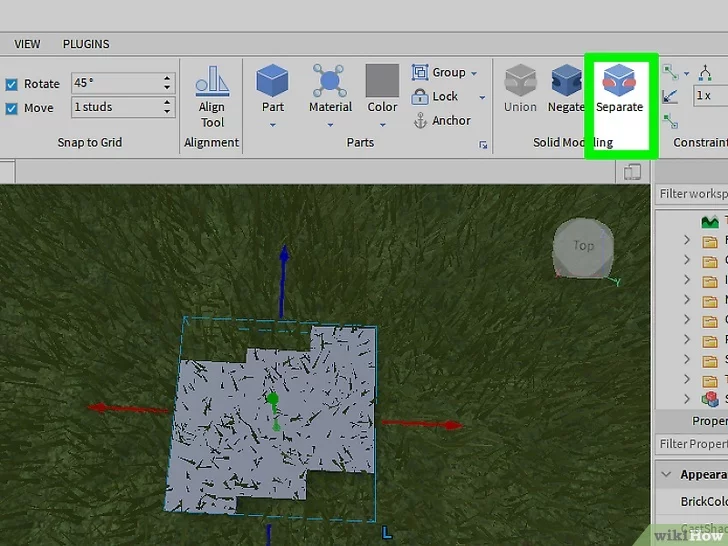
If you want to edit individual sections, click on the section to select it, and then click Separate in the Shape Modeling section of the top panel to split it into individual sections.
7. Use the Negate tool to cut the sections.

The Negate tool can be used to remove parts on parts. For example, you can use the Negate tool to hollow out a cylinder using another cylinder as a wheel. Use the following steps to use the Negate tool to cut out part of a part:
- Place a block that intersects another part.
- Click the intersection block.
- Click Negate in the Shape Modeling section of the top panel.
- This section will turn red.
- Hold down the Shift key and click on both sections.
- Click Union in the panel at the top.
8. Choose a color for the part.
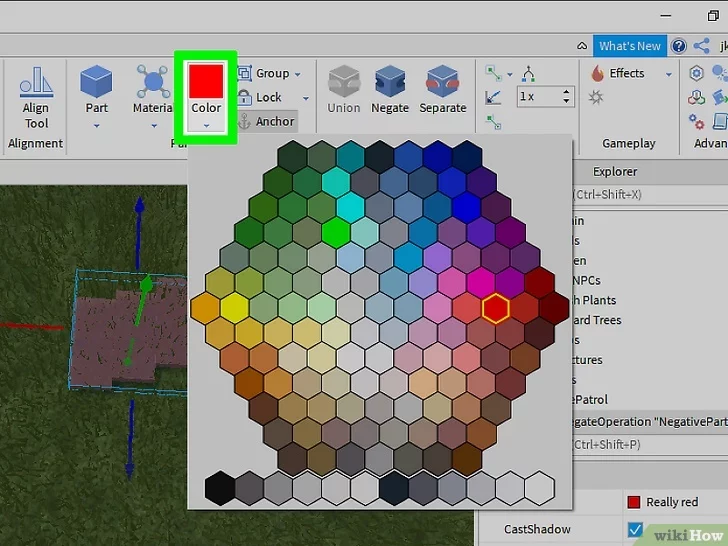
To choose a color for a section, click the section you want to change the color for. Click Color in the panel at the top. Then click on one of the swatches to change.
9. Select the material for the part.
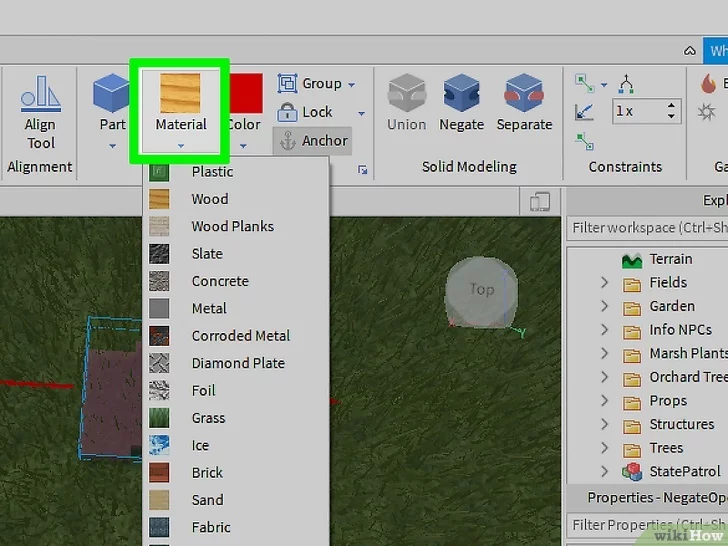
In addition to changing the color of a part, you can also change the material. This allows you to create objects that look like they are made of glass, wood, concrete, metal, stone, granite, brick, etc. To change the material of a part, click on the part you want to change. Then click on Material in the panel at the top. Click the material you want.
10. Add effects to a part.
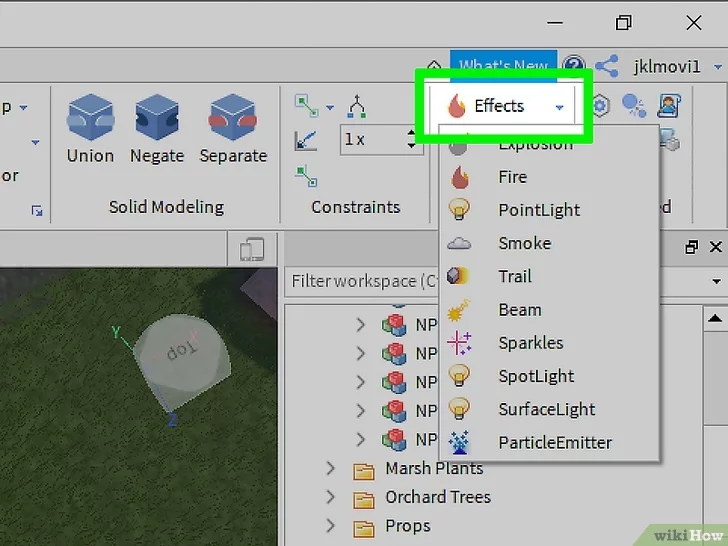
Effects let you do things like burn a part, make it smoke, give it a sparkle, or turn it into light. To add an effect to a part, click the object you want to animate, then click Effect in the Gameplay section of the top panel. Click the effect you want to add from the drop-down menu.
11. Add spawn locations and checkpoints.
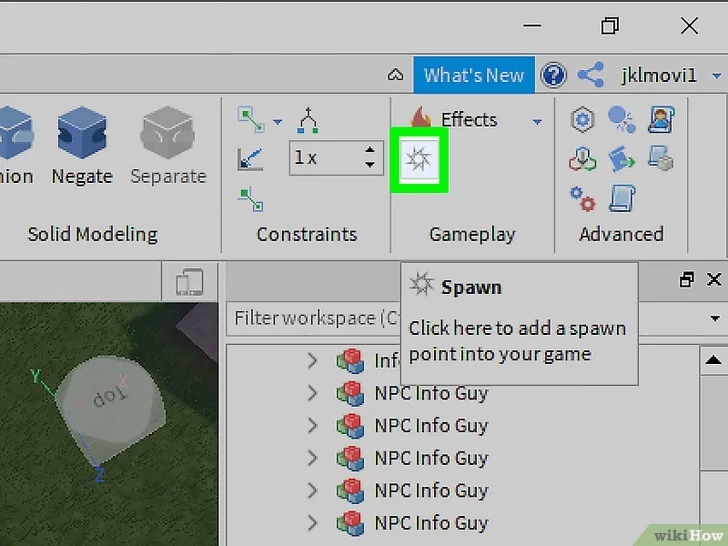
In Roblox, spawn locations appear indicating where the player started. Many spawn locations also serve as checkpoints (a milestone where players can store their progress). To add a spawn location to your game, simply click Spawn Location in the menu at the top.
Was this article helpful?
Your feedback helps us improve.
Related Articles
 Latest Plants vs Brainrots Roblox Codes3 minutes read
 Instructions on how to redeem Roblox Slap codes and a list of the latest codes.4 minutes read
 Top best Roblox music IDs that should be featured on radio11 minutes read
 What is LM Studio? What are its applications?5 minutes read
 A compilation of the hottest music IDs and hit songs in Roblox.9 minutes read
 The latest Roblox codes for April and how to enter Roblox Promo Codes 20264 minutes read
Reader Comments 0
Sign in with email or Google to join the discussion.