Table of Contents
This guide provides a practical overview of Set a Password for the USB, including its main features, benefits, limitations, and important considerations.
Below I will guide you to use the USB Flash Security software.
USB Flash Security is a software that helps you create a password for your USB flash drive, make installation simple and easy to use.
How to set a password for USB with USB Flash Security.
Step 1: Install USB Flash Security.
You can download the software at: http://usb-flash-security. en. malavida. com/. After downloading the software, run the extract file and run the. exe file to install.
Program interface:

Step 2: Plug the USB into the computer, then open the program.
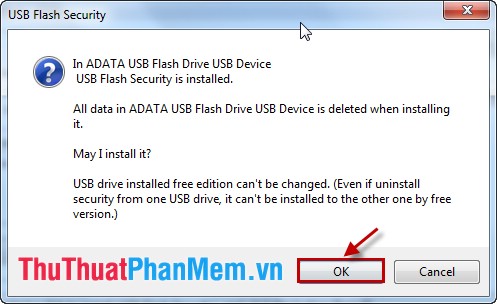
Note: Before setting the password for the USB, you should copy data from the USB to the computer. Because after setting password all data in USB will be erased.
The first time you open the USB Flash Security program, the following message will appear:
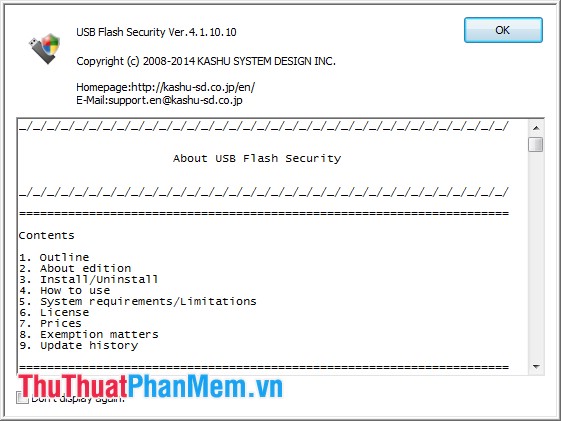
To open the next time no longer notify you select Don't display again and select OK . Then you choose Install to install.
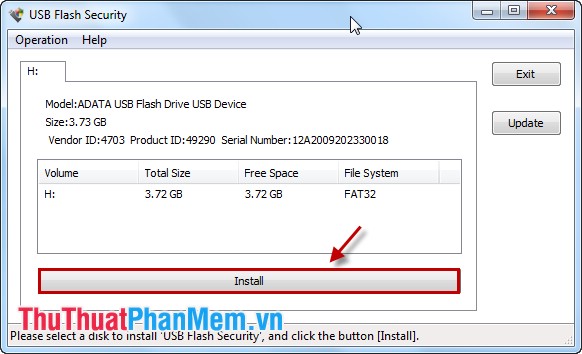
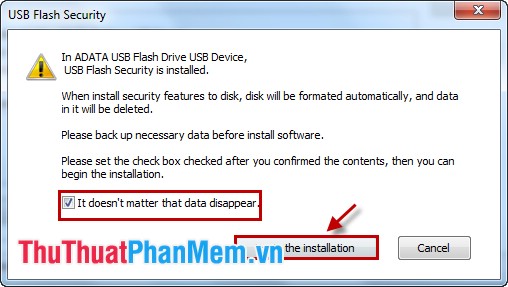
The program will give a notice, after the installation of the data in the USB device has been deleted, select OK to continue:
Step 3: Set a password for the USB.
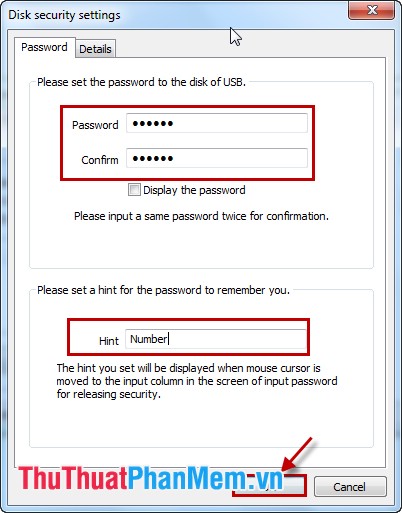
You enter the password in the Password box, re-enter the password in the Confirm box and can fill in the information to remember the password in the Hint box. Choose OK .
Next, check the It doesn't matter that data disappear box and select Begin the installation .
Click Close to finish.
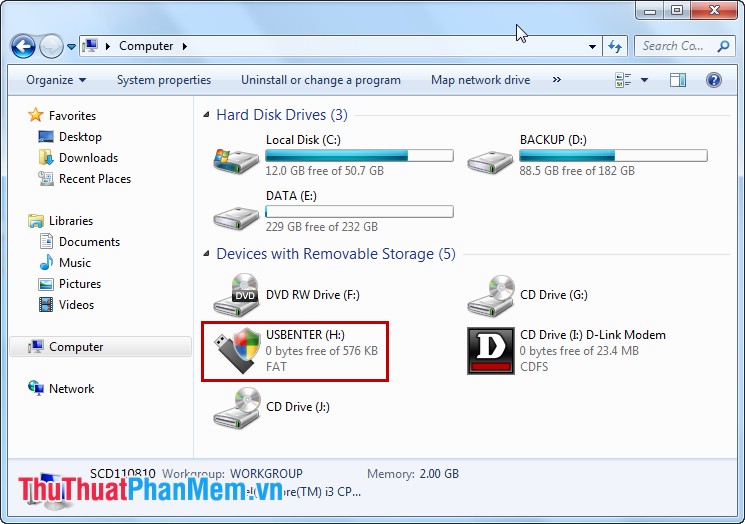
Step 4: After completing the installation, your USB will be renamed to USBENTER.
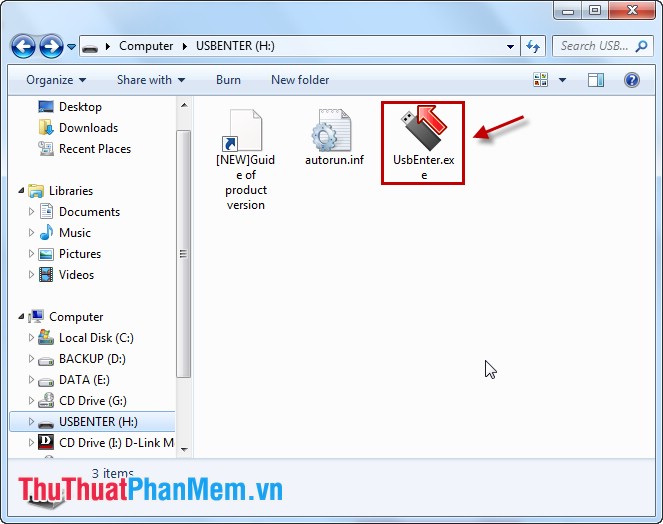
Access to USB, select UsbEnter. exe:
Enter your password and select OK to open USB:
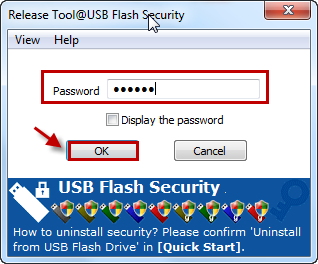
From now on, when you plug the USB into the computer, you will always have to enter the password to use the data in the USB.
If when plugging the USB into the computer without displaying a message to enter the password, you go to My Computer, select on USB and select UsbEnter. exe to enter the password.
How to remove the password for USB USB Flash Security.
Only remove the password in case your USB is in a protected state (when you plug the USB into the computer you have not entered the password to access USB). You do the following:
1. Plug the USB into your computer.
2. Open the USB Flash Security program.
3. At the program interface, select Operation -> Uninstall.
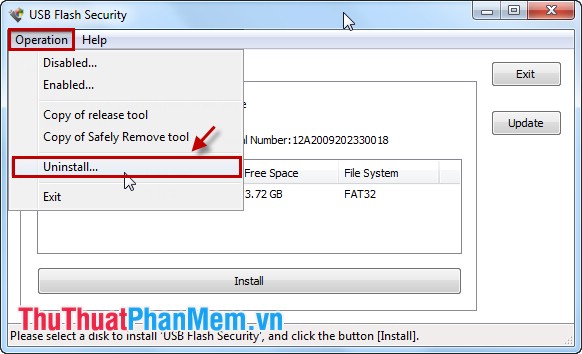
Now you can completely secure the data in your USB without worrying about losing important data. Good luck!
FAQ
What should I know about Set a Password for the USB?
Focus on the key features, requirements, limitations, and practical use cases explained in this guide.
How do I get the best results with Set a Password for the USB?
Follow the recommended steps, use current software or information, confirm compatibility, and review settings before major changes.
Are there any risks or limitations?
Potential limitations depend on compatibility, data quality, cost, privacy, support, and how the product or method is used.
Related Articles
 How to Retrieve a Tik Tok Password When It Is Lost3 minutes read
 How to Remove PDF File Password7 minutes read
 Password Security: Check the Security of the Password3 minutes read
 Use an 8-Character Windows NTLM Password? Congratulations7 minutes read
 5 Best Password Management Apps for iOS8 minutes read
 Has Your Password Been Leaked? Please Check Now7 minutes read
Reader Comments 0
Sign in with email or Google to join the discussion.