New Update Guide for AirPods: Enhanced Auto-Connection!
However, this update is not official yet and is only in beta. More specifically, users who want to upgrade to a new version for AirPods force the device to be updated to iOS 16 Beta. Here's how to update your AirPods:

Step 1: Upgrade iPhone to iOS 16 beta and MacOS must upgrade to Ventura Beta
Step 2: Download Xcode 14 beta for macOS Ventura Beta device.
Step 3: Connect AirPods to iPhone (iOS 16).
Step 4: Connect iPhone to Mac via connection cable.

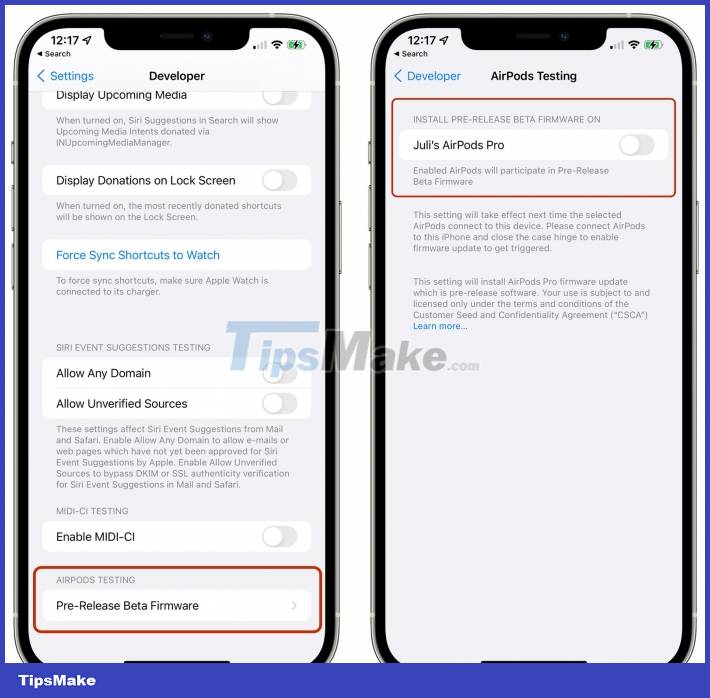
Step 5: Open Settings on iPhone > Select Developer > Select Pre-Release Beta Firmware (under AirPods testing section )
Step 6: Turn ON to automatically update beta firmware for your AirPods.
Note that, firmware update time will be very long (within 24 hours), you should make sure to connect AirPods to iPhone continuously. At the same time, the iPhone must always be connected to the internet. If there is a problem, you can not return the AirPods to the old firmware anymore.
This method is really cumbersome and takes a lot of time. If you are a user who does not want to play around and is using AirPods in a stable way, it is best to wait for the official version in September.