Table of Contents
Learning how to use musescore to create new tracks is easier when the steps are completed in the correct order. Use this guide to prepare, make the changes, and verify the result.
For those who compose music and sound recordings, professional software will always be a powerful supporter, such as Encore, Finale, Sibelius, etc. These software will provide users with features. music editing. However, most of the above software are charged, need professional operations, causing some difficulties for users. If so, you can use MuseScore software, which supports completely free compositions.
MuseScore is also software for writing music and signing music. MuseScore's interface is simple, intuitive, not too confusing. We can use a keyboard, mouse or MIDI keyboard to work with the app. The steps below explain how to create new music on MuseScore.
- Download music on Soundcloud with 3 simple ways
- 5 cutting software, best free music composer and download link
- How to download audio for Facebook videos on Facebook Sound Collection
How to use MuseScore compositing software
- Download MuseScore software
Step 1:
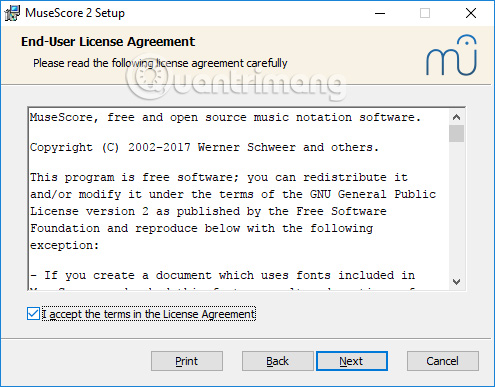
Read the link above to download the app installation file to your computer. MuseScore's capacity is relatively light, the installation steps are quick, there is no extra software included.
Step 2:
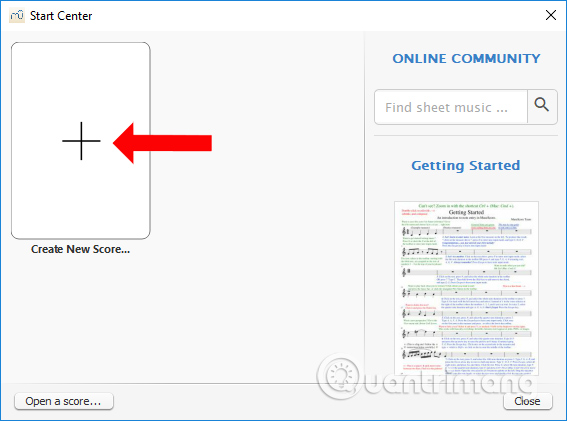
When the app is successfully run, users will see the initialization Center as shown below. click The plus icon To then create a new track (Creat New Score).
Step 3:
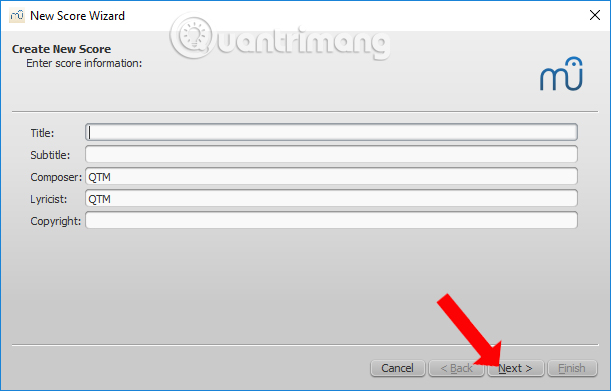
Switch to the new interface, enter the title of the song in Title, Title in Subtitle, Shining in Composer, Lyrics at Lyricist, Copyright in Copyright and then click Next button Below.
Step 4:
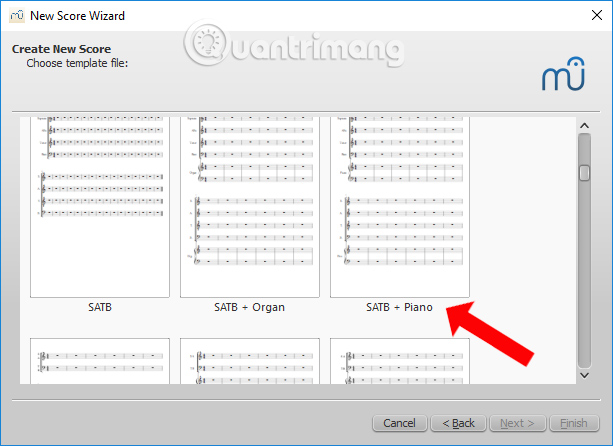
Users will then see patterns of sample music for you to choose to create new tracks. click one of these models and then click the Next button below.
Step 5:
Appear The tempo and dialog box , select any template and Click Next To continue.
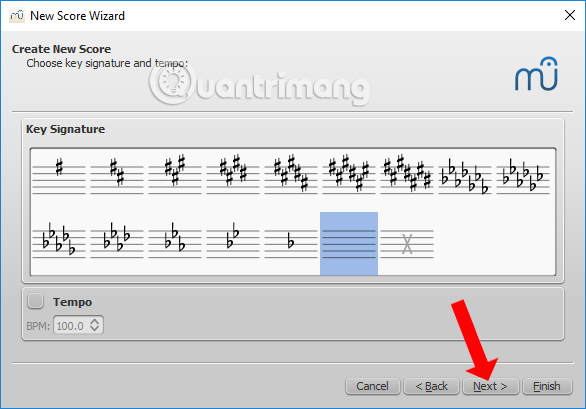
Step 6:
At this interface, users can create an initial number of indicators. If the opening track is a momentum bar, check the Pickup Measure box, then adjust the cadence at Enter Time Signature. Enter the number of bars in the Enter Number of Measure . You can change the number of bars later.
When you're done Press Finsh To create a new track.
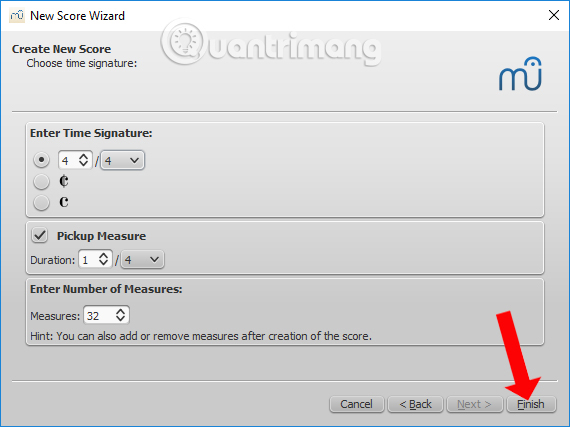
Step 7:
Appearance interface to create new tracks. Here you will see the number of bars as well as the number of previously entered cadence numbers.
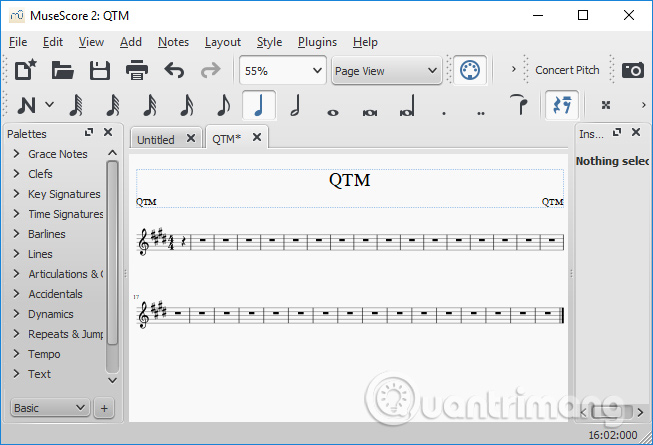
Step 8:
Next enter the note in the score, press The N key Above the interface.
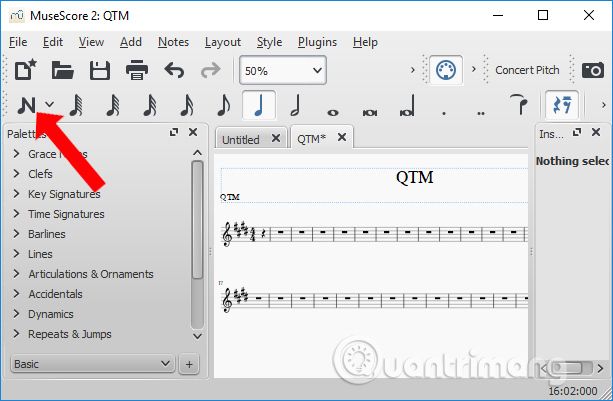
Step 9:
Then select the note pitch field on the toolbar, then click the pitch point where you want to enter the score. Press the Esc button to end or pause the import process.
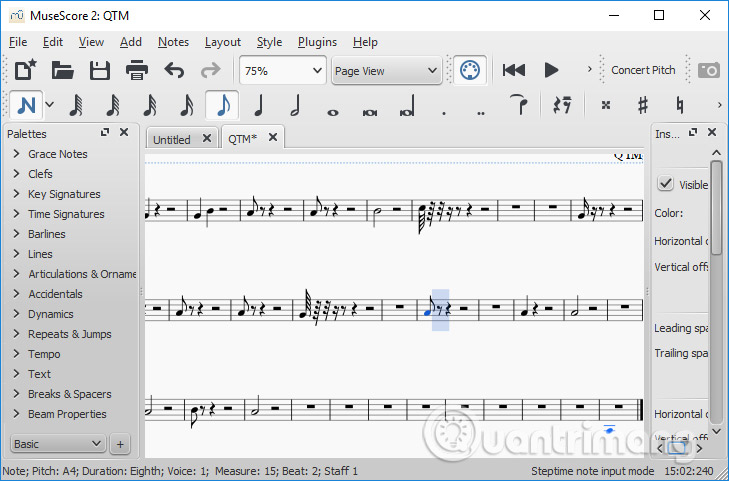
On the left and right of the interface is a list of settings for users to customize their music. when needed to change, click The Edit button And then edit the items in the list.

Step 10:
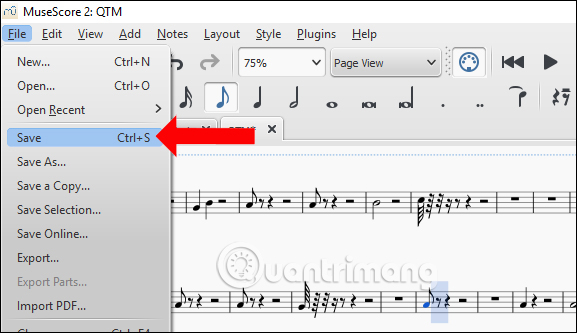
After you have created users click The File Then choose to Save Or press Ctrl + S to save the music.
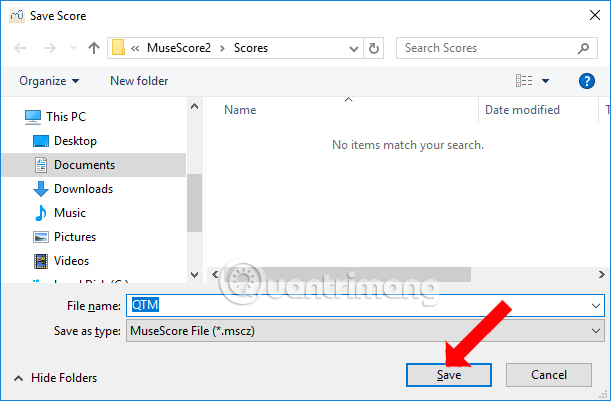
Finally, we will select the folder to store the music, name the new music, then click The Save button Below to save it.
For those who have knowledge and knowledge of music theory, often composing music, MuseScore is a bad choice. the app can run on many different operating systems.
- How to create lyrics of karaoke songs on Windows
- Collection of free music sources to make YouTube videos
- The best free music download apps on Android
I wish you all success!
FAQ
What should I prepare before I use musescore to create new tracks?
Review the requirements in the guide, confirm that your device or software is compatible, and save important work before changing settings related to use musescore to create new tracks.
Why might use musescore to create new tracks not work as expected?
The most common causes are incompatible versions, missing permissions, incorrect settings, or an interrupted internet connection. Recheck each step and restart the app or device when appropriate.
Can beginners follow these use musescore to create new tracks steps?
Yes. Follow the steps in order, avoid skipping confirmation screens, and compare your interface with the screenshots because labels may differ slightly between versions.
Related Articles
 11 Video Tutorials on How to Use MuseScore2 minutes read
 How to Download and Install MuseScore5 minutes read
 How to Cross a Railroad Crossing: Step-by-Step Guide11 minutes read
 Function Tracks Change, Comments in Microsoft Word5 minutes read
 How to Set Audio Tracks Automatically on VLC: Clear Instructions6 minutes read
 Instructions for Blocking Google User Tracking9 minutes read
Reader Comments 0
Sign in with email or Google to join the discussion.