How to use Apple Invites to create events
Apple has released its own event management app called Invites. This app lets you create events, send invites, and manage responses..
Apple has released its own event management app called Invites. This app allows you to create events, send invitations, and manage RSVPs. The person who responds and receives the invitation does not need to have an Apple device or an Apple account to respond. Here's how to use Apple Invites to manage events.
Who can use the Apple Invites app?
The Apple Invites app doesn't come pre-installed on your iPhone or iPad. Instead, you'll need to download it from the App Store. It requires an iCloud+ subscription to work. You'll also need a device running iOS 18 or earlier.
While this may seem inconvenient, it actually makes sense since the resulting invitations will be stored in the cloud and will definitely take up some space.
If you don't want to create an invitation using your iPhone, you can also access this feature without downloading any additional content via the web on your PC or other device.
How to use Apple Invites to create events
Note, to create an event you need the Apple Invites app from the App Store. You also need to sign up for iCloud+ to create a new event.
Step 1:
You download the Apple Invites app for iPhone from the link below.
- Download the Apple Invites app
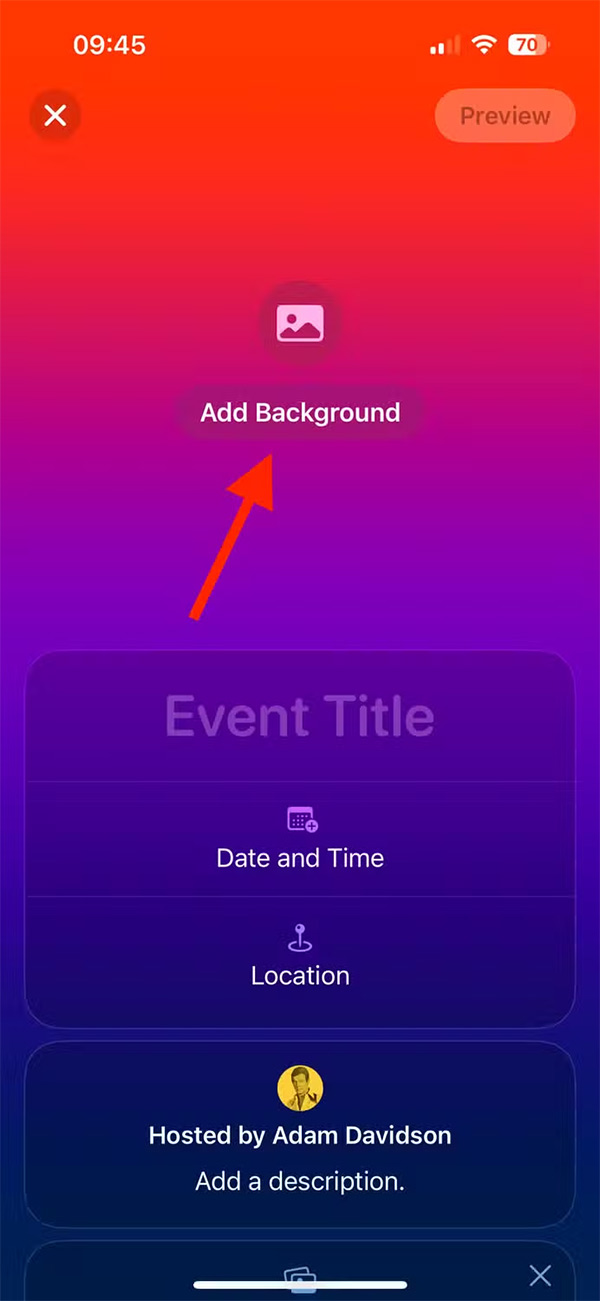
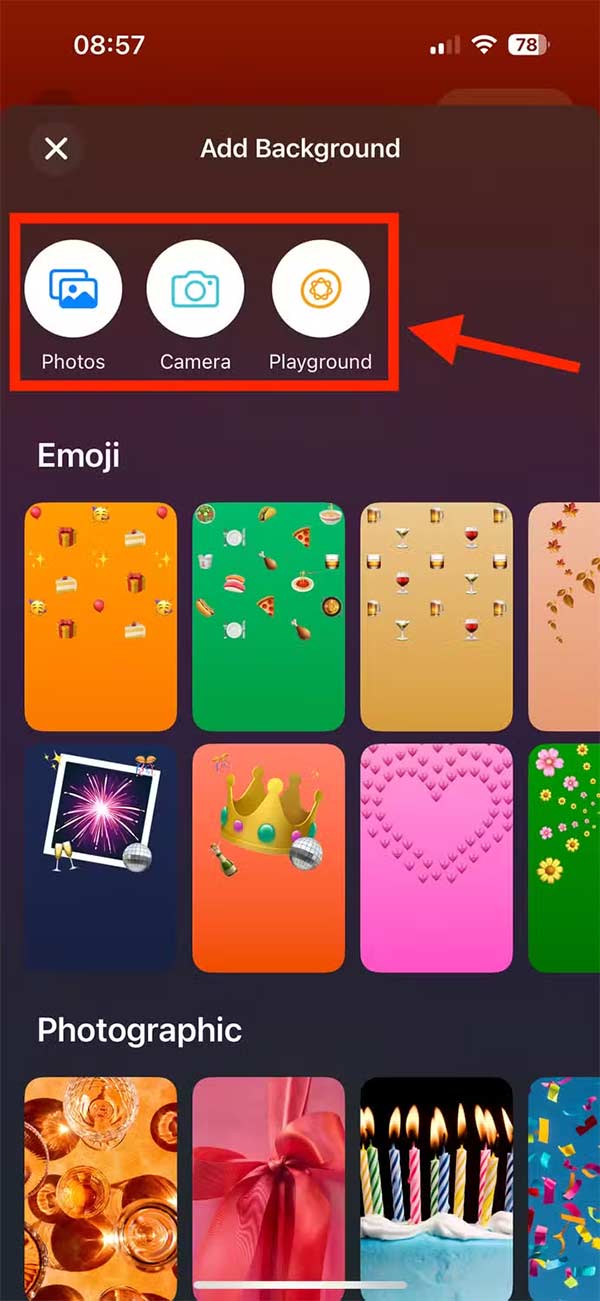
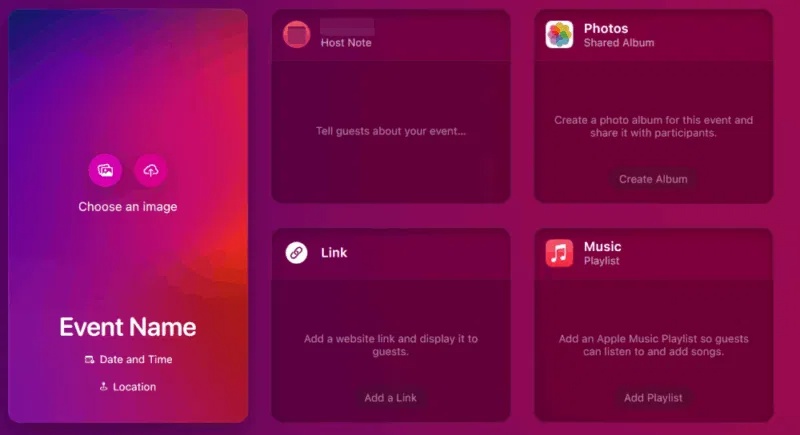
Next, open the app and click Create Event and then click Add Background to create a background for the invitation. Users can choose a pre-made background or click your own background.

Step 2:
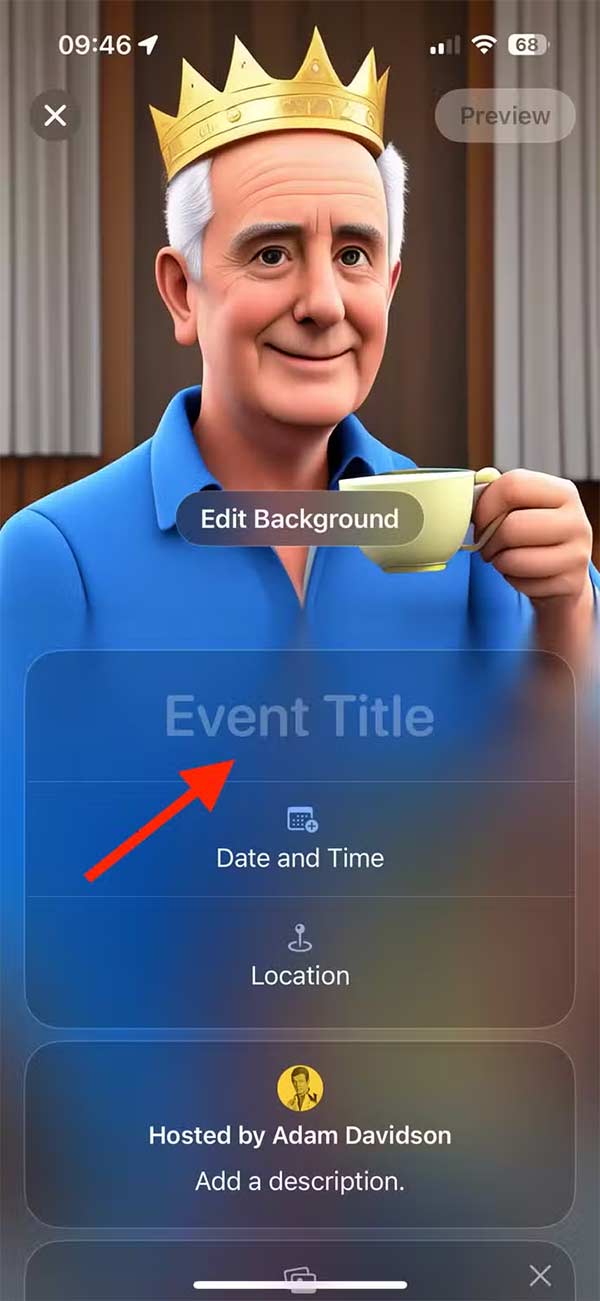
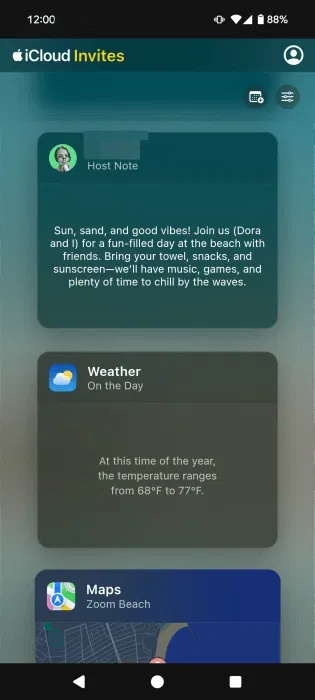
After creating the wallpaper, we fill in the event name , time , or location .
Step 3:
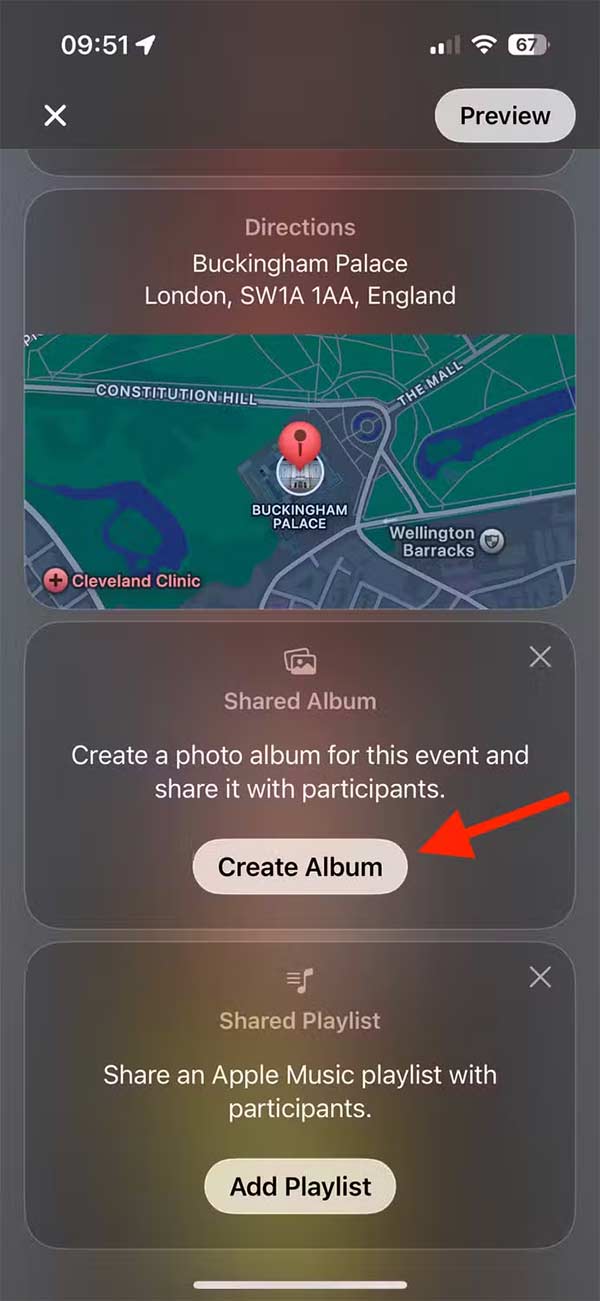
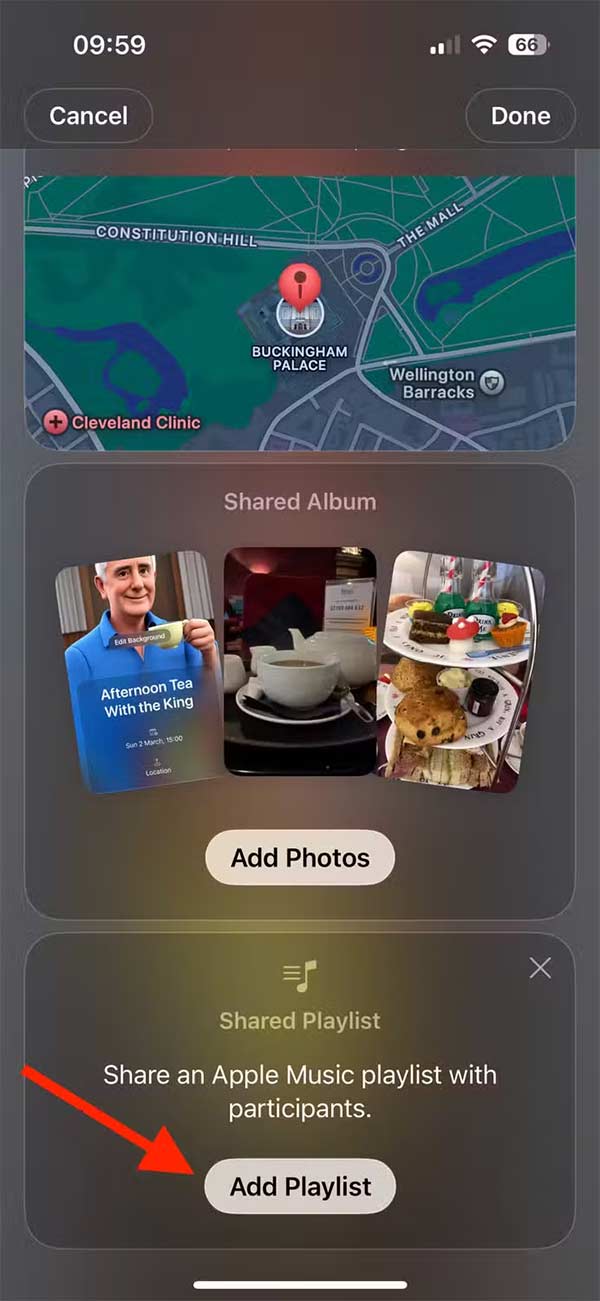
In the event customization interface, users also have the option to add a shared photo album to their event. This allows you and other invitees to upload photos that everyone who receives an invitation can see.
Tap Create Album and give the app access to your photos. Then tap Add Photos and select the photos you want to add to the album and tap Post to post.
Step 4:
Next you set up a shared Apple Music playlist for the event, but the recipient needs to have an Apple Music account.
Step 5:
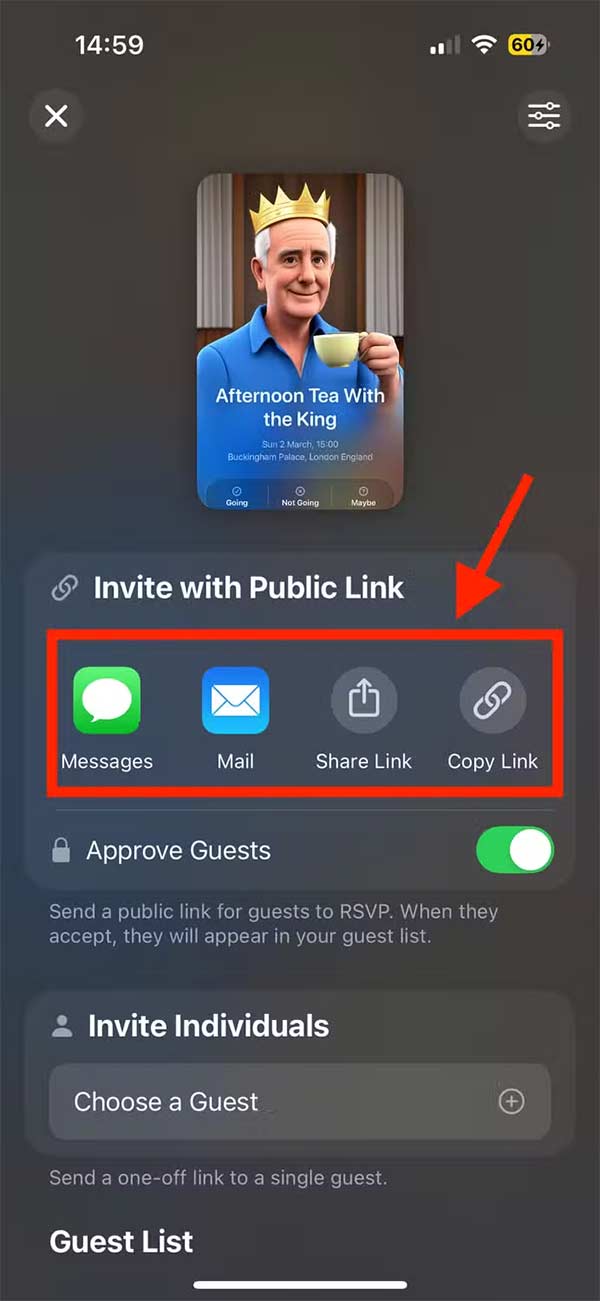
After setting up the event, click Next to move to the next step, click Invite Guests to invite others. Now there are options to send the event as shown. Approve Guests will activate the respondent mode.

Step 6:
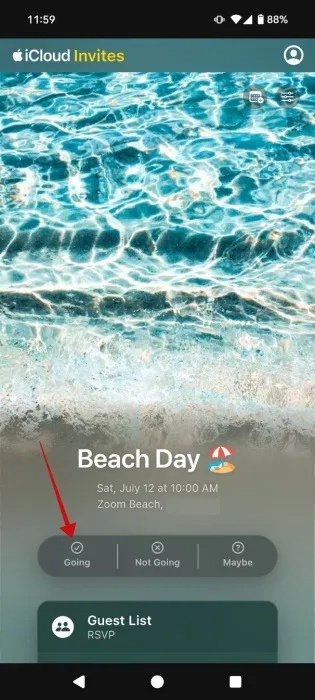
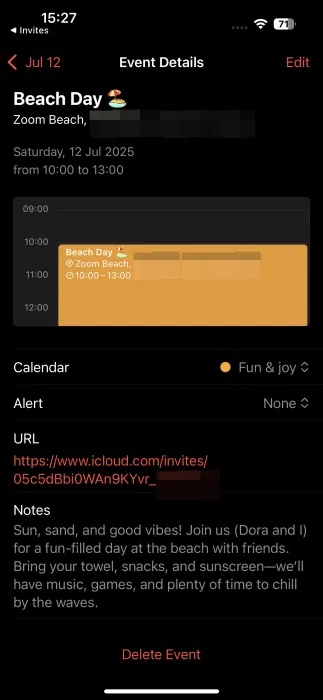
The invitation recipient taps Open Invitation to view the invitation and taps Going, Not Going, or Maybe to respond.

View and respond to invitations
Clicking the Apple Invites link will take you to the iCloud page in your browser (mobile). Enter your email below or sign in with your Apple account if you have one.
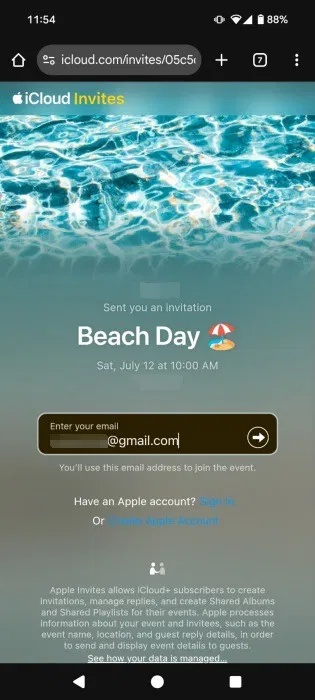
You'll receive a verification code in the email you added. If the host has the Approve Guest option enabled , entering the code will send them a request to allow you to view the event.

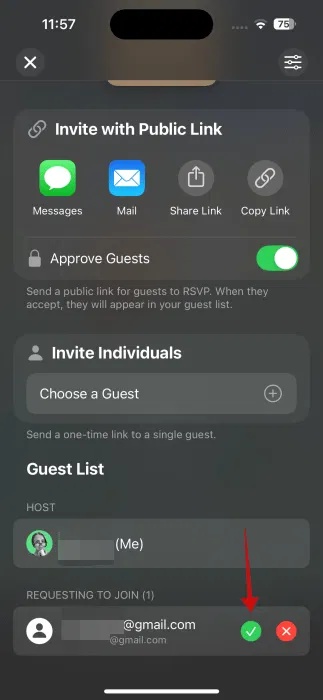
On the host device, open the event page and tap the 1 Access Request button that appears at the top.

At the bottom, click the green check button to approve the guest.
Back on your client device, you'll receive an email letting you know the event is now available. Refresh the iCloud page in your browser. Check the event overview.
Swipe up to the top and tap Going if you want to attend. Other options include Not Going or Maybe .
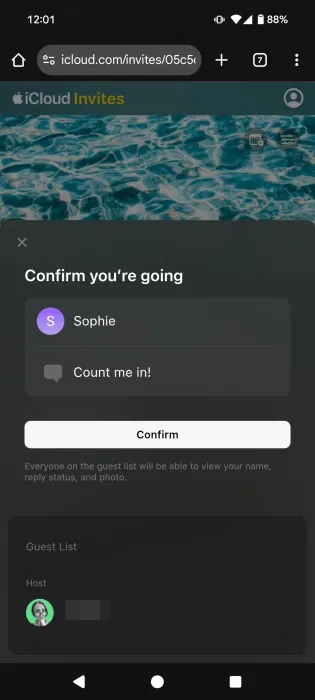
If your answer is yes, leave a note and press the Confirm button to join.
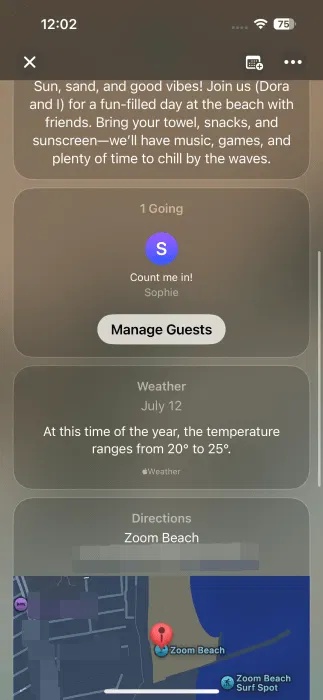
New participants and their responses will appear in the Guests tab on the event page.
Add events to calendar on iPhone
After you create an event on your iPhone, you can add it to your calendar so you don't forget.
Open the event you want to join in the Invites app on your iPhone. Tap the calendar-like icon in the upper-right corner.

Modify any parameters as you see fit. Select the type of calendar you want to include this event in and hit the Add button at the top.
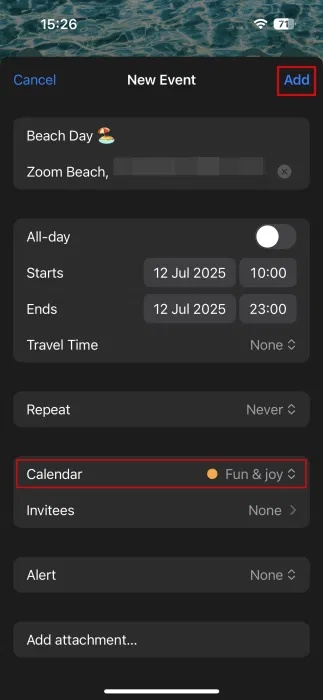
Invites will automatically create an event for you in Calendar, complete with a link to your invite. Be sure to review the resulting invite, as the end time has changed in the last version.
Create event invitations on PC
As mentioned, you can also create web version event invites on your PC. Navigate to this iCloud page and sign in with your Apple ID.
Doing so will sync your devices, so you can access events created on your iPhone from your PC and vice versa. To create a new invitation, tap the New Event button .

You can set up the invitation page as you did on iPhone, although now you'll view the page in landscape mode instead of portrait mode.
If you want to learn more iPhone tricks, see how you can easily put two photos side by side without downloading an additional app, or, learn how to change the lock screen shortcut on your iPhone .