How to use Aperty to edit portrait photos
Many people use Aperty for portrait editing – it has traditional RAW development tools focused on editing portraits for great results and innovative AI tools dedicated to improving professional portraits.
Table of Contents
A professional photo editor dedicated to portraits is hard to find, especially one with AI features that don't enhance your photos. Many people use Aperty for portrait editing – it has traditional RAW development tools focused on editing portraits for great results, and innovative AI tools dedicated to improving professional portraits.
1. Set up Canvas
Using the Canvas tab , you can crop the canvas as well as realign it. Try to frame your photo well when taking it and don't crop it too often. You can crop to a specific aspect ratio if needed and you can also rotate or flip the canvas.
Other Canvas settings help correct camera optical flaws like distortion, chromatic aberration, or blur. You can also correct lens distortion and blur if needed.
The Transform section of the Canvas tab seems pointless to use because it warps the image in unsightly ways. Avoid these sliders. Once you've created the perfect crop, it's time to get into the nitty gritty.
2. Essentials of RAW format
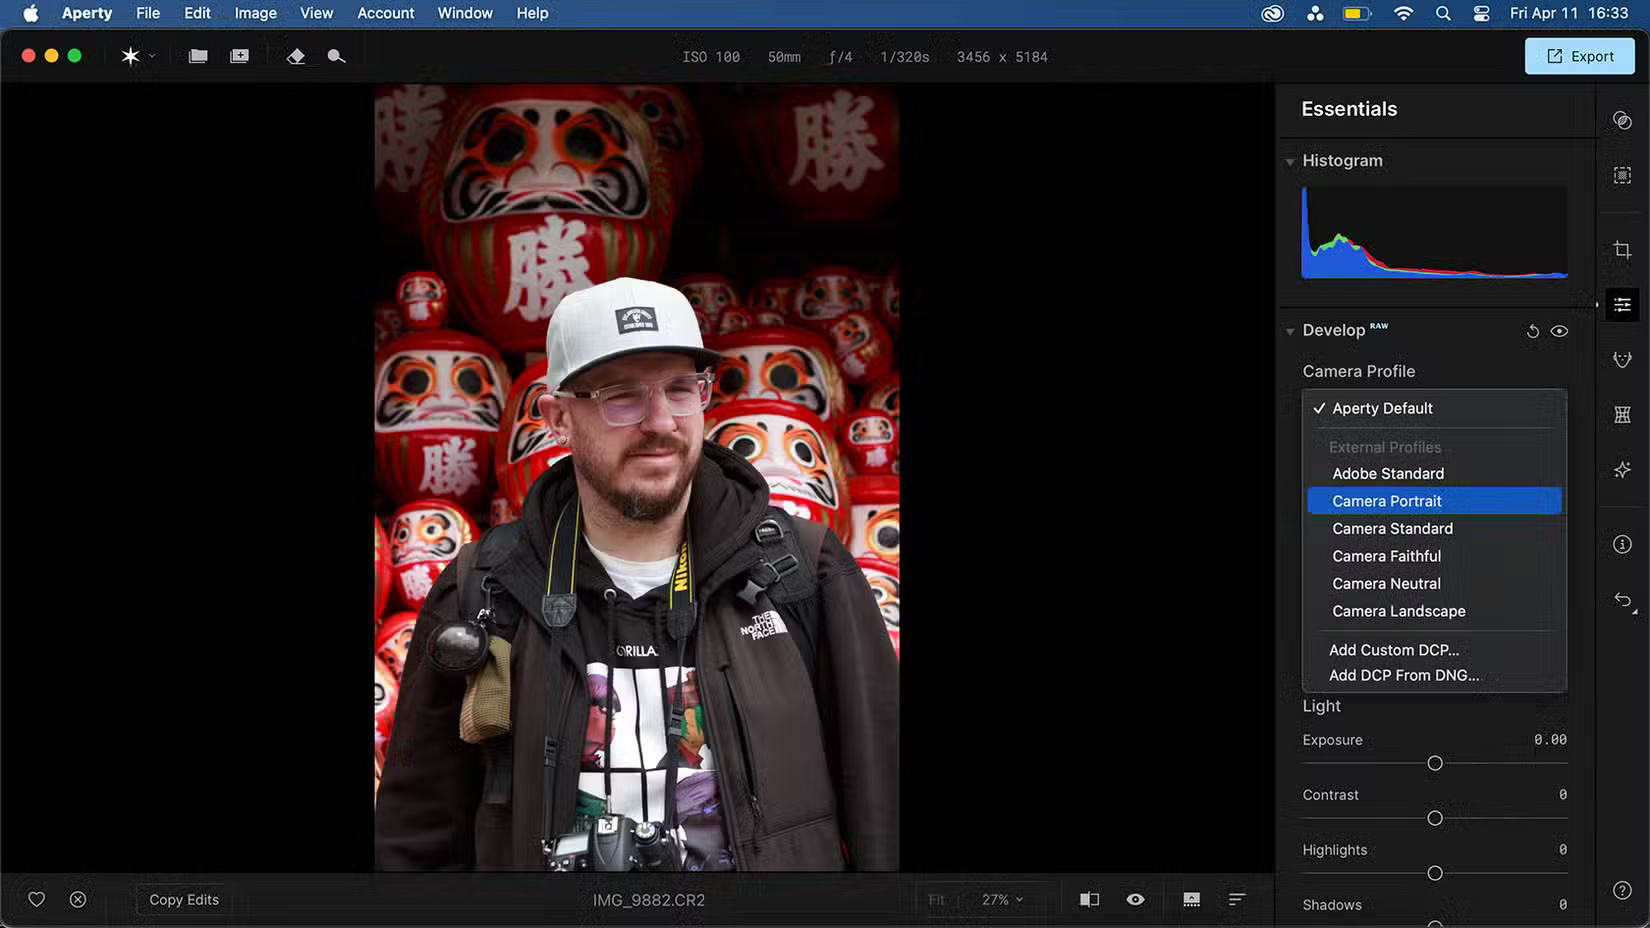
Switch to the Essentials tab , which covers everything you need to develop RAW images – whether you're editing portraits or not. You can use this tab for non-portrait editing if you want a powerful RAW editing tool.
Choose a camera profile that enhances color and depth in your photos — Camera Portrait in the example — and then use the color sliders if you need to tweak the color a little further.
Experiment with the Light settings - Exposure; Contrast; Highlights; Shadows; Whites; Blacks - when I first edit the RAW image. These settings can be changed further later to fine-tune the image and often only require minor changes.
The Curves and HSL sliders can also help with recoloring your photo. Use some of the Creative tools afterwards to make sure the colors are where you want them. The Essentials tab also has tools for black and white conversion, sharpening, detail, structure, and noise reduction.
3. Add relevant preset settings
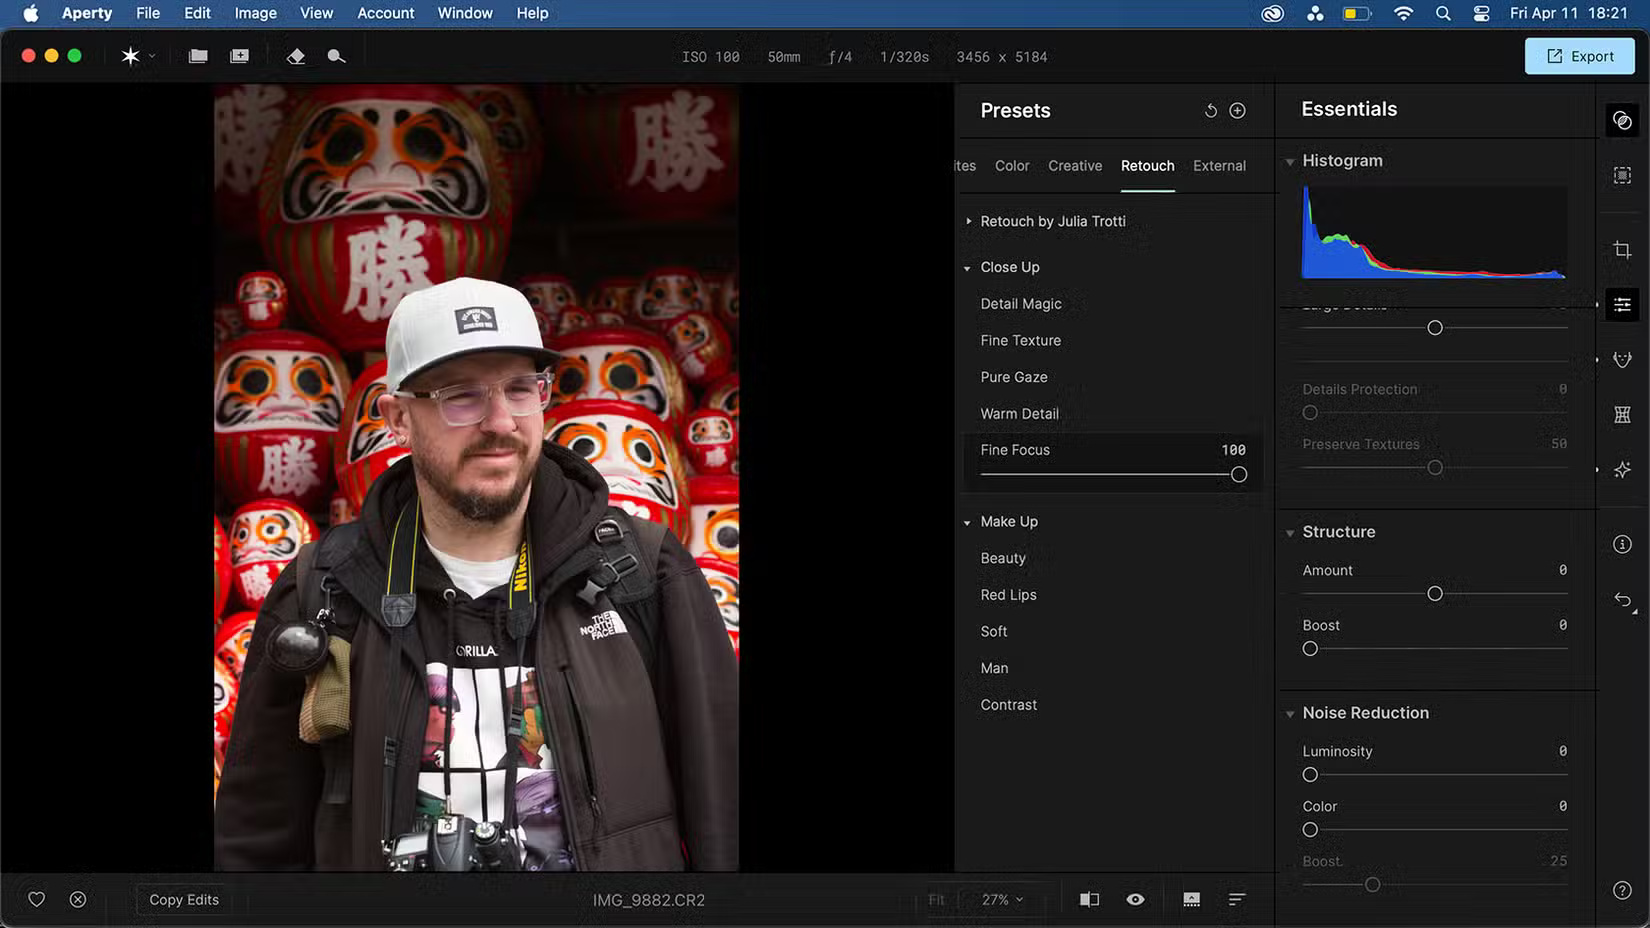
Aperty presets were developed in collaboration with portrait photographer Julia Tutti. There are a few presets with her name on them in the Presets tab , but there are plenty of other types of presets you can use in the Presets menu. Using presets and filters are some of the best ways to instantly enhance your photos in any app.
People don't often use presets in their editing workflow, but try some out and see if you like them. Presets in Aperty can't be edited beyond the strength slider; however, you can create and save your own presets from the curated settings.
For example, we selected the Fine Focus preset located in the Retouch category and left it at 100%.
4. Edit and reshape with AI
Aperty's biggest draw is its focus on AI for portrait editing. That's where the Retouch and Reshape features come in handy. Each of these features is located in its own menu item on the toolbar. Retouch covers facial retouching, and Reshape covers the shape of the subject, including the model's body and face.
While this is a major advantage of Aperty, try not to overuse these features. Improper use can promote negative body image, especially since most slimming sliders start at zero – suggesting that the model should always look thinner than they started at.
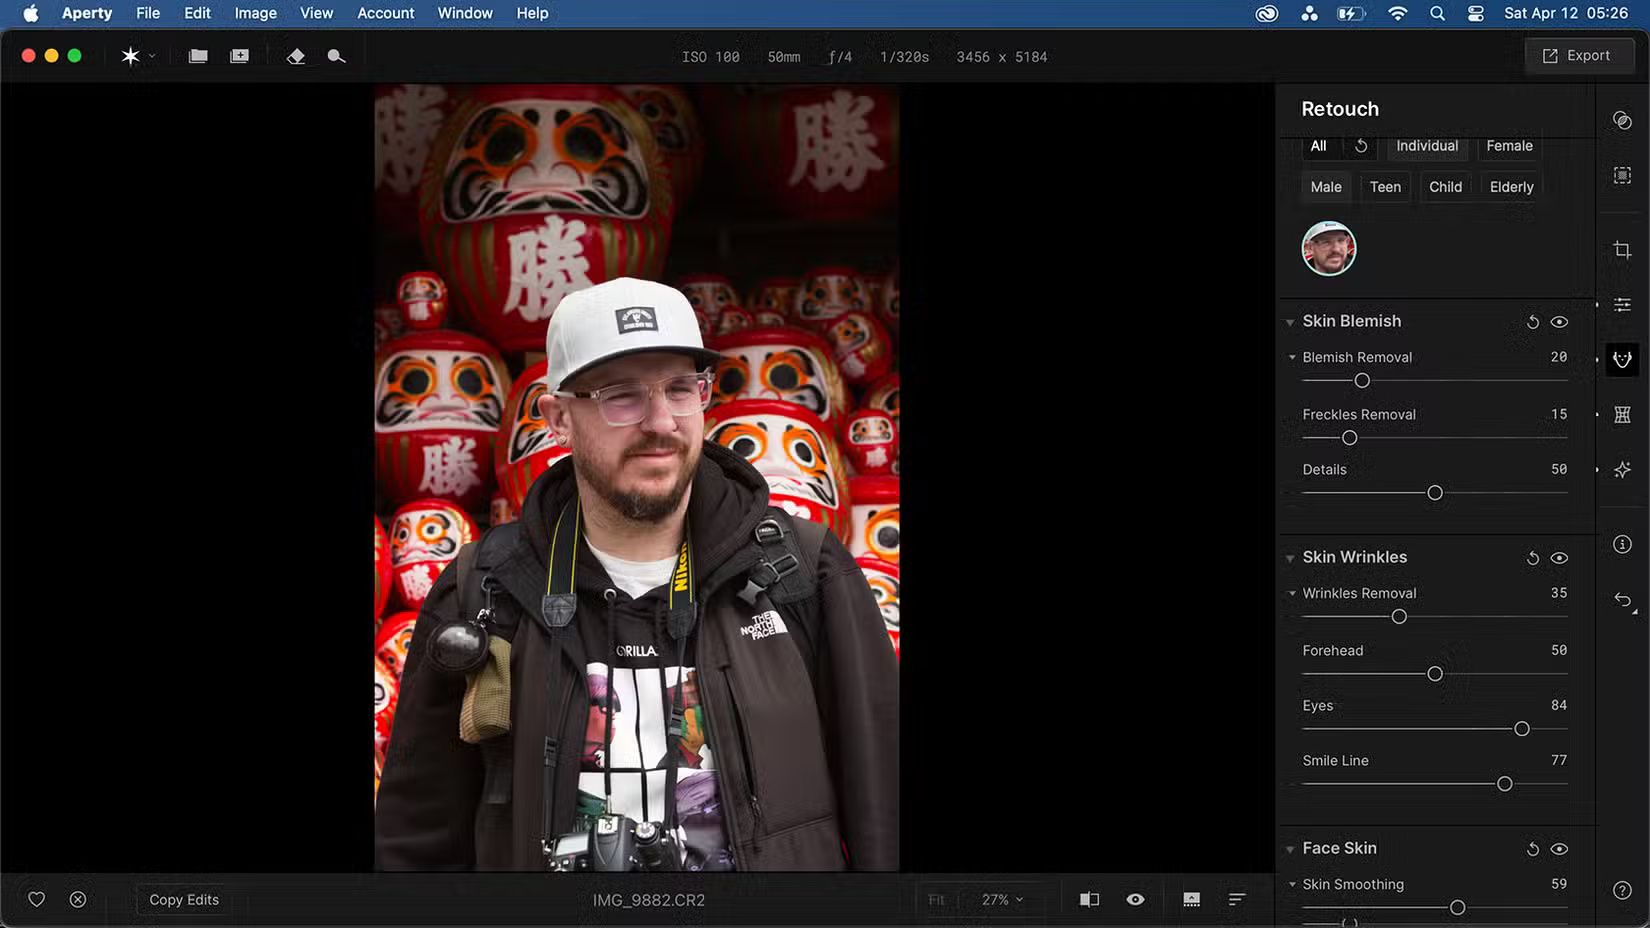
These tools use AI to analyze and recognize people in photos, allowing you to categorize them by number of people, gender, and age for better editing results.
Retouch
The Retouch tool offers brand new blemish removal sliders and wrinkle removal tools in update 1.3.1, including general and specific sliders for the forehead, eyes, and smile lines. The tool also features skin smoothing and color correction, as well as eye and teeth enhancements. Finally, there's a retouch makeup section for applying subtle makeup corrections to models.
Use the standard wrinkle removal, skin smoothing, color correction, and brightening sliders. These sliders help provide better lighting results without significantly changing the model's appearance.
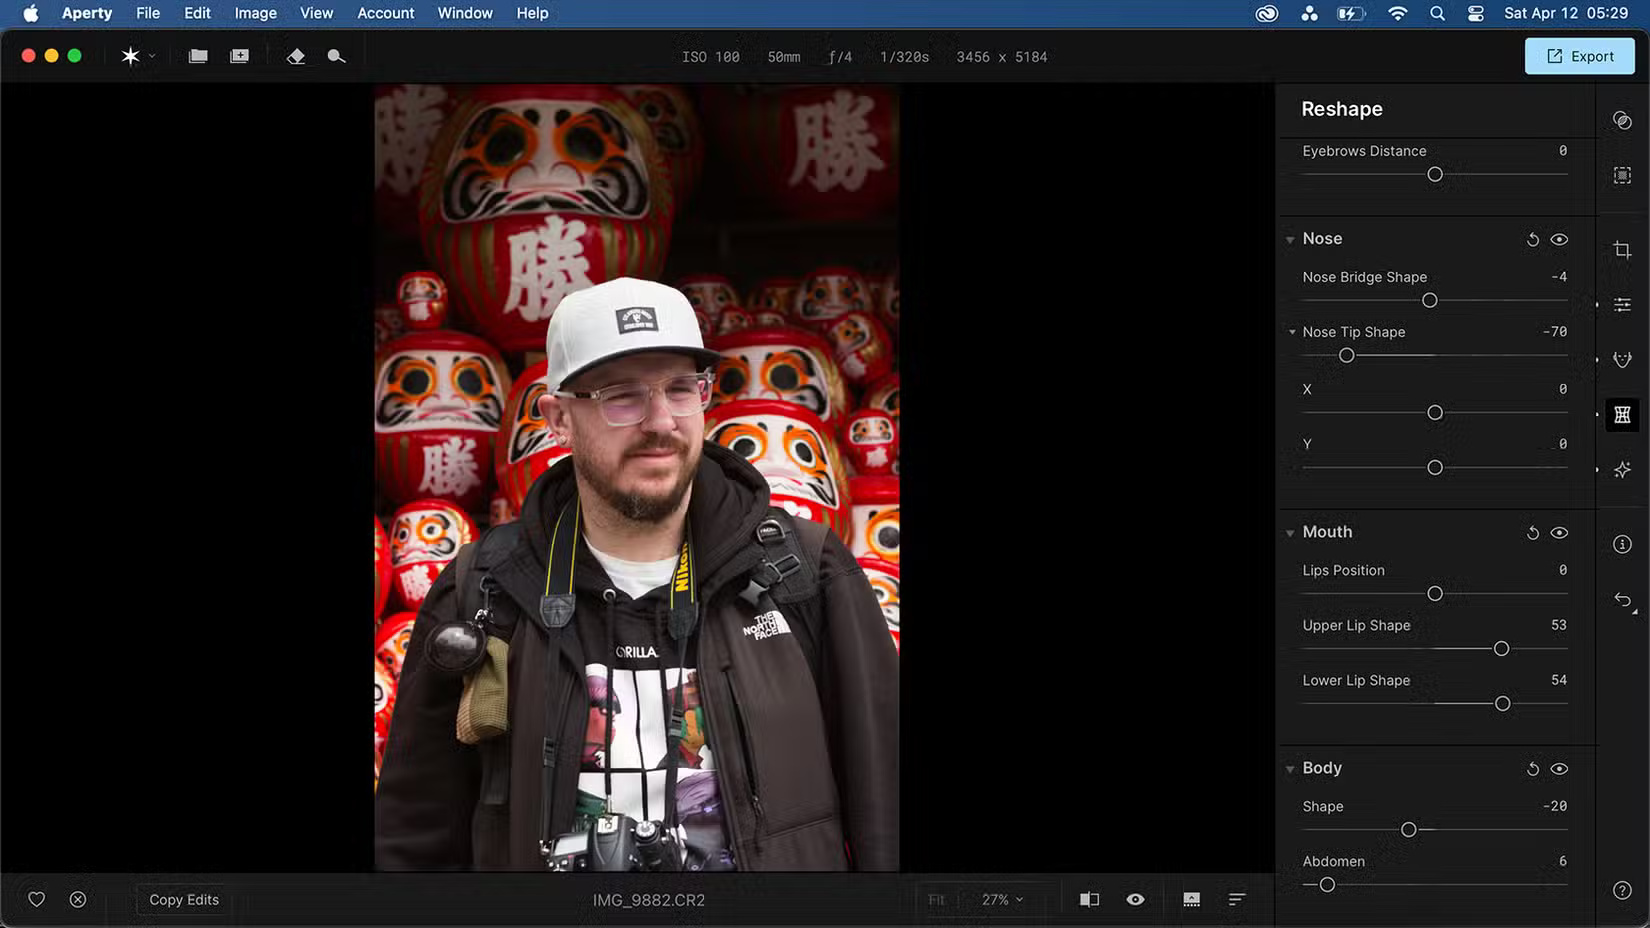
Reshape
The Reshape menu provides shape changes to the model's body and face, as well as almost every individual facial feature such as the eyes, eyebrows, mouth, and nose.
People don't usually use these features much because they can often result in a strange sense of distortion for models, especially when facial features change. Professional photo editors often edit models to look slimmer or have perfect proportions and lines – which is what this tool can provide with AI while still maintaining control over the effects.
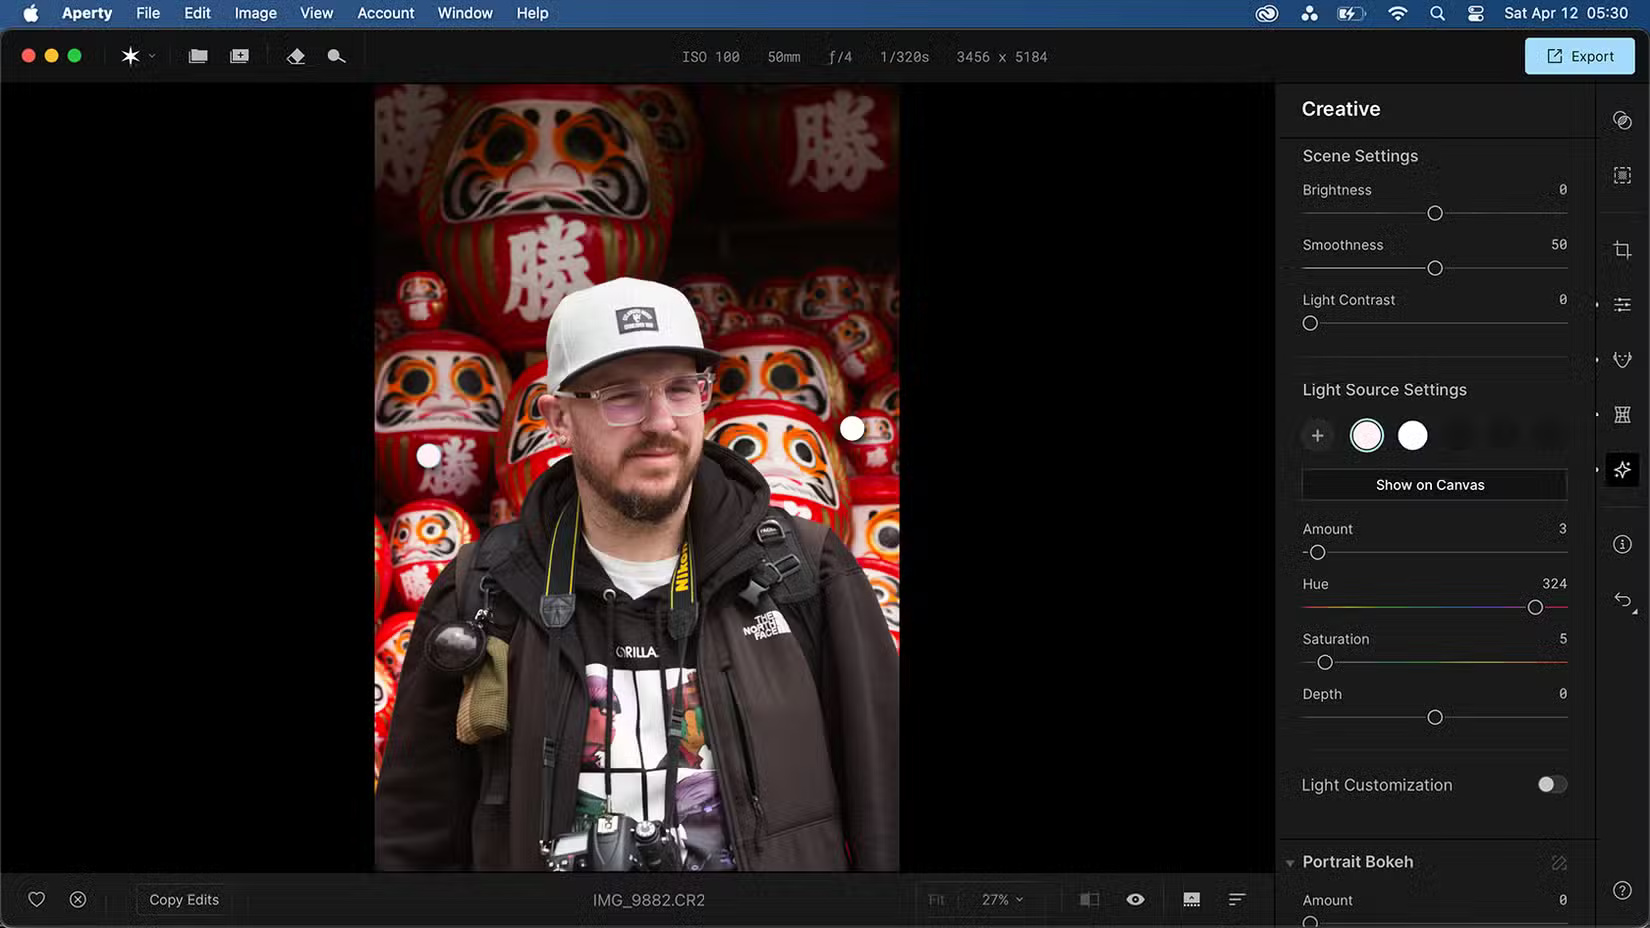
5. Finish with Creative tools
Aperty's Creative tab is one of our favorite aspects of the tool.
You can apply light sources to your canvas. Similar to the Relight options in the Clipdrop AI tool, this tool works great if you need to change or enhance any light source. The light is white by default, but you can change the hue, saturation, amount, and depth, as well as choose the location and amount of available light sources.
There are also other lighting customization options to add texture or pattern to the light. These options would be great for high-end fashion photography.
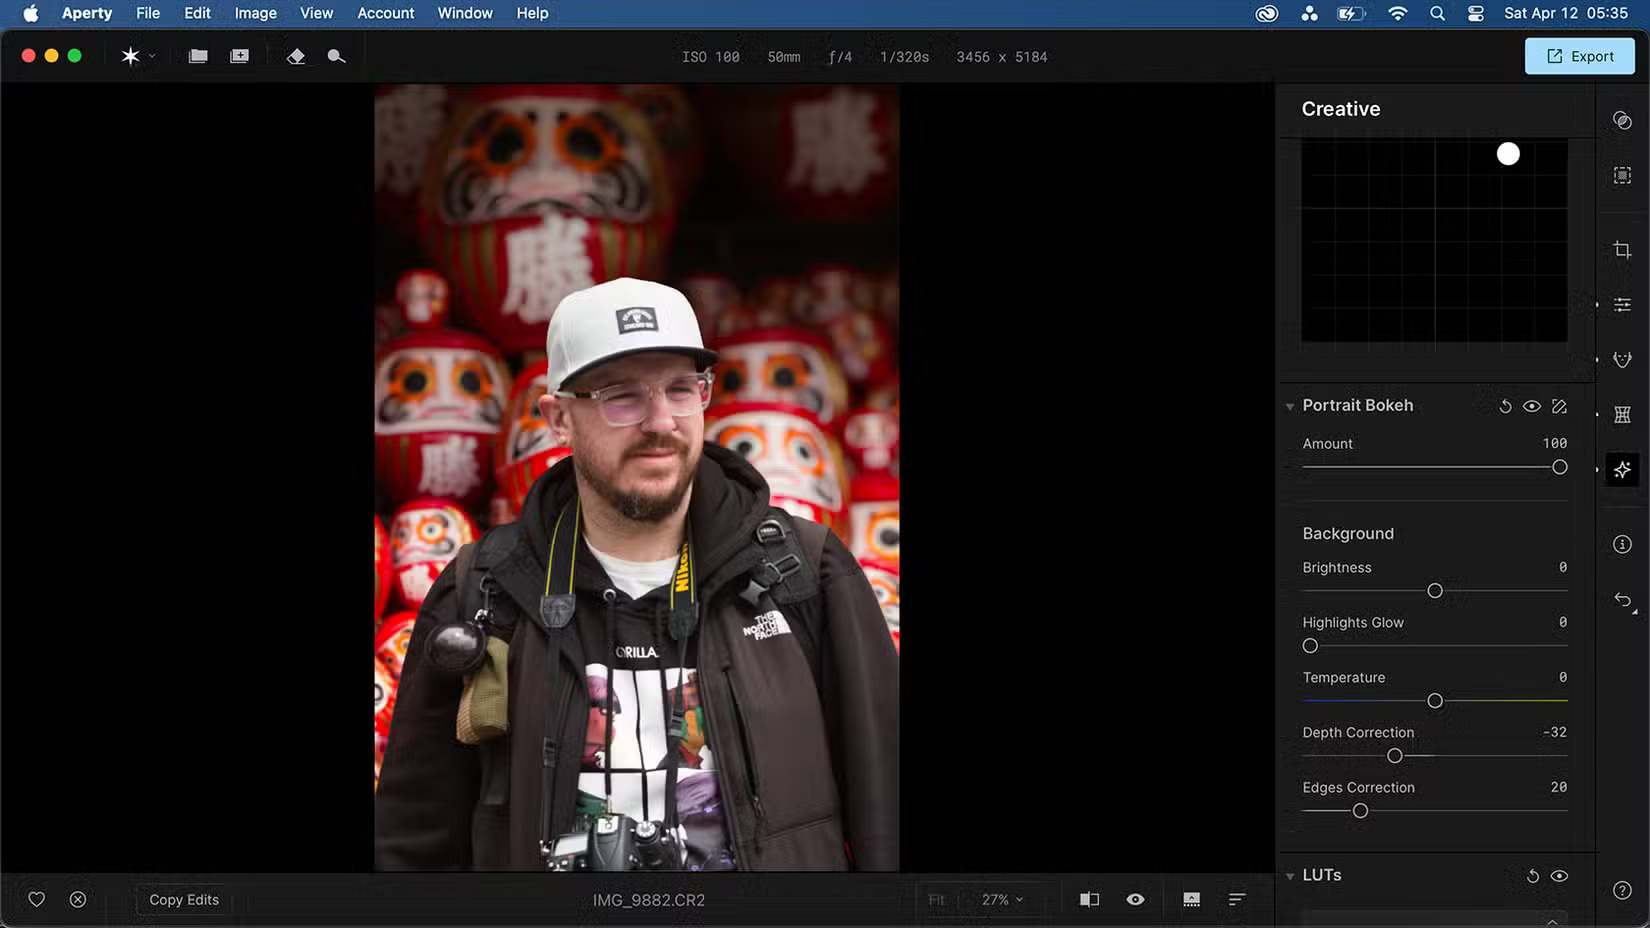
The Portrait Bokeh slider is one of my favorite features in the Creative tools. Many people love photos with a strong bokeh effect—or lens blur—in them.
There are many other settings in Creative, such as LUTs for color management, film grain, vignettes, etc. You can get by without touching any of those. The bokeh adds exactly what your photo needs.
Was this article helpful?
Your feedback helps us improve.
Related Articles
 Aperty - Portrait photo editing tool, rival to Adobe Lightroom6 minutes read
 Aperty or Retouch4Me is the AI portrait photo editor that gives better results?9 minutes read
 TOP AI tools for creating professional portrait photos10 minutes read
 How to take a Portrait mode on Android3 minutes read
 How to take Portrait Mode selfie photos on iPhone X4 minutes read
 What is Portrait Mode? What is Portrait Lighting?4 minutes read
Reader Comments 0
Sign in with email or Google to join the discussion.