How to take a photo in Portrait and Portrait Lighting mode on iPhone 7 Plus and 8 Plus
Along with the new iOS versions of Apple are amazing improvements. In it, the new features of the most anticipated Camera app are Portrait Mode and Portrait Lighting. To learn the concept of these two modes, do not miss the article Portrait Mode? What is Portrait Lighting? Below, TipsMake.com will guide you how to take photos with these 2 modes on iPhone 7 Plus devices and above.
How to take photos of people in Portrait or Portrait Lighting mode
First, you need to open the Camera app .
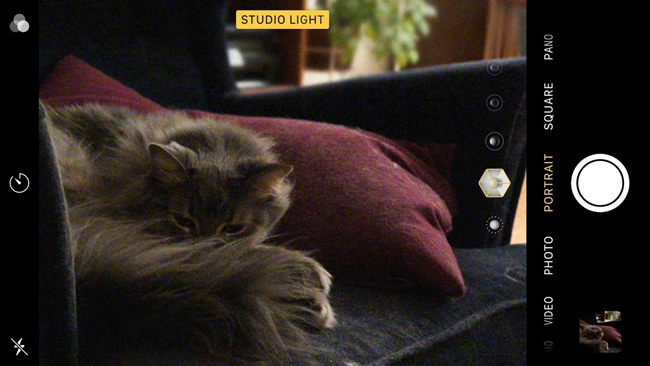
Swipe through Portrait settings .
Place the camera between 2 and 8 feet away (about 60 - 240 cm). At this time, the camera will automatically identify the subject.
Notice the Camera app's prompt (need more light, turn on the flash, put the subject within 8 feet or move further away).
Once you meet the requirements of the Camera, you will see the banner at the bottom of the screen (for iPhone 8 Plus, iPhone X) or on the top of the screen (with iPhone 7 Plus) turns yellow.

Note: You can still take pictures in Portrait mode with a telephoto lens even if the banner does not turn yellow. However, you will not get a photo with depth and light effects.
If you use the iPhone 8 Plus or X, you can swipe or tap the cube icons above the shutter button to change the light effect. Then click the capture button to finish.
- How to take screen shots of iPhone 7, iPhone 7 Plus?
- Some tips and tricks on using Camera on iPhone (part 1)
- Some tips and tricks on using Camera on iPhone (part 2)
How to capture objects and animals in Portrait mode
Capturing other non-people objects is not officially supported in Portrait mode, however, you can still do it.

Set Camera way to object with a distance of 8 feet or less. Your iPhone will automatically identify the subject or focus. However, you can also tap the screen to set manual focus.
Notice the reminders of the Camera as when shooting with the subject who is above.
Then do the same steps as for capturing people in Portrait mode is done.
How to delete light and depth effects in a photo
If you take a photo in Portrait mode but don't want to have the effect of removing bokeh or light effect on the image, you can easily delete these two options.
Note: Although you take photos with both depth and lighting effects in Portrait mode, they exist completely independently. Therefore, you can delete the depth effect without erasing the light effect and vice versa.
How to delete depth effects with photos using Portrait mode
- First, you need to open the Photos app on your iPhone or iPad. Find photos taken with Portrait mode you want to edit.
- Click Edit.
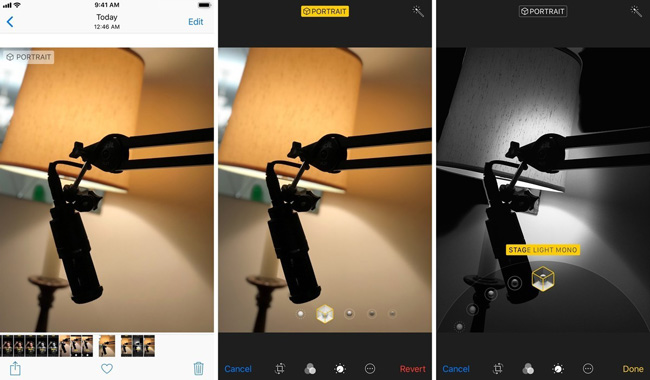
- Then, click the yellow Portrait button when it appears at the top of the screen.
- Finally, click Done.

Note: Users can only delete depth effects with photos taken on iOS 11 and above.
How to delete or change the lighting effect of photos on iPhone
Note: This feature is only available for iPhone 8 Plus or iPhone X versions.
- First, you need to open the Photos app on your device. Find photos using Portrait mode you want to edit.
- Click Edit.
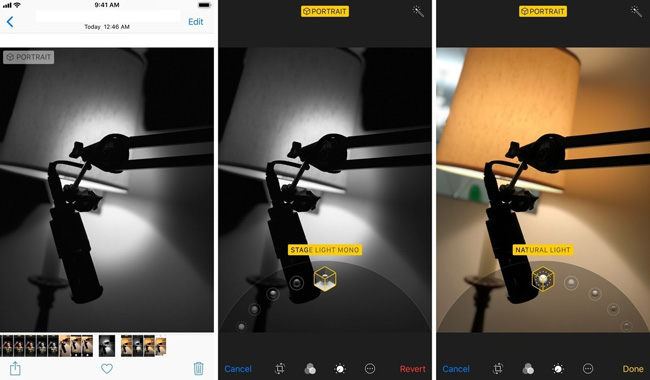
- Click on the cube in the bottom corner of the screen to open the light menu. Swipe right to return to the Natural Lighting option or select another alternative lighting effect. Finally click Done.

How to delete depth effect or lighting on macOS High Sierra
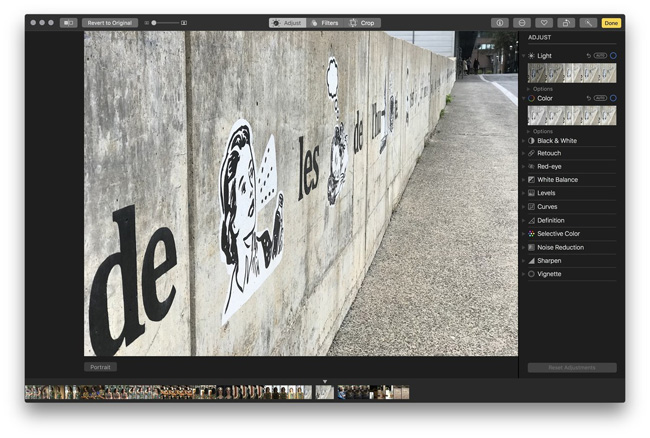
- Open Photos from the Dock or Applications folder.
- Double-click the image you want to edit.
- Click Edit.
- Then click the Portrait button at the bottom left of the edit screen to disable. You can also click on the cube if available to adjust the lighting effect.
- Finally, click Done.

Similar to iOS 11, you can go back and click the Portrait button again to restore the depth effect to the image.
Good luck!