How to update or downgrade WSL kernel on Windows 11
Windows Subsystem for Linux, or WSL, is usually updated automatically as part of regular Windows updates. But if the automatic update fails and you need to change the WSL version for any reason, you can do it manually with Command Prompt.
How to update WSL kernel in Command Prompt
The wsl.exe command line tool makes changing the Windows Subsystem for Linux kernel relatively easy.
1. In Windows Search, type cmd and select the option to run Command Prompt with admin rights. Without admin rights, you will not be able to use wsl.exe.
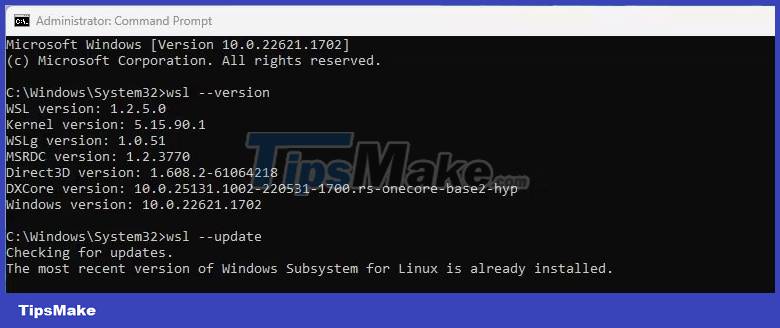
2. In Command Prompt, type wsl --version and check your current WSL version with the latest version on GitHub.
3. Assuming you are using an earlier version, type wsl --update and press Enter.

4. After a short process, WSL is now up to date. You can check by typing wsl --version again and pressing Enter.
How to restore WSL kernel to previous version
If the WSL update causes unexpected problems or breaks somehow, you can rollback to the previous version.
1. In Windows Search, type cmd and select the option to run Command Prompt with admin rights.
2. At the cursor, type wsl --update --rollback and press Enter.

3. After the restore is complete, You can check the WSL version by typing wsl --version and then pressing Enter.
Windows Subsystem for Linux will now revert to its previous version and any issues that a manual update introduces will be fixed. If the problem persists, it might be worth checking out some alternatives to WSL for running Linux distributions on Windows.
Check Windows 11 automatic update settings
Being able to update WSL manually at the command line is very useful. But you should check the automatic Windows Update settings if you don't want to update manually every time a new version is available.
- Open the Windows Settings app and navigate to Windows Update.
- Select Advanced Options and make sure that the Receive updates for other Microsoft products option is enabled.

WSL will now be updated automatically whenever a new revision is released.