How to create a Custom Kernel on Ubuntu
The idea of compiling a user's own kernel is a psychological blow for newcomers to Linux. Building the most important part of the system from scratch sounds scary. However, actually building Linux kernel is easy.
The construction of Linux kernels does not require programming. Some of the best programmers in the world have written all the code. You just need to select the features you want and put them together.
- How to enable automatic system update mode on Ubuntu
- Display IP address on the system tray on Ubuntu
- Which distro should I use with Linux?
Download the Dependency
Before using a kernel, you need to use the appropriate tools to build it. Use Apt to download Dependency from Ubuntu repositories.
sudo apt install install git build-essential kernel-package fakeroot libncurses5-dev libssl-dev ccache
Download kernel source
Now you can get the source you want to build. All kernels are available on the official Linux repository. You can view the latest stable versions in their git repository. At this time, the latest version is 4.11. This version is listed as linux-4.11.y and it will be copied with the command below.
cd ~
mkdir kernelbuild
cd kernelbuild
git clone -b linux-4.11.y git: //git.kernel.org/pub/scm/linux/kernel/git/stable/linux-stable.git

It will take a while to clone your kernel so be patient.
Set up to build the kernel
Start setup by changing the directory to a new duplicate folder. After that, it configures the current kernel into it.
linux-stable cd
cp / boot / config-'uname -r '.config
Now you need to adjust the old configuration for the new kernel.
yes '' | make oldconfig
Usually, the script will ask what you want to do with the new features, then accept the defaults. If you want to be asked, just use make oldconfig .
Configure kernel
You can leave the default configuration. However, if you do not customize, there is no point in building a custom kernel.
To customize the configuration, open make menuconfig .

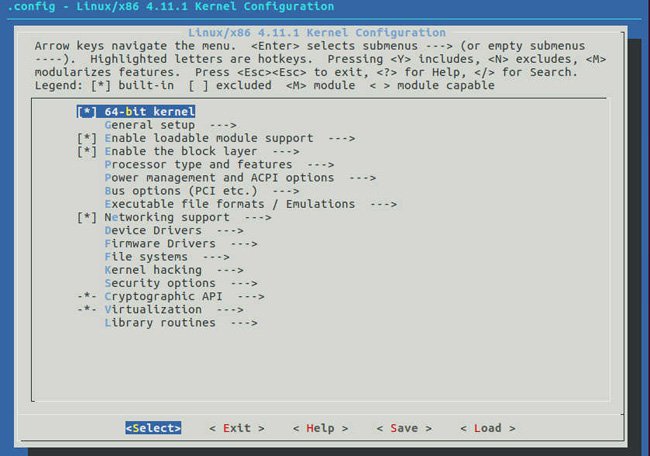
A blue menu will open with a list of headings. These categories contain features that you can choose to build your own kernel.

For example, if you really want to build direct support for the BTRFS file system into your kernel and enable other features, you can go to " File systems -> ". Then scroll down until you see " Btrfs filesystem support ". Select the option you want and press the Space key. Space bar circulates between " M ", " * " and empty file. " M " denotes the feature built as a module that will be downloaded when Ubuntu starts if necessary. " * " means that this feature will be built into a kernel and always loaded. Select file does not include empty options in the final product.
When you are done setting up, clean the folder
make clean
Now your kernel is ready to build
Build kernel packages
Ubuntu uses a method to build its kernels, but it forces users to use selected files written for older versions. Therefore, it is better to use generic Linux methods with GNU make.
make -j 'getconf _NPROCESSORS_ONLN' deb-pkg LOCALVERSION = -custom
The bold line above is to compile the kernel into packages into .deb by using a large number of CPU cores on the system. It also adds " custom " to the end of the package version to parse your custom kernel with others.
Note: It will take hours to compile a kernel. So be patient.
Install the kernel
You will find kernel packages on a directory. They are easy to identify by version number. You can use dpkg to install.
cd .
sudo dpkg -i linux-firmware-image-4.11.1-custom_4.11.1-custom-1_amd64.deb
sudo dpkg -i linux-libc-dev_4.11.1-custom-1_amd64.deb
sudo dpkg -i linux-headers-4.11.1-custom_4.11.1-custom-1_amd64.deb
sudo dpkg -i linux-image-4.11.1-custom-dbg_4.11.1-custom-1_amd64.deb
sudo dpkg -i linux-image-4.11.1-custom_4.11.1-custom-1_amd64.deb
When the installation process is finished, restart your computer. Ubuntu will automatically boot into your new kernel. You can check to see if it works by running in a terminal when it starts. If you have seen your version, congratulations. You are running your own custom kernel.
Good luck!