How to Transfer Files from Computer to iPad
Use iCloud Drive
Log in to http://www.icloud.com on your computer. Click the link or type the address into your computer's web browser, then enter your Apple ID and password, then click the arrow in the password box.
Click Create yours now if you don't have an Apple ID yet.
Click iCloud Drive . The icon is white with a blue cloud.
If you want to save the file to a specific folder, click the folder you want to save it to.
Click the "Upload" icon. The icon is an upward-facing arrow in a cloud at the top of the window.
Select the file you want to upload and click Open or Choose .
Open the iCloud Drive app on iPad. The app is white with a blue cloud.
If prompted, follow the onscreen instructions to sign in or set up an iCloud profile.
If your iPad doesn't have iCloud Drive pre-installed, you can find it in the App Store, then click GET , and click INSTALL to download the software.
Click on the file you just saved. If saving in a folder, first click on the folder.
You need to be connected to the Internet to access the file you just transferred for the first time.
Use Google Drive
Sign in to http://drive.google.com on your computer. Use the link or type the address into your computer's web browser, then enter your Gmail address and password, then click SIGN IN .
Click Create account if you don't have a Google account.
Click NEW . The blue button is in the upper left corner of the window.
If you want to save the file to a specific folder, click the folder you want to save it to.
Click File upload .
Select the file you want to upload and click Open or Choose .
Open Google Drive. The app is white with a blue, green, and yellow triangle icon.
Sign in if you aren't automatically signed in already.
If your iPad doesn't have Google Drive pre-installed, find the app in the App Store, then click GET , and click INSTALL to download the app.
Click on the file you just saved. The file may be located in the upper left corner of the screen in the "Quick Access" section.
You need to be connected to the Internet to access the file you transferred for the first time.
Click ⋮ . The button is located in the upper right corner of the screen.
Turn "Available offline" to "On" (blue). The button is next to a circle icon with a white tick mark.
Click the file name at the top of the screen. The file is now downloaded and available offline on iPad, as well as Google Drive cloud servers.
You can view and customize files offline without an Internet connection.
Use Microsoft One Drive for iPad
Sign in to http://onedrive.live.com on your computer. Use the link or type the address into your computer's web browser, click Sign In , then log in with your Microsoft account email and password, then click Sign in .
Click Sign up for free if you don't have a Microsoft account.
Choose a location to save the file.
If you want to save the file to a specific folder, click the folder you want to save it to.
Click ↑Upload . The card is located in the top left center of the screen.
If prompted, click Files or Folder .
Select the file you want to upload and click Open or Choose .
Open the OneDrive app. The icon is blue with a white cloud.
Sign in if you aren't automatically signed in already.
If your iPad doesn't have OneDrive pre-installed, find the app in the App Store, then click GET , and click INSTALL to download.
Click the file you saved to OneDrive. If you save the file to a folder, click the folder first.
You need to be connected to the Internet to access the file you transferred for the first time.
Click ⋮ . The button is located in the upper right corner of the screen.
Click Make Available Offline . The button is next to the umbrella icon. Files are now saved locally on iPad, as well as in the cloud so you can view and customize them without an Internet connection.
Use Dropbox
Log in to http://www.dropbox.com on your computer. Use the link or type the address into your computer's web browser, click Sign In , then log in with your Microsoft account email and password, then click Sign in .
Click Get Dropbox Basic if you don't have a Dropbox account.
Click Upload files . The button is blue at the top right of the window.
If you want to save the file to a specific folder, click the folder you want to save it to.
Click Choose files .
Select the file you want to transfer to iPad and click Open or Choose .
Open the Dropbox app. The app is white with a blue box icon.
Sign in if you weren't automatically signed in.
If your iPad doesn't have Dropbox pre-installed, find the app in the App Store, then click GET , and click INSTALL to download the app.
Click the file you saved in Dropbox. If you save to a folder, click the folder first.
You need an Internet connection to access the file you first transferred.
Click … . The button is located in the upper right corner of the screen.
Click Make Available Offline . Files are now saved locally on iPad, as well as in cloud storage so you can view and customize without an Internet connection.
Use email
Open email software or visit the website to access your email account on your computer.
Compose a new message.

Send the message to an email address you can access on your iPad.
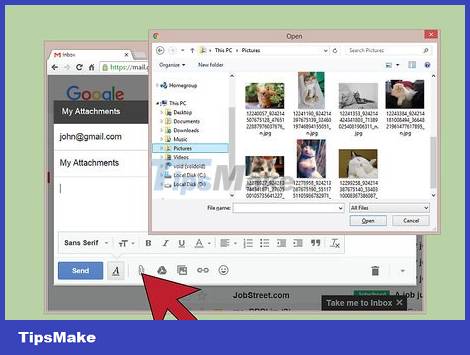
Attach the file you want to transfer. The "attach files" button sometimes has a paper clip icon.
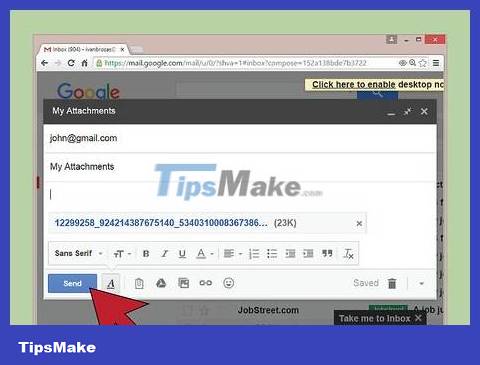
Mailing.
Open the email app you use on your iPad.
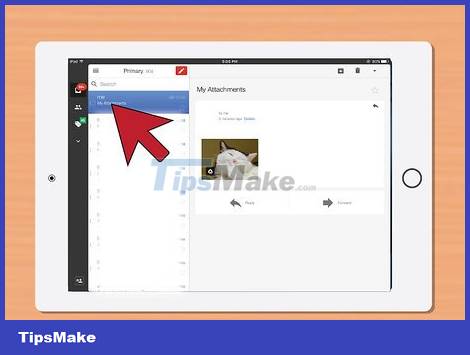
Click the message you sent yourself.
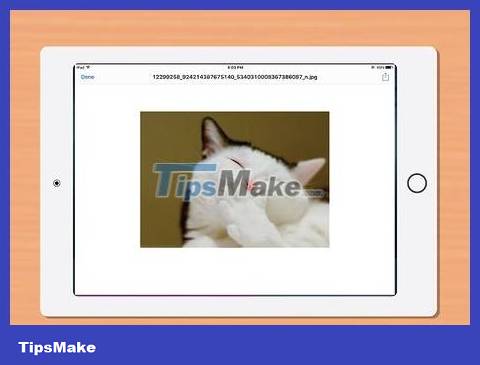
Click on the attachment to open the file. The file will be opened using the support application or preview mode in the email application.
Use iTunes
Connect iPad to computer. Using the cable that came with the device, connect the USB end to the computer and the other end to the iPad charging port.
Open iTunes on your computer. The app has a circular icon with colorful music notes.
Click the iPad icon. The icon is on the top left of the iTunes window.
Click Apps . The button is on the left side of the iTunes window.
Scroll down and click on the app. Select the app where you want to view files on your iPad in the "File Sharing" section of the iTunes window.
There are only a few apps that can accept file transfers using iTunes, such as Word for iPad and Pages.
Click Add… (Add). The button is in the bottom right corner of the iTunes window.
Select file. Use the dialog box to find the file you want to save to iPad.
Click Add . The file has been saved to iPad.
To view the file, open the iPad app that saved the file, then click the file.