Table of Contents
This practical guide walks through how to make SSD boot Windows faster, explains the main requirements, and highlights common issues that may appear along the way.
Tips to help SSD boot Windows fastest
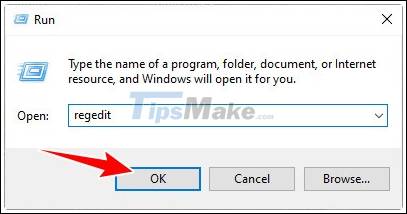
Step 1: At the main interface of the Windows screen, press Windows + R, enter regedit in the Run box => click OK (or Enter).
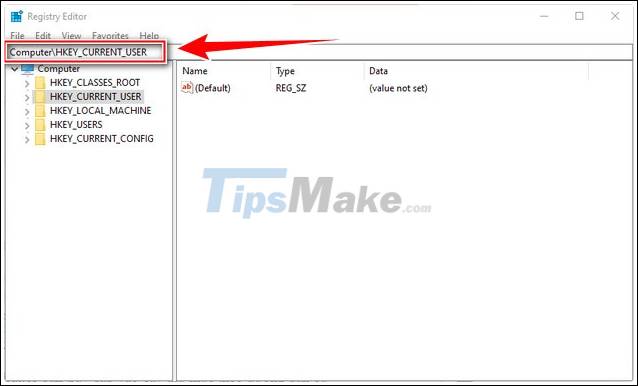
Step 2: In the Registry Editor settings panel, access the tree under the specific path below (or copy the entire line into the search bar)
HKEY_LOCAL_MACHINESOFTWAREMicrosoftWindowsCurrentVersion
Step 3: Next Right-click on the Explorer folder => New => Key.

Step 4: Name the newly created folder in Step 3 as Serialize. (use F2 on computer keyboard to change folder name faster)

Step 5: Continue to right-click Serialize => New => DWORD (32-bit) Value.

Step 6: Name the newly created file on the right side as StartupDelayInMSec.
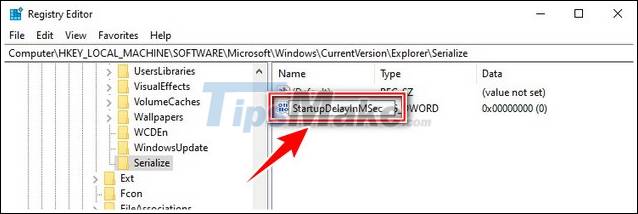
Step 7: Click directly on the file StartupDelayInMSec set the parameter Value data is number 0 => tick select Hexadecimal side as shown below => click OK.

In case you want to remove the mode that helps the SSD to start Windows quickly, load individual data before entering the OS, just delete the file just created in the steps above (StartupDelayInMSec). If it feels good, don't forget to share it with everyone so they can all know as you.
Key Takeaways
Use the information above as a practical reference for how to make SSD boot Windows faster. Review each step carefully, confirm any requirements, and choose the option that best fits your situation.
FAQ
What does this guide explain about Make SSD Boot Windows Faster?
It explains the main concepts, practical considerations, and useful steps related to make SSD boot Windows faster without requiring advanced knowledge.
Who can benefit from learning about Make SSD Boot Windows Faster?
This information is useful for readers who want a clear overview, practical guidance, and reliable steps related to make SSD boot Windows faster.
What should I check before applying this information?
Review the requirements, confirm that your device, software, or situation matches the instructions, and back up important data before making major changes.
Related Articles
 'Clear the Way' for Win XP to Boot Faster (Part 1)1 minutes read
 Start Windows Faster: How to Make Windows Boot Faster11 minutes read
 How to Fix Boot Errors on Windows 88 minutes read
 Tips to Help Win 10 Boot Faster: How to Speed Up Windows 109 minutes read
 Simple Ways to Help Your Windows PC Boot Faster8 minutes read
 Click: How to Make Windows 10 Start up Faster2 minutes read
Reader Comments 0
Sign in with email or Google to join the discussion.