How to Install Fusion on Kodi
Kodi is an open-source media center program that allows you to play videos, music, pictures, games, and more on compatible devices. Fusion is an add-on application for Kodi that allows you to download and install add-ons that can enhance....
Part 1 of 2:
Installing Kodi
-
 Navigate to Kodi's official website at www.kodi.tv/download/. This web page features all Kodi installers for all compatible devices.
- If XBMC / Kodi is already installed on your device, skip to Part Two of this article to install Fusion.
-
 Click on the installer link next to the device on which you plan on using Kodi. A downloads dialog box or prompt will display on-screen.
 -
 Select the option to install Kodi on your device, then follow the on-screen prompts to complete installation. The installation process will vary depending on the device you're using.
 -
 Restart your device or computer after Kodi has completed installation. Your device is now ready for the installation of Fusion.
Part 2 of 2:
Installing Fusion
-
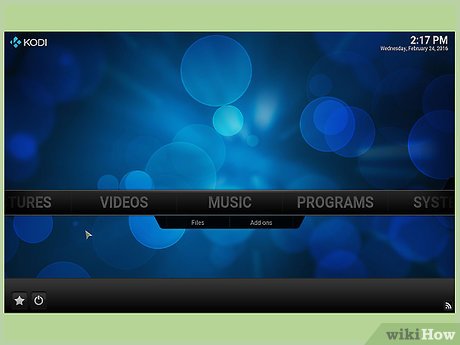 Launch Kodi on your device or computer.
 -
 Select 'System,' then select 'File Manager.'
 -
 Select 'Add Source,' then select 'None' when prompted to enter a path for the media locations.
 -
 Type the following URL into the field provided, then select 'Done:' http://fusion.tvaddons.ag/
- Select 'Symbols' in the on-screen keyboard to enter colons, periods, and slashes.
-
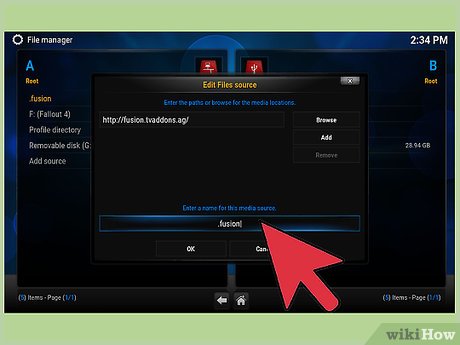 Highlight the box displayed below 'Enter a name for this media Source,' then type '.fusion.'
 -
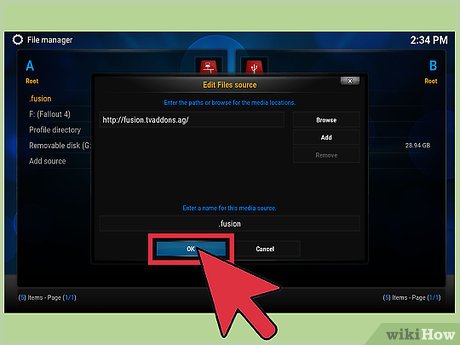 Select 'OK,' then navigate back to the Home screen of XBMC / Kodi.
 -
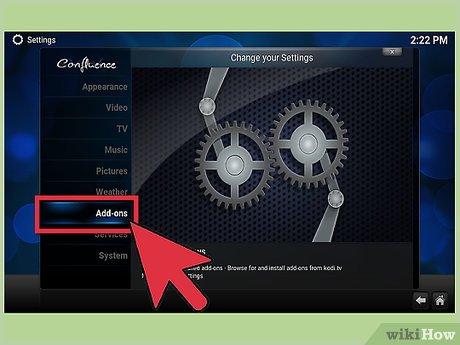 Select 'System,' then select 'Add-ons.'
- Select 'OK' if a 'First run help…' message displays on-screen.
-
 Click on 'Install from zip file,' then select '.fusion' from the list of files provided.
 -
 Select 'xbmc-repos,' then select 'OK.' Fusion is now installed, and you now have the ability to browse and install add-ons from multiple sources using Fusion.[1]