How to Insert Graphics Into PageMaker Documents
There are good news and bad news about inserting a graphic into PageMaker. The good news is that it's easy. The bad news is that it's obsolete. Your best bet would be to upgrade to the newer InDesign. If, for some reason, you're stuck...
Table of Contents
Method 1 of 2:
Selecting and Dragging Your Picture
-
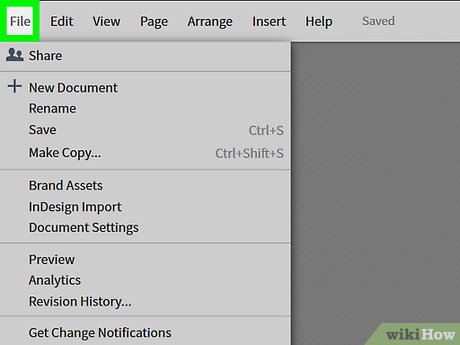 Go to File > Place. Then, browse to and select your desired graphic. Your cursor will turn into a box.
 -
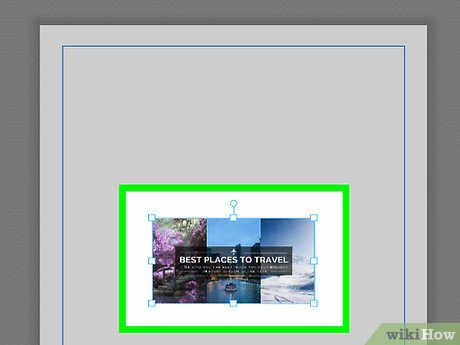 Click to drop your graphic where you want it on the page.
Method 2 of 2:
Using a Placeholder
-
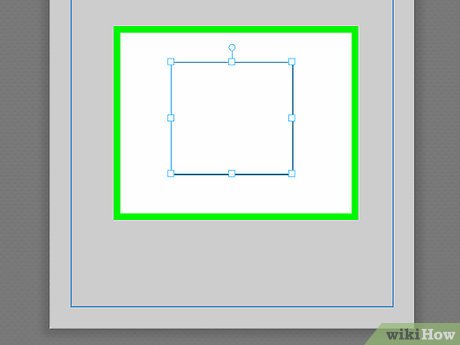 Create a placeholder by drawing a rectangle on the page where you want the graphic.
 -
 Select the placeholder then File > Place.
 -
 Browse to and select your desired graphic. Your graphic will appear in the rectangle.
 -
 Use Edit > Object > Fit to fit the graphic to the placeholder as desired.
Was this article helpful?
Your feedback helps us improve.
Related Articles
 How to add graphics to Word documents 20199 minutes read
 MS Word - Lesson 9: Insert pictures, mathematical characters, especially on documents4 minutes read
 MS PowerPoint 2007 - Lesson 7: Insert images and graphics in the slide3 minutes read
 Insert special characters in Word documents2 minutes read
 How to Insert Symbols into Word Documents4 minutes read
 MS Excel 2007 - Lesson 9: Insert images and graphics into a spreadsheet3 minutes read
Reader Comments 0
Sign in with email or Google to join the discussion.