How to fix common errors on MEmu . emulator
MEmu is an Android emulator on PC, allowing users to experience Android games right on their computer. The following article Tipsmake will guide you on how to fix common errors on the MEmu emulator.
1. "Failure to initialize" error on MEmu
Sometimes in the process of opening Android applications or games on the MEmu emulator, you may encounter a "Failure to initialize" error.
There are many causes of this error, it can be due to:
- Application crashes or "Failure to initialize" errors may be caused by AMD CPUs.
Solution: If possible, you can switch to using Intel's CPU or alternatively send the name of the faulty application to support@microvirt.com.
- If the error is related to the graphics, it may be because you have set the wrong graphics display mode.
Solution: Change the render mode in the System Settings or send the name of the application that is failing to support@microvirt.com.

- In case if the error is related to security or the emulator, the cause may be the application developer blocking the emulator.
Solution: send the faulty application name to support@microvirt.com.
- If in the process of running the application on the MEmu emulator, an error occurs as shown in the image below, and you are using AMD CPU. The cause of the error may be the missing x86 lib.so file.

The solution is to send the application name and specific description of the error, and send it to support@microvirt.com.
2. MEmu emulator launch failed error
Failed MEmu emulator launch error can be caused by:
- Windows operating system crashes, crashes or due to sudden power failure causes MEmu disk image to be corrupted or damaged.
Solution: Create a new MEmu using Multi-MEmu.
- Anti-virus software like AVAST blocks specific files in MEmu.
Solution: Disable anti-virus software and programs and create new MEmu using Multi-MEmu.
- MEmu installation is not completed due to restricted environment and anti-virus software.
Solution: reinstall the software under Admin and disable anti-virus software and programs.
In addition to MEmu, readers can also use other Android emulators here such as Noxplayer, BlueStacks, LDplayer. These are the most popular Android fake software today.
3. Error "MEmu failed to start, please reboot the computer and try again."
The cause of the error "MEmu failed to start, please reboot the computer and try again." may be because the emulator installation file is corrupted, corrupted, or it may be due to some other reason. .
Solution: to fix "MEmu failed to start, please reboot the computer and try again." error, the simple way is to uninstall MEmu, then restart the computer, download and install simulate again.
4. MEmu emulator crashes 59%, 99%
To fix the error MEmu crashes 59%, 99, follow the steps below:
Step 1: Create a new MEmu using Multi-MEmu
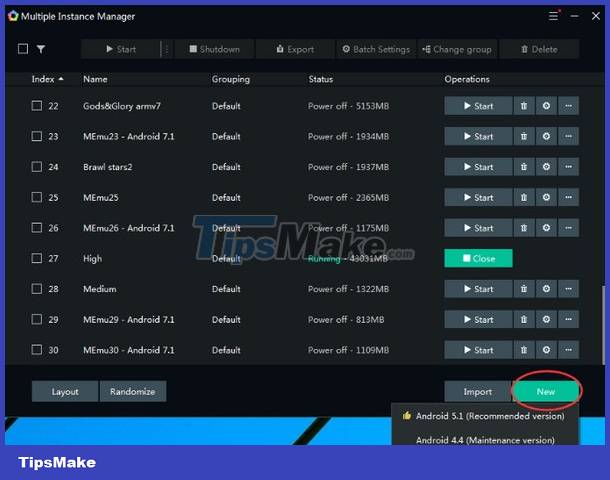
Wait until the MEmu creation is finished, then run the emulator.
Step 2: Update the graphics driver
- Download 3DP Chip to your device and install.
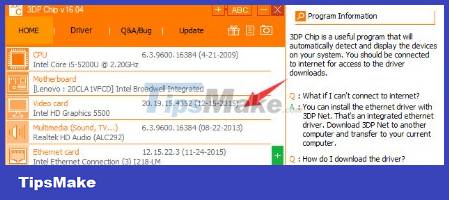
Download 3DP Chip to your device and install it here.
=> Link to download 3DP Chip Portable for PC
- Run the tool and select your discrete graphics card to upgrade.
- Click Driver download to redirect to the driver download page.
- Select the appropriate driver version for your computer to download and install.
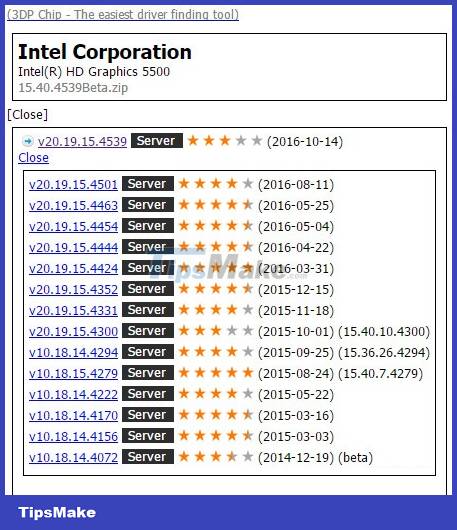
- After installing the graphics driver, the next step is to open the MEmu emulator.
Step 3: Switch to Render mode
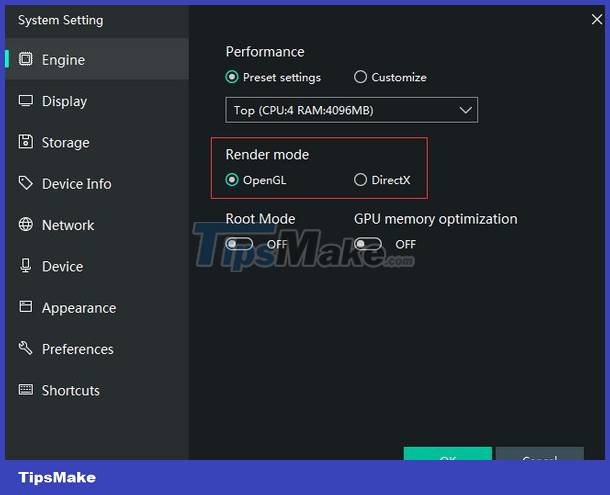
- Open Multi-MEmu, then click to select each emulator settings.

- Switch render mode from OpenGL to DirectX, then relaunch the emulator.
Step 4: Activate VT
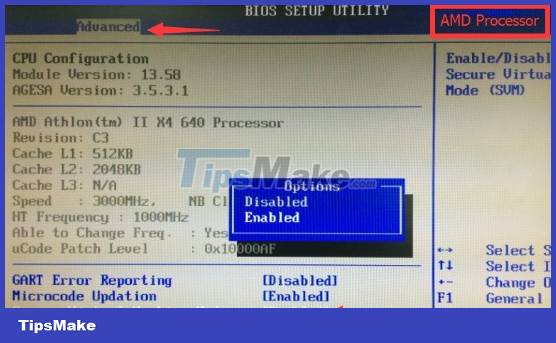
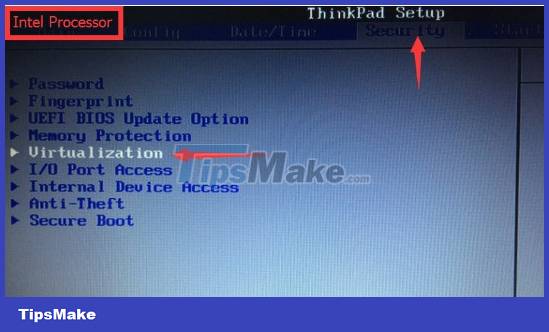
- Open BIOS Setup Utility to enable Virtualization Technology.
To open BIOS Setup, follow the steps below:
- Turn off your computer and wait about 5 seconds then turn it back on.
- During the computer startup, the Windows logo is not displayed, repeatedly press the Esc key (this key may change, depending on the computer model you are using).
- Press the F10 key to open the BIOS Setup Utility.
- Toggle the option to Enabled.
- Save and exit the BIOS Setup Utility window.
On AMD CPUs:
On Intel CPUs:
5. Error MEmu loads 100%
The cause of MEmu loading error 100% may be due to anti-virus software blocking Android startup.
Solution: Disable anti-virus software and programs and create new MEmu using Multi-MEmu.
6. "MEmu is starting" error on Android home screen
The cause of this error is network socket.
Solution: Run the command "netsh winsock reset" on Command Prompt and restart the computer.
The above article Tipsmake has just shown you how to fix common errors on the MEmu emulator. In addition, if there are any questions or questions that need to be answered such as the summary of causes and how to fix BlueStacks errors, readers can leave their comments in the comments section below the article.