How to Easily Create Time-lapse Videos from Photos on Windows
You can easily create impressive time-lapse videos from your photo collection on Windows without any expensive or complicated video editing software..
Whether you are capturing blooming flowers, bustling streets, or a moving sky, turning still photos into a series of moving images will bring your memories to life. You can easily create impressive time-lapse videos from your photo collection on Windows without any expensive or complicated video editing software. This tutorial will show you how to create time-lapse videos on Windows.
Create Time-Lapse Video
To create a time-lapse video, you'll need to have a sequence of photos in Windows. It's a good idea to put them all in a single folder for easy importing. You can also adjust the names if you want to change the final sequence of time-lapse photos. For most people, sorting by date taken will work, but for customization, adding a number to the end of the name will help you align the sequence.
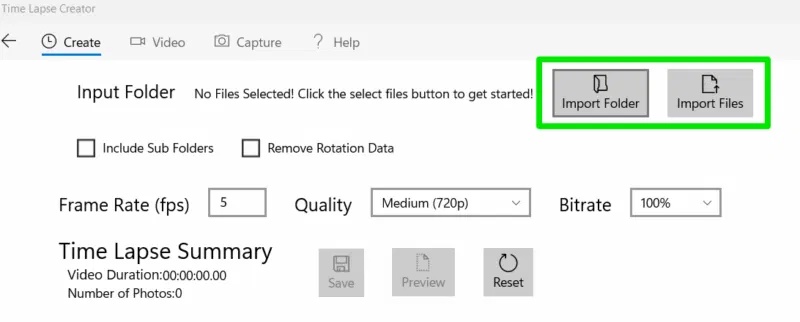
We will be using the Time-Lapse Creator app because it is completely free and very easy to use. To create a time-lapse video, click Import Folder and select the folder containing all of your photos. If you only want to import specific photos, click Import Files .
The tool has a variety of settings to adjust, which will be applied when you click the Preview button . The frame rate (FPS) is the most important parameter, as it determines how many photos are displayed per second. FPS depends on the total number of photos you have and the length of the video you want. In general, try to capture enough photos to create a 24-30FPS video for the desired length, such as 600 photos for a 20-second 30 FPS time-lapse video.
Quality and Bitrate directly determine the size of the final video and the quality of the image. In our tests, if both were set to maximum, the final video size would be slightly smaller than the original size of the image provided. Be careful with reducing quality and bitrate, as they are very drastic and you will notice a drop in quality even at medium settings (and a significant drop in file size as well).
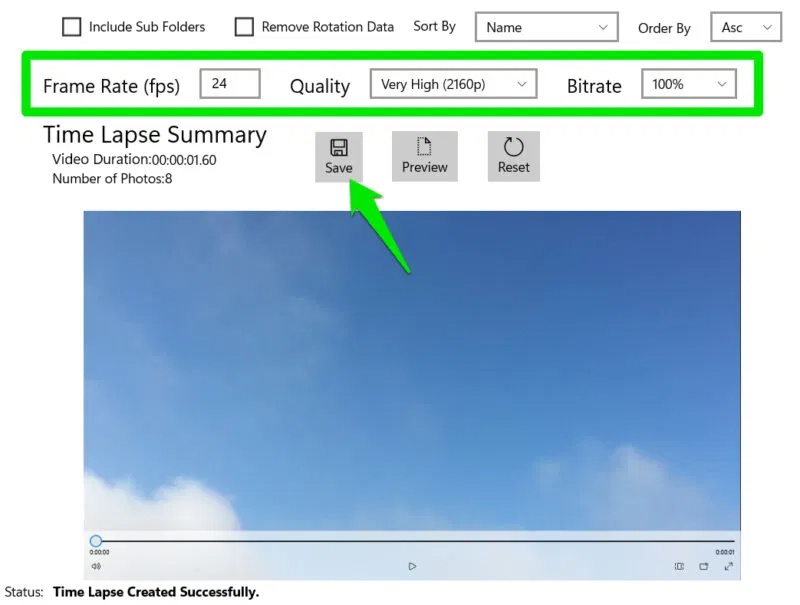
When you're done, click Save and you can save the video in MP4 format . Time Lapse Creator also has options to create time-lapses from videos and capture images from your webcam, but they're not as powerful as dedicated tools for this purpose.
Alternative time-lapse apps for Windows
Apart from Time Lapse Creator, there are a number of other handy time-lapse creation tools for Windows with their own unique features.
Here are some of the most reliable and free Windows time-lapse apps:
- MakeAVI : A simple yet powerful time-lapse creator that allows you to crop frames, adjust photo sequences, and save them in AVI format , uncompressed for the highest quality.
- Time Lapse Live : A basic app with just the option to select a photo and set FPS. Great if you want a simple solution.
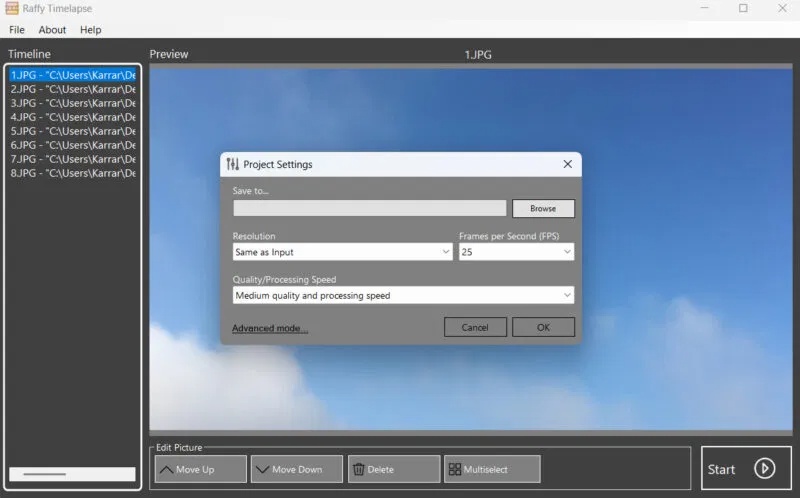
- Raffy Timelapse : Allows you to manage multiple projects at once and has an automatic settings system that applies the best settings based on the images provided.
For best results, make sure your photos have a consistent focus and context; otherwise, they'll look like a photo slideshow too quickly. Also, make sure you use the proper file-sharing method when moving photos from your phone to your PC to avoid losing quality.