Table of Contents
The following guide provides a clear overview of Christmas cards, with the most relevant background, details, and practical takeaways.
Christmas Cards Overview
Before you start creating Christmas cards, you need to prepare the pictures you want to put on your card.
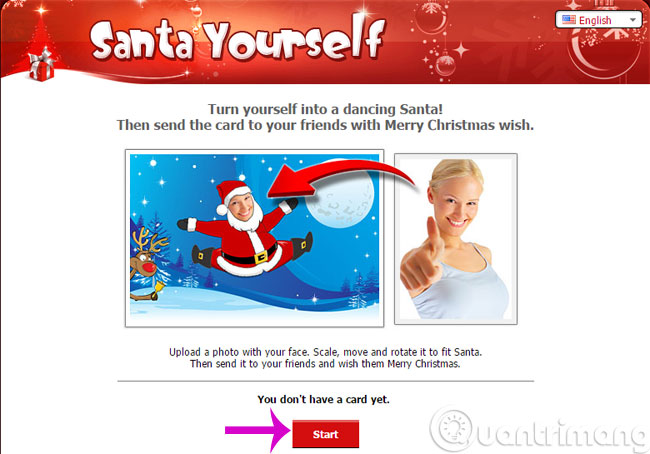
Step 1: Visit the Santa Yourself website and press Start to get started
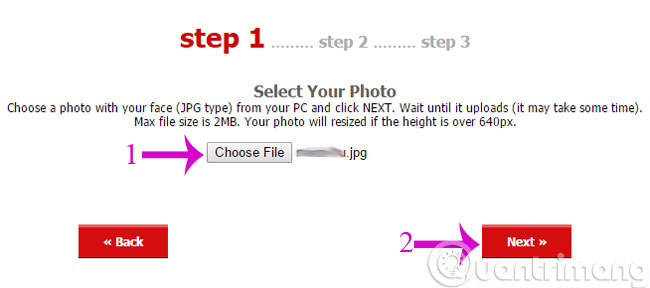
Step 2: When the Select your photo interface appears, select the picture you want the most (maximum size of 2MB) by clicking Choose. Then click Next to move to the next step.
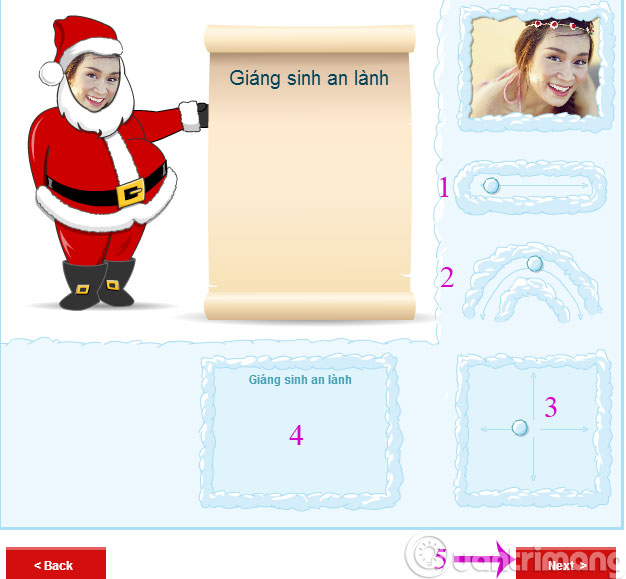
Step 3: In the next window, align the face of the photo by dragging the slider and writing the greeting as instructed below. Then, click Next to continue.
- Photo stretch
- Rotate photos
- Move photos
- Write wishes
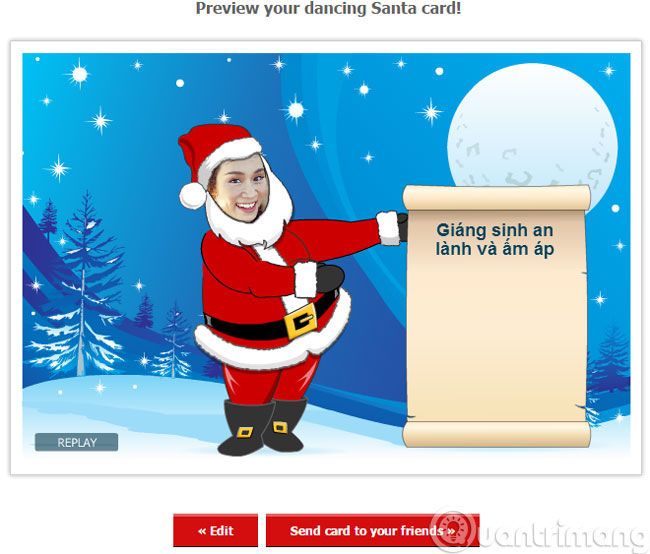
Step 4: You will be given a preview of your card. If you want to edit, click Edit and if you are fine, click Send card to your friends.
Step 5: Copy the link below to send to friends or share on Facebook, Twitter.
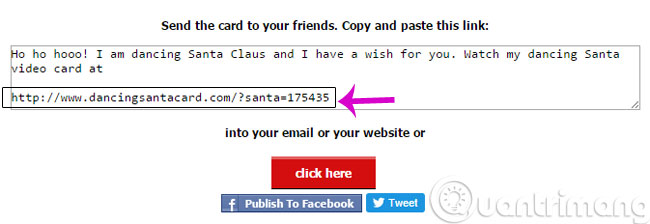
Thus, in just 5 simple steps, you have created a personalized Christmas card to give to your loved ones.
- Create Christmas cards in Photoshop
- Make a Christmas card with Fotojet
- How does Christmas snowman animation effect?
Having fun!
FAQ
How does Christmas cards work?
The following guide provides a clear overview of Christmas cards, with the most relevant background, details, and practical takeaways.
What should you prepare before using this method?
Christmas Cards Overview Before you start creating Christmas cards, you need to prepare the pictures you want to put on your card.
What should you do if the process does not work as expected?
Step 1: Visit the Santa Yourself website and press Start to get started Step 2: When the Select your photo interface appears, select the picture you want the most (maximum size of 2MB) by clicking Choose.
Related Articles
 Photoshop: Create Your Own Christmas Cards6 minutes read
 How to Create Christmas Cards on Smartphones6 minutes read
 Make a Christmas Card with Fotojet: Christmas Cards3 minutes read
 How to Create Cards 8/3, Celebrate International Women's Day4 minutes read
 Photoshop: Create a Christmas Card with a Decorative Sphere5 minutes read
 Guide 22 Ways to Make Beautiful Christmas Cards and Very Easy5 minutes read
Reader Comments 0
Sign in with email or Google to join the discussion.