Instructions for using Photoshop CS6 (Part 7): Creating Christmas cards with Christmas balls on a Stylish background
In this Photoshop CS6 tutorial series, we will continue to learn how to create Christmas cards with Christmas balls on a Stylish background!
In this tutorial, we will continue to learn how to create Christmas cards on a Stylish background with Christmas balls using Adobe Photoshop CS6. Here will use advanced coupling techniques, layer style effects, custom shapes and brushes to create an impressive Christmas card.
- 45 smart Photoshop tips you need to know (Part 1)
Start working by creating a new document ( Ctrl + N ) in Adobe Photoshop CS6 with dimensions of 1000px x 1000px ( RGB color mode), resolution of 72 pixels / inch . Click the Add a layer style icon at the bottom of the Layers panel and select Gradient Overlay .

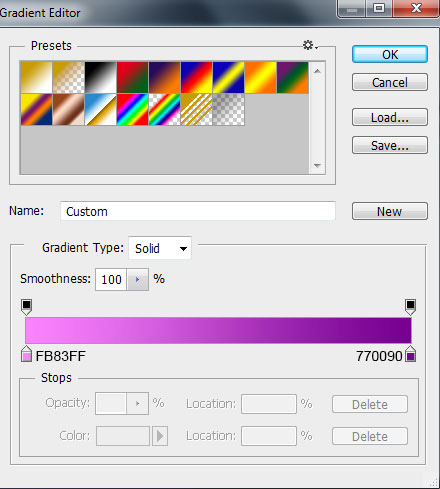
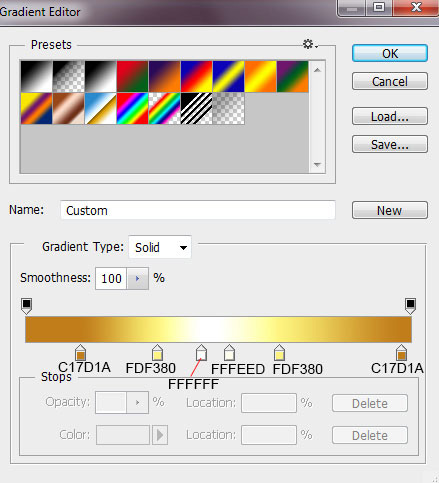
Click the color bar to open the Gradient Editor and set the color stops as shown. Click OK to close the Gradient Editor dialog box.
We have the background:

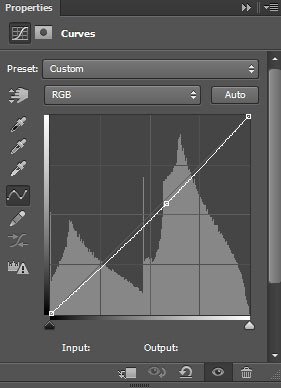
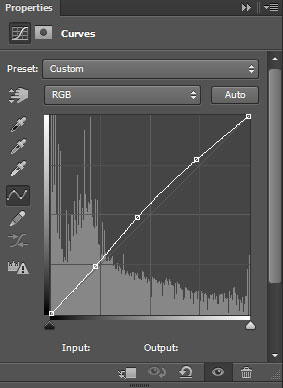
Click Create new fill or adjustment layer from the bottom part of the Layers panel and click Curves to adjust the curve as shown to make some minor color modifications.
We have the next result:

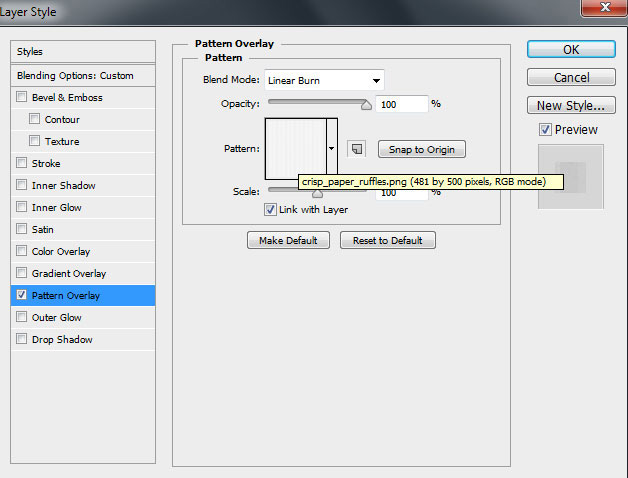
Find patterns, here use Crisp Paper Ruffles from Subtlepatterns.com. If you like, you can replace your own pattern. Open it in Adobe Photoshop and select Edit > Define Pattern . Enter a name for this template in the Pattern Name dialog box.

Next, create a new layer and set the Fill to 0% for this layer. Click the Add a layer style icon in the bottom part of the Layers panel and select Pattern Overlay . Click the Pattern Overlay dialog box and find the pattern created earlier in the list.
We have the background:

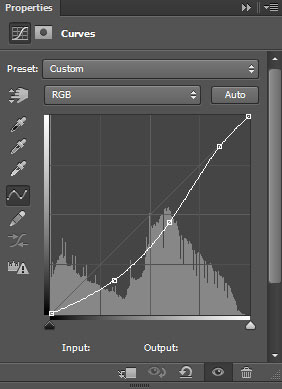
Click Create new fill or adjustment layer from the bottom part of the Layers panel and click Curves to adjust the curve as shown.
We have the next result:

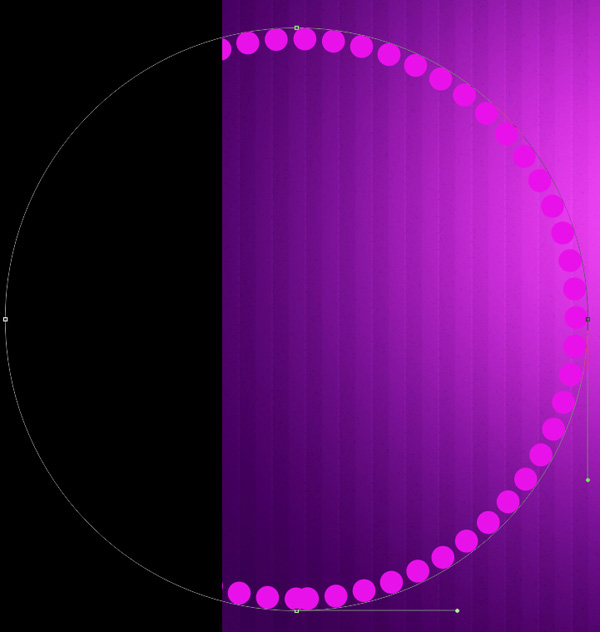
Use the Ellipse Tool (U) to draw a large circle.

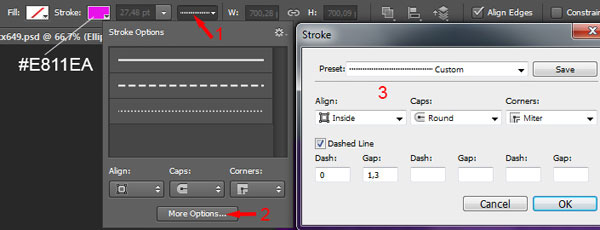
In Adobe Photoshop CS6 , there is now a convenient Stroke option on the Options Bar when drawing a shape. Use the drop down menu to set the next Stroke option for the circle, set Fill to None , Stroke color to # 811EA and Stroke type to Dotted.
We have the next result:
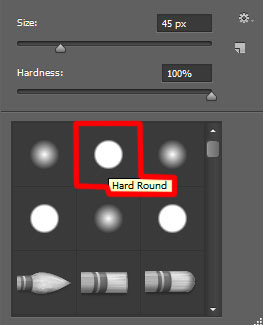
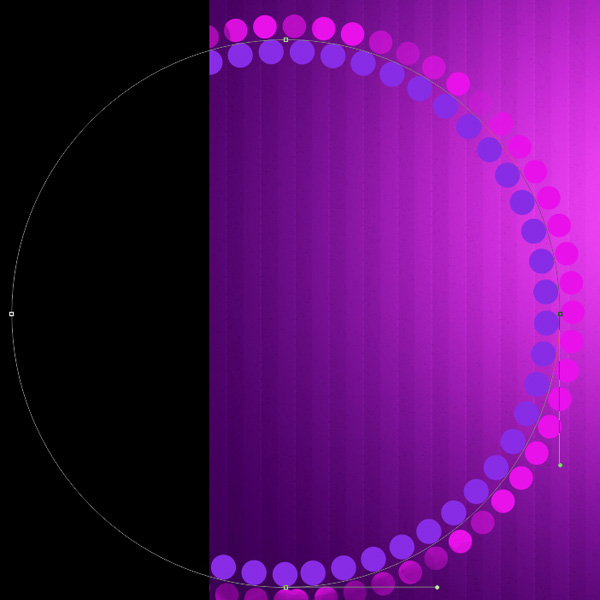
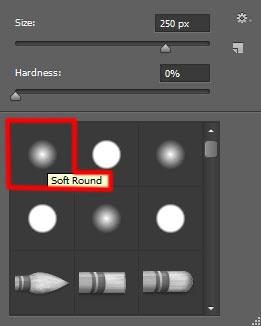
Insert a mask for this layer by selecting Add layer mask at the bottom of the Layers panel and selecting the Hard Round black brush (set the Opacity to 20% in the Options bar).
Paint in the mask using this brush to hide some circles:

Use the same Ellipse Tool (U) to draw the next circle and the same Stroke option ( Stroke's color is # 882CE5 ).
Insert a mask for this layer and hide some circles, using the same Hard Round brush.

Next draw another circle using the Ellipse Tool (U) and set the next Stroke options in the Options bar :

Stroke color is # 6D2DB9 . We have the next result:
Insert a mask for this layer by selecting Add layer mask at the bottom of the Layers panel and selecting the Hard Round black brush (set the Opacity to 20% in the Options bar).

Paint in the mask using this brush to hide some circles.

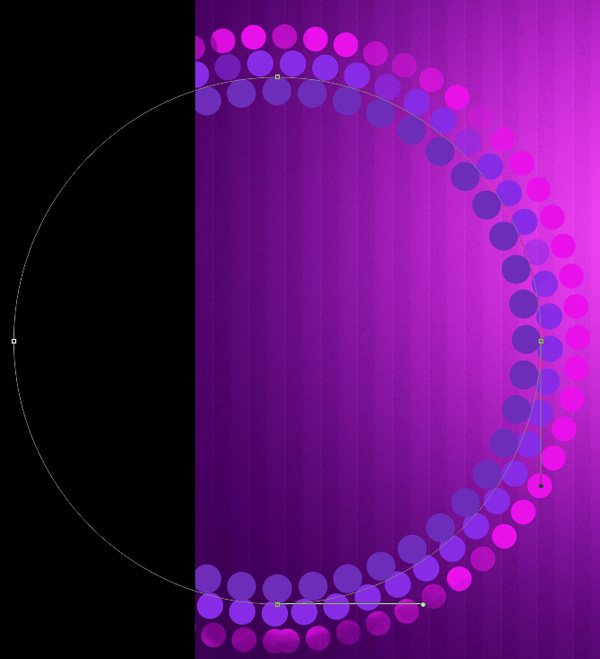
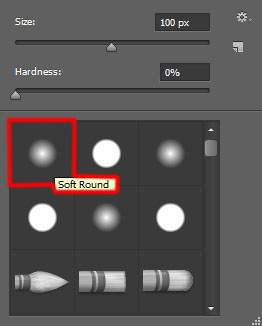
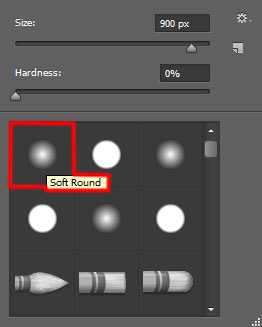
Group all the layers containing the circle into a group (press the CTRL button to select the layers and hold the left mouse button while dragging the selected layers into the Create a new group icon from the bottom part of the Layers panel). Insert the mask into the group and then select Soft Round brush with black color ( Opacity of this brush is 30% ).
Paint in the mask using this brush to hide the circle as shown:

Similar to the above, we will draw two more circle groups. Insert the mask into the groups and hide the circle exactly as shown on the image using the same brush.

Use the Ellipse Tool (U) to draw a Christmas ball.

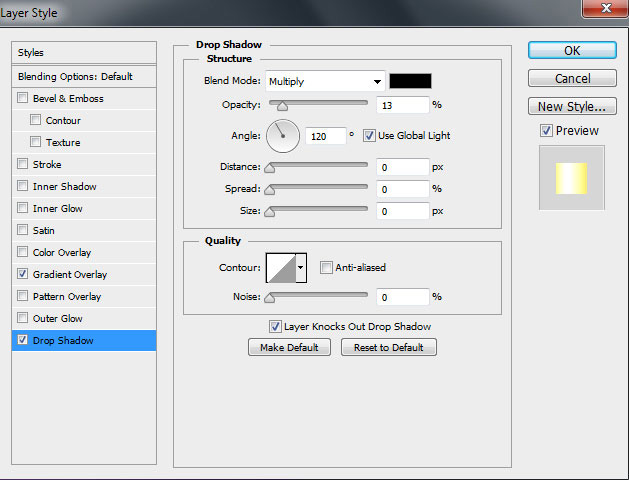
Click the icon Add a layer style from the bottom part of the Layers panel and select Inner Glow .
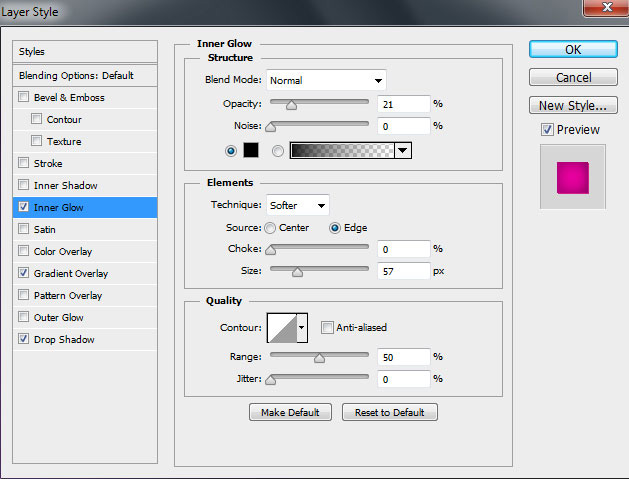
Select Gradient Overlay :
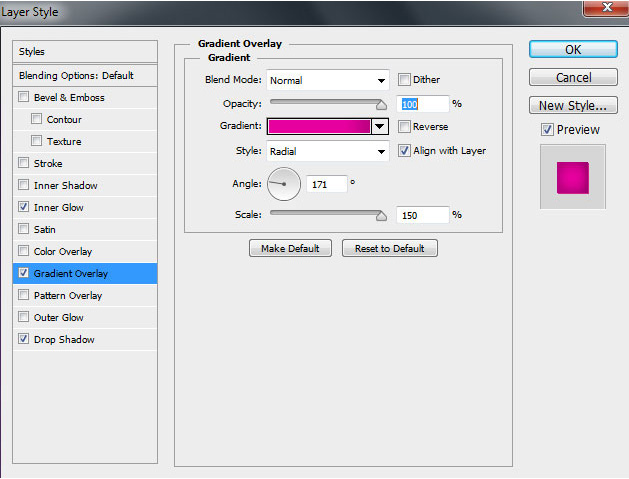
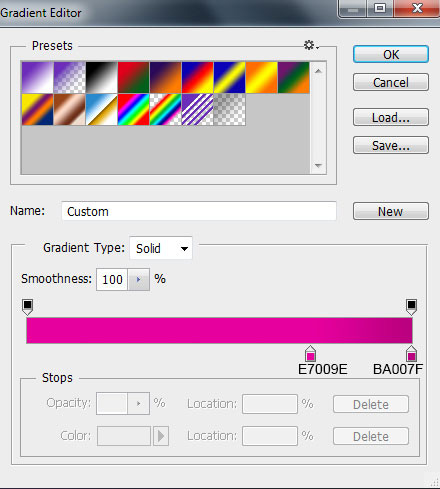
Click the color bar to open the Gradient Editor and set the color stops as shown. Click OK to close the Gradient Editor dialog box.
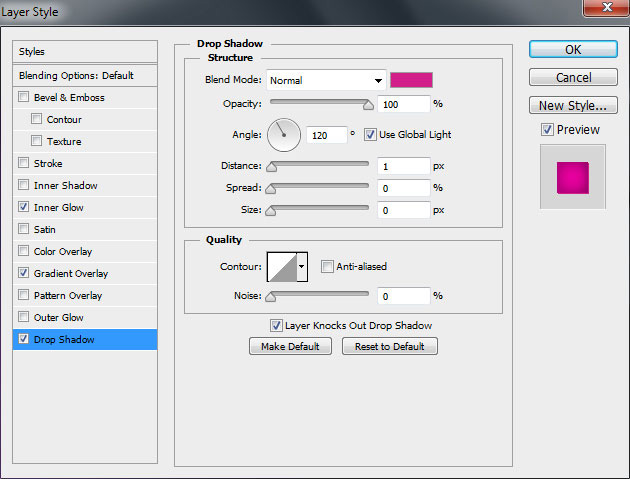
Select Drop Shadow :
We have the next image:

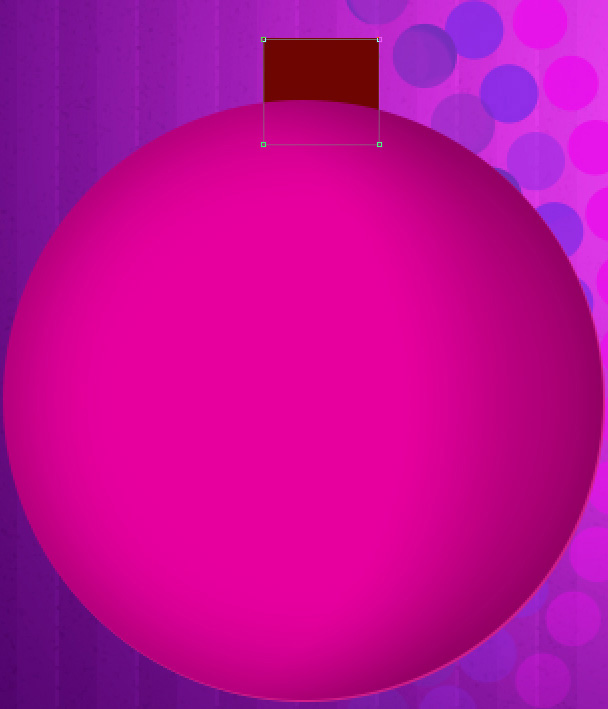
Next, we will draw the support for the ball using the Rectangle Tool (U) to draw the next rectangle, this layer must be below the layer of the ball.
Click the Add a layer style icon from the bottom part of the Layers panel and select Gradient Overlay .
Click the color bar to open the Gradient Editor and set the color stops as shown. Click OK to close the Gradient Editor dialog box.
We have the next result:
Use the same tool to represent a horizontal line above the ball button.
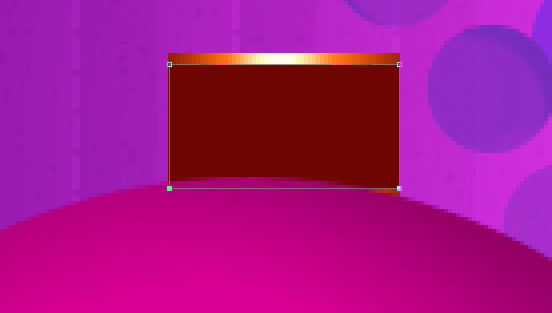
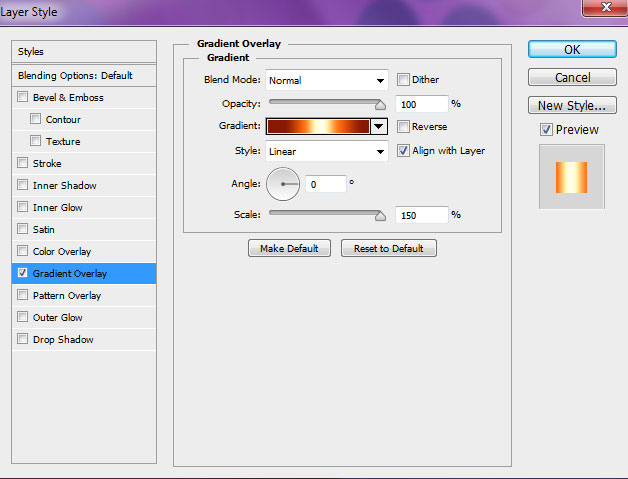
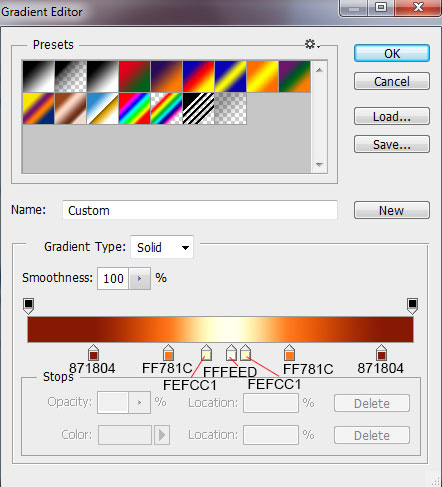
Click the Add a layer style icon from the bottom part of the Layers panel and select Gradient Overlay .
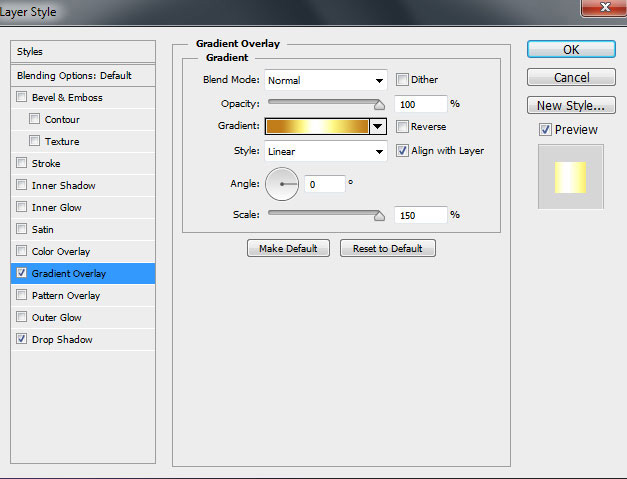
Click the color bar to open the Gradient Editor and set the color stops as shown. Click OK to close the Gradient Editor dialog box .
Add Drop Shadow :
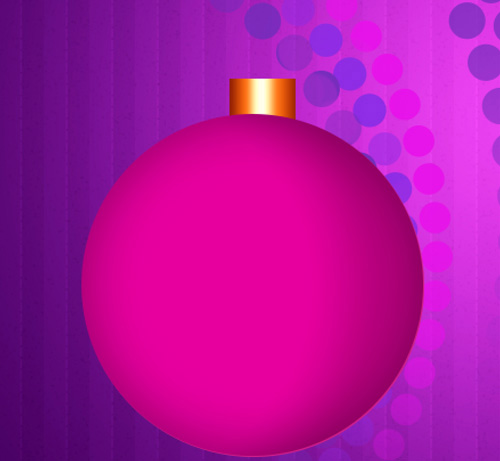
We have the next result:

Create a new layer and apply a Soft Round white brush ( Opacity of this brush is 15% ).
Use this brush to show the shine effect (shining effect) for the top part of the Christmas ball.

Next, we will draw a highlight on the ball in the bottom left, select the Ellipse Tool (U) draw the next circle.

Insert the mask into this layer by selecting Add layer mask at the bottom of the Layers panel. Press Ctrl + I to invert the color, select Soft Round white brush.

Paint in the mask using this brush to hide the highlight.

Next, download a set of custom snowflakes named Decorative Snowflakes Shapes.
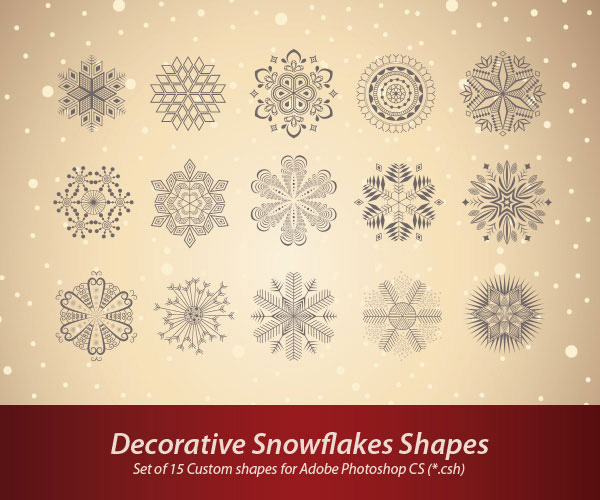
Select the Custom Shape Tool (U) in the Tools bar and Click Shape in the Options bar to open the selection menu. Find the decorative snowflake shape at the bottom of the menu and then double-click the thumbnail of the shape to select it. Click and drag to draw a snowflake shape as shown.

Here, we will draw a circle around the finished snowflake using the Ellipse Tool (U) .
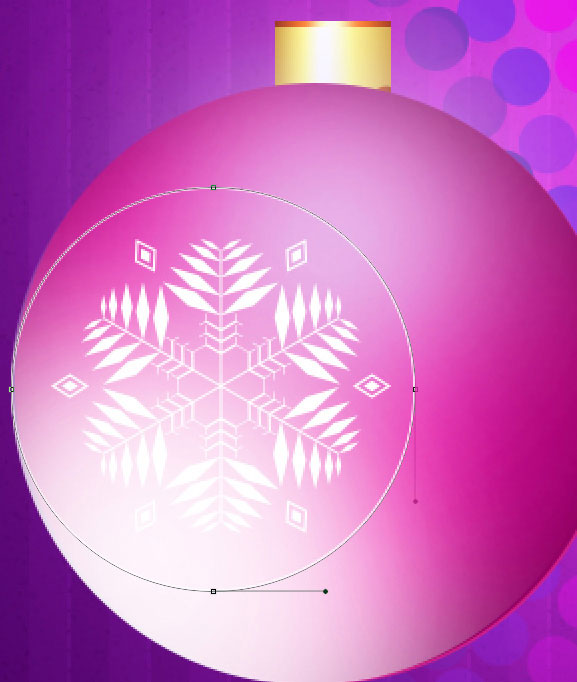
In the Options bar , select the options for Strok e with None Fill , Stroke color White and Stroke type is Solid Line as shown.

Now we will highlight the top part of the Christmas ball, using the Ellipse Tool (U) to draw the next rhombus.

Insert the mask on this layer by choosing Add layer mask at the bottom of the Layers panel and select the Soft Round black brush (set the Opacity to 60% in the Options bar).

Paint in the mask using this brush to make the highlight look like the next image.

Then reuse the Ellipse Tool (U) to draw a prominent element on the right.

Insert the mask into this layer by selecting Add layer mask at the bottom of the Layers panel. Press Ctrl + I to invert color and select Soft Round white brush (set Opacity to 40% in Options bar).

Paint in the mask using this brush to hide the highlights like the image below.

Select the Custom Shape Tool (U) in the Tools bar, in the Options bar click on Shape to open the selection menu. Find the snowflake photo set that has been downloaded and draw the snowflakes on the Christmas ball to make it look like the picture below.

Create two copies of the layer containing snowflakes at the top right. Now we will highlight another point, use in the Ellipse Tool (U) . First draw a circle using the Ellipse Tool (U) , then hold the Alt button or select Subtract from shape area (-) from the Options bar and draw two ellipses using the Ellipse Tool (U) to cut the circle exactly as shown in the picture below:

Insert a mask for this layer by selecting Add layer mask at the bottom of the Layers panel and selecting the Soft Round black brush (set the Opacity to 60% in the Options bar).

Paint in the mask using this brush to hide the highlighted part the same way from below:

Set the blending mode for this layer to Soft Light .

Now create a shadow for the Christmas ball, use the Ellipse Tool (U) to draw a circle with the color # 072730 . This layer must be under the layer of the ball.

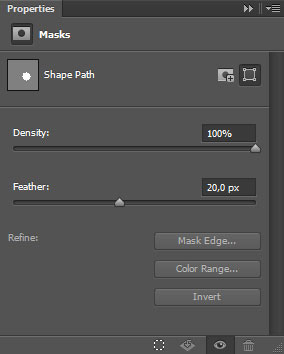
Access the Mask Panel and set the Feather to 20px (in case you can find the Mask Panel on the right, just activate it on the Windows > Masks main menu).
Set Fill to 80% for this layer.

Now show off the next shadow layer, use the same Ellipse Tool (U) and color # A0060 . Mask options are similar to previous examples. Put this layer on the previous layer but lower the layer of the ball.

Set Fill to 80% for this layer and change the Blending mode to Color .

Combine these groups into one and make a copy of the group and choose the Free Transform (Ctrl + T) command , you can enlarge the size of the copy and place them in the same way from below:

Next, we'll draw the strings for the Christmas balls, use the Line Tool (U) and set the Weight to 3px in the Options bar. The layer containing the strings will be below the ball's layer.

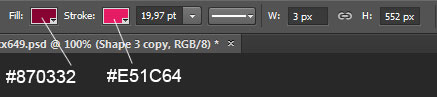
Colors for Fill and Stroke :
We have the next result:

Select the Ellipse Tool (U) to draw a small circle of color # F894FB . Put this layer under the ball layer.

Set Fill to 52% for this layer.

Now draw many small circles with the same color but different diameter and Fill values. Put these layers under layers containing Christmas balls and rope layers.

Using the same tool, we will draw three white circles, this layer must be mixed with layers containing pink circles, placing them under the ball layer.

Insert the mask into each layer containing the white circle by choosing Add layer mask to the bottom part of the Layers panel and select the Soft Round black brush (set Opacity to 40% in the Options bar).

Paint in the mask using this brush to hide the white circles exactly the same way indicated in the image.

Paint the background in its upper left part. This time create a new layer and apply a Soft Round white brush ( Opacity of the brush is 20% ), like in the previous example.

Set the Blending mode for this layer to Overlay .

Create a new layer and select the Paint Bucket Tool (G) to overlay the color # F5F0A7.

Set the Fill for this layer to 24% and change the Blending mode to Color .

Create a new layer and use the same tool mentioned above and apply this layer with the color # 5002B .

Insert the mask on the layer by selecting Add layer mask at the bottom of the Layers panel and select the Soft Round black brush.
Paint in the mask using this brush to hide the center part of the layer. Set the Blending mode for this layer to Overlay .

Create a new layer and use the Paint Bucket Tool (G) to overlay this layer with color # 190007 .

Set Fill to 28% for this layer and change the Blend mode to Soft Light .

Click Create new fill or adjustment layer at the bottom of the Layers panel and click Curves to adjust the curve as shown below.
We have the next result:

Create a new layer and select Soft Round white brush (Brush has Opacity of 15% ).

Use this brush to draw snowflakes on Christmas balls. Set B lending mode for this layer to Overlay .

Create a new layer and use the Soft Round brush again to paint the background as shown below. The color of the brush is white (Brush has an Opacity of 20% ).

Finally insert the text on the card using the Horizontal Type tool (T) , select the font, size and color in the Character table .
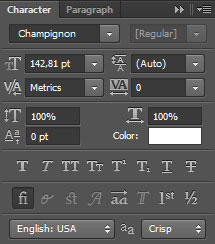
Click on the frame and type ' Merry Christmas '. Press Enter to apply the text.

Download the free Layered PSD file.
See more:
- How to use Photoshop CS6 (Part 1): Create digital photos
- How to use Photoshop CS6 (Part 2): Create fashion collage images
- How to use Photoshop CS6 (Part 3) - Create Manipulation artwork with exposure effect
- How to use Photoshop CS6 (Part 4): Create a fading effect
- Instructions for using Photoshop CS6 (Part 5): Create christmas cards with snowflakes on a red background
- How to use Photoshop CS6 (Part 6): Create abstract geometric blocks
I wish you all success!
Was this article helpful?
Your feedback helps us improve.
Related Articles
 Instructions for using Photoshop CS6 (Part 5): Create christmas cards with snowflakes on a red background6 minutes read
 Make a Christmas card with Fotojet3 minutes read
 Guide 22 ways to make beautiful Christmas cards and very easy for you5 minutes read
 PhotoShop: Create your own Christmas cards5 minutes read
 Create Christmas cards in Photoshop6 minutes read
 How to make Christmas cards with unique 3D Christmas trees3 minutes read
Reader Comments 0
Sign in with email or Google to join the discussion.