How to Build a Fully Functional Kanban Board in Excel
Most people see Excel as just rows, columns, and endless formulas. But others see it as a blank canvas to organize things.
Table of Contents
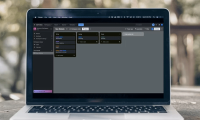
Most people see Excel as just rows, columns, and endless formulas. But others see it as a blank canvas to organize things. So they tried creating a Kanban board in it, complete with status tracking, color coding, and easy updating.
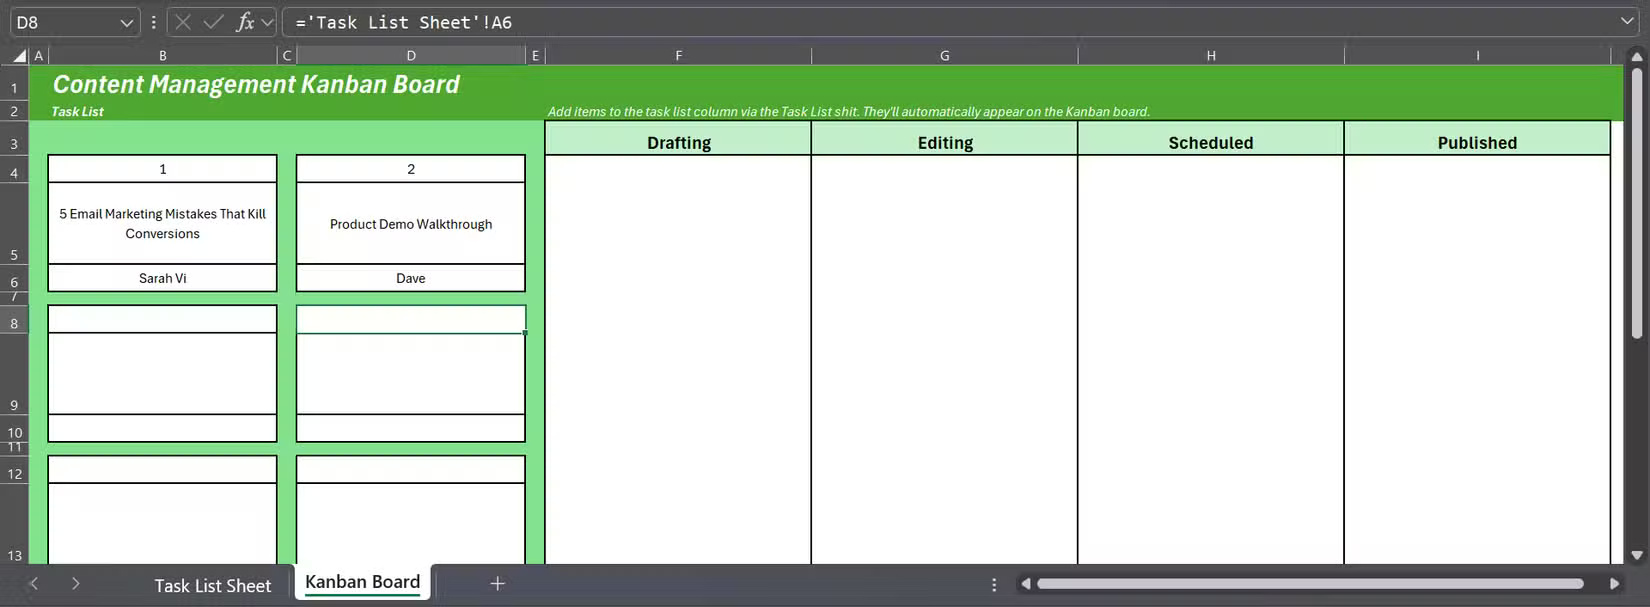
The article built an Excel Kanban board using two sheets: One for the to-do list (the brains of the operation) and one for the board itself (the sheet that everyone sees). While the to-do list is the foundation of the board, start by designing the board first so you know where you're going.
1. Table title design
The example uses the first two rows as headers for the table. This is where you can add the project name, quick instructions (like " Add tasks in the Task List tab "), and any keys you need to make the table easy to read.
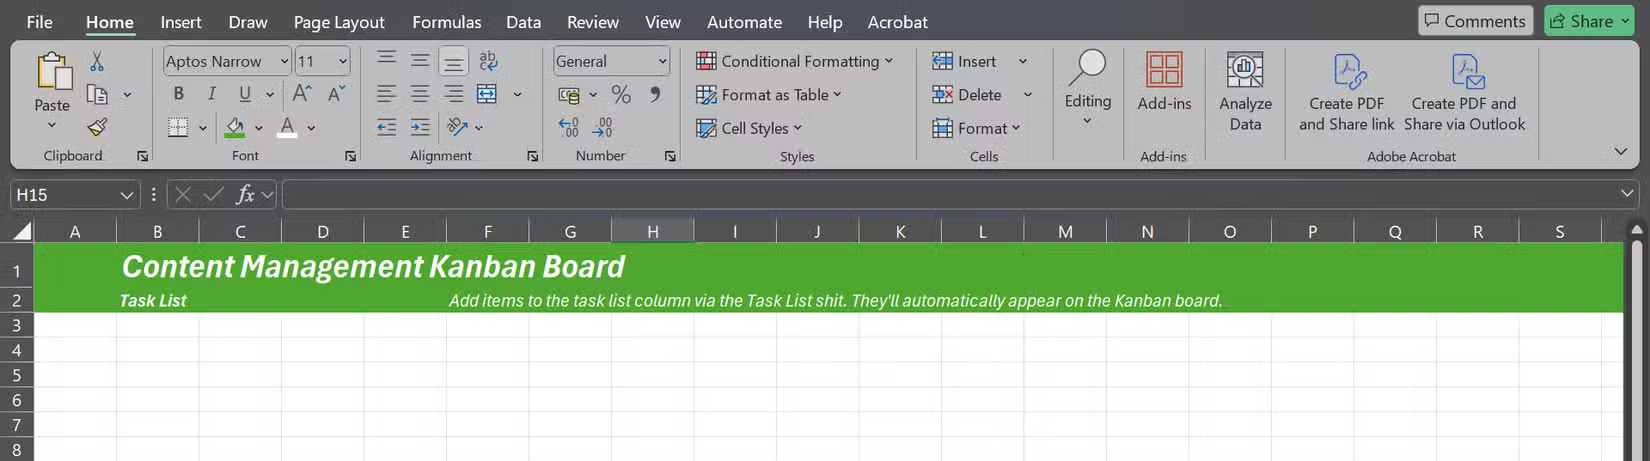
For example, put the board name in row 1, insert the title for the task cards in row 2, and add a short note asking people not to edit the cards directly, also in row 2. Then, fill these top two rows with a green color, adjust the font and color, and generally make it look like something you'd actually use.
2. Create task cards
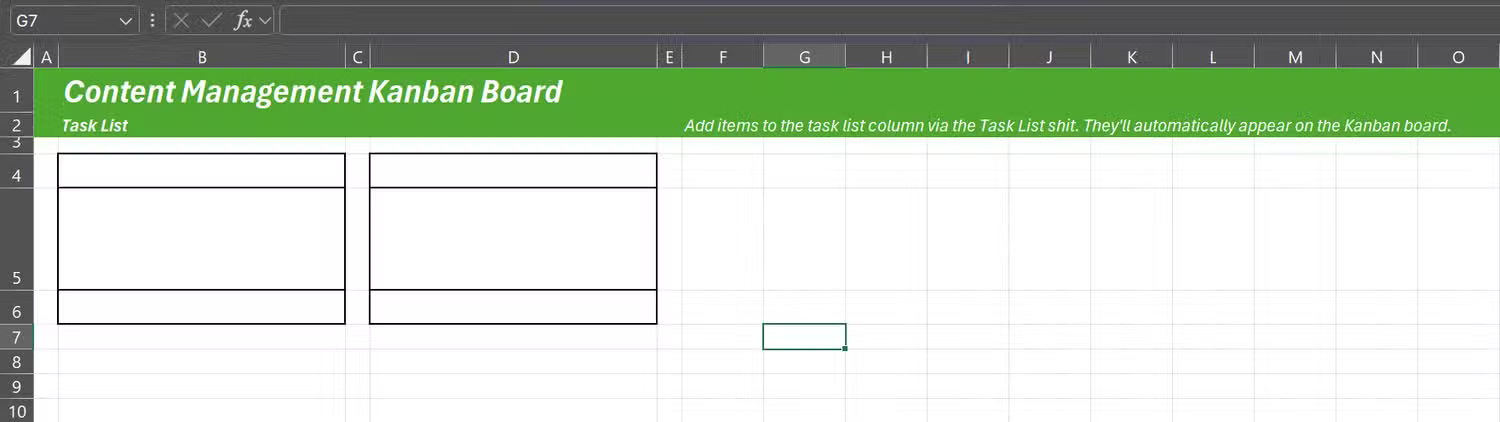
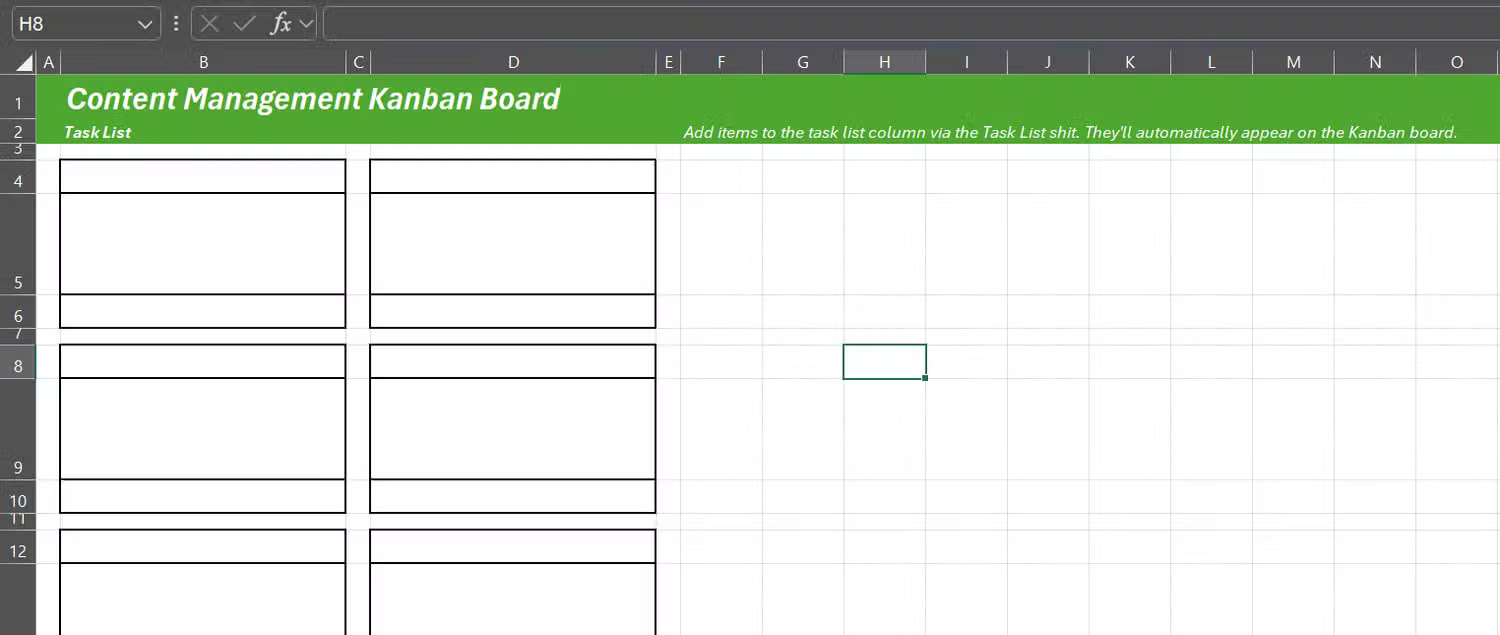
The preferred card layout is 3 rows high: One row for ID, one middle row for task name, and one footer row for assignee.
Skip row 3 after the header rows and use 3 rows over 5 columns to create two task blocks. Rows 4 and 6 are low, while row 5 is high. Columns A, C, and E are low, while Columns B and D are wide, perfect for holding the actual cards.
Here are the sizes used:
|
Narrow columns |
3 point wide |
|
Wide columns |
30 point wide |
|
Row 3 |
25 points high |
|
Blank lines between tags |
10 points high |
|
Narrow rows for cards |
20 points high |
|
The high rows for the cards |
60 points high |
*1 point is equivalent to 1/72 inch (about 0.035 cm)
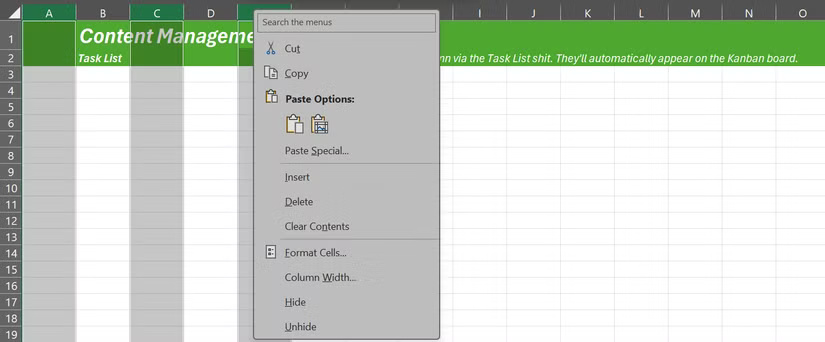
To adjust row height or column width, select the row and column you want, right-click, and select Column Width or Row Height .
You don't necessarily have to use the same number as the article used, but you want the tags to be neat, easy to read, and not take up the entire screen.
3. Add border
Borders will make the cards look like actual task cards. For example, with B4 – B6 selected, open the borders menu ( Home tab > Borders menu icon), click Thick Outside Borders and do the same for the corresponding cells in column D.

Note : The example also added borders to the middle task header cells (e.g. B5 and D5 ) for clarity.
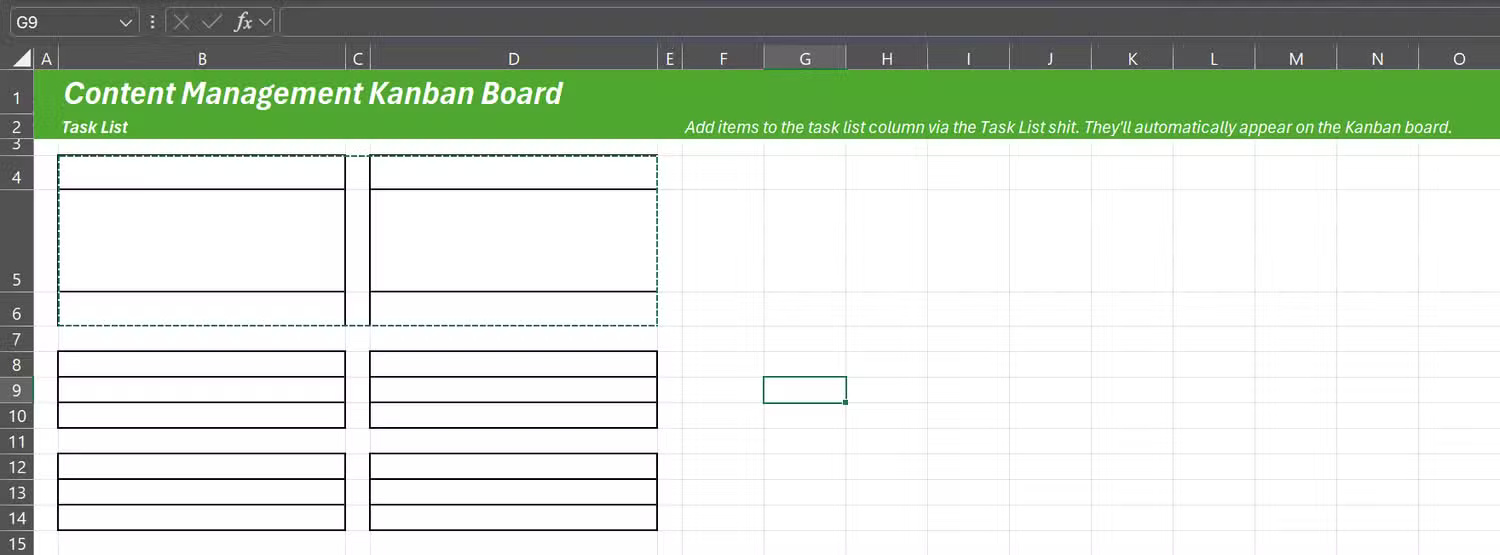
If you need to add more cards, copy the structure down, leaving a blank row between each card. Once copied down, adjust the row height as needed. All your task cards are ready and you can always add more cards as needed.
4. Set up workflow columns
The example has designed 4 columns to represent 4 work stages: Drafting , Editing , Scheduled , and Published . Since the task card is 30 points wide, make the stage columns at least 35 points wide so the cards can fit.
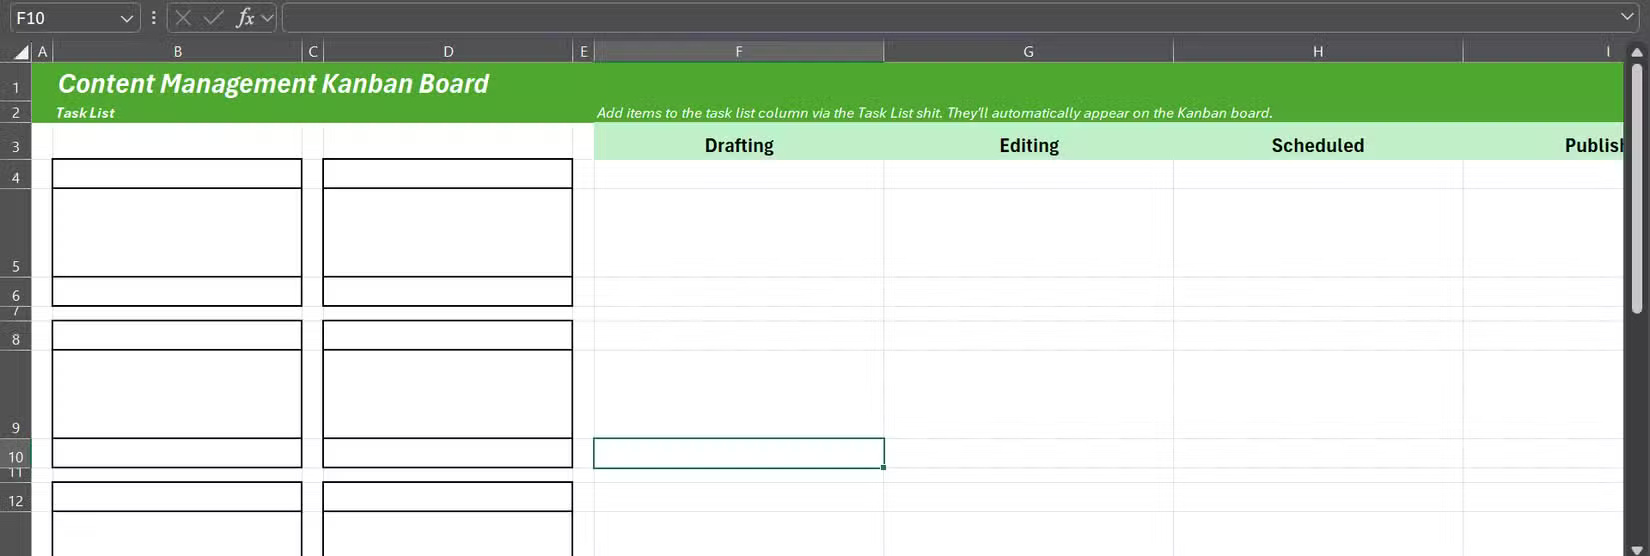
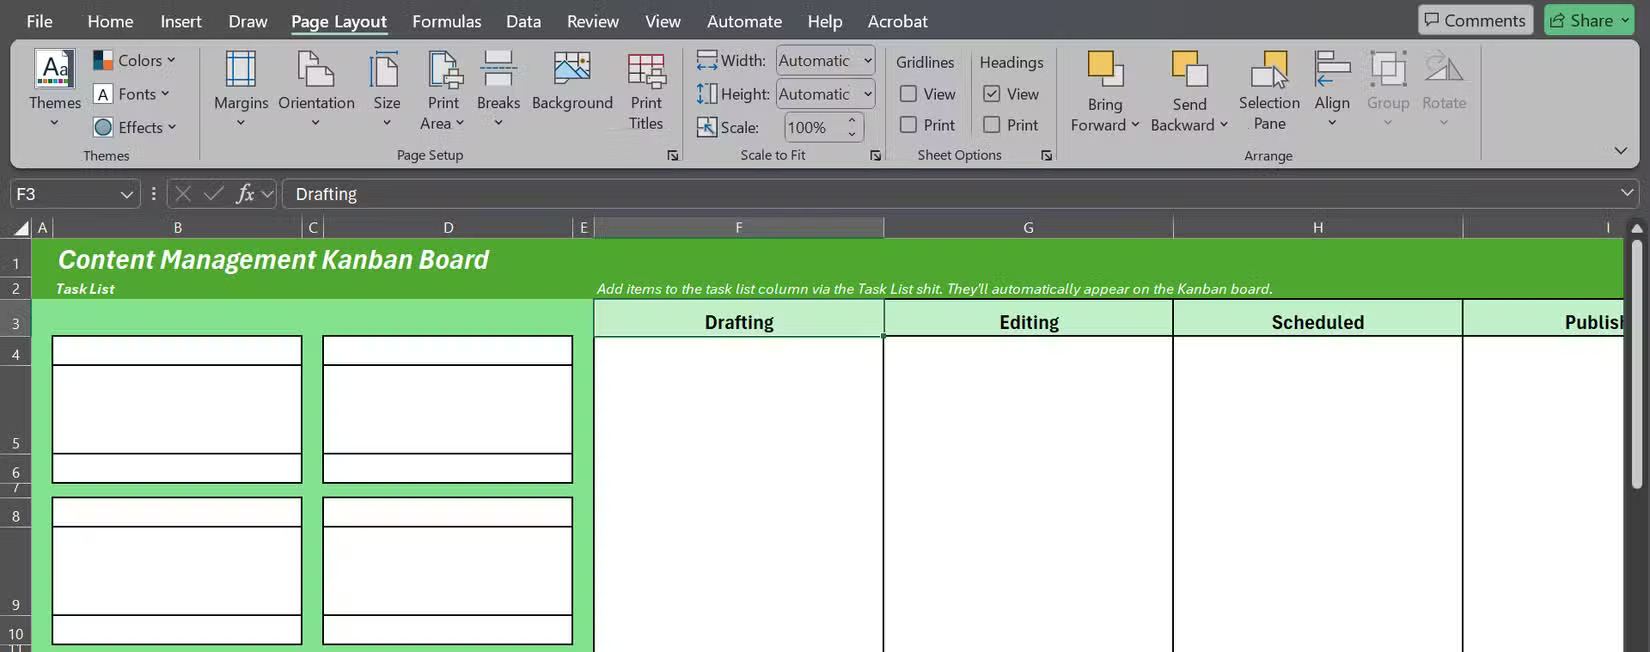
From there, it's just a matter of formatting — adjust the font size, center the text, choose a background color, and add a border around each stage column. You can fill the blank background around the task cards with a contrasting color and hide Excel's gridlines ( Page Layout tab > Gridlines > uncheck View ).
The columns are wide enough to display task titles, narrow enough to fit on one screen, and each card is readable at a glance. And that's what you need to think about when designing your board.
5. Automatically update the table
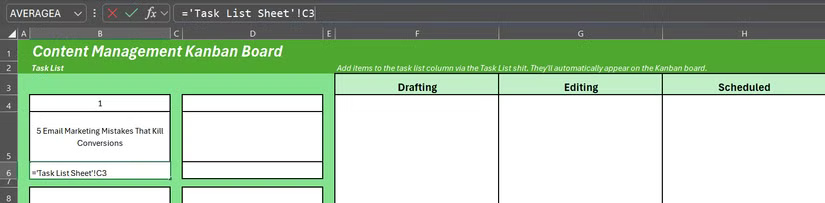
The real magic of this Excel Kanban board is that the cards automatically update when you change something in the task list. To do this, create a sheet called Task List Sheet with 4 columns: Task ID , Title , Assignee , and Description .
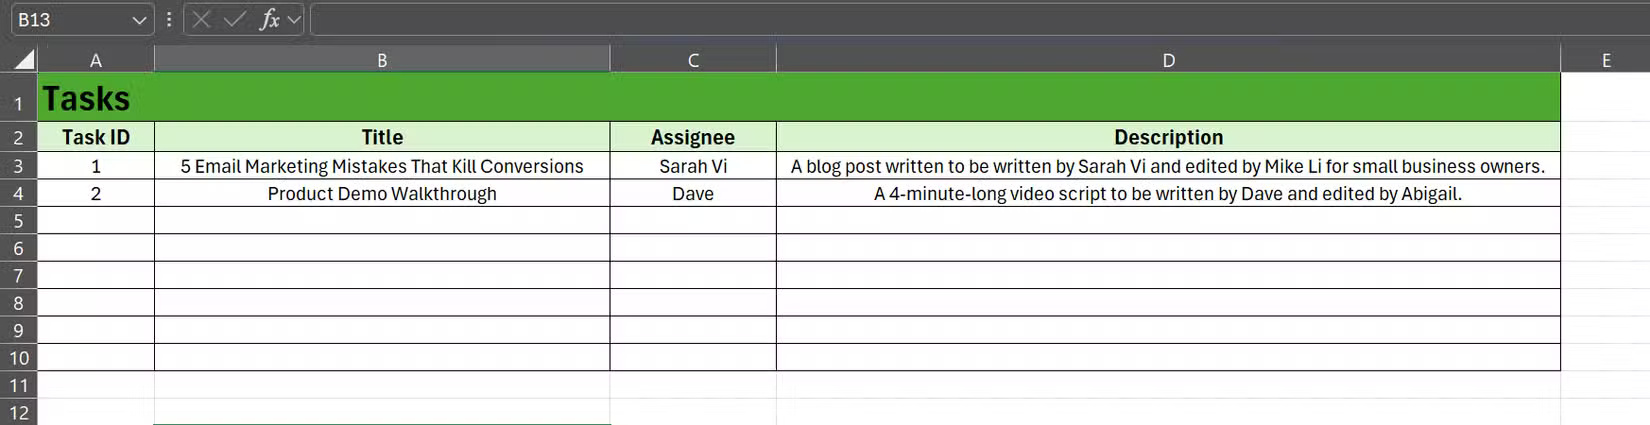
This sheet is the master sheet. Each card on the Kanban board will pull information from here. Each card is essentially just a small window into the master sheet. For example, the top cell of the card links to the Task ID ( ='Task List Sheet'!A3 ), the middle cell links to the title ( ='Task List Sheet'!B3 ), and the bottom cell links to the assignee ( ='Task List Sheet'!C3 ), all from a row in the master sheet.
In this case, just replace " Task List Sheet " with the actual name of your main sheet. Just use that name here because that's the name of the main sheet.
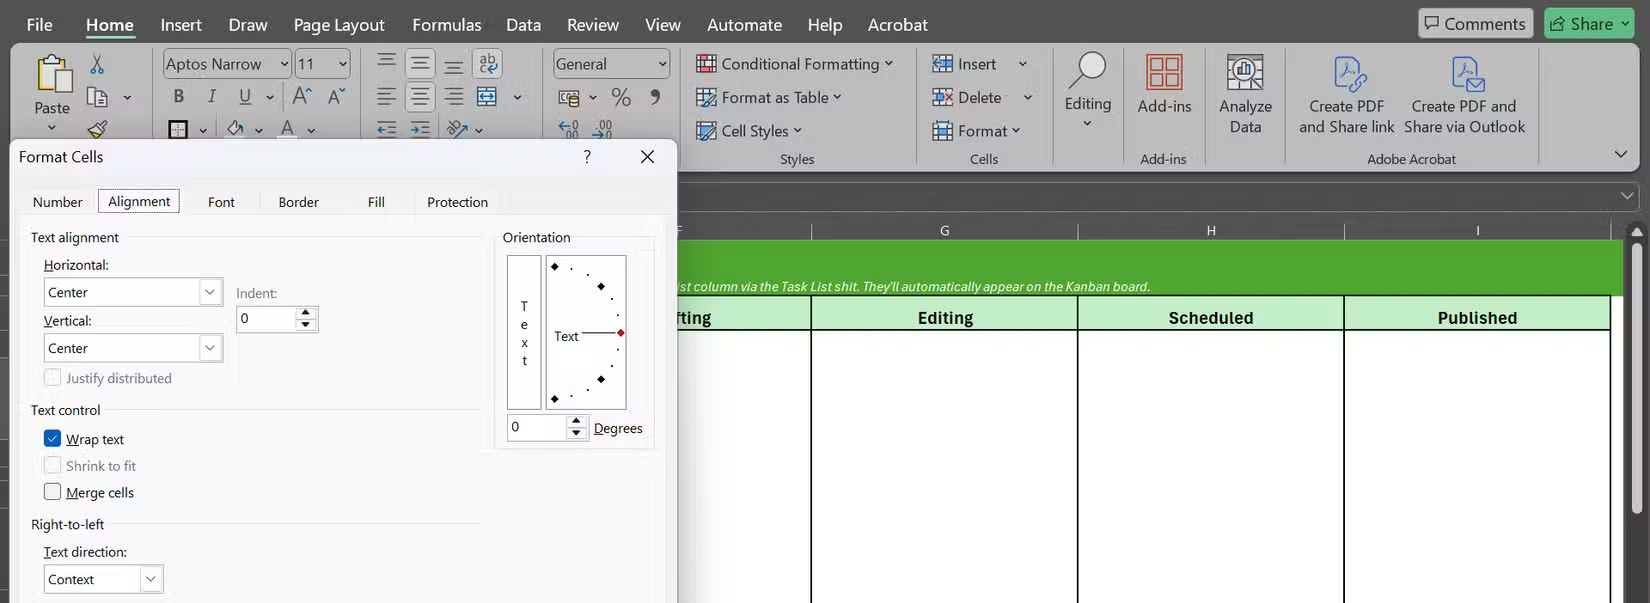
Format all the cells in your task card so that the text is centered both vertically and horizontally, and turn on Wrap Text to keep long titles neat. You can make all of these changes by right-clicking the cells and clicking Format Cells > Alignment .
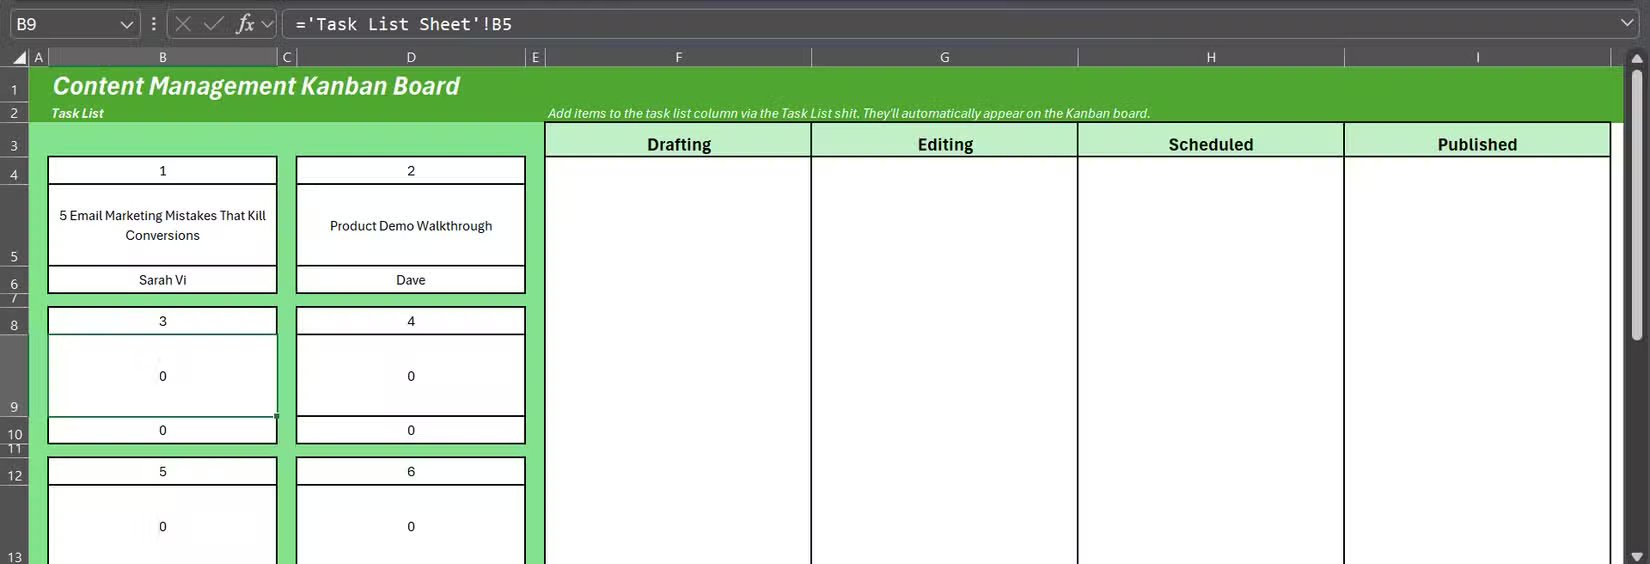
When you first link everything, any blank rows in the Task List Sheet will show up on the board as zeros, and that's not pretty.
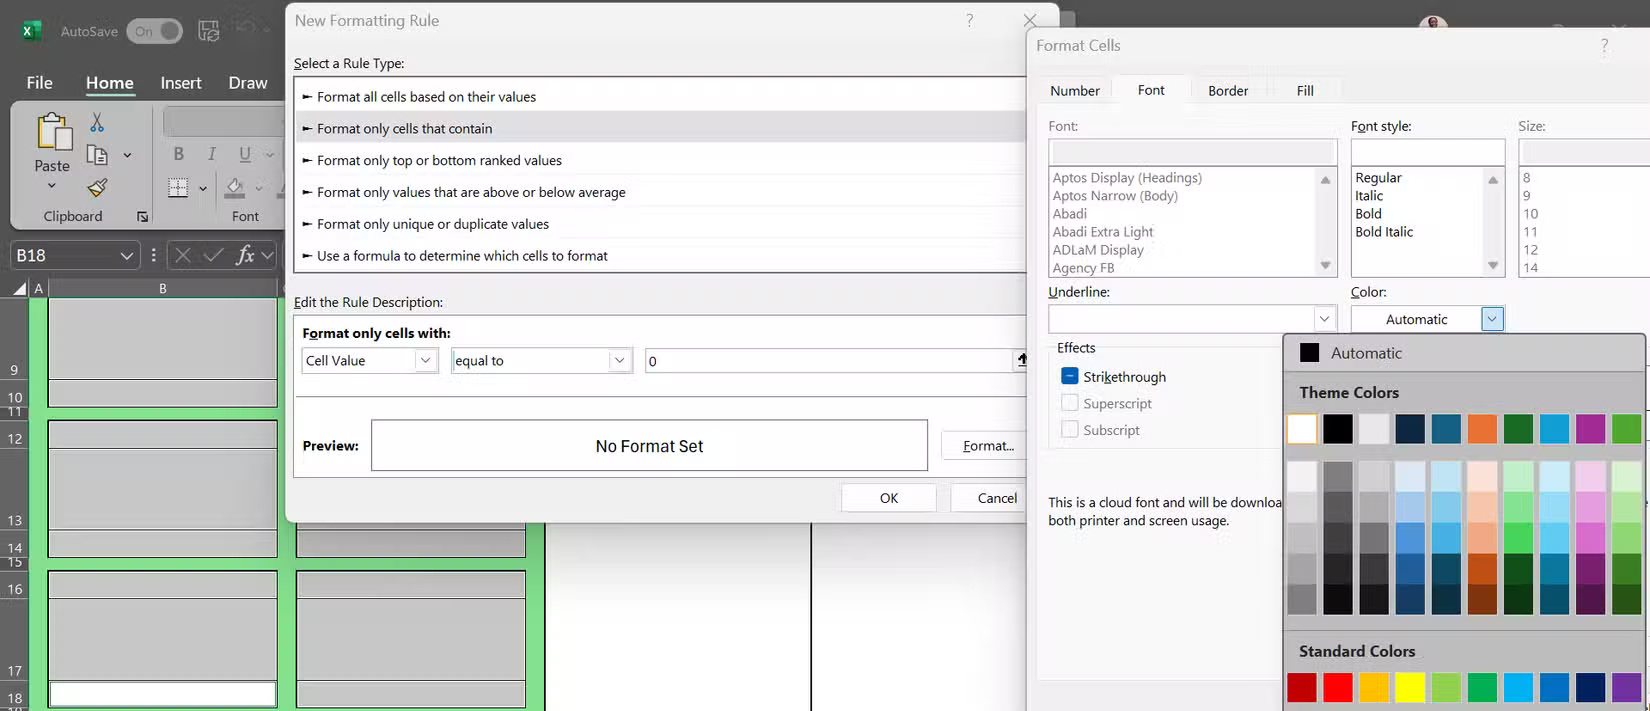
Here's how to fix the problem, using conditional formatting in Excel:
- Select all the tab cells you want to clean up (hold the Ctrl key to select multiple cells at once).
- Go to Home > Conditional Formatting > New Rule .
- Select Format only cells that contain .
- In the rule description, set Cell Value to 0 .
- Click Format , set the font color to white and press OK twice.
Now any unused cards will appear blank until you add a task to the Task List Sheet. Once the links are set up, try editing the task title in the main sheet. The corresponding card on the board will be updated immediately.
6. Create a movable Excel card
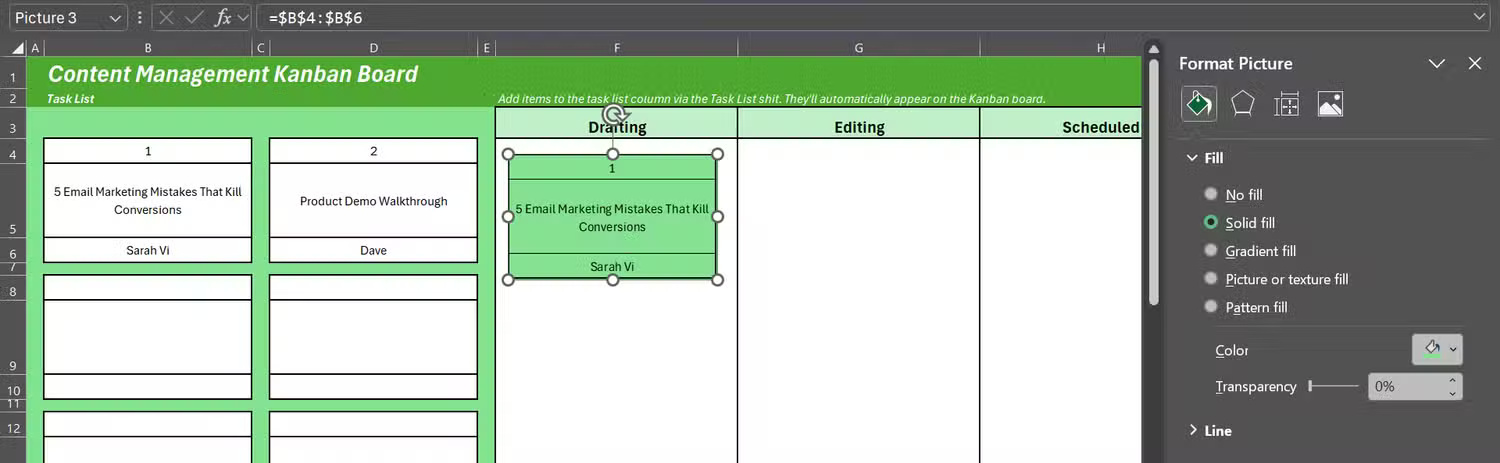
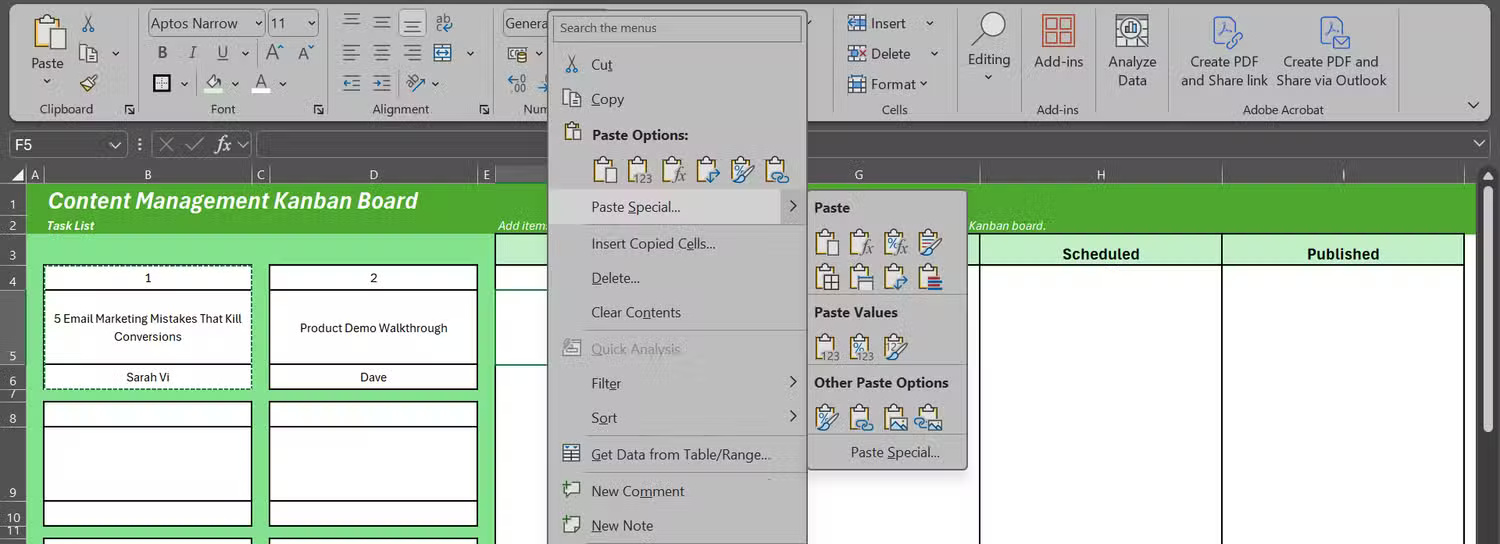
The real challenge with an Excel Kanban board isn't just creating the cards; it's also getting them to move around without breaking the connection to your task list. That's where Excel's Linked Picture feature comes in.
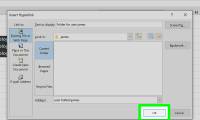
Start by selecting all the cells that make up a task card. Press Ctrl + C to copy. Right-click the column where you want the card to appear, then go to Paste Special and select Linked Picture (I) . This is usually the last option under Other Paste Options .

This will create a floating image of the original card. It may look a little transparent at first, but that is normal and easy to fix.
To create a solid background for an image, right-click on the image, select Format Picture , click the Fill icon (the first icon) and choose a color that matches your design.
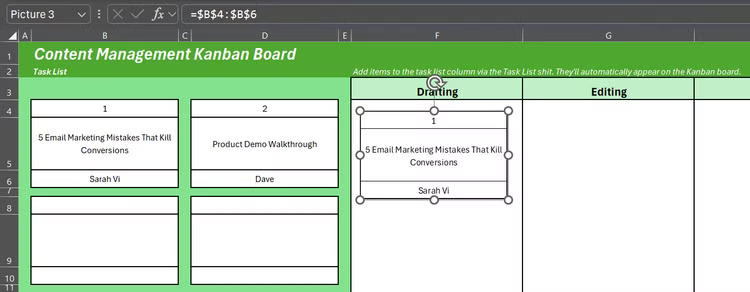
Note : Since the linked item is an image, you can simply drag it from one column to another (e.g., Drafting to Scheduled) while the task is in progress.
Additionally, because the linked photo is tied to the original card, any changes to the source data, such as assigning new team members, will automatically appear on every linked photo of that card.
Was this article helpful?
Your feedback helps us improve.
Related Articles
 How to Create a Kanban Board in Trello5 minutes read
 How to create a Kanban table in Excel7 minutes read
 How to Add Links in Excel8 minutes read
 5 functional programming languages you should know8 minutes read
 This guy uses only Microsoft Excel formulas that create 3D games1 minutes read
 What is a Board Game?7 minutes read
Reader Comments 0
Sign in with email or Google to join the discussion.