4 Winget Tips That Will Change the Way You Use Windows 11
Anyone who uses a computer regularly knows how quickly some tasks can become repetitive and boring.
Anyone who uses a computer regularly knows how quickly certain tasks can become repetitive and tedious. For someone who regularly troubleshoots or repairs their computer, having a Windows feature that makes it easy to install software is always a useful tool.
WinGet is a game-changer. It makes these tasks significantly easier. But it does more than just install applications; processes that used to take hours now take minutes.
Note : Although WinGet is very powerful and best suited for professional users, some of the shared applications are also suitable for everyday use.
4. Configure WinGet
Manage the entire system status
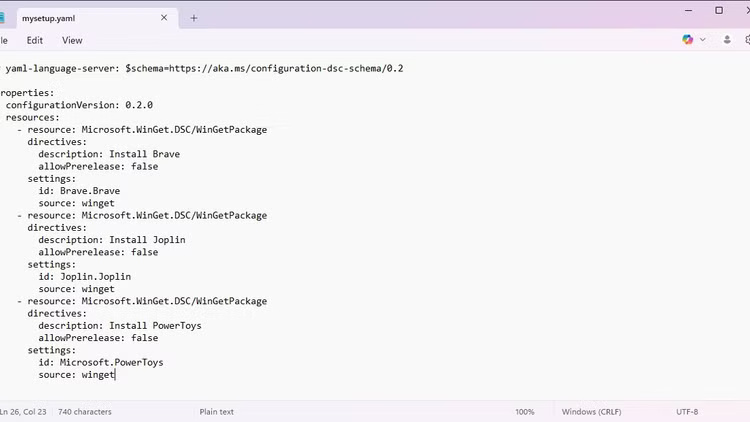
With a new computer, you need to install your most used applications, but installing them one by one is often very slow. While you can speed this up with WinGet, installing them one by one doesn't demonstrate its power. If your goal is to install them individually, you're better off using a regular GUI installer.
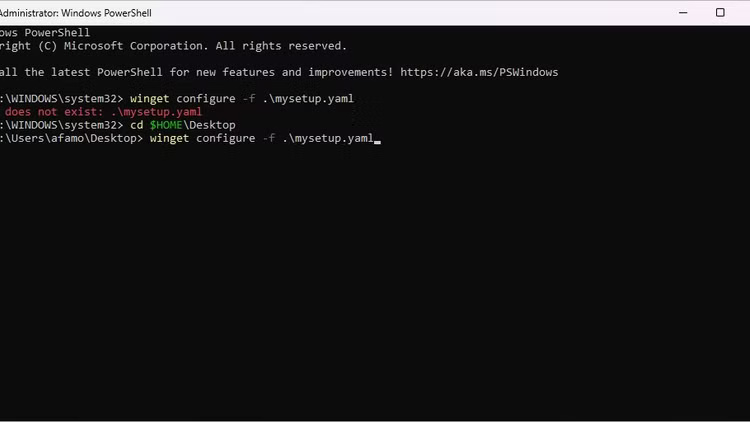
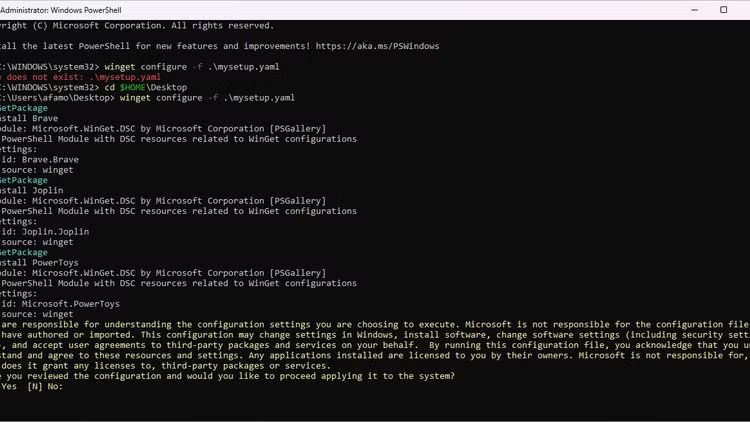
To do this, use the winget configure command . This requires a one-time initial setup, where you define the applications you want to install on any system and save them to a YAML file. Once done, just copy that file to the new computer, open PowerShell with admin rights , and run the command:
winget configure -f .mysetup.yamlWinGet will look up all included applications from their source, download installers and run them silently, and provide you with feedback once the installation is complete.
3. WinGet upgrade --all
One command to download the latest version of all applications
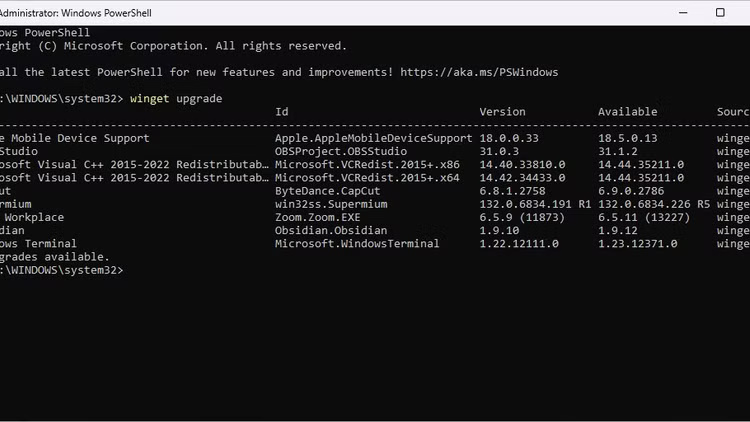

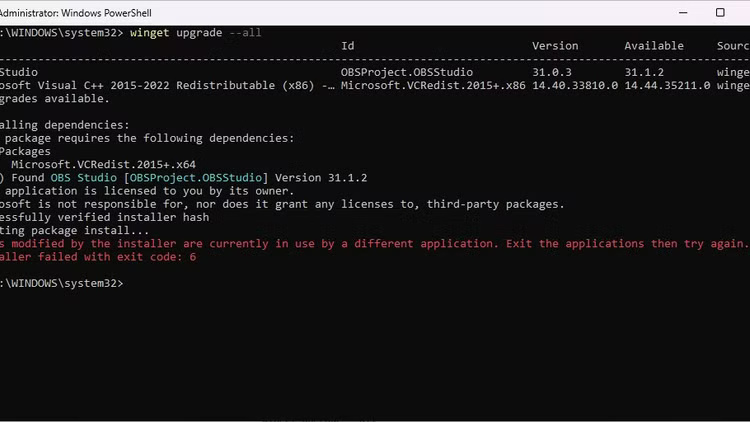
It's well known that keeping your apps up to date is important for security, as updates often come with security features and bug fixes. However, upgrading every single app on your computer can be a hassle.
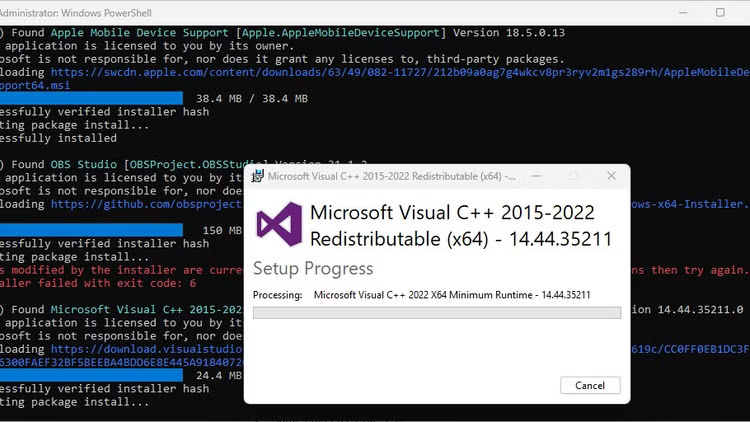
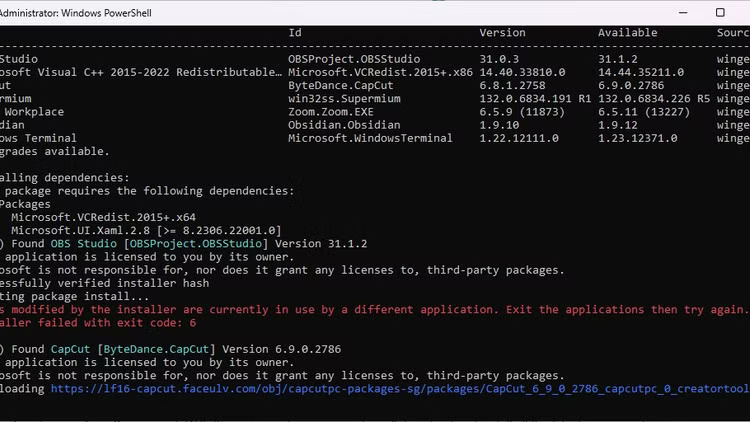
WinGet provides a simple way to do this: The winget upgrade --all command . With this command, the computer will download and install all the latest versions of the application.
WinGet upgrade commands are useful when troubleshooting. For example, use this command to reinstall and update any application, including those with uncertain version information:
winget upgrade --all --include-unknown --force2. WinGet pin
Avoid any accidental app updates
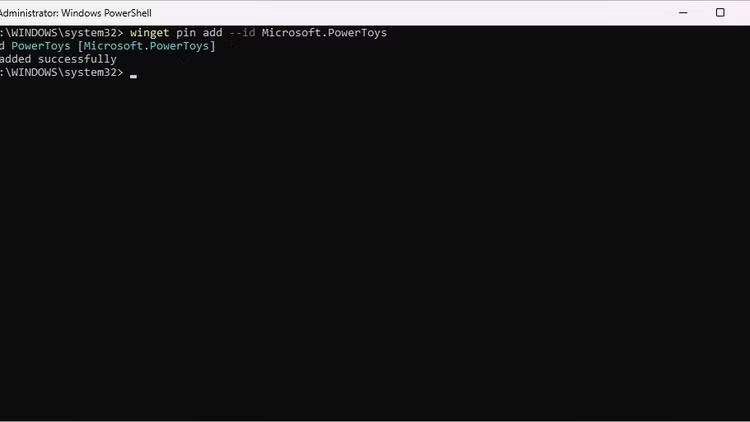
WinGet pin is a perfect match for the upgrade command above. While the guideline is to always keep your applications up to date, there are some cases where you don't need to update your applications. For example, when an update introduces user interface changes that take time to adjust to, which can impact your productivity.
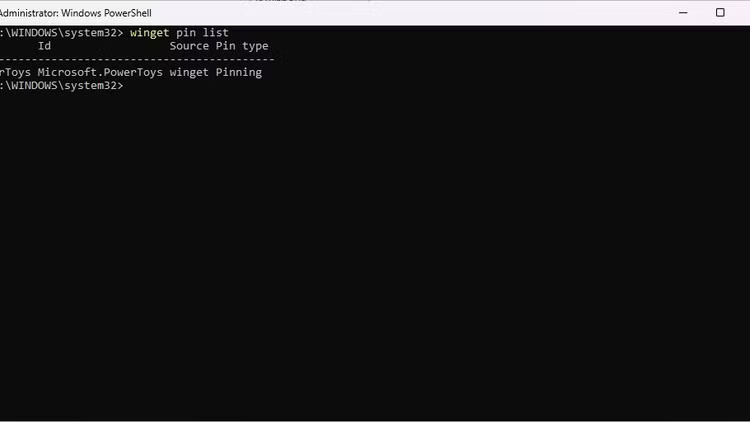
Using the command winget upgrade --all will update all applications, including those you don't want to update. This is what people like best about WinGet pin. It gives you granular control over the application environment, allowing you to disable or skip updates for certain applications.
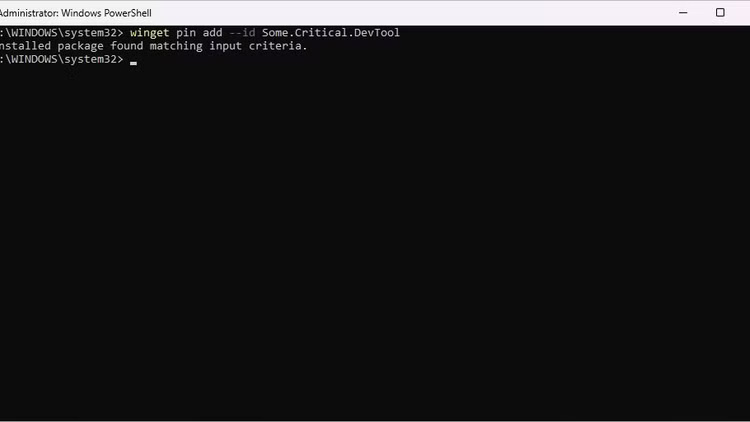
The following command instructs WinGet to ignore all updates for Microsoft PowerToys:
winget pin add --id Microsoft.PowerToys1. WinGet + Task Scheduler
Configure automatic application maintenance
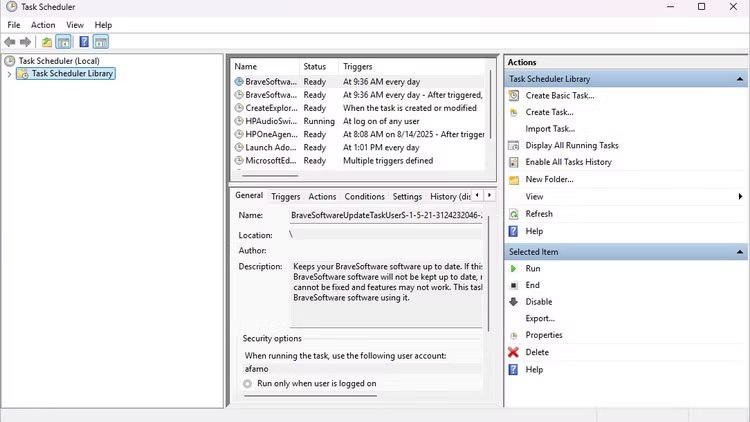
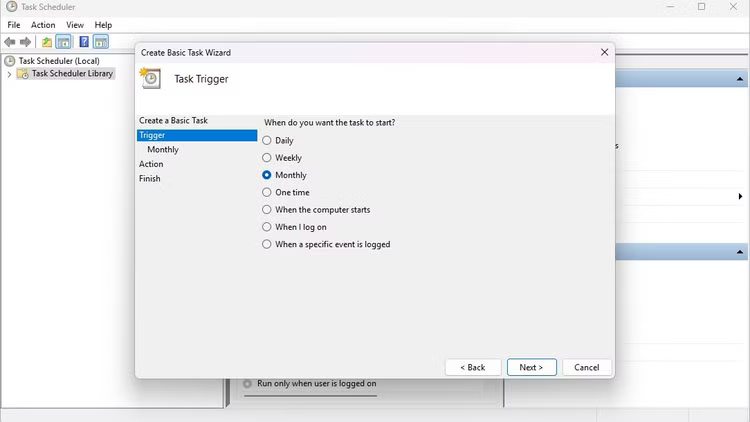
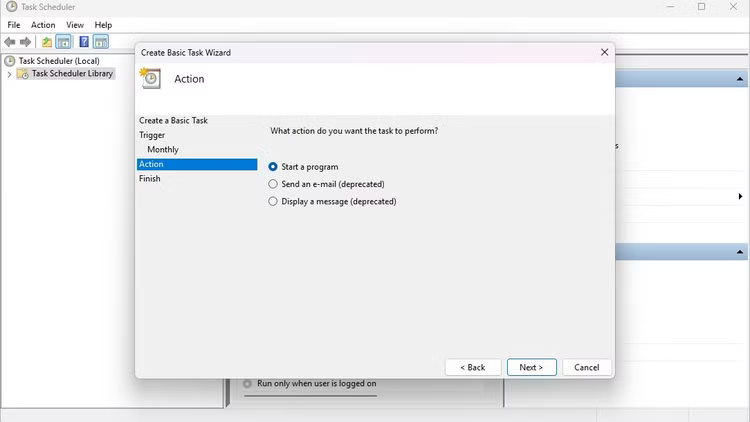
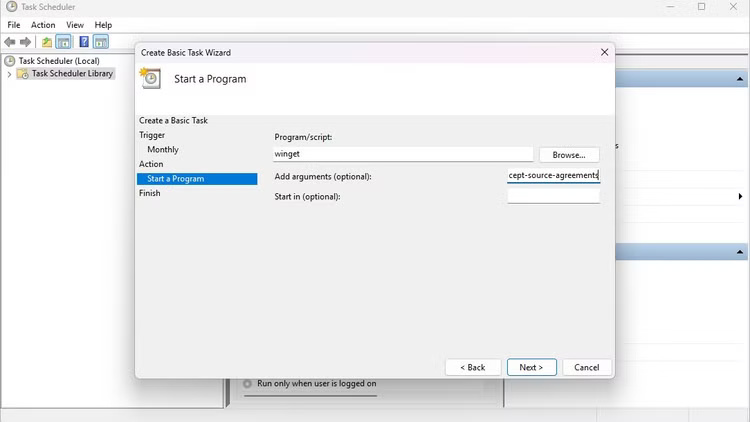

Of all the productivity tips WinGet offers, automation is at the top of the list. Windows Task Scheduler can run programs on a schedule, but you can take it to the next level and create an automated maintenance tool when combined with WinGet.
The most common use of this feature is to update all applications on a schedule. Since the scheduler works with scripts, you can create a new task, add WinGet as a program, and include this command as a script:
upgrade --all --silent --accept-package-agreements --accept-source-agreements This way, when the scheduled task runs, WinGet will automatically run the script and automatically update all applications.
- How to fix Winget not recognized error on Windows
- How to install multiple applications using winget and winstall on Windows 10
- How to use winget - New Package Manager for Windows 10
- How to Install 20 Windows Apps with Just One Command with Winget
- Instructions for installing Claude Code on Windows 11
- Hidden Windows features make software installation easy
- Good tips and tricks in Windows 7 (Part 2)
- How to convert Windows 8 / 8.1 keyboard language
- Change the Windows 7 and 10 Logon screen backgrounds
- Instructions for changing Windows 10 wallpaper timer
- Useful AI features in Windows 11
- How to Install 20 Windows Apps with Just One Command with Winget
- Hidden Windows features make software installation easy
- How to fix Winget not recognized error on Windows
- Download Ghost Windows 11 Pro Full Soft v1.0 Best New Standard 2021
- Download Ghost Windows 11 Pro No Soft v1.0 2021
- Run Android on a computer without installing emulator software with Windows 11
- Minimum and recommended computer configuration to run Windows 11
- What is WDDM 3.0? Features enabled by WDDM
- How the feature was removed on Windows 11
-
 How to Install 20 Windows Apps with Just One Command with Winget
-
Hidden Windows features make software installation easy
-
How to fix Winget not recognized error on Windows
-
How to install multiple applications using winget and winstall on Windows 10
-
How to use winget - New Package Manager for Windows 10
 How to Install 20 Windows Apps with Just One Command with Winget
 Hidden Windows features make software installation easy
 How to fix Winget not recognized error on Windows
 How to install multiple applications using winget and winstall on Windows 10
 How to use winget - New Package Manager for Windows 10