Table of Contents
This updated guide examines Click: How to Set up Internet Connection Sharing for Windows Xp and organizes the essential facts, background, and practical takeaways in clear American English.
Method 1of 2:
On the Host Computer
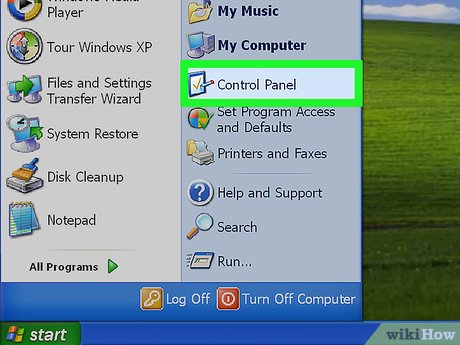 Click Start, and then click Control Panel.
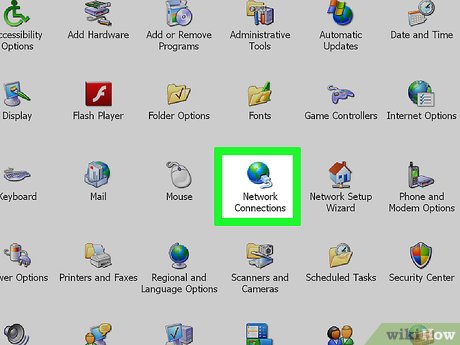 Click Network and Internet Connections, Click Network Connections.
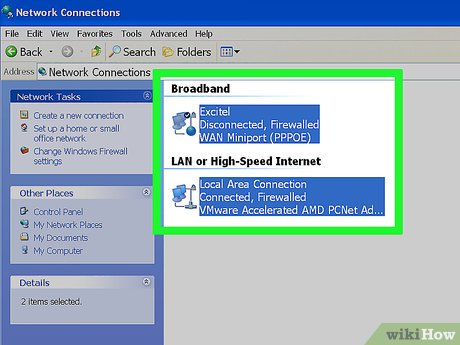 Right-click the connection that you use to connect to the Internet. For example, if you connect to the Internet by using a modem, right-click the connection that you want under Dial-up.
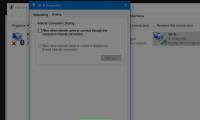
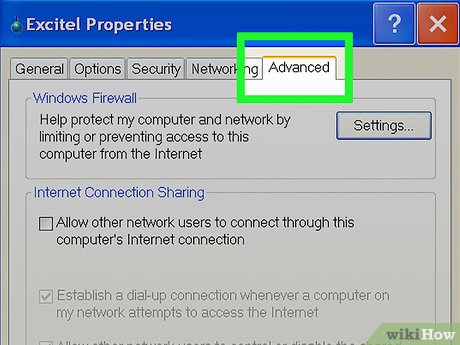 Click Properties. Click the Advanced tab.
 Under Internet Connection Sharing, select the Allow other network users to connect through this computer's Internet connection check box.
 If you are sharing a dial-up Internet connection, select the Establish a dial-up connection whenever a computer on my network attempts to access the Internet check box if you want to permit your computer to automatically connect to the Internet.
 Click OK. You receive a message, Click Yes.
Method 2of 2:
On the Client Computer
 Click Start, and then click Control Panel. Click Network and Internet Connections. Click Network Connections.
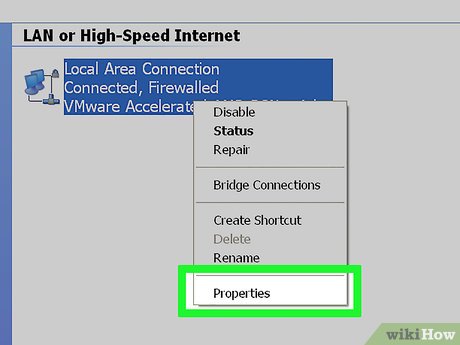 Right-click Local Area Connection, and then click Properties.
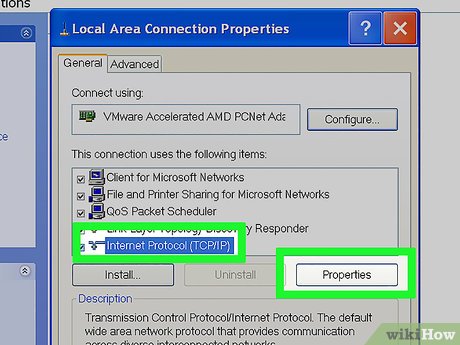 Click the General tab, click Internet Protocol (TCP/IP) in the This connection uses the following items list, and then click Properties.
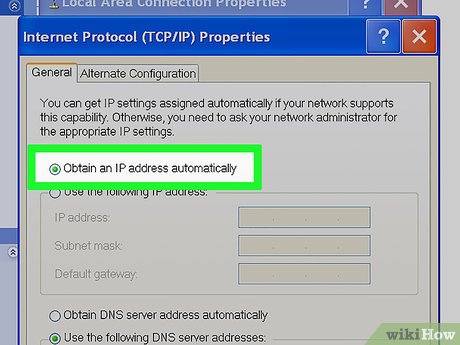 In the Internet Protocol (TCP/IP) Properties dialog box, click Obtain an IP address automatically (if it is not already selected), and then click OK.
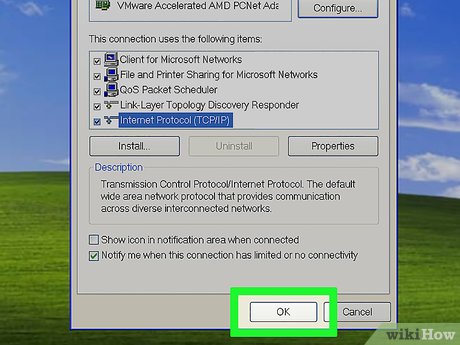 In the Local Area Connection Properties dialog box, click OK.
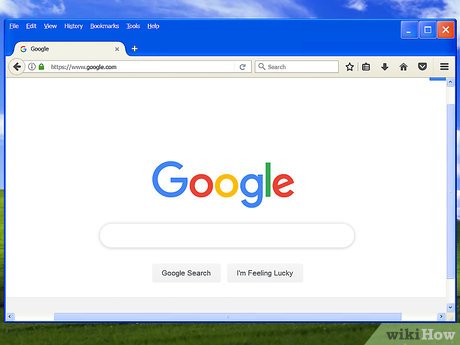 Open your browser to check, if what you did works.
FAQ
What is Click: How to Set up Internet Connection Sharing for Windows Xp about?
It provides a structured overview of click, explains the main context, and highlights practical takeaways for readers.
Why does this topic matter?
Understanding the main concepts helps readers evaluate the issue, avoid common mistakes, and make better-informed decisions.
How should readers use this information?
Use the guidance as a practical starting point, confirm details that may have changed, and follow current product, safety, or security recommendations.
Related Articles
 How to Turn Off Internet Connection Sharing on Windows4 minutes read
 How to Disable Internet Connection Sharing in Windows 114 minutes read
 Internet Connection Sharing -- Internet Connection Sharing6 minutes read
 Create a Wireless Connection Between Two Laptops10 minutes read
 How to Share Internet Connection: Turn Windows 8 Laptop Into4 minutes read
 How to Turn Off Network Sharing on Windows4 minutes read
Reader Comments 0
Sign in with email or Google to join the discussion.