How to Clean an RV Fresh Water Tank
An RV water tank needs to be cleaned at least once a year in order to prevent bacteria from growing in the system. You can do this by pouring chlorine bleach and clean water into the tank. While you are taking care of the tank, consider...
Table of Contents
Part 1 of 3:
Draining the RV's Water Supply
-
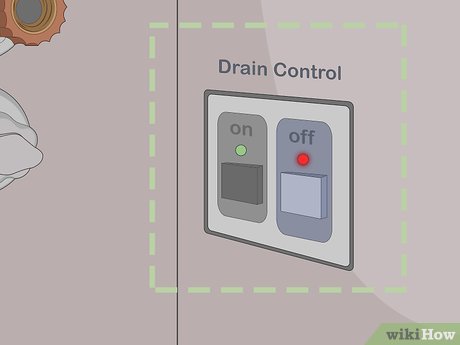
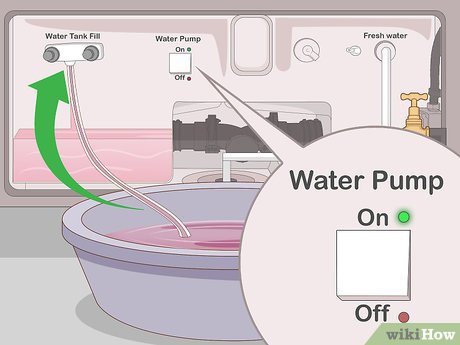
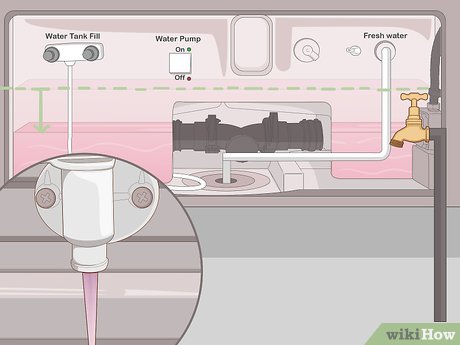
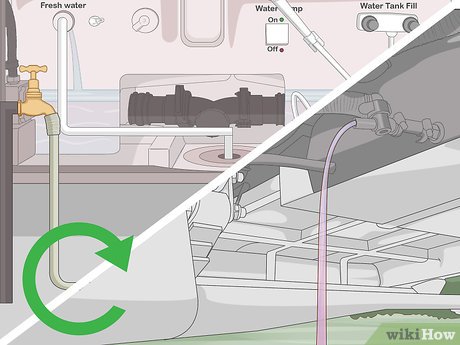
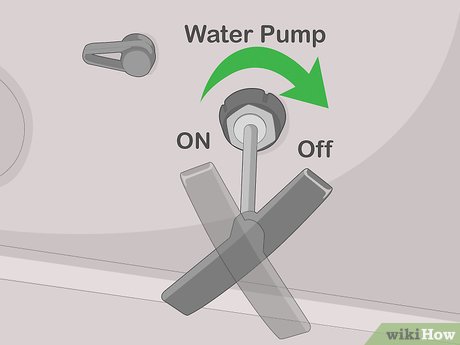 Turn off the RV's water pump. To avoid damaging the pump, shut it off before draining the water. It will be in a chamber inside the RV. Look inside the storage bay above the fresh water tank. Flip the switch to stop the pump.
- No water will circulate in the RV, so make sure you won't be needing it for about 5 hours.
- Running a pump while dry can cause it to overheat, so always shut the pump off first.
-
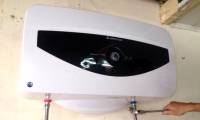
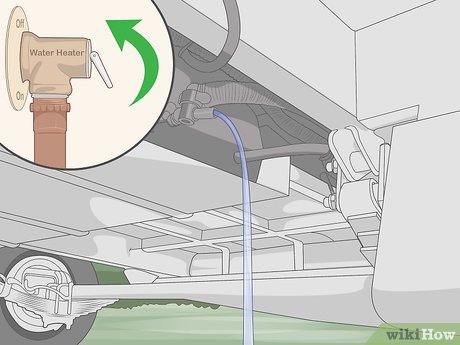 Drain the water heater. Go to the water heater, which is located outside the RV and near its back end. Turn it off first if it's active or you feel heat coming from it. First, flip the pressure relief valve switch at the top of the heater. Then, look for a nozzle near the bottom-left corner of the heater. Pull the plug out, then replace it once the water has drained.[1]
- The water heater is located inside a square box on the RV and is covered by a removable panel.
- The water heater can overheat and burn out, so make sure it is off before draining the water.
-
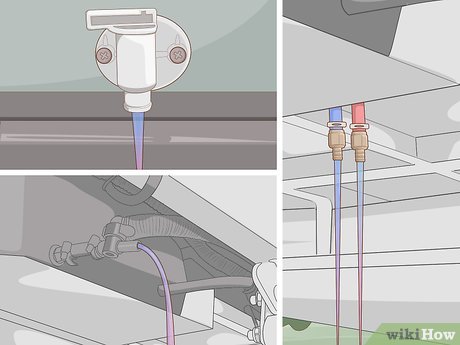
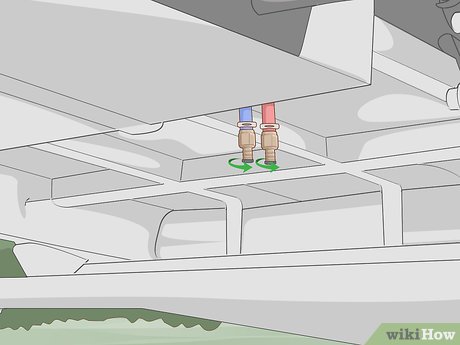 Open the water lines beneath the RV. The hot and cold water are located at the lowest point underneath the RV. They look like 2 capped pipes hanging down from the RV's floor. They stand out a lot, so they're easy to spot. Twist the end caps counterclockwise by hand to drain the water from the lines.[2]
- The lines are often colored red and blue. Depending on your RV, they may both be colored white instead.
- You will need to reach underneath the RV to access these pipes as well as the fresh water tank line.
- To keep the RV still, park on a level surface. You can place chocks on the wheel, but these usually are not necessary.
-
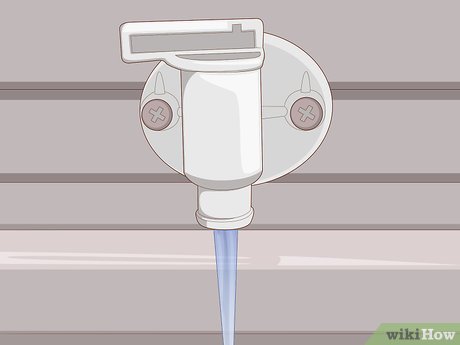 Drain the fresh water tank. The water tank can usually be accessed underneath the RV, close to the water lines. You may see a brightly-colored spigot sticking out from a square, white box. Pull the plug out of the line. If the water doesn't begin draining, turn the spigot's knob clockwise to open the line.[3]
 -
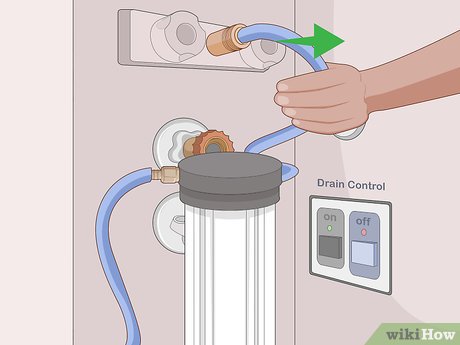 Detach any water filters hooked up to the water lines. Most water filters and purifiers are external, but check for an interior filter around the fresh water tank inside the RV. The filter will look cylindrical, often colored white or blue. Twist the hose off by hand to remove the filter from the system.[4]
- Consider changing the filter inside the cylinder to avoid reintroducing bacteria into your clean tank.
- You can get a replacement filter online or wherever camping supplies are sold. Filters are made in a standard size.
-
 Close all of the drains. Before you begin cleaning out the water tank, check the drains again. The plug should be inserted in the water heater's drain line. Also, replace the caps on the water lines and plug the fresh water line if you haven't already.
- If all the lines are closed off, no more water should be leaking out. Watch for any signs of leaking as you clean the tank.
Part 2 of 3:
Sterilizing the Tank
-
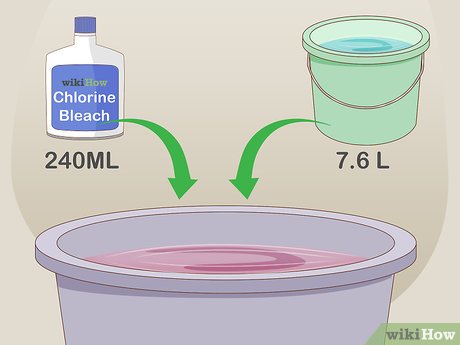 Mix chlorine bleach in water. Use a portable water container or large bucket to mix 8 fluid ounces (240 mL) chlorine bleach in 2 gallons (7.6 L) of water.. Make sure you choose chlorine bleach. Like in swimming pools, the chlorine is what neutralizes bacteria in your tank.[5]
- Avoid pouring chlorine directly into the tank. Undiluted chlorine will damage your system and give you much bigger problems to solve.
-
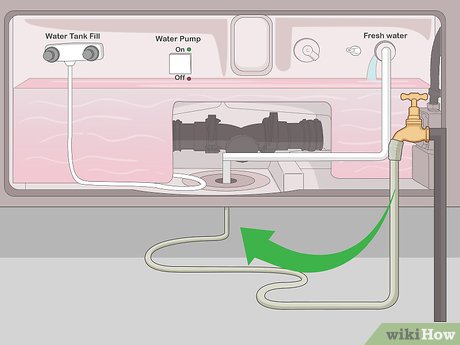
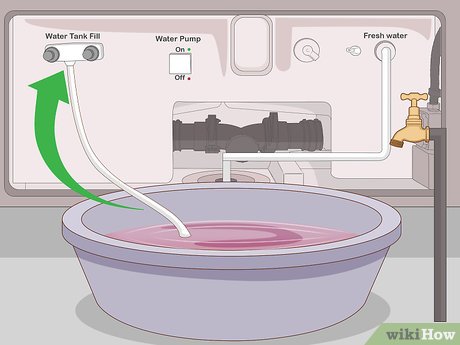 Hook a water pump to your water tank. Add the bleach water to the tank through the same method you use to refill your tank with water. Hook 1 end of the hose to the water tank spout, which is accessible either underneath or on the side of your RV. Place the other end of the hose in the water.
- You can buy a portable hand pump and hose at most home improvement stores.
-
 Pump the water into the tank. Turn on the hand pump to let water into the tank. Keep the free end of the hose positioned in the water. As long as it is submerged, it should continue to suck the water right into your RV tank.
 -
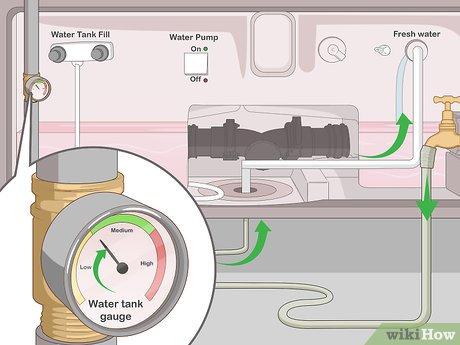
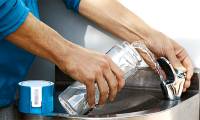
 Fill the tank with fresh water. Now fill up the rest of the tank to dilute the bleach. You can use the water container and hand pump again to do this. Some RVs have water gauges near the intake valve or on the dashboard that indicate when the water is full. Water gushing back out of the hose also indicates that the tank is full.
- If you know how much water your tank holds, you can use the size of your bucket to estimate how much water to add.
- An easy way to fill the tank is by hooking the hose to a city water connection, such as at a campground or similar location.
-
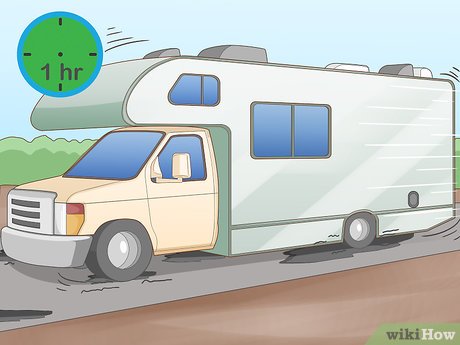 Drive around on a bumpy road for an hour. If you can, spend some time driving the RV while the tank is filled with chlorinated water. The bumpier the road is, the more the water will splash over the water tank's interior. Take all the time you need to drive around before you finish cleaning the tank.[6]
- A good time to clean the tank is when you are taking a short ride to a campground or another location.
-
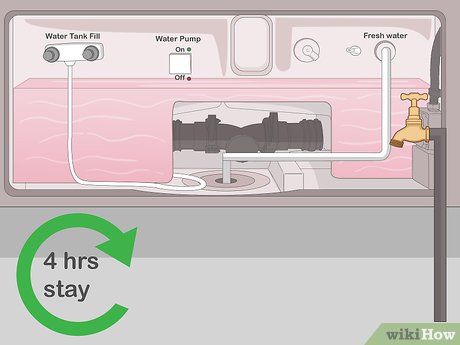 Leave the water in the tank for about 4 hours. To ensure the chlorine does its job, let the water stay in the tank as long as possible. Usually, 4 hours is enough time, although you should let the tank soak overnight if possible.[7]
- If you drive for 4 hours or longer, that should be enough to sterilize the tank.
-
 Drain the chlorine water if you're only cleaning the tank. Go under the RV to pull the plug out of the water tank's line. If the water doesn't flow right away, turn the spigot wheel clockwise to open it. Then, let the nasty chlorine water out, refill your tank with water that is much more drinkable, and activate the pump and heater.[8]
- If you wish to clean out the rest of the RV's water system, you do not need to drain the tank yet. Pump water through the system first.
- Be courteous when draining the water. You may not want to do it if people are nearby.
- The bleach is diluted, so dumping it near a storm drain isn't a big deal. If you can, make use of any nearby dumping facilities.
Part 3 of 3:
Cleaning the Rest of the Water System
-
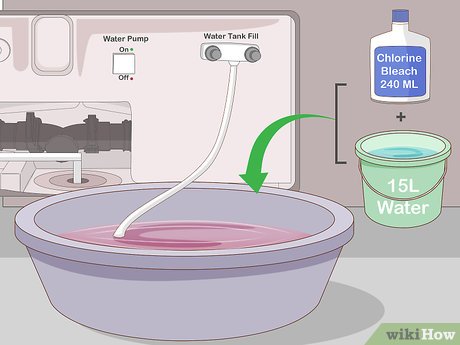 Fill the fresh water tank with chlorine water. If your tank does not already have chlorine water in it, mix 8 fluid ounces (240 mL) of chlorine bleach with 4 gallons (15 L) gallons of water. Pump it into the tank, then add more fresh water until the tank is full.[9]
- As a rule of thumb, add approximately 6 fluid ounces (180 mL) of bleach per every 15 gallons (57 L) of water your tank can hold.
-
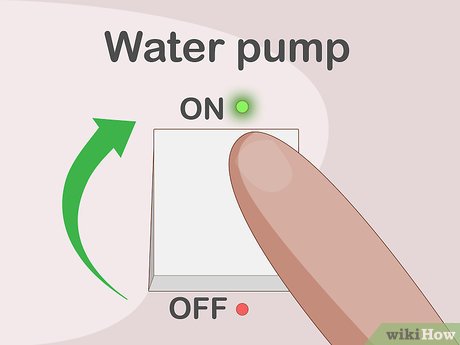 Activate the RV's water pump. Turn the water pump back on to begin circulating the chlorine water. Leave it on for now so the water cleans out all parts of the system.[10]
 -
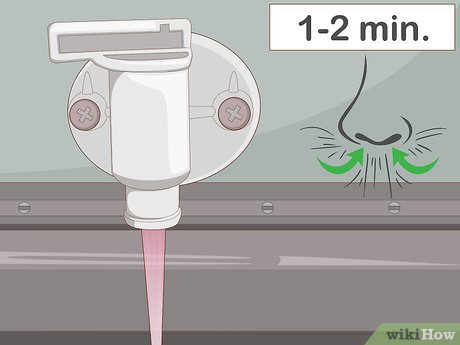 Turn on the RV's water faucets until you smell chlorine. Go inside the RV and use each faucet 1 at a time. After the water runs for 1 or 2 minutes, you will probably smell that harsh odor chlorine has. When this happens, turn off the faucet, then repeat this with any other faucets you have.[11]
- Let both hot and cold water run, since they are supplied by separate lines.
- Forgetting a faucet is easy, but try to get all of them. This includes the shower as well as any sinks.
-
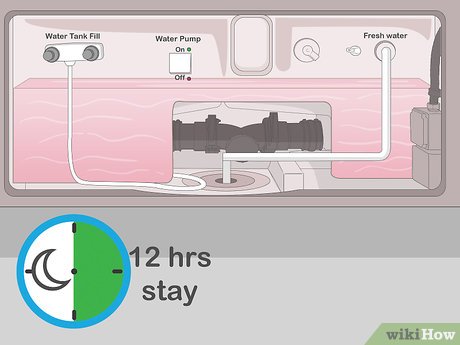 Let the water pump through the system overnight. If you have the time, let the water circulate through the RV's system. This will clear out the lines, tanks, and water heater. If you can't wait that long, at least let the system soak for about 4 hours.[12]
- If you clean the system once a year or more, 4 hours is usually enough soaking time. Ideally, leave the water in the system for at least 12 hours.
-
 Drain the water by opening the water lines. You will need to go under the RV to open up the lines. First, pull the plug out of the fresh water tank's line, turning the spigot as needed to start the water flow. Also, open the hot and cold water pipes hanging down from the RV.[13]
- You can turn off the pump and water heater. However, since you will refill the tank immediately, these elements won't have a chance to overheat if you leave them on.
- The water is diluted, so you can let it go into a storm drain. You can also drain it at a dumping facility or onto nearby grass.
-
 Refill the tank with fresh water. Plug up the water lines again before you add new water. Then, fill the fresh water tank by hooking it up to a city water connection or by pumping water through a hose. Wait until the entire tank is filled.[14]
- If your RV has a water gauge, use that to monitor the tank's fullness. Otherwise, estimate or wait for water to flow back out of the hose.
-
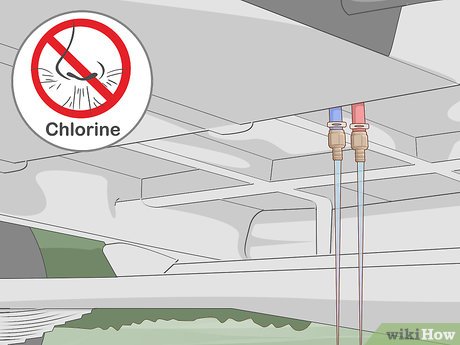 Run water through the faucets until you cannot smell bleach. Activate the faucets 1 at a time inside the RV, checking each for signs of chlorine. At first, you will probably smell it again. Let the water run through each faucet for a few minutes.[15]
- You do not want to drink chlorine water, so make absolutely sure the water is clean before using it.
-
 Repeat draining and refilling the tank if you still detect chlorine. Sometimes the chlorine smell doesn't go away. If this happens, you can get rid of it by repeatedly flushing out your tank. Drain the tank and refill it again, checking all the faucets for the chlorine smell.[16]
- You may need to do this a couple of times before the water is safe.
-
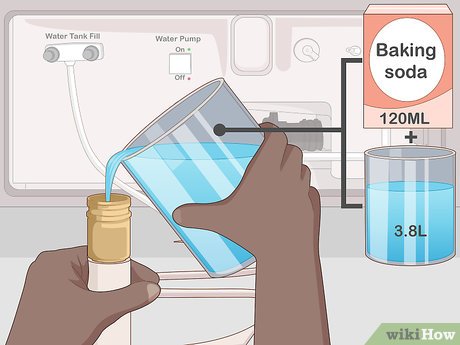 Flush the water lines with baking soda if the chlorine smell is strong. Mix 4 fluid ounces (120 mL) of baking soda with 1 gallon (3.8 L) of water. Pump this into the fresh water tank, then fill the tank completely with clean water. After letting it flow through the RV's system, drain the water again to eliminate the unpleasant chlorine odors lingering in your water line.[17]
- Remember to drain the water again and refill the tank with clean water after doing this.
Was this article helpful?
Your feedback helps us improve.
Related Articles
 How to Clean a Boat Water Tank11 minutes read
 How to clean the residue in the water tank4 minutes read
 Installation instructions for Son Ha water tank4 minutes read
 How to choose a hot and cold bottle to suit your needs3 minutes read
 Common problems on the heater and how to fix it8 minutes read
 Is the water you use everyday really clean?8 minutes read
Reader Comments 0
Sign in with email or Google to join the discussion.