Detailed instructions for checking Dell Laptop warranty
To check your Dell Laptop warranty, you need to know the Service Tag and use Dell's online system. The simple process makes it easy to look up warranty period and support services..
Let's learn how to use Service Tag and determine the exact warranty period for your product with TipsMake.
How to check Dell Laptop warranty
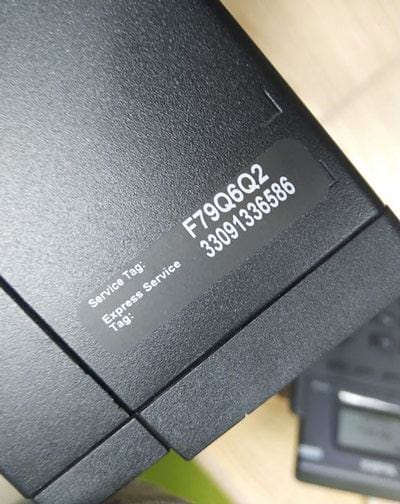
Step 1: Identify the Service Tag of Dell Laptop
To check your warranty, you will need a Service Tag, usually located on the back of your Dell laptop. The Service Tag is a unique code that helps Dell's system identify your device.
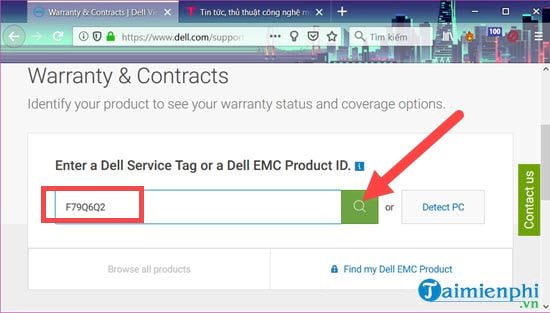
Step 2: Access the warranty check system
Click HERE .
Step 3: You will see a section called Enter a Dell Service Tag or a Dell EMC Product ID , enter the Service Tag.

Step 4: After filling in the Dell Service Tag, click on the magnifying glass icon to check.
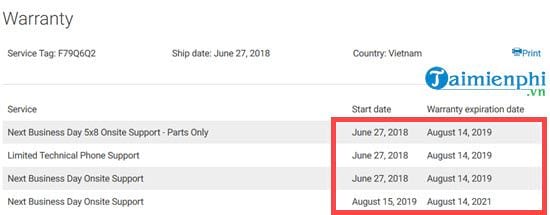
Wait a moment for the test results to display.
- If the machine is expired, there will be a message Expried.
- If it is still under warranty, there will be a specific date as shown below.
In case the machine needs warranty but has expired, you can find the nearest Dell warranty address for detailed information about the service. Note that before buying a Dell laptop, ask the consultant about the genuine warranty period to ensure your rights when the machine has problems.