The features in Excel are many but not enough, with complex functions or features in Excel without you, you can install Add-ins to manipulate and process data more easily. When not needed, you can remove Add-in from Excel.
The following article shows you how to install and remove Add-ins in Excel 2010.
Install the Add-in
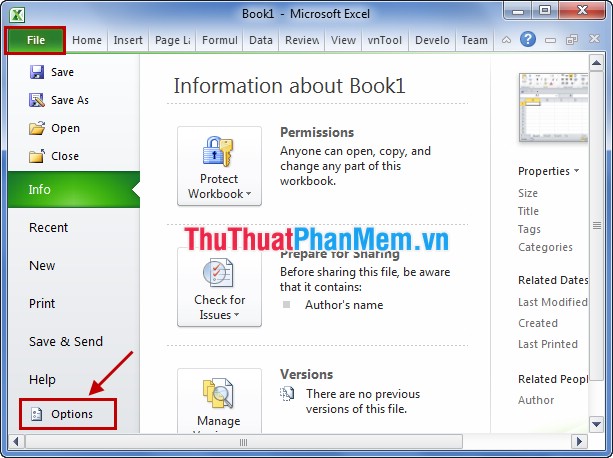
Step 1: Open Excel and select File -> Options to open Excel Options .

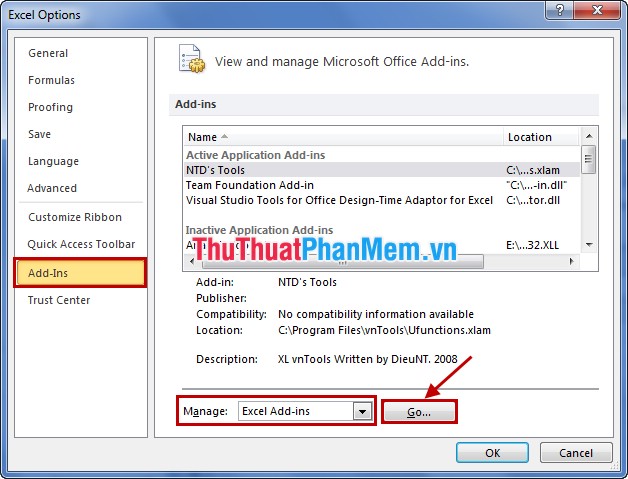
Step 2: In Excel Options, select Add-Ins in the left menu. In Add-Ins, go to Manage, select Excel Add-ins , and then click Go .

Step 3: In the dialog box Add-Ins you can select the default Excel Add-Ins by checking the box before the Add-Ins you want to add.
In addition, you can download other Add-ins to your computer and click Browse to select the Add-in .
Click OK to install the Add-in in Excel, then you restart Excel.
Uninstall the Add-in
Follow the same steps above to open the Add-Ins dialog box. In the dialog box Add-Ins, if you want to remove any Add-in you deselect in the box before that Add-in. Then click OK to remove.
Close all Excel files and restart.
The article has shown you how to install and remove Add-in in Excel, you can easily use advanced features that Excel does not yet support. Therefore, the processing of data in Excel will be faster and more efficient. Good luck!
