6 Simple Ways to Get More Performance from Your NVMe SSD
With just a few tweaks and settings adjustments, an SSD can deliver improved performance and longer lifespan – so don't settle for what the hardware can deliver.
Table of Contents
NVMe SSDs offer blazing fast performance for a faster computing experience, but sometimes we don't tap into their full potential. With a few tweaks and settings adjustments, SSDs can deliver improved performance and longer lifespans - so don't settle for less than what your hardware can offer.
6. Update NVMe driver and firmware
Outdated drivers are often the silent performance killers of high-end hardware. Your NVMe drive may be slowing down with generic drivers that don't take advantage of its capabilities.
Unlike older SATA drives, modern NVMe SSDs require specialized drivers to reach their full potential. Many of us assume that Windows will automatically install the optimal driver, but that's not always the case. Microsoft's default drivers work, sure, but sometimes they're designed for compatibility rather than peak performance.
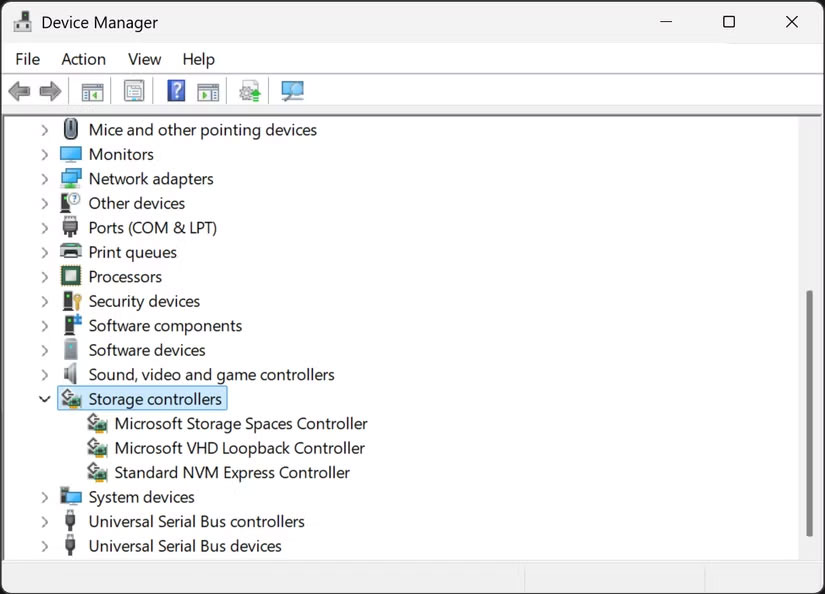
Check to see if your memory driver needs updating in Windows Device Manager . You can also check to see if there are any firmware updates available for your NVMe. To do that, you'll need to visit the SSD manufacturer's website.
5. Make sure NVMe is running in the correct PCIe mode
Your NVMe drive will not perform near its advertised speed if it is running in the wrong PCIe mode. This can happen when a PCIe 4.0 drive is operating at PCIe 3.0 speeds without you knowing.
First, check the NVMe slots on your motherboard and see if they support the same generation as your drive. The speed difference between PCIe 4.0 and PCIe 5.0 is huge, and running a drive in a lower-generation slot will severely limit performance.
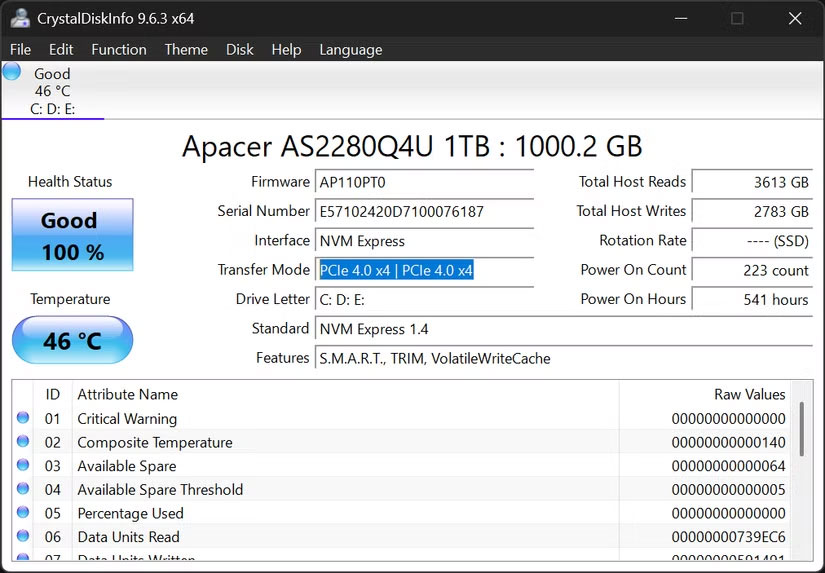
To verify your drive's current operating mode, load CrystalDiskInfo and check the Transfer Mode field. If your Gen4 drive shows "PCIe 3.0 x4" instead of "PCIe 4.0 x4," you're missing out on significant performance. Common culprits include an outdated BIOS, using the wrong motherboard slot, or enabling the wrong BIOS settings.
4. Enable TRIM for NVMe to run smoothly
TRIM is one of those important features that many people overlook, but is essential to maintaining your NVMe performance over time. Without TRIM, your drive will slowly slow down as it fills up with data, even data that you've technically "deleted."
Unlike traditional hard drives, NVMe drives can't overwrite existing data. They need to erase cells before writing new data, which creates overhead. TRIM solves this problem by telling the drive which blocks of data are no longer in use, allowing it to clean up during idle times instead of when you're trying to save a file.
Enabling TRIM can also prevent your SSD from failing prematurely. Luckily, Windows 10 and 11 usually enable TRIM by default, but you should always double-check.
Warning : When TRIM is active, deleted files become much harder (often impossible) to recover. This can be beneficial for security, but is not ideal if you accidentally delete important files.
Refer to: How to enable/disable TRIM support for SSD in Windows 10 for more details.
3. Adjust these Windows settings for maximum speed
Windows itself has a number of settings that can impact NVMe performance. Let's be honest, these Windows tweaks won't make your NVMe drive significantly faster. The performance gains are minimal compared to anything else. However, these optimizations are worth implementing to get the most performance out of your drive.
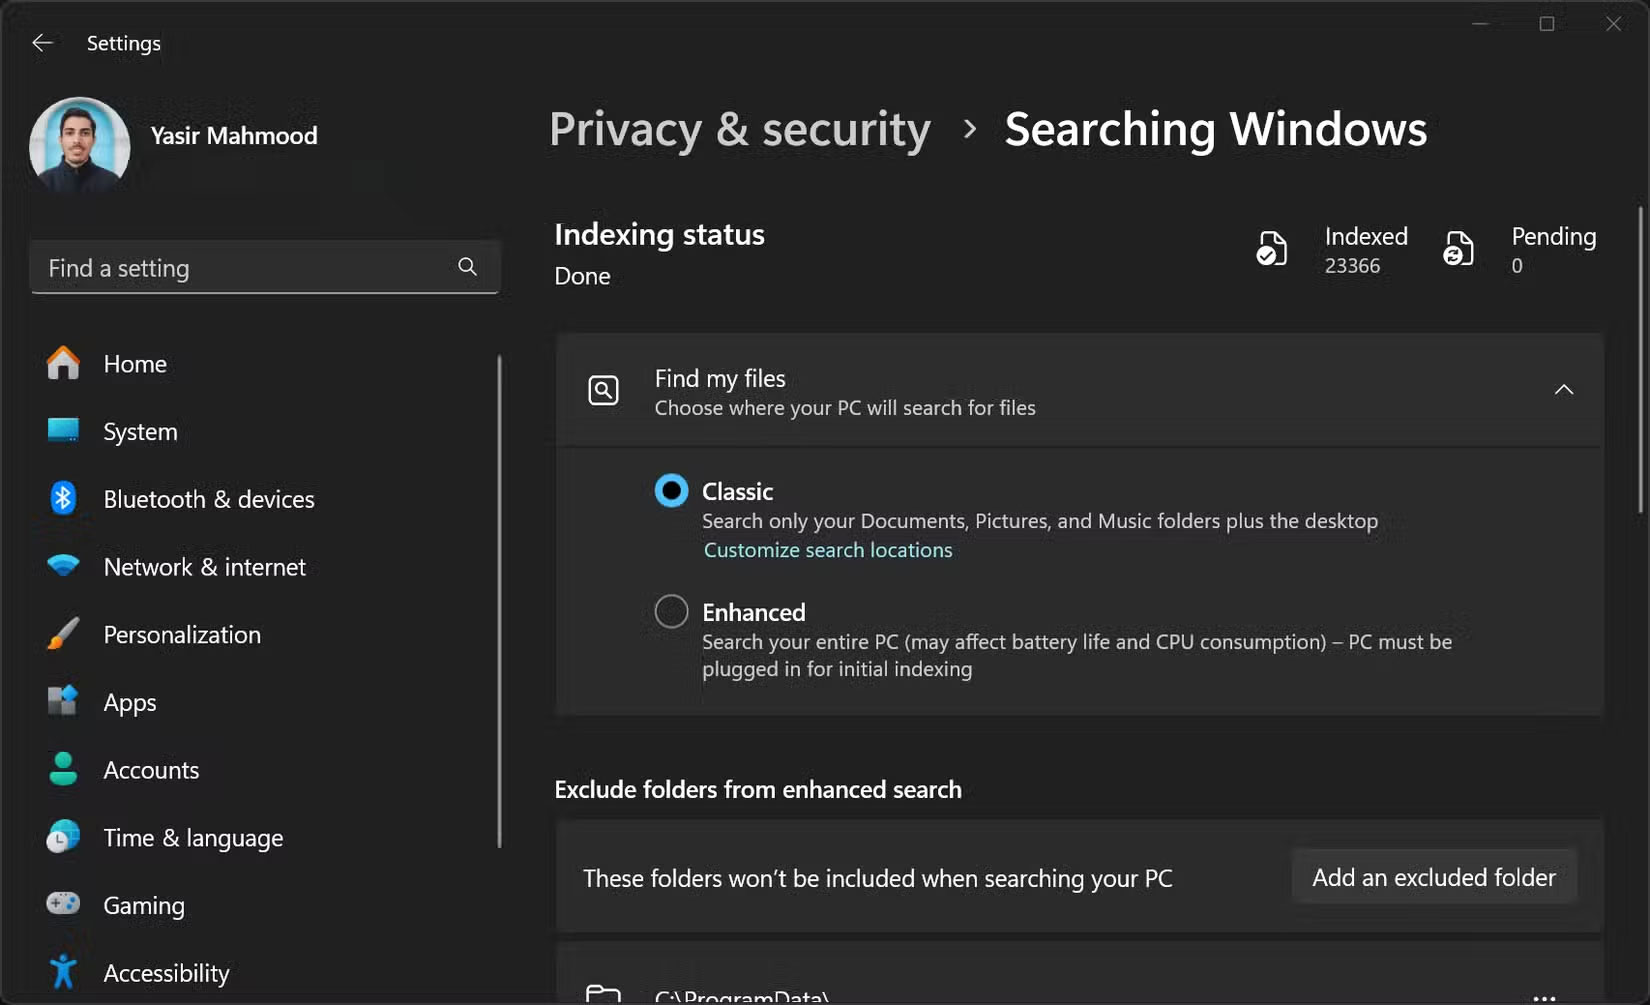
First, check the Windows Search Indexer, as it can reduce performance. While useful for finding files quickly, it is constantly writing to the SSD, which can affect the lifespan and performance of the SSD. Turning off the Windows Search Indexer, especially if it is only used for games or applications, can free up resources and reduce unnecessary wear and tear.
Additionally, you may want to adjust your Windows power plan, as it usually defaults to 'Balanced.' This throttles performance to save power, which is not what you want on a high-performance NVMe desktop PC. Switching to 'High Performance' will remove these limitations, allowing your drive to run at full speed without random throttling.
2. Monitor NVMe temperature to prevent throttling
NVMe drives run much hotter than similar SATA drives – and excessive heat will reduce both performance and lifespan. Once the drive reaches around 70°C (158°F), it will start to throttle down to prevent damage, which defeats the purpose of having high-performance storage in the first place.
For example, the Apacer PCIe 4.0 NVMe temperature spikes during heavy file transfers, resulting in throttling. This happens automatically without any warning. Tools like HWiNFO64 or CrystalDiskInfo, as mentioned earlier, provide real-time temperature monitoring, allowing you to detect these issues before they impact performance.
1. Run these benchmarks to verify improvements
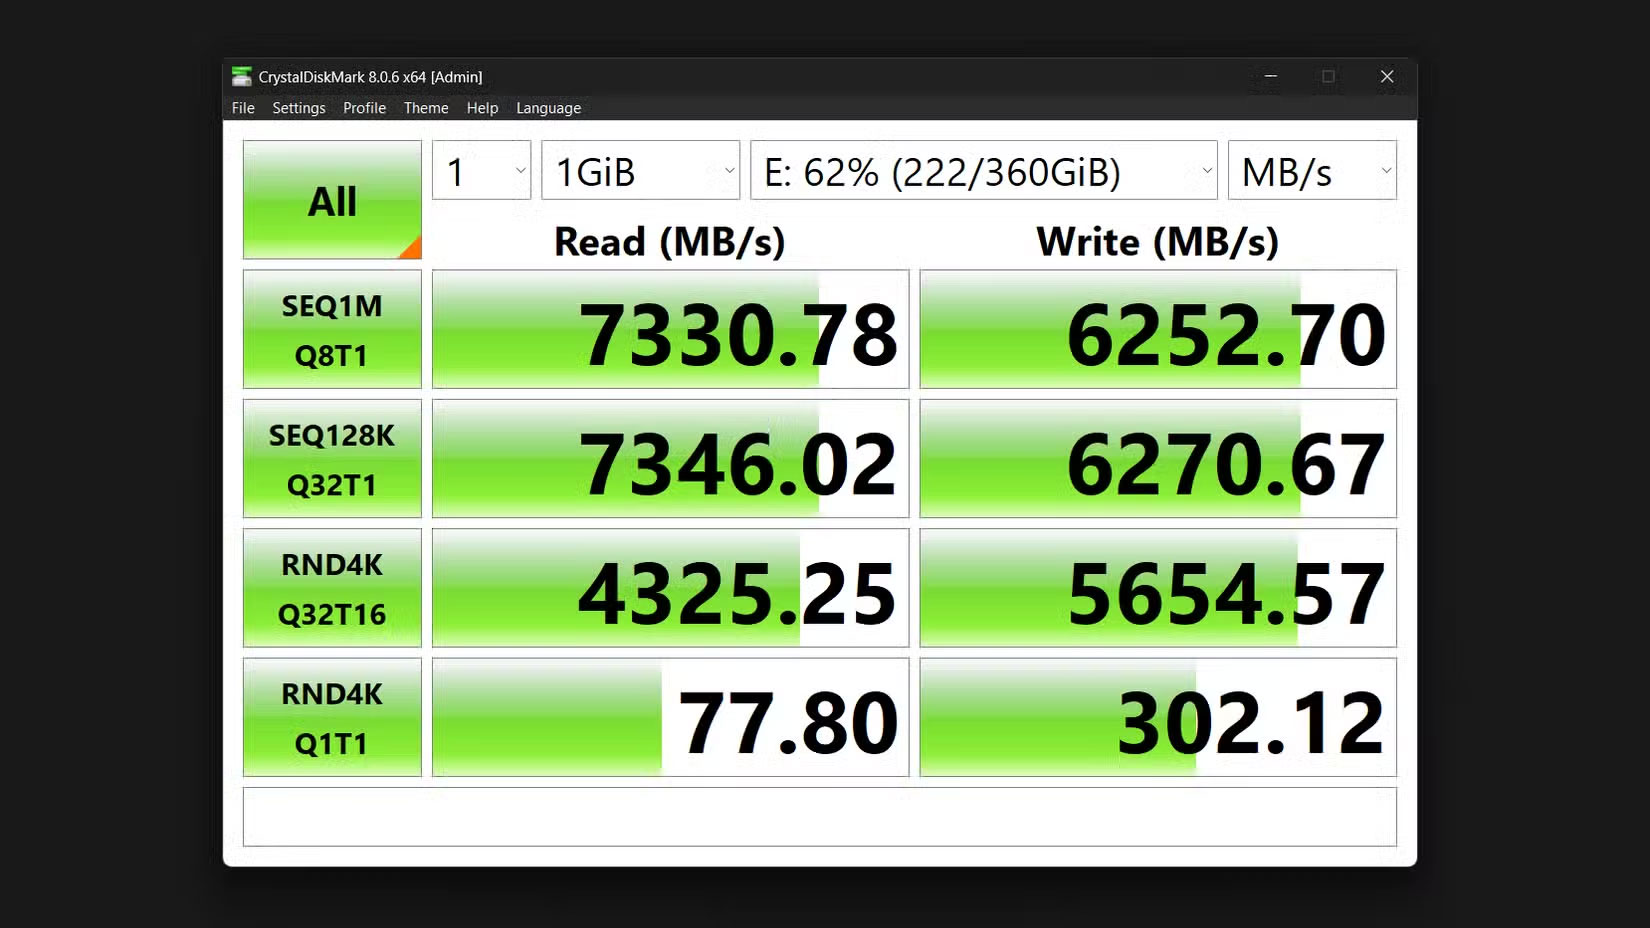
Once you've implemented all of these optimizations, you need to verify that they actually make a difference. CrystalDiskMark is a tool for testing NVMe speed and performance. It's simple and provides comprehensive metrics for sequential and random read and write speeds, with the latter being more important for everyday tasks. Run it before making any changes to establish a baseline, then rerun it after each major optimization to track improvements.
The "SEQ1M" test measures sequential read and write speeds for large files—important when transferring movies or large data sets. Meanwhile, the "RND4K" test measures how quickly the drive handles small, random data—important when booting Windows or launching applications.
The 'Q' and 'T' values, on the other hand, represent queue depth and thread count, respectively. Higher numbers represent heavier workloads, like video editing, while Q1T1 represents everyday tasks like web browsing.
Was this article helpful?
Your feedback helps us improve.
Related Articles
 What is a NVMe drive? Compare NVMe drive with SSD drive5 minutes read
 How to install SSD hard drive NVMe M.2?3 minutes read
 7 Things You Should Check Before Buying Any NVMe SSD8 minutes read
 Reasons to use SATA SSD hard drive7 minutes read
 Many users report that Windows 11 causes NVMe SSDs to slow down2 minutes read
 NVMe 2.0 protocol supports both PCIe-connected HDDs2 minutes read
Reader Comments 0
Sign in with email or Google to join the discussion.