Use the Quick Look feature of OS X on Windows
Quick Look is one of the useful features when using OS X operating system, enabling users to collapse multiple actions using the Spacebar. You absolutely have this unique unique feature experience on Windows, by ...
Table of Contents
Quick Look is one of the features that many OS X users love. All operations such as viewing image files, PDF data files we just need to use through the Spacebar. All file contents will be displayed immediately without the need for any other support application.
Now Windows users can also experience Quick Look thanks to the free Seer tool with a small amount. In this article, Network Administrator will guide you how to install and use Seer to bring Quick Look to Windows
Step 1:
First of all, you need to install the Seer tool on your computer according to the following link. The installation is extremely simple, just click Next to complete the process.

After successfully installing on the computer, the icon of the tool will appear in the Taskbar.

Step 2:
The use of the Seer tool is relatively simple and not too difficult.
To view the image, click on the file and press the Spacebar . Seer window will appear shortly after.

Step 3:
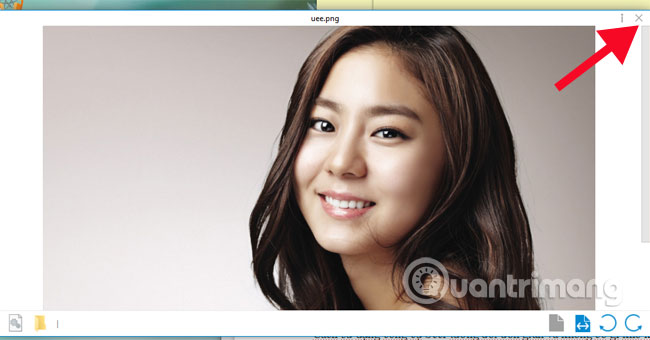
To close the window, click the X icon on the top of the image.
To view image information, click the i icon .

Rotate the image according to different angles or zoom in.

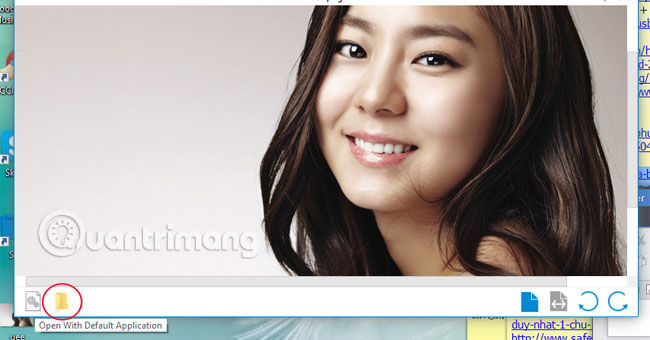
Or access the file location via the File Explorer icon .
Step 4:
We can also change the options settings in the Seer tool, right-click on the software icon at the taskbar and select Settings .

Step 5:
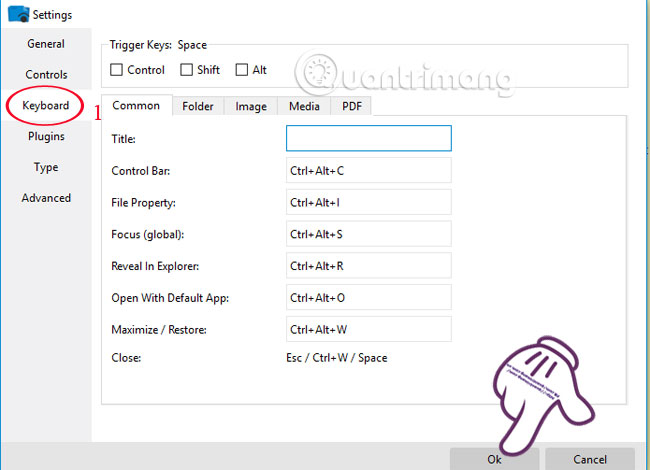
To set up shortcuts for faster operations, we click on the Keyboard item and can change it freely. In it, you can also set up keyboard operation for Folder, Image, Media, PDF.
Step 6:
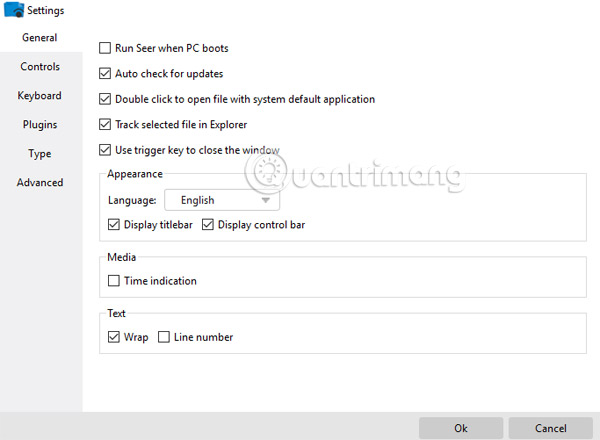
In addition, we can also explore many other installation items on Seer including:
- General : General settings for Seer.
- Controls : control settings.
- Plugins : install extensions.
- Type : Seer file format supported.
- Advanced : advanced options.
Thus, you can experience the attractive Quick Look feature right on Windows thanks to the simple Seer tool.
Refer to the following articles:
- Notes before updating Mac OS X 10.10 Yosemite
- Share files and folders between Mac OS X and Windows 7
- Create ZIP files in just two steps in Mac OS X
Hope the above article is useful to you!
Was this article helpful?
Your feedback helps us improve.
Related Articles
 How to Bring Mac Quick Look to Windows2 minutes read
 Enable the Quick Removal feature to quickly remove USB drives on Windows.3 minutes read
 How to open the Quick Assist tool in Windows 112 minutes read
 Users will be allowed to create their own Quick Actions on Windows 102 minutes read
 How to add Quick Launch bar in Windows 104 minutes read
 How to turn off Recent Files and Quick Access on Windows 103 minutes read
Reader Comments 0
Sign in with email or Google to join the discussion.