Syncthing
Syncthing is a peer-to-peer file sync app that lets you sync files across multiple devices without the need for a central server or third-party cloud service.
Table of Contents
Many people have been using Syncthing for a while now to sync files across several of their devices without the cloud, and love it.
What is Syncthing? How does it work?
Learn about Syncthing's P2P sync feature
Syncthing is a peer-to-peer file syncing app that lets you sync files across multiple devices without the need for a central server or third-party cloud service . You can use it to sync documents, photos, videos, and other types of data. All transfers take place over an encrypted channel, ensuring privacy and security.
Syncthing works by scanning all the files in a folder and breaking them into small blocks. Then, whenever a file is changed, the app only sends the modified blocks to other devices, saving time and data. If a file is changed simultaneously on multiple devices, Syncthing keeps both versions and renames the conflicting file to avoid data loss.
Setting up and using Syncthing
Set up once, sync easily forever
Setting up your own sync system with Syncthing involves several steps. You can run Syncthing across multiple computers, multiple phones, or a combination of both, depending on your needs.
Basic installation and setup
Start by downloading and installing the Syncthing app on the devices you want to sync data to. Syncthing is available on all major desktop platforms, including Linux, macOS, and Windows. Unfortunately, there are no official Syncthing apps for Android and iPhone, so you'll need to use forks or third-party apps. Syncthing-Fork and Synctrain are popular choices for Android and iPhone.
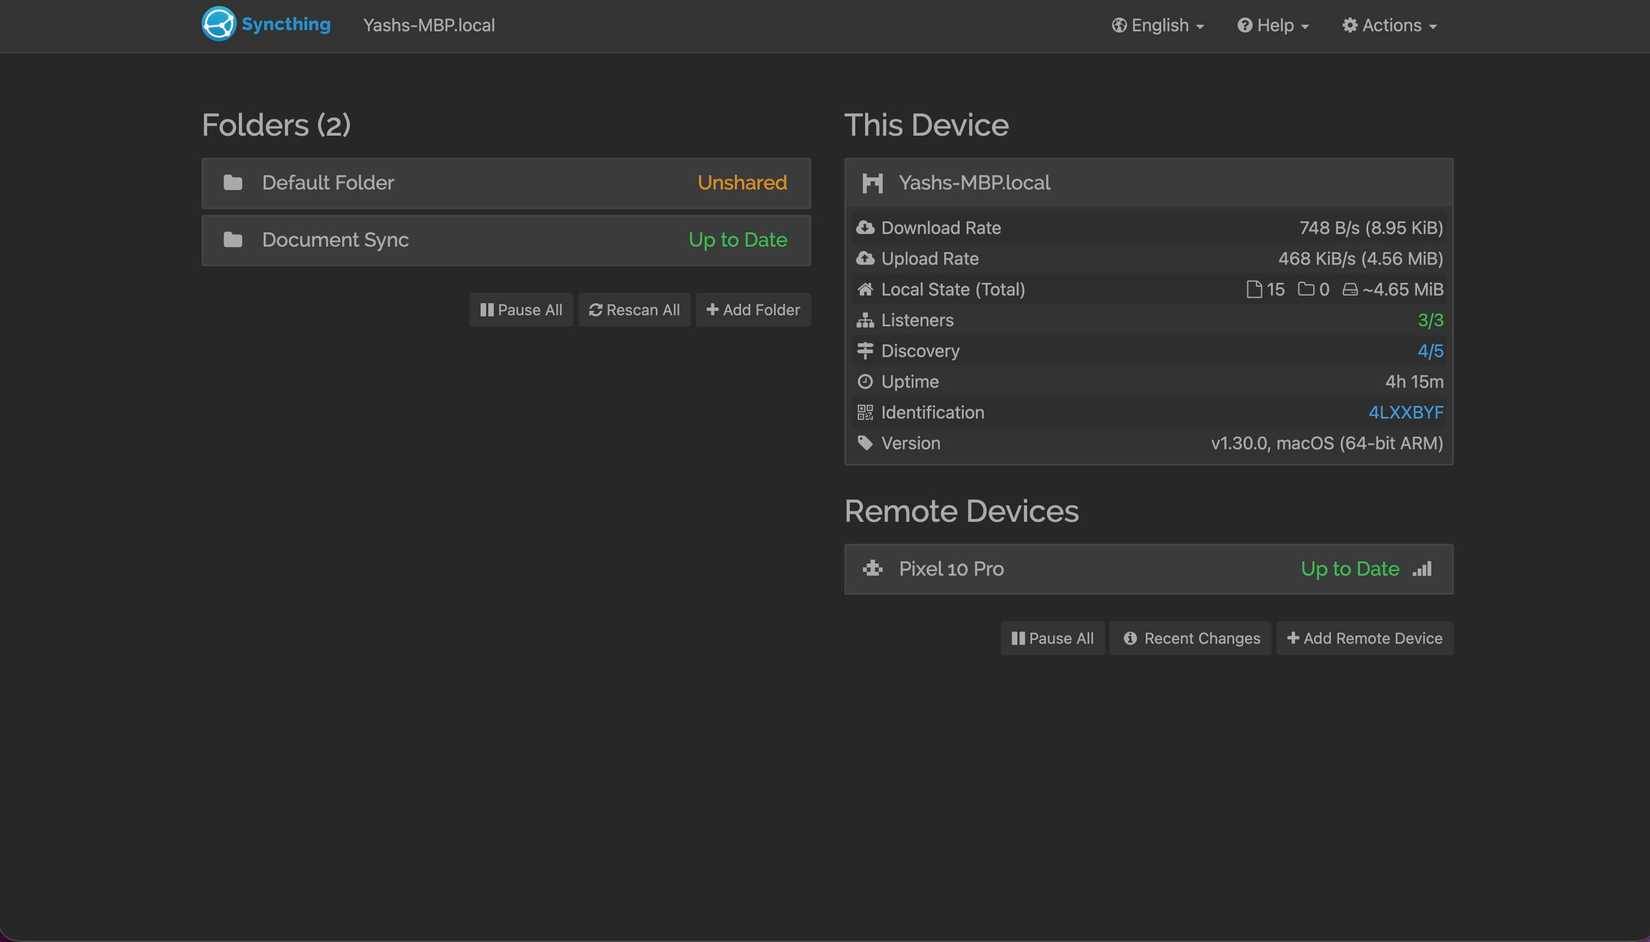
Open the Syncthing app on your computer. The app will create the necessary configuration files and a unique device ID, and start a local web server. You can access the app on your computer by going to http://localhost:8284 in your web browser.
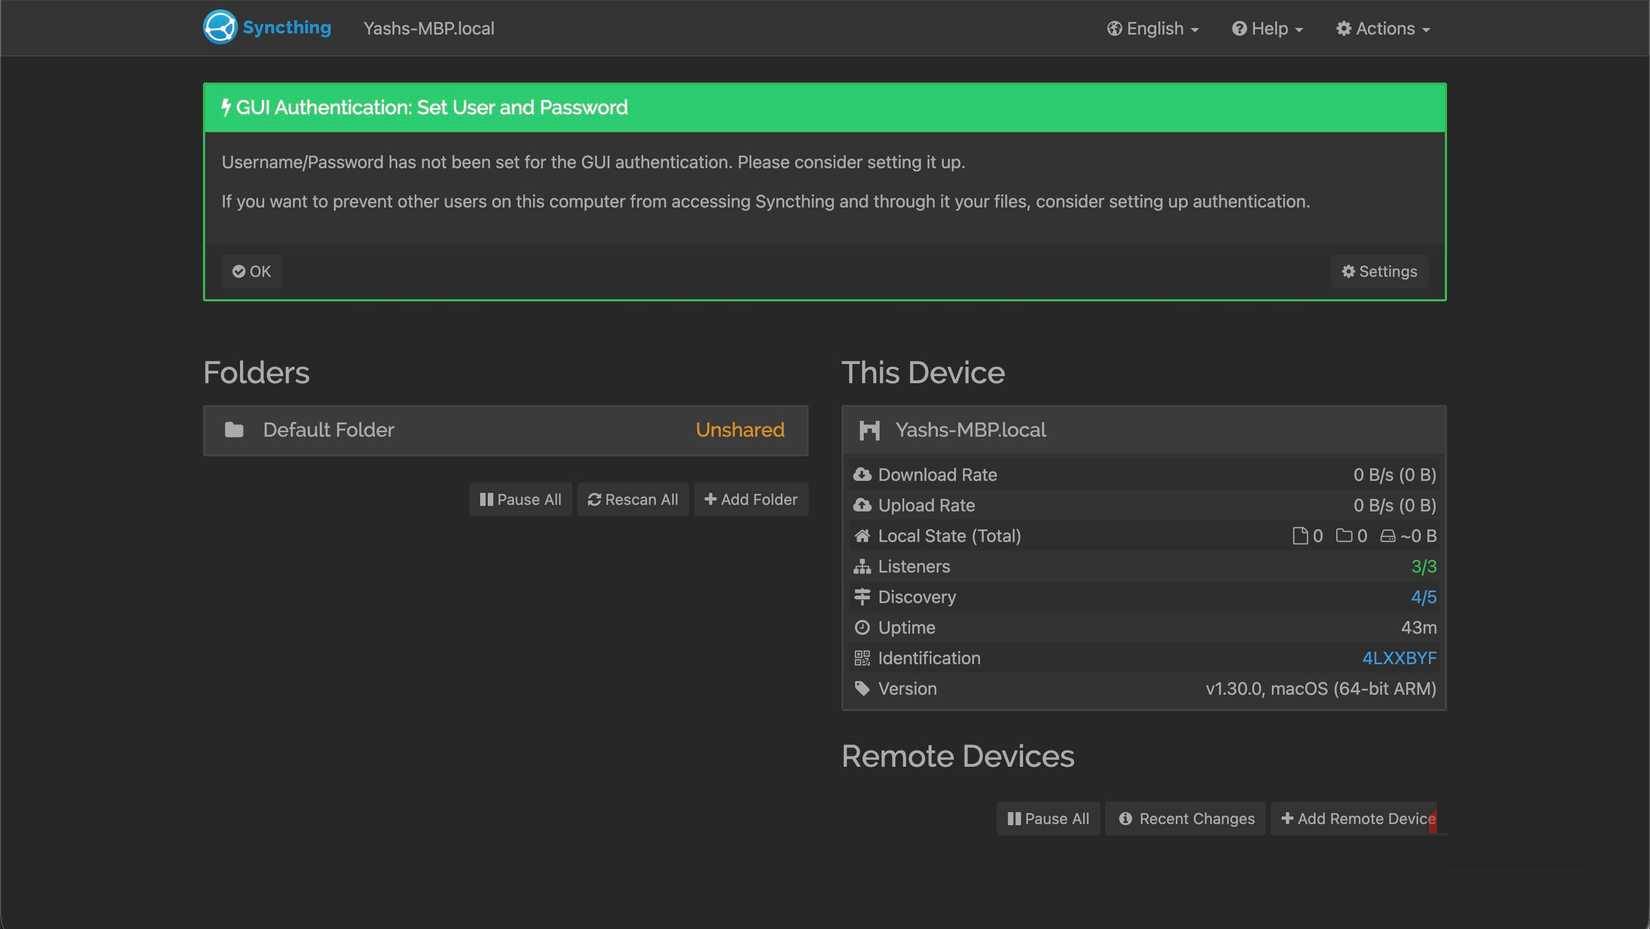
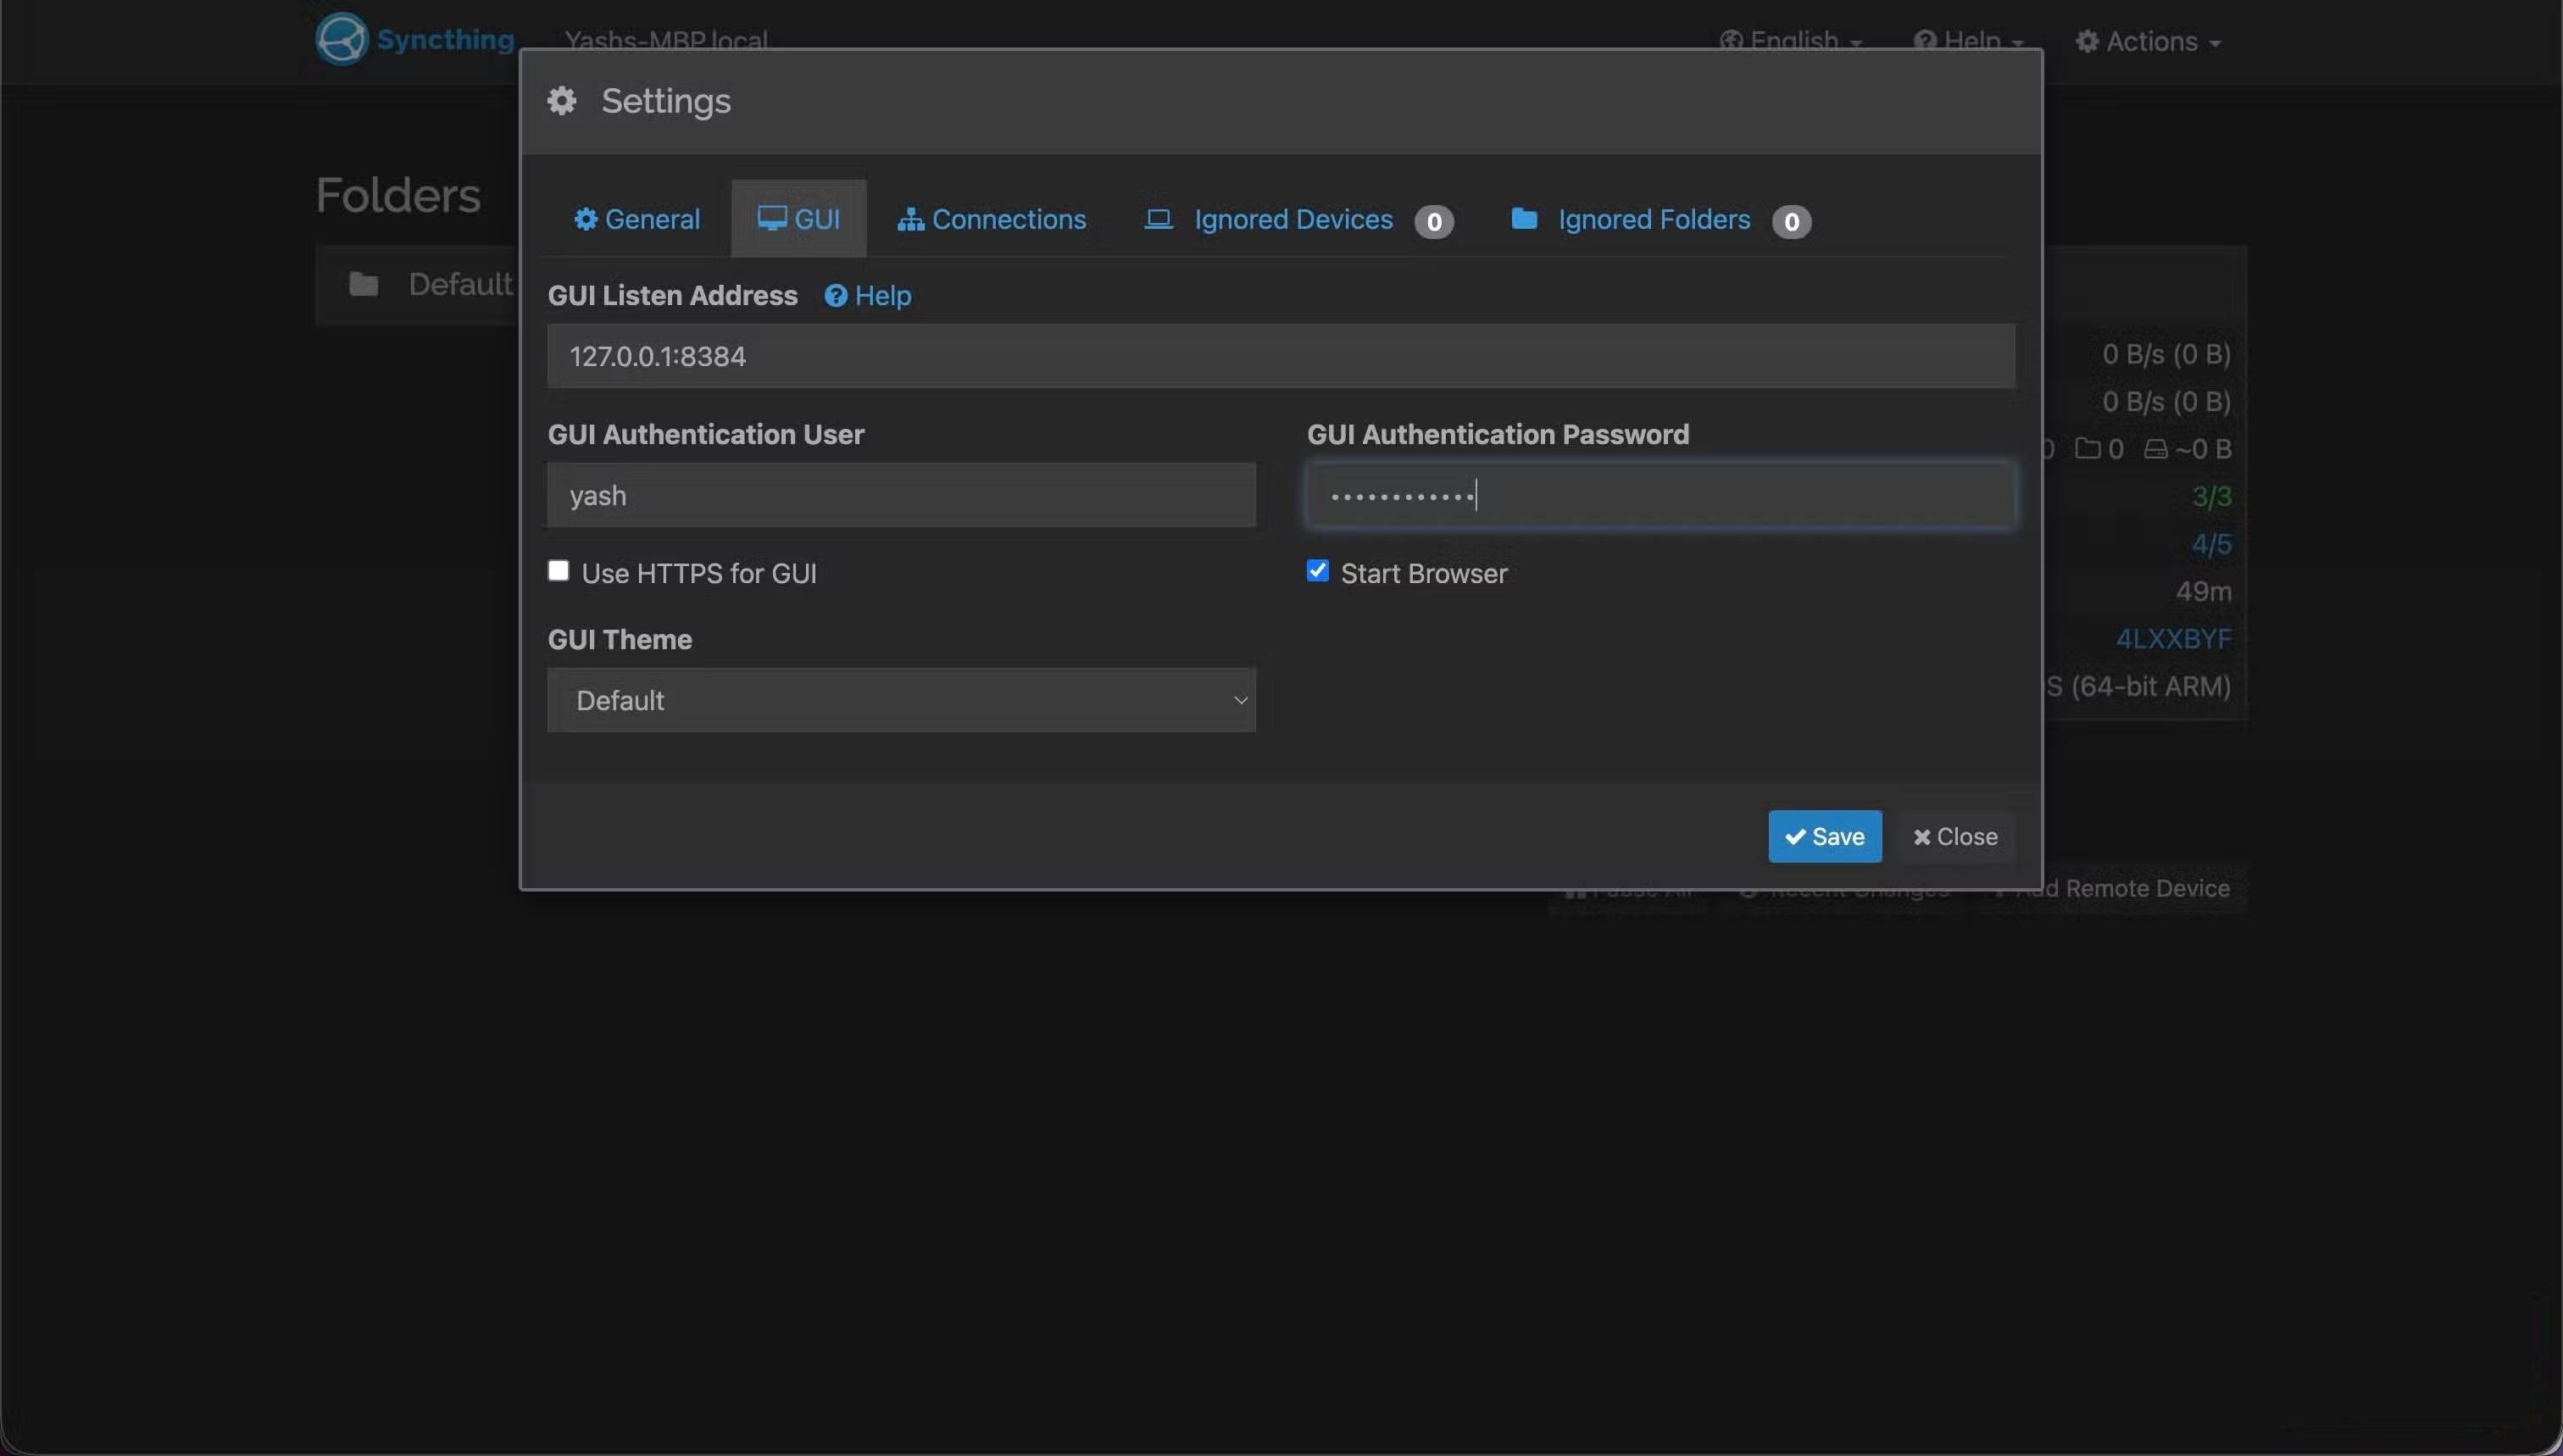
Here you will be prompted to set up a username and password to prevent unauthorized access to the Syncthing web interface.
- Click Settings to open the GUI settings. Or, click Actions , select Settings and go to the GUI tab .
- Enter the username and password in the GUI Authentication User and GUI Authentication Password fields respectively, and then click Save . You can also enable the Use HTTPS for GUI option for added security.
- Additionally, you can give your device a memorable name to make it easier to manage and monitor. Go to Syncthing settings in the web interface. On the General tab, click the Device Name text field and enter the name you want.
- Click Save to save changes.
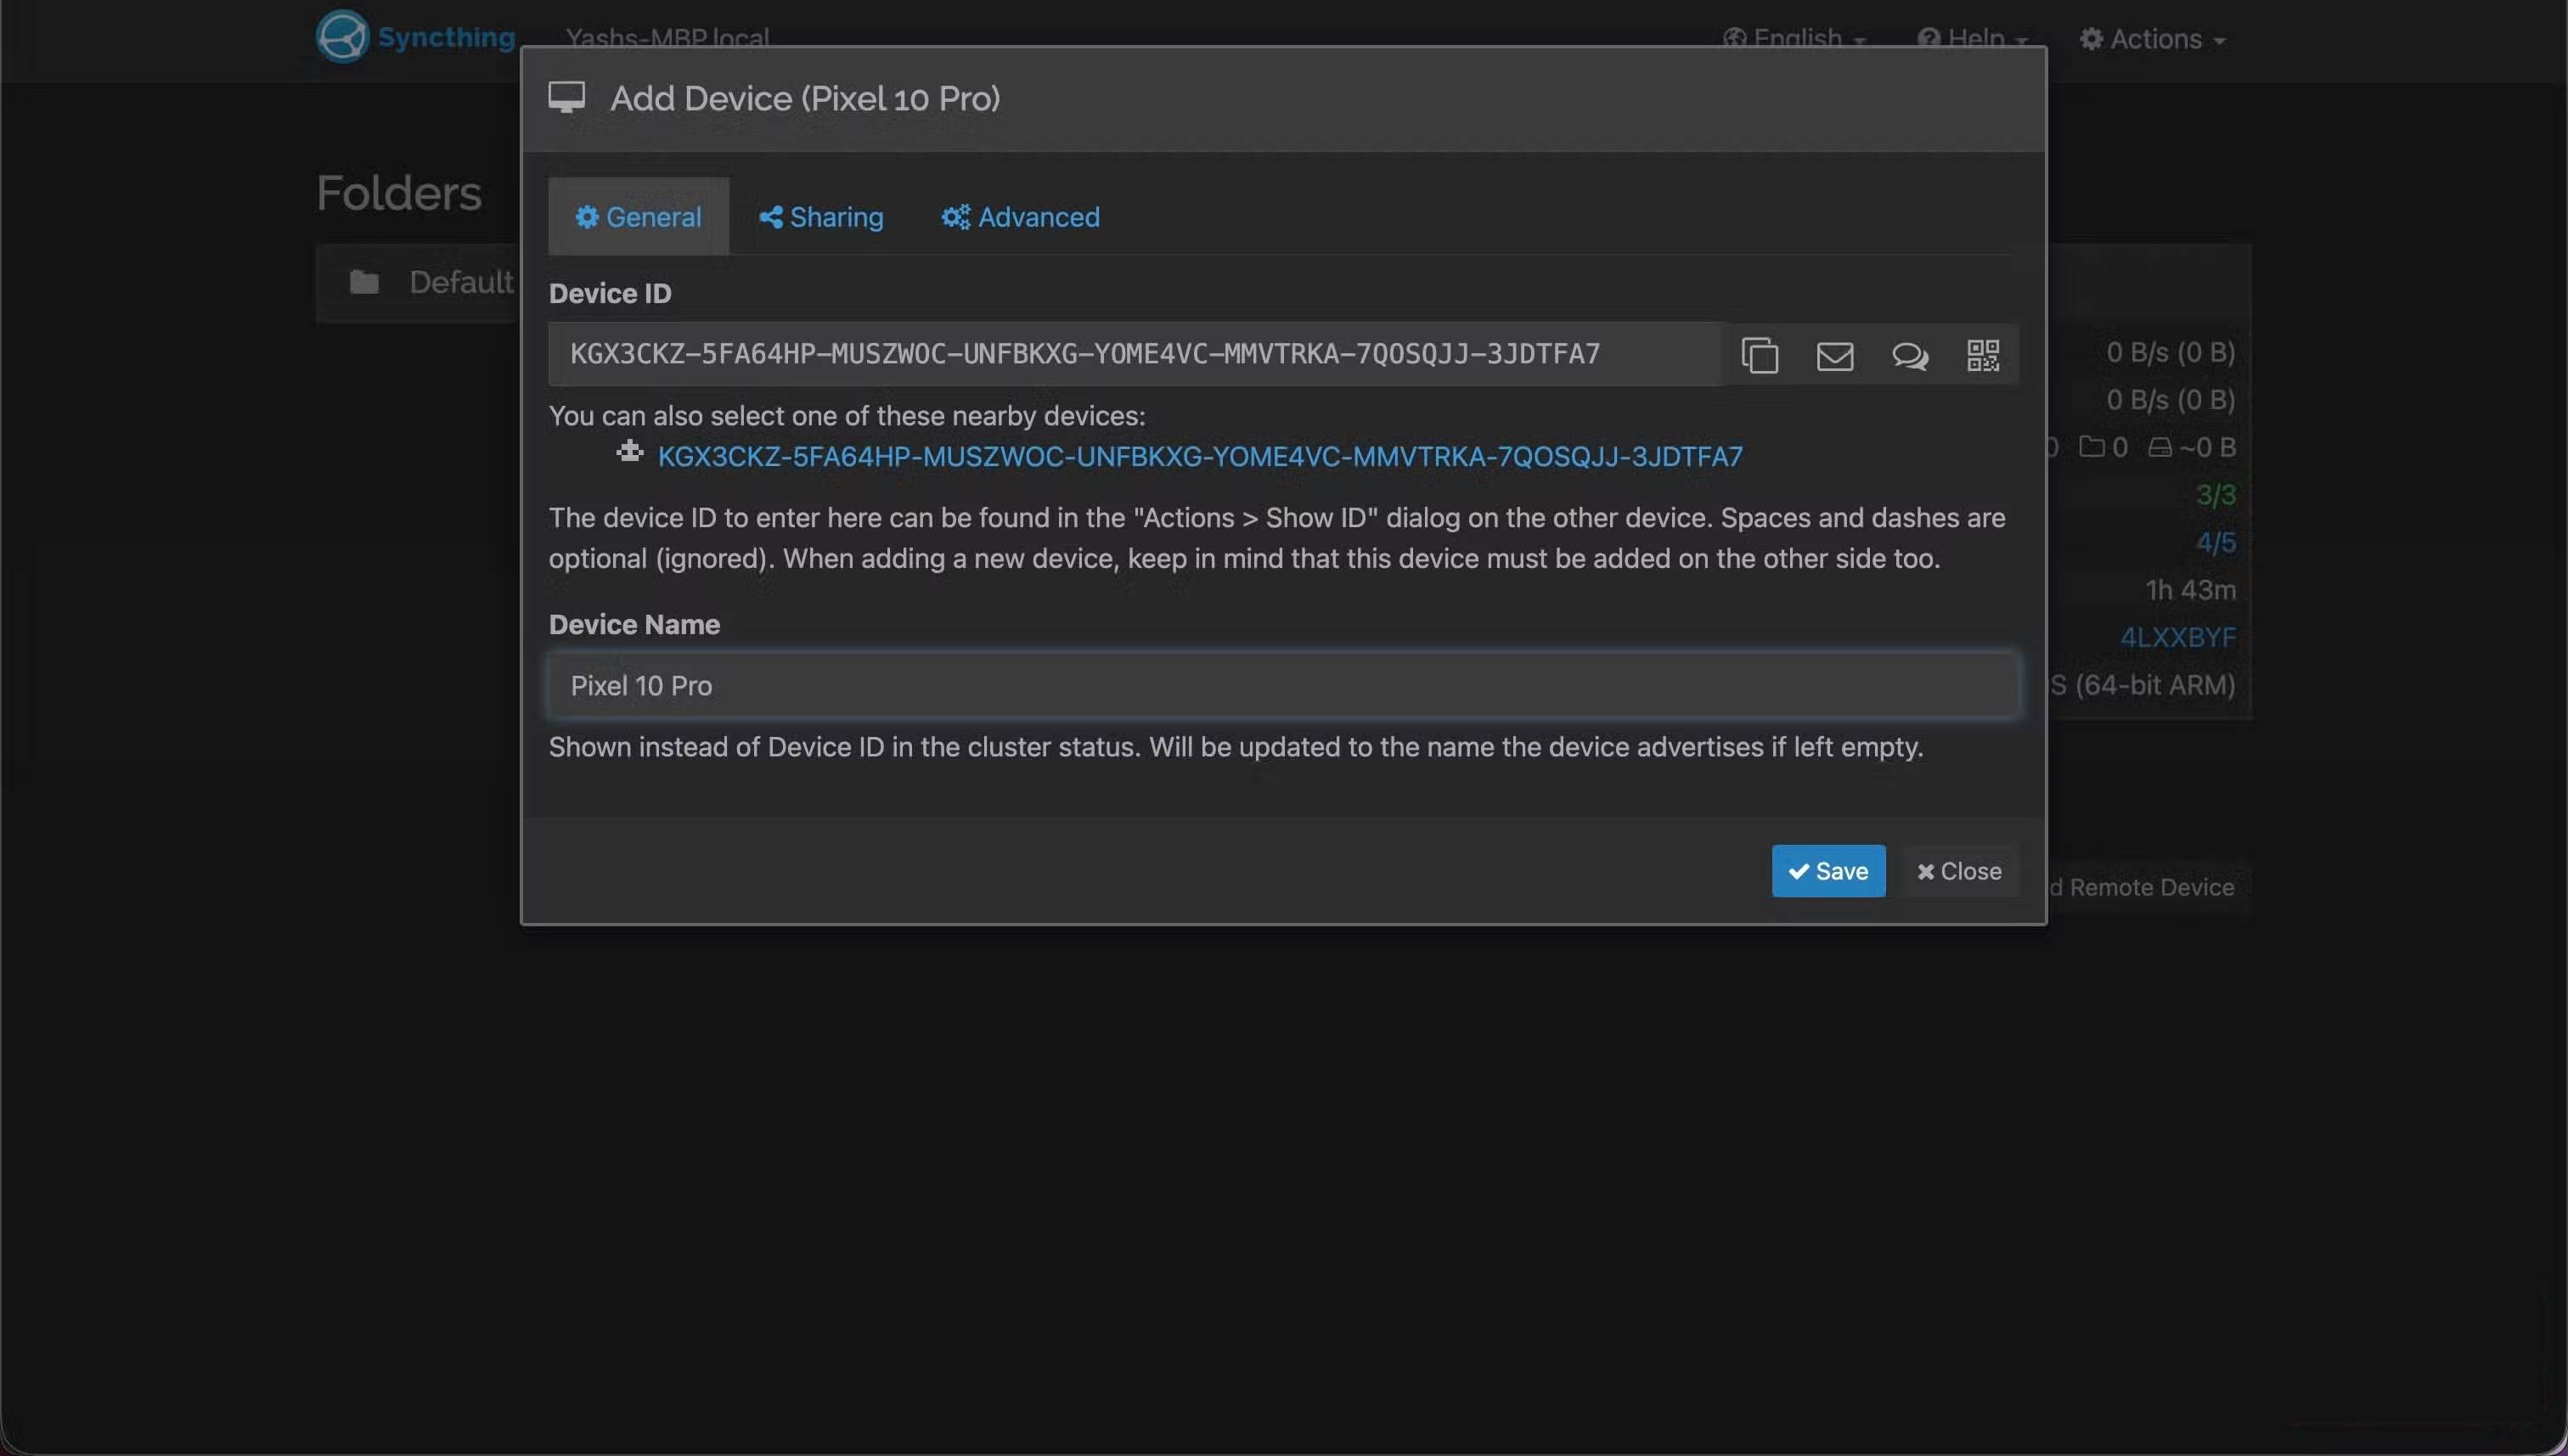
Add device
Once you've completed the basic setup, the next step is to link the devices you want to sync files to. To do this on the desktop:
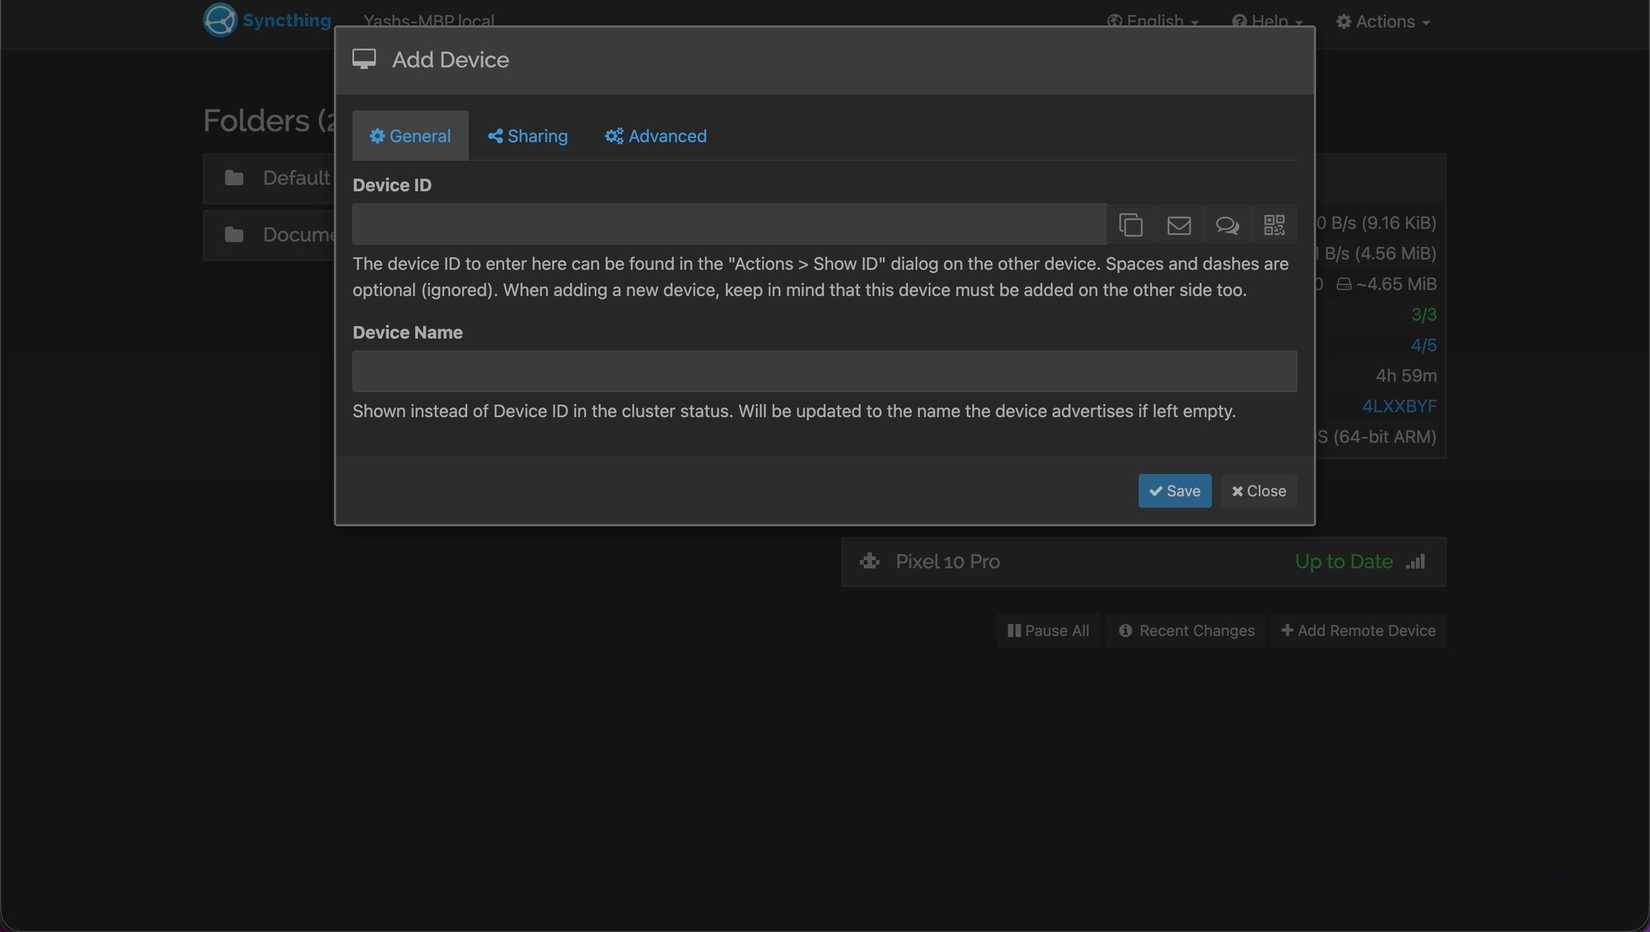
- Go to the Syncthing web UI, click Actions in the upper right corner and select Show ID . If you're on a mobile device, tap the three-dot menu in the upper left corner and select Show device ID .
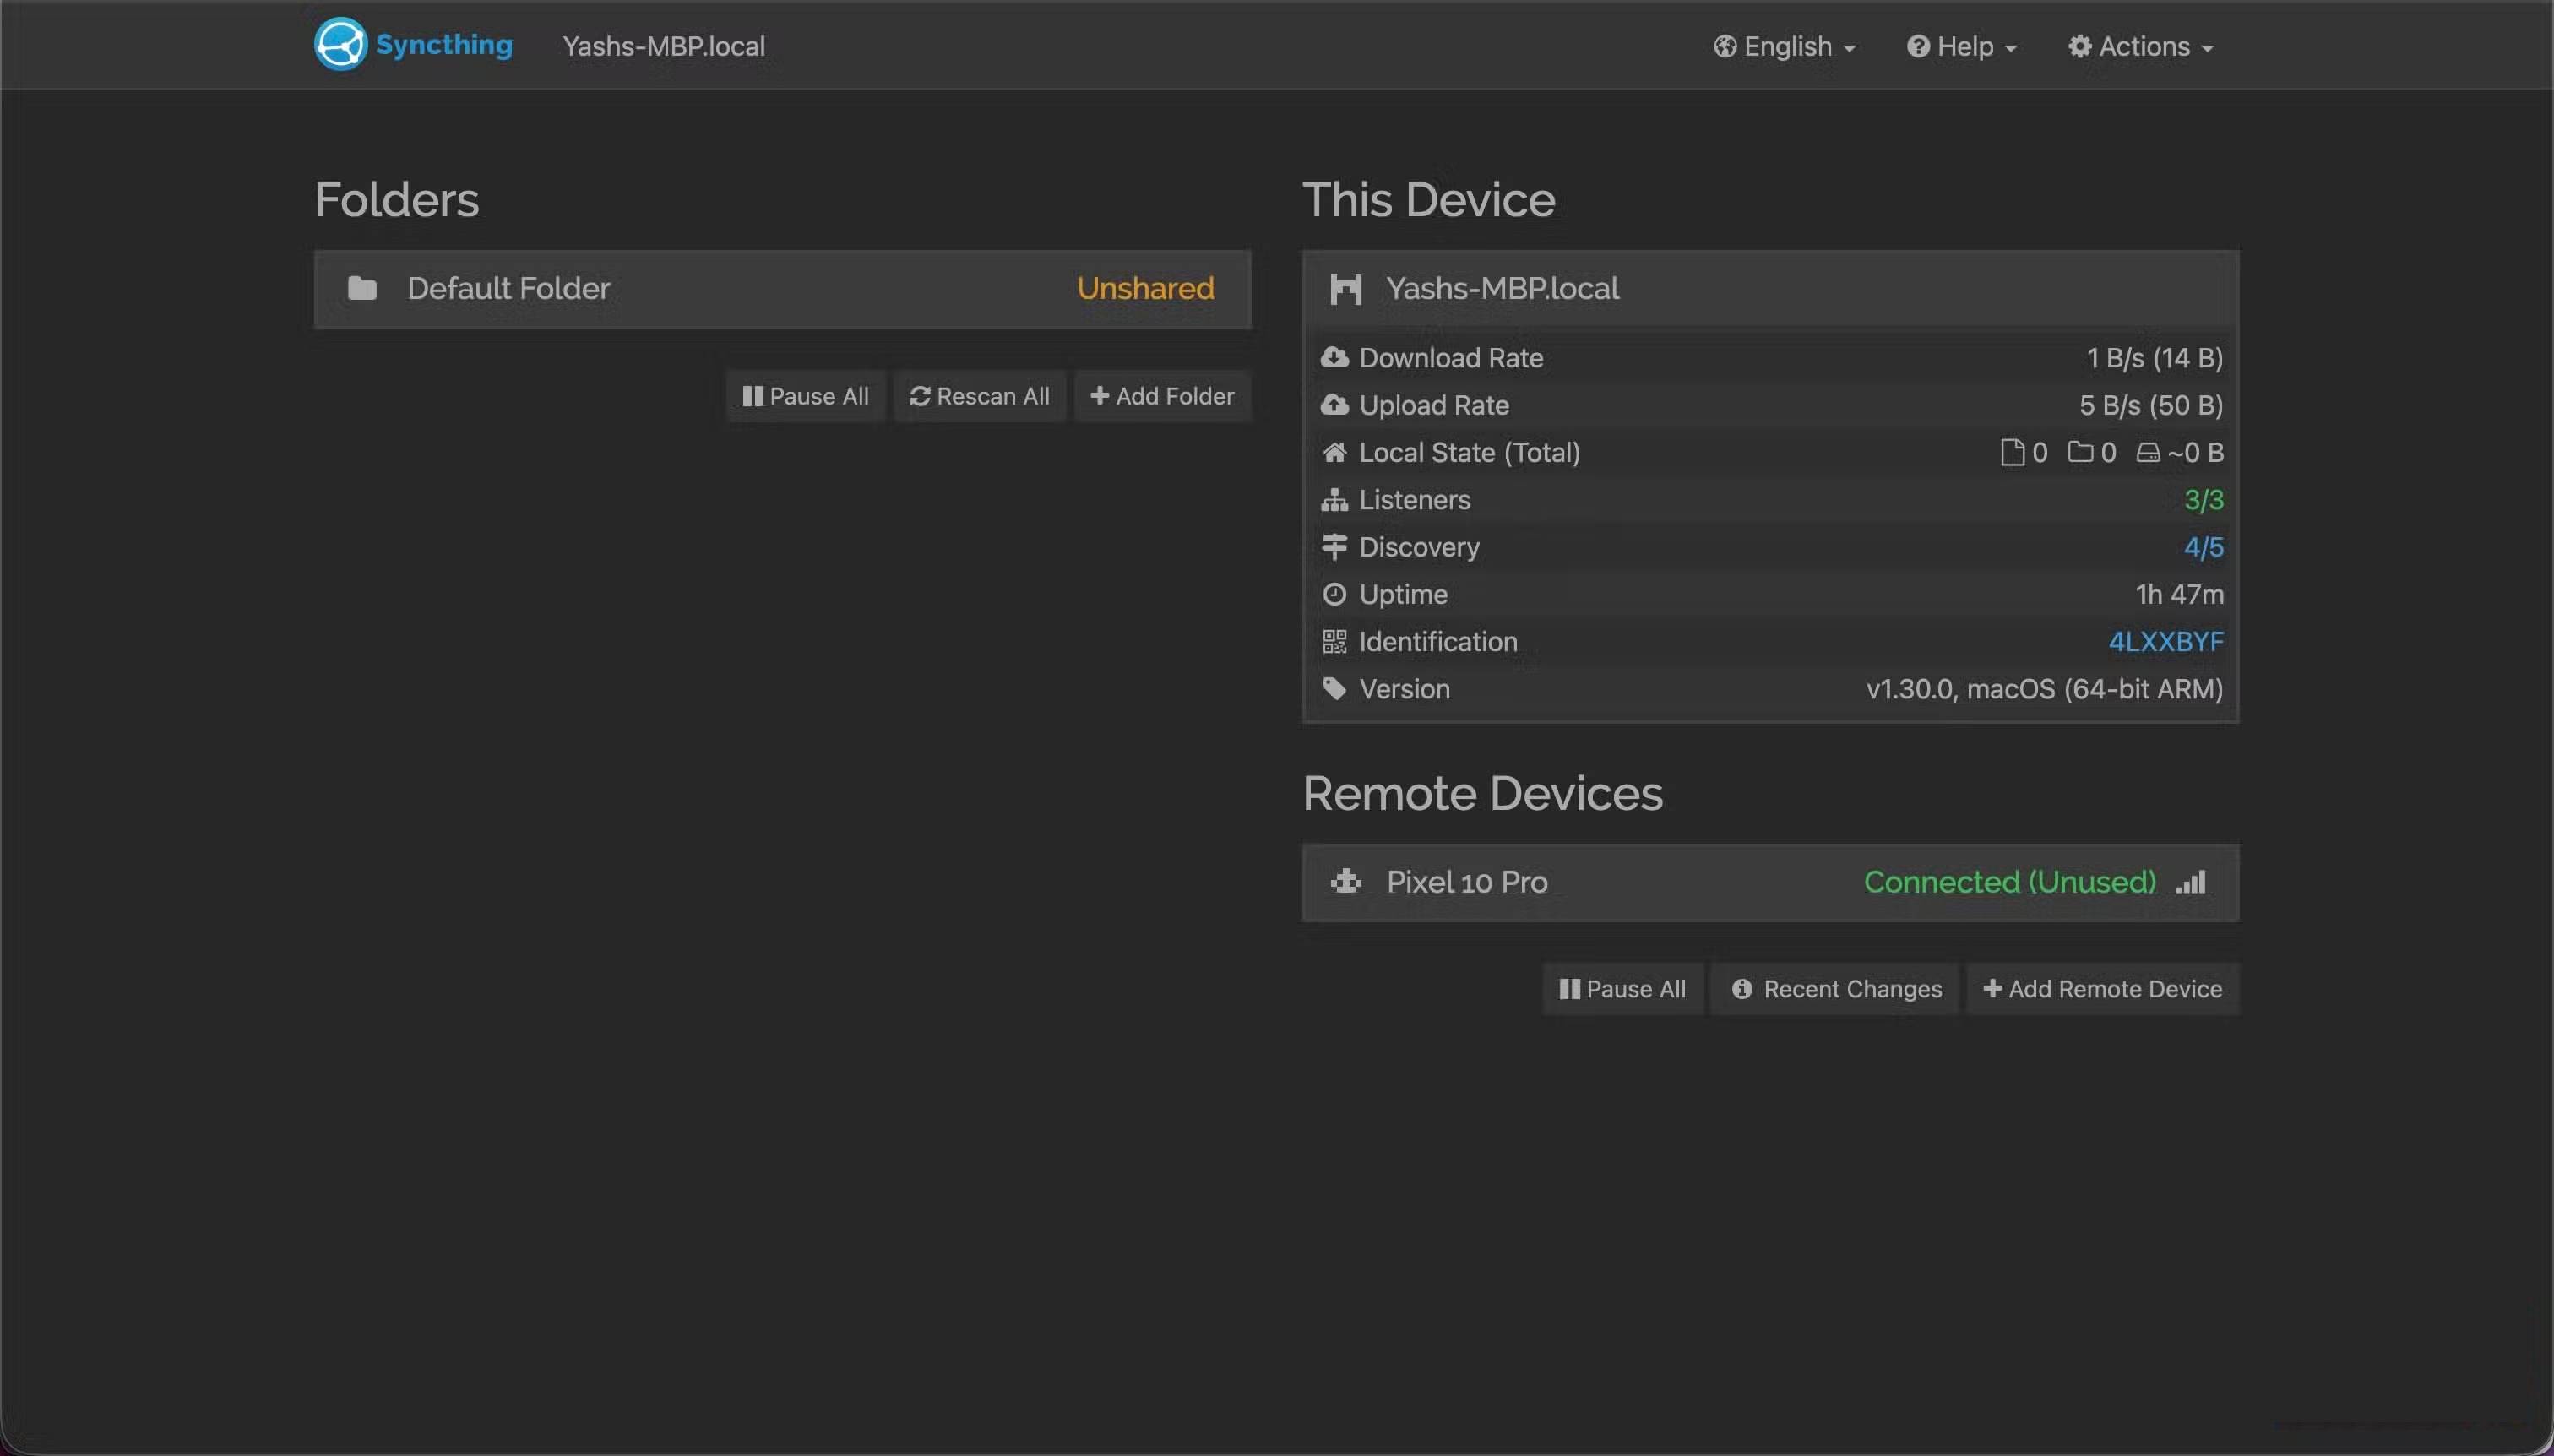
- Then, on another device, click Add Remote Device in the bottom right corner of the page, enter the device ID for the first device, and hit Save . If you're on a phone, go to the Devices tab , tap the new device icon (with a + button) in the top right corner, and fill in the fields.
Add folders to sync
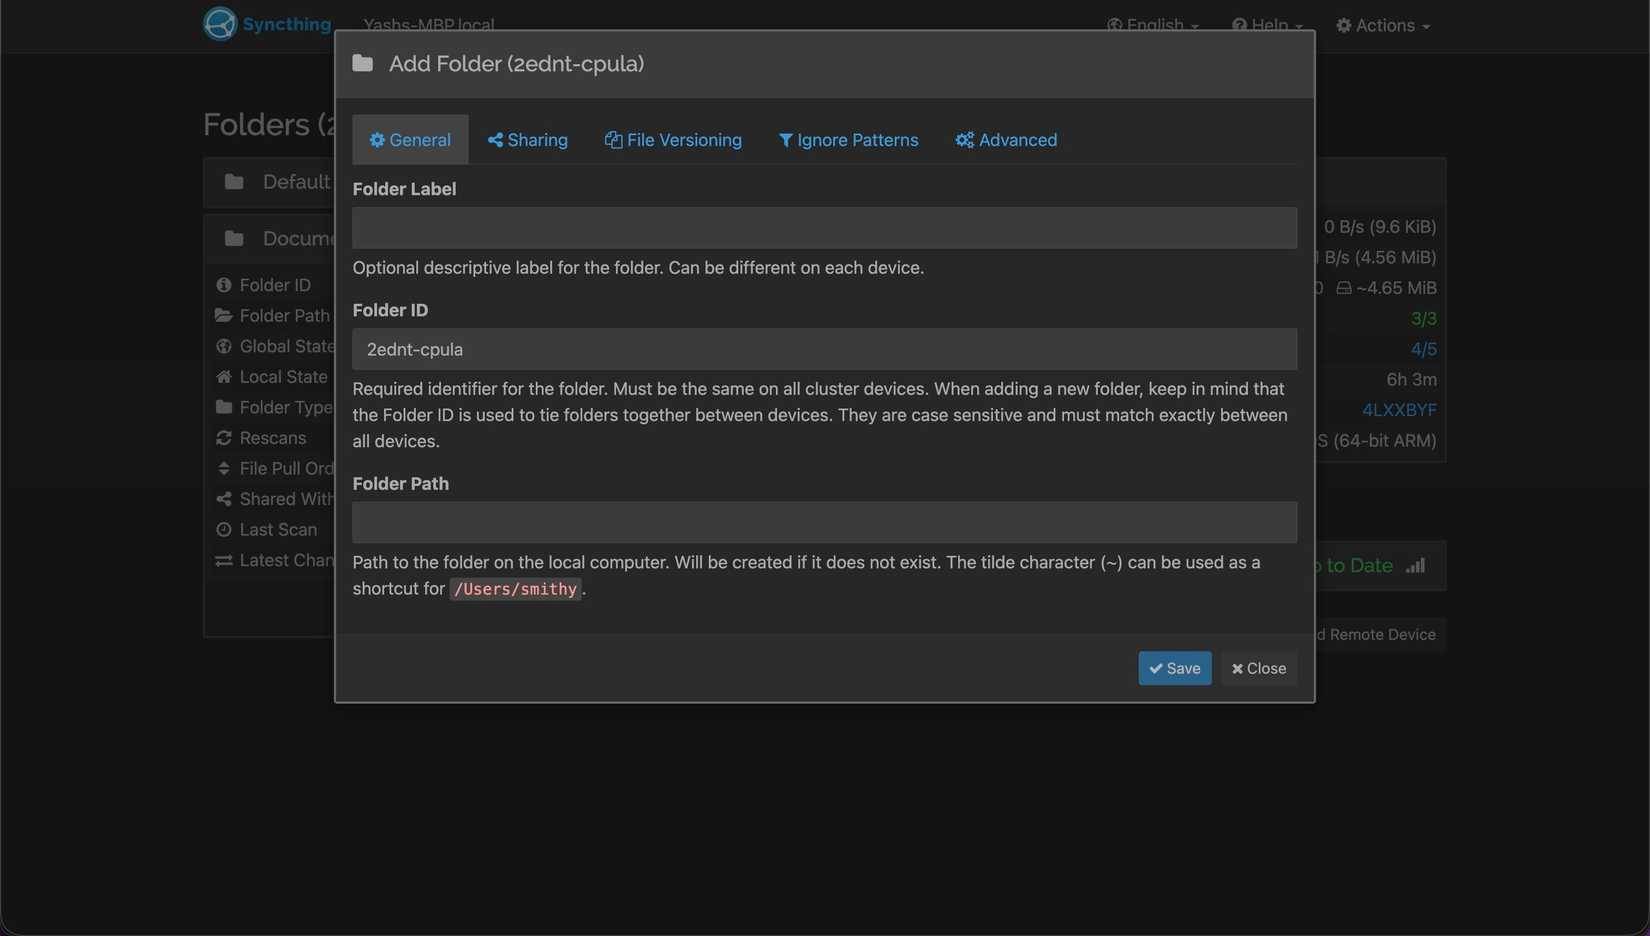
Once you've linked your devices, it's time to add the folders you want to sync.
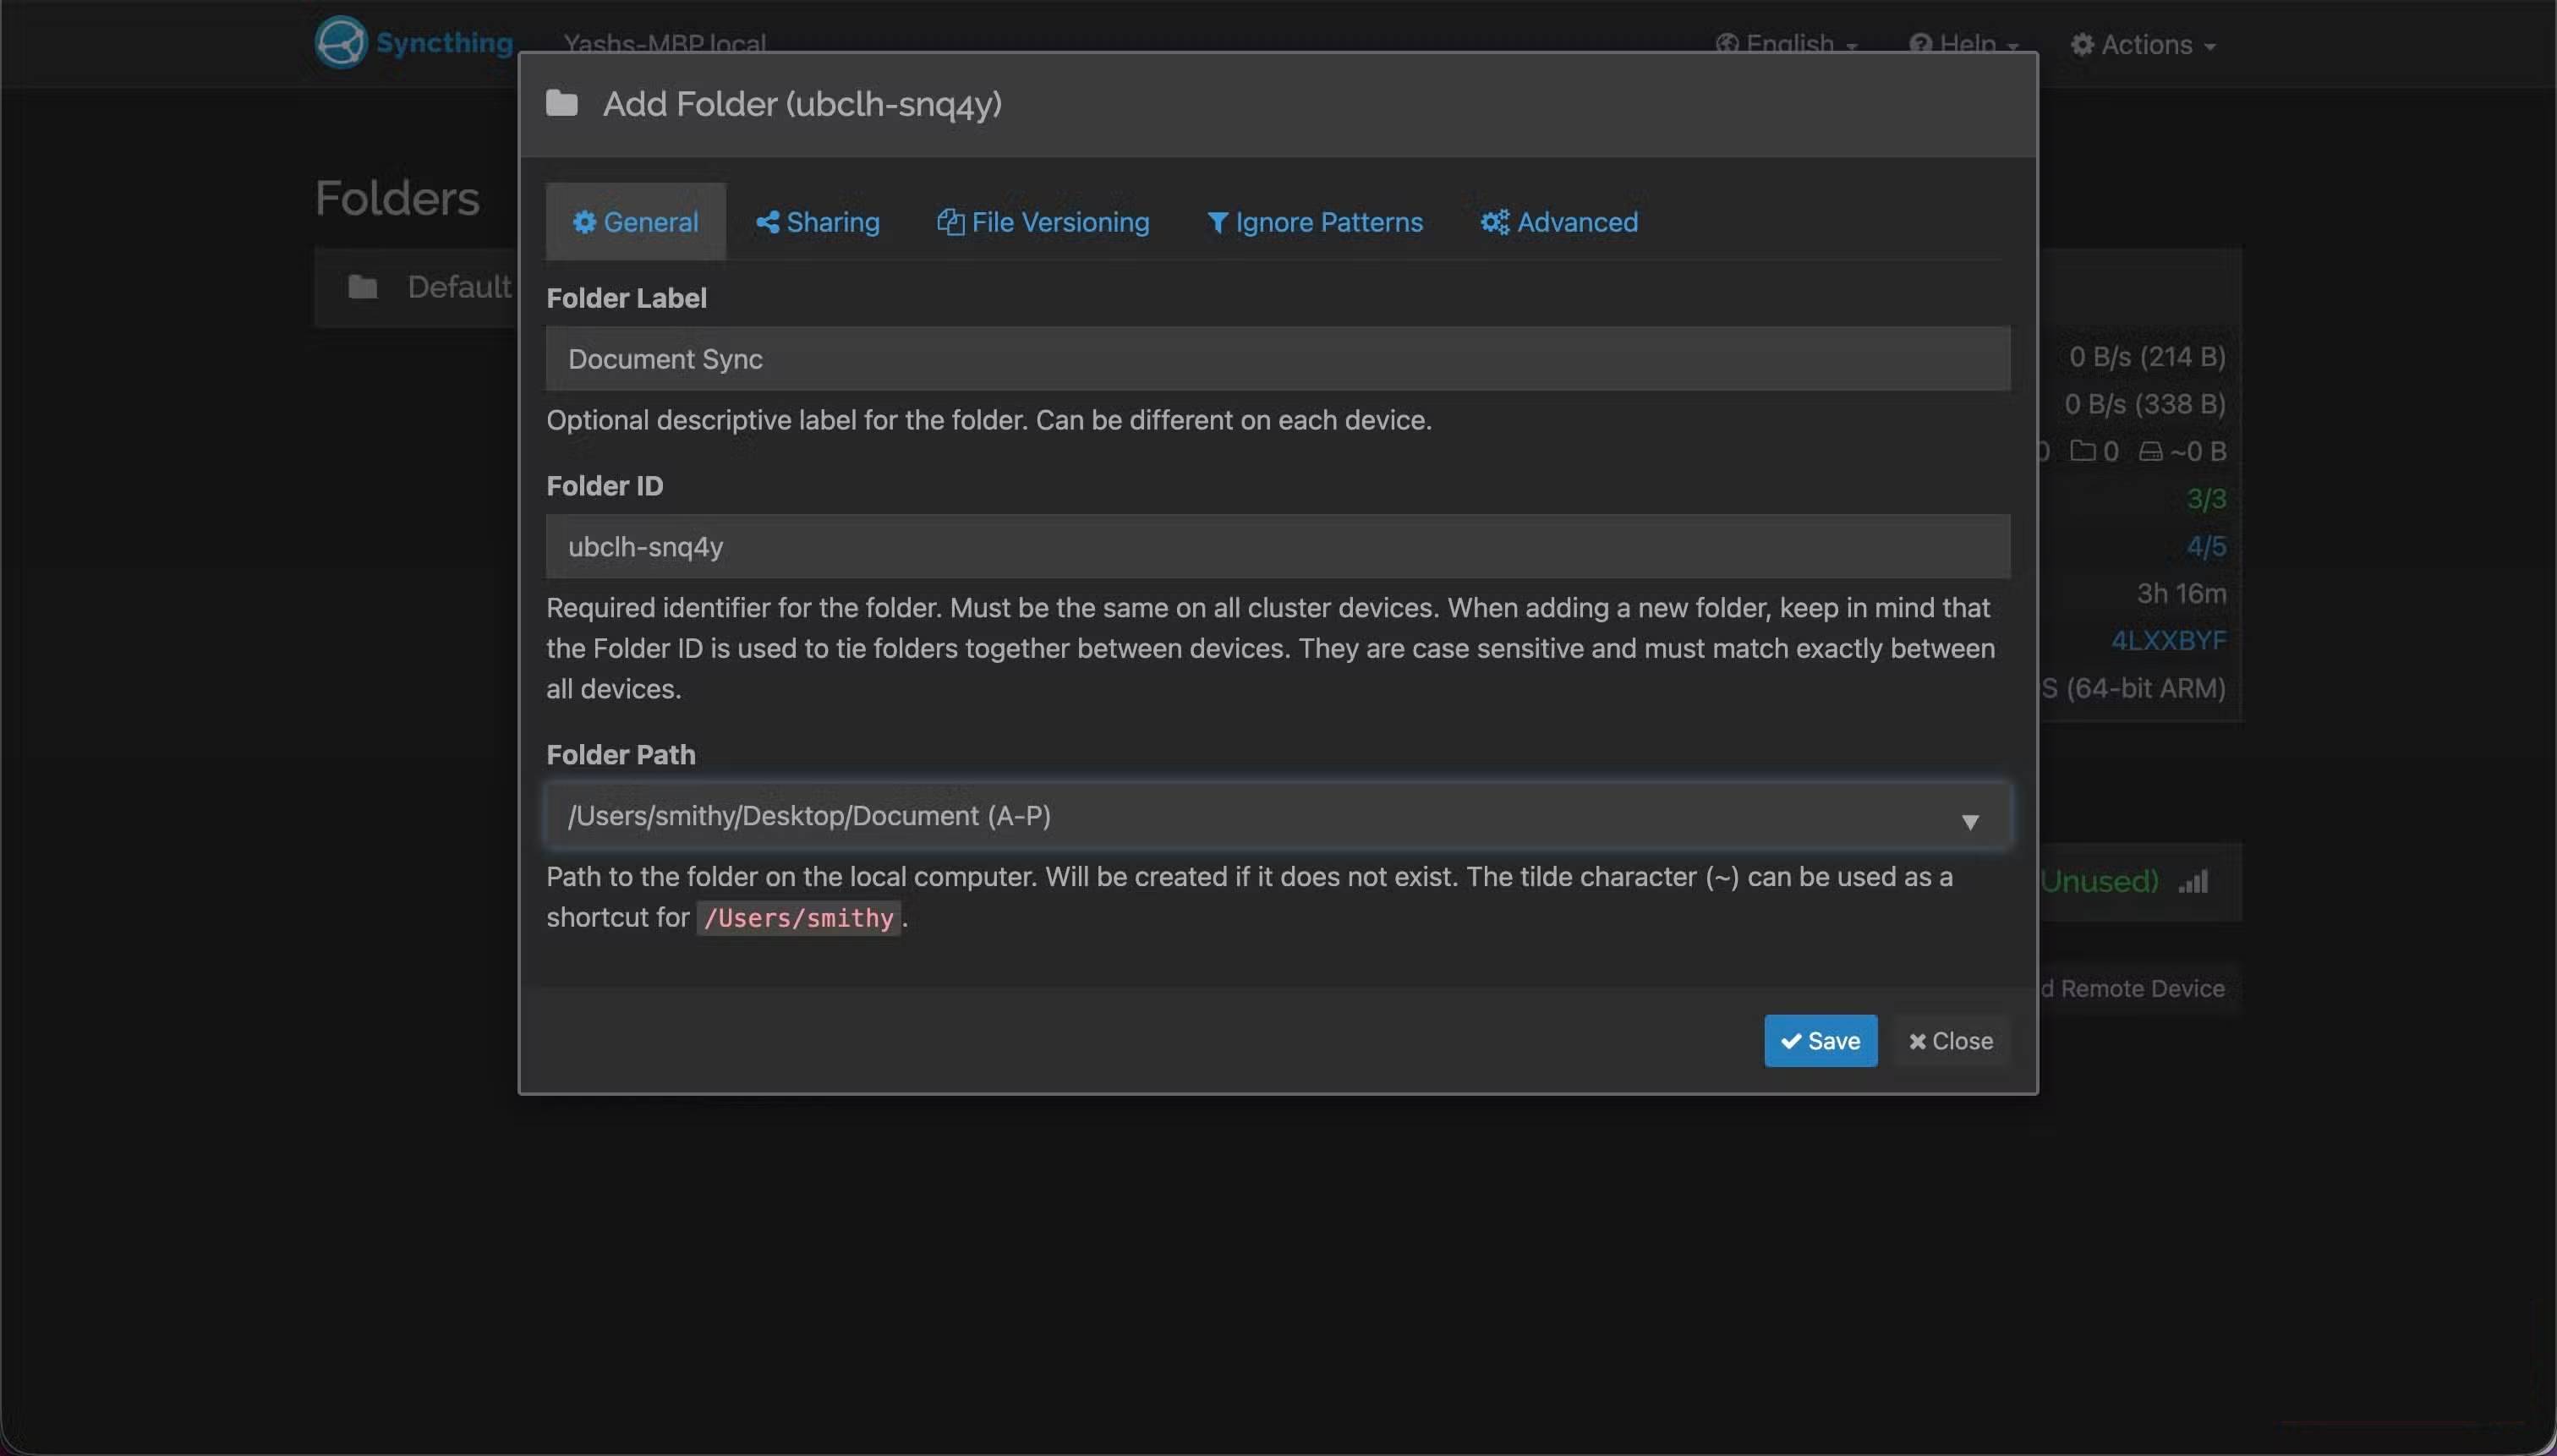
- Go to the Syncthing web UI and press the Add Folder button . Here, set a descriptive label for the folder in the Folder Label text field .
- Then, enter the path to the folder on your computer that you want to sync. You may see a prompt asking for access to the folder. Give it permission.
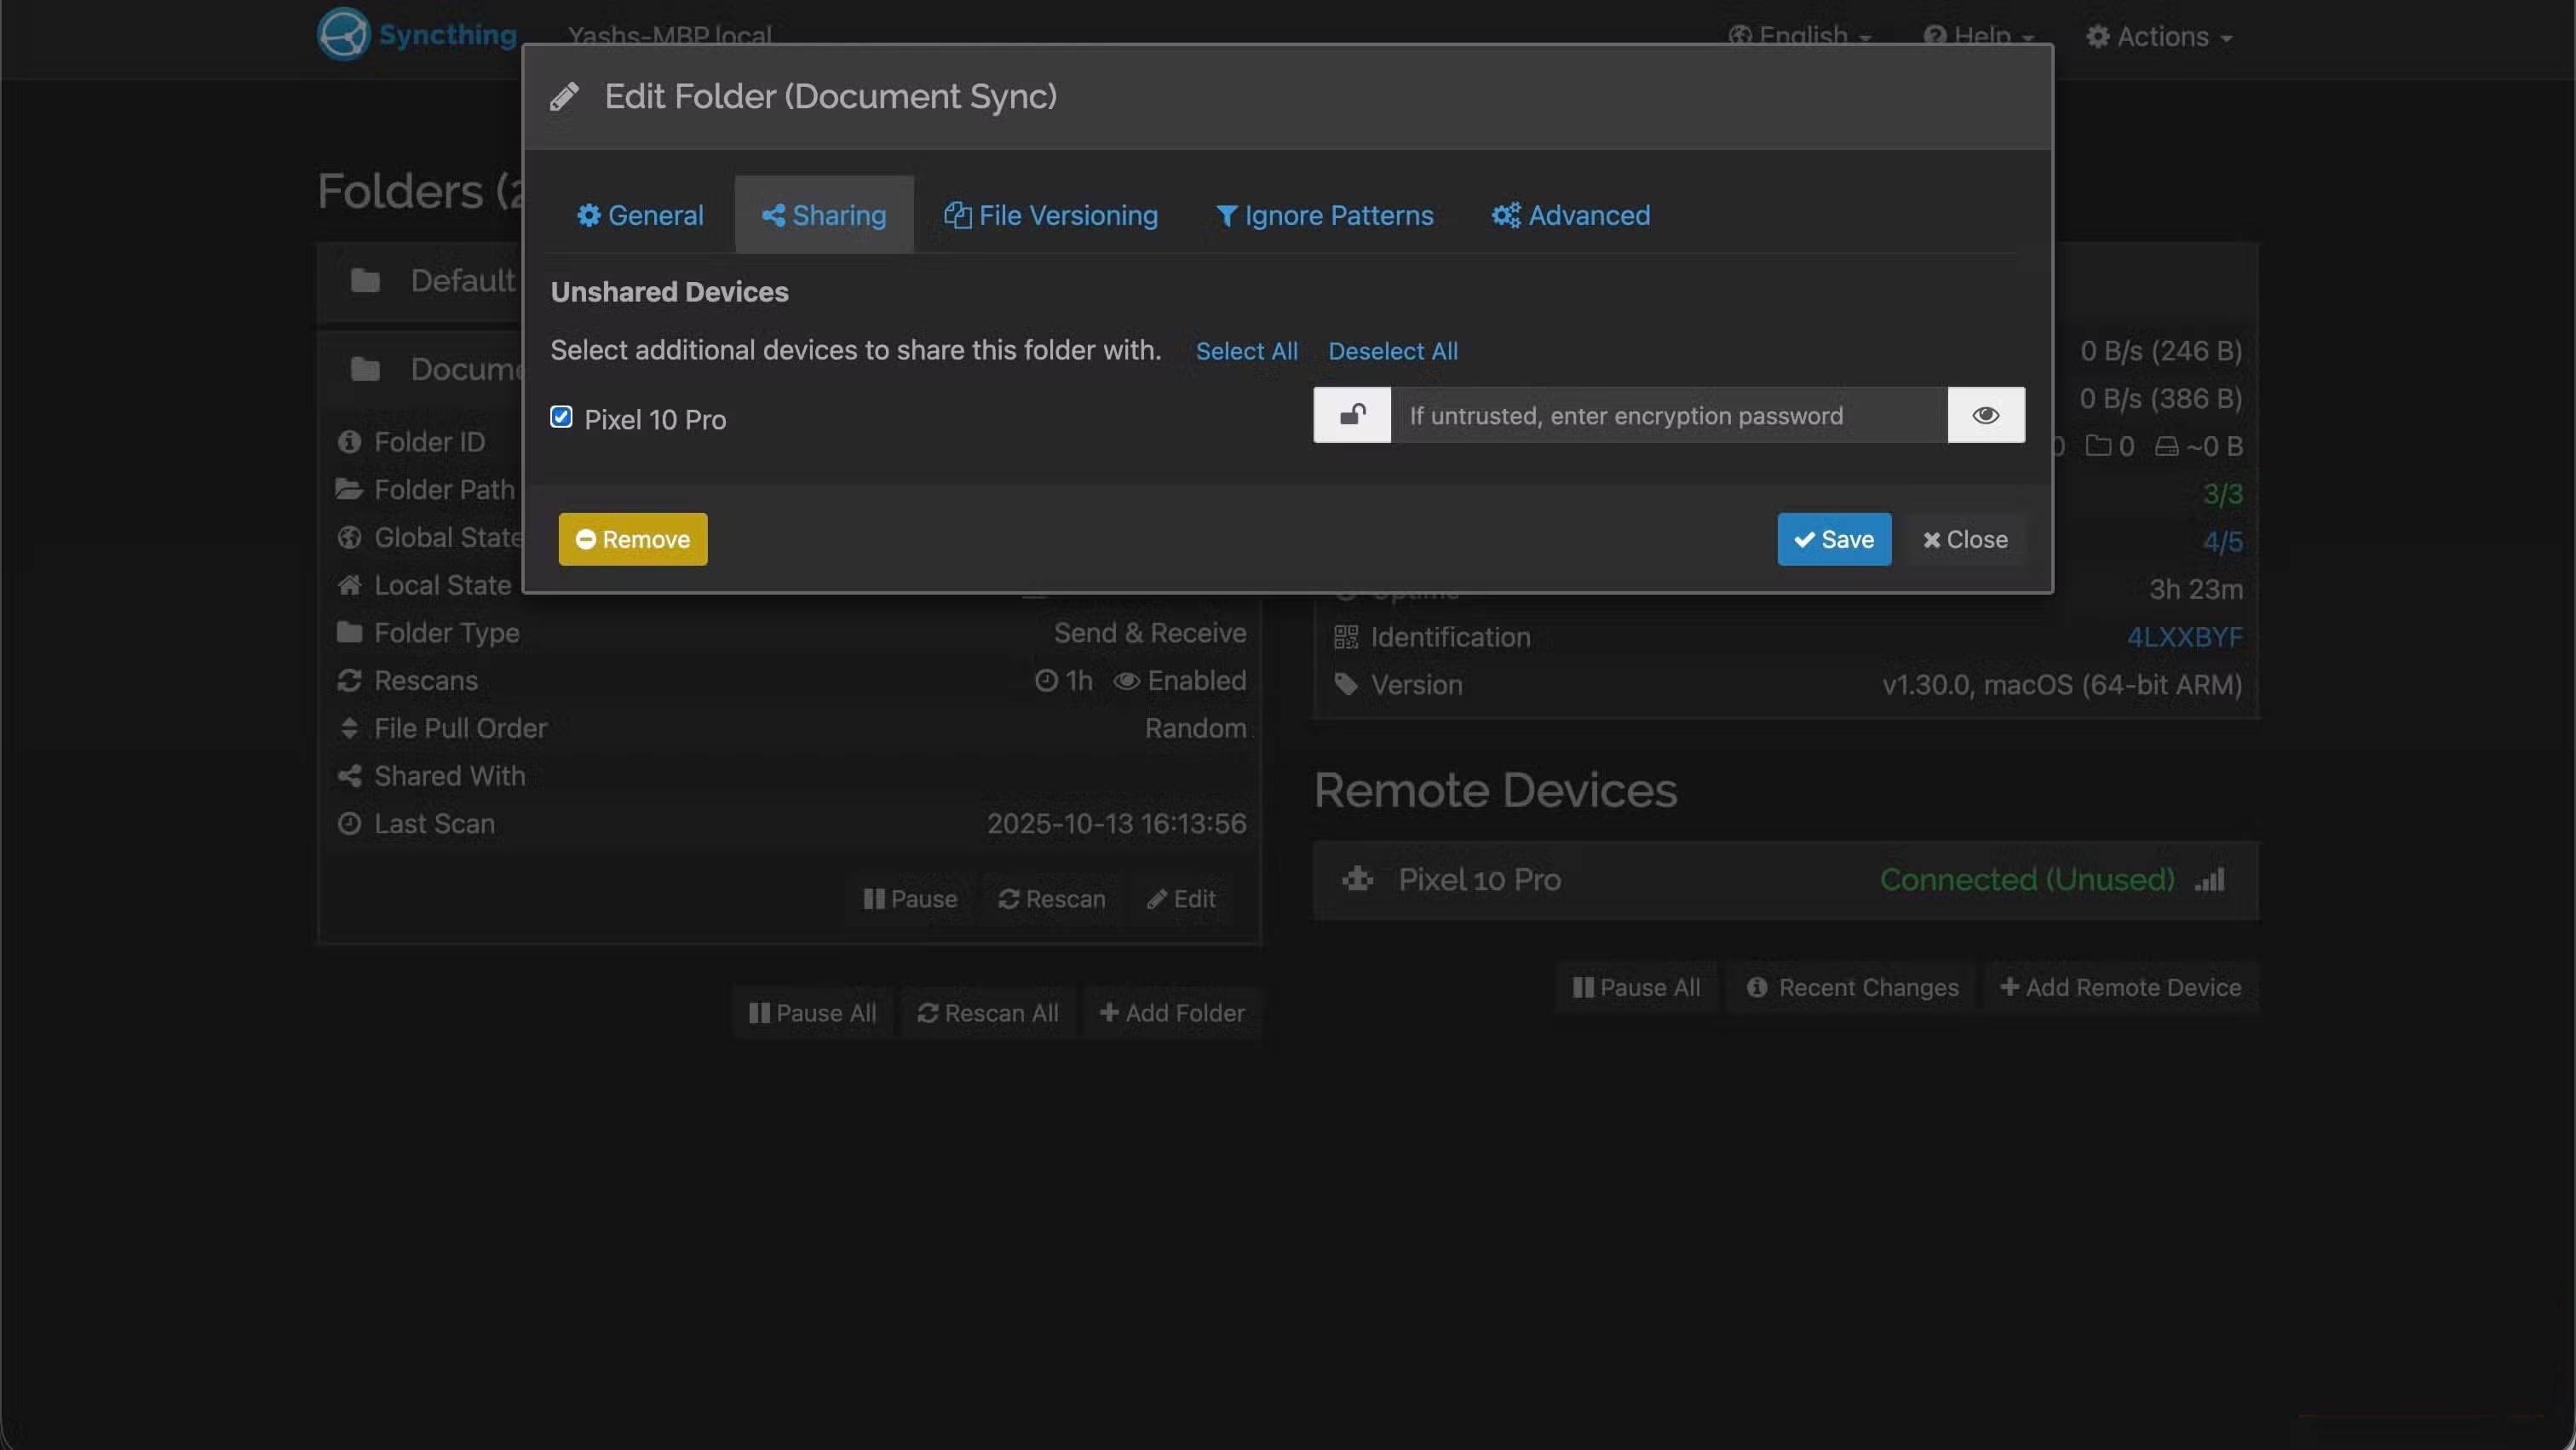
- Switch to the Sharing tab . Under Unshared Devices , check the box next to the device you just added and tap Save . You'll see a notification on your other devices asking if you want to add the shared folder.
- Click Add to continue.
Now, you need to add a label and enter the path to the folder where you want to store the synced files. Finally, click Save .
File synchronization
Now that you have everything configured, whenever you create, modify, or delete a file or subfolder inside the synced folder on any of your synced devices, the changes will be synced across all of them. This happens automatically and in real-time, without any intervention.
Set file version
By default, Syncthing doesn't use file versioning, meaning it doesn't keep old versions of files when they're deleted or replaced from other devices. However, if you're using Syncthing to sync files that change frequently, it's a good idea to set up file versioning to avoid losing data due to accidental changes.
Syncthing offers a variety of file versioning options. Its web interface includes a Help button that takes you to a blog that explains each option and its use cases in detail. But overall, I think the staggered file versioning system is the best option for most people. It strikes the perfect balance between keeping a useful version history and managing storage space by distributing multiple versions over time—more recent and fewer older—and automatically deprecating older versions.
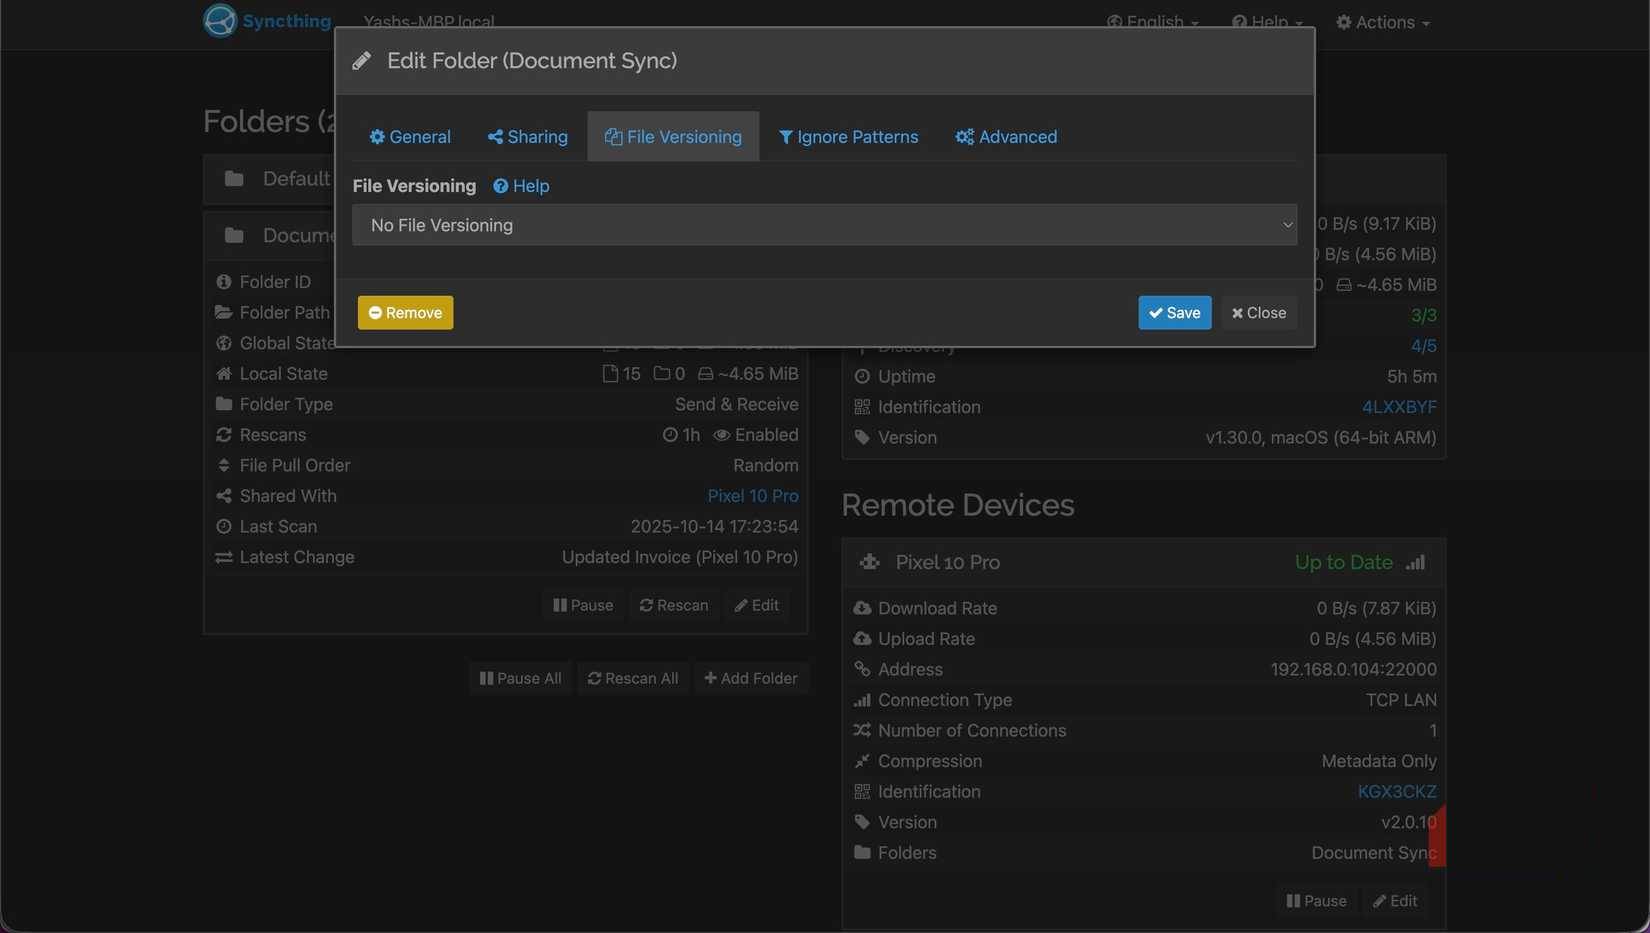
To do this, click on the folder you are syncing and press Edit . Go to the File Versioning tab , click the drop-down menu and select the appropriate option. Press Save .
Was this article helpful?
Your feedback helps us improve.
Related Articles
 How to sync files for free across all devices with SyncThing6 minutes read
 4 Privacy-Focused Google Photos Alternatives6 minutes read
 How to build your own sync system without Google Drive or OneDrive6 minutes read
 Can Pokemon Go be played on a computer? The answer is yes!5 minutes read
 Summary - How to play Pokemon GO, virtual reality game catch Pokemon on smartphone5 minutes read
 Things you didn't know about 26 types of Pokeball - Part 24 minutes read
Reader Comments 0
Sign in with email or Google to join the discussion.