Quickly identify file locations in Word 2013
During the compilation of Microsoft Word documents, you can forget where you saved the document in the device. In addition to using the 'Save As' command, you can quickly view the file location on the Quick Access Toolbar. This article explains how to quickly locate the file that is open in Microsoft Word 2013..
The article explains how to quickly locate the file you are opening through the Quick Access Toolbar in Microsoft Word 2013.
During the compilation of Microsoft Word documents, you can forget where you saved the document in the device. In addition to using the ' Save As' command, you can quickly view the file location on the Quick Access Toolbar.

How to do the following:
Open any document or open a new Microsoft Word editing window, click the tab (card) 'FILE'.

Click 'Options' at the bottom of the options list on the left.

In the ' Word Options' dialog box , click on the 'Quick Access Toolbar' in the list of options on the left.

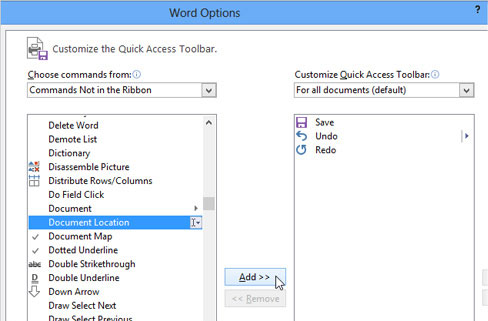
To reduce the options that appear to easily find the desired option, select ' Commands Not in the Ribbon' from the drop-down list in the ' Choose commands from' section .

Scroll down the list of commands until you find 'Document Location', click on it and click 'Add ' to add it to the Quick Access Toolbar.
You can move the Document Location button to another location in the Quick Access Toolbar using the arrow buttons. In the example in this article, the Document Location button is placed at the bottom of the toolbar, because the Document Location button is larger than the other nodes.
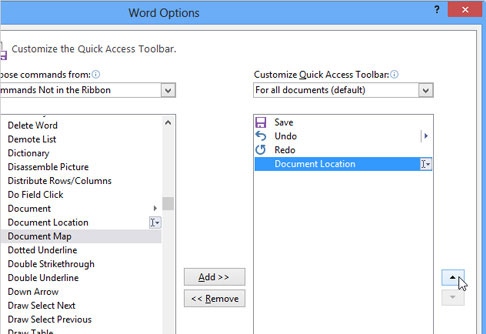
Click 'OK' to save and change the 'Word Options' dialog box .
You will see a ' Document Location' box with a drop-down list that appears on the Quick Access Toolbar and shows the path to the open document.
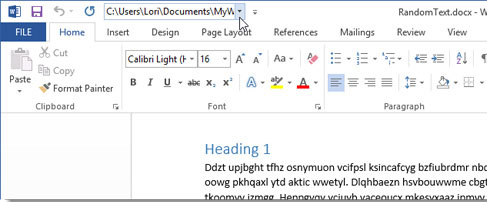
If you don't see the entire path in the Document Location box, click in the box and use the arrow keys to move the cursor to the end of the path.