The text editing operations on Word 2013 are basic
If you are a new user of Microsoft Word, you will probably have to learn more about the basics of how to enter, edit and organize text. Basic operations include adding, deleting and moving text on your documents, as well as how to cut, copy and paste text. Let's TipsMake.com get acquainted with the text editing operations in this article!
You can refer to the basic operations when working with Word documents in the video below:
Besides, you can refer to the Word 2013 Complete Guide (Part 1, 2 and 3) here:
- Word 2013 Complete Guide (Part 1): Basic tasks in Word
- Word 2013 Complete Guide (Part 2): How to create and open existing documents
- Word 2013 Complete Guide (Part 3): How to store and share documents
Using insertion points to add text
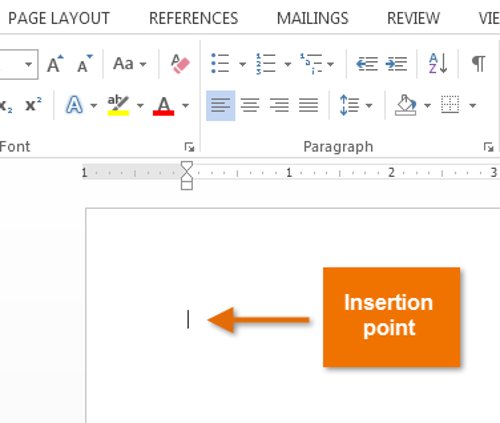
Insertion point is a flashing vertical line in the document text. It displays the location you can enter text on the document page. You can use insertion points in many different ways.
- Blank document : When opening a blank document, the insertion point will always appear in the top left corner of the page. If you wish, you can enter text from this location.
- Spacing between words : Press Spacebar to add space after words or between paragraphs.

- Down the next line : Press Enter to move the insertion point to the next line.
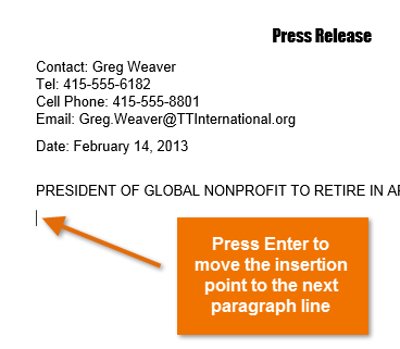
- Specific location editing : After the import is complete, you can use the mouse to move the insertion point to a specific location in the document. Simply click on the location where you want to place the insertion point in the text to edit .

In a blank document, you can double-click to move the insertion point to another location on the page.
I. Selection of text
Before formatting the text, you will first have to select the text. To do this, you need:
1. Move the point to insert the mouse to the position you want to select in the text.
2. Click and drag to the text you want to select, then release the mouse button.The selected text will be blacked out.

- When selecting text or images in Word, a Toolbar bar containing command shortcuts will appear. If the Toolbar does not appear, try hovering over the selected item.

- Other shortcuts include double-clicking to select a word or clicking the mouse three times to select the entire sentence or paragraph . In addition, you can also select all text in the document by pressing Ctrl + A shortcut key on the keyboard.
II. Delete text
Here are some ways to delete text:
- To delete the text to the left of the insertion point, press the Backspace key on the keyboard.
- To delete the text to the right of the insertion point, press the Delete key on the keyboard.
- Select the text you want to delete, then press the Delete key.
If you select the text to delete and start typing, the selected text is automatically deleted and replaced with new text.
III. Copy and move text
Word 2013 allows users to copy text in documents and paste into another location to help save time. If you want to move the text to other locations in the document, you can cut and paste or drag and drop .
Copy and paste text
Copy text creates a copy of the text.
1. Select the text you want to copy.

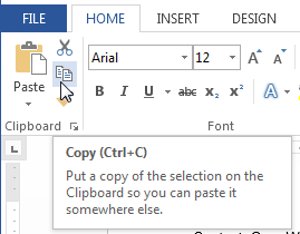
2. Click the Copy command on the Home tab. In addition, you can also right-click on the selected text and choose Copy or perform a quick operation by pressing Ctrl + C.
3. Move the insertion point to the location where you want to paste the text.

4. Click the Paste command on the Home tab. Or press Ctrl + V.

5. Text will appear at the location where you paste.

Cut and paste text
1. Select the text you want to cut.

2. Click the Cut command on the Home tab. Or right-click on the selected text and select Cut , or press Ctrl + X.

3. Move the insertion point to the position where you want to paste the cut text.

4. Click the Paste command on the Home tab. Or press Ctrl + V. That text will appear.

- You can access the cut, copy and paste commands using keyboard shortcuts. Press Ctrl + X to cut, Ctrl + C to copy and Ctrl + V to paste.
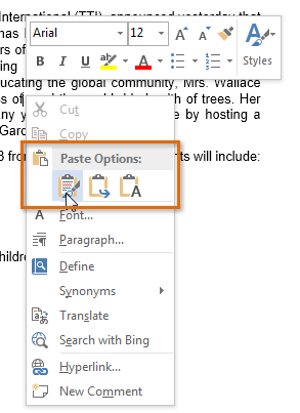
- Alternatively, you can also cut, copy and paste by right-clicking on the document and selecting the desired action from the drop-down menu. When using this method to paste, you can choose from three options to determine how the text will be formatted: Keep Source Formatting, Keeping Formatting and Keep Text Only ( Only keep text ). You can hover over each icon to see how it looks before selecting it.
Drag and drop text
Drag and drop text allows you to use the mouse to move text.
1. Select the text you want to move.

2. Click and drag the text to the position you want to paste. A small rectangle icon will appear below the arrow so users can know that the text is being moved.

3. Release the mouse button and the text will appear where you pasted.
Use Find and Place
When working with a long document, it will be difficult and sure to take a lot of time to find a specific word or phrase. Word can automatically search your document using the Find feature and allow you to quickly change a word or phrase using the Replace feature .
I. Find text
In the example below, we write an academic report and use the Find command to find all the objects of a particular word.
1. From the Home tab, click the Find command.

2. At this time, there is a navigation panel on the left side of the screen.
3. Enter the text ( words or phrases ) you want to find in the box at the top corner of the navigation panel. In the example below, you can see the keyword is the author's last name that we searched for in the document:
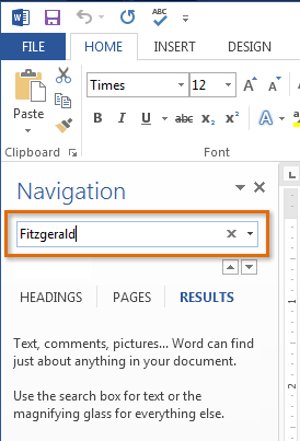
4. If the text ( word or phrase ) you find is found in the document, it will be highlighted in yellow and a preview of the results will be displayed on the navigation panel.
5. If the text appears several times, select a playback option ( review option ) to review each case. When an instance of the text is selected, it will fill in gray:
- Arrows : Use the arrows
 to move through the results.
 - Preview the results : Select the preview of the result to go directly to the location of a specific result in the document.

In addition, you can click on each search result in the results under the arrow to jump to that word or text.
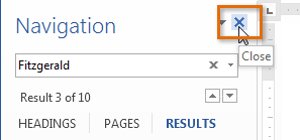
6. After finishing, click on the X icon to close the navigation panel. The highlighted text will disappear.
- You can access the Find command by pressing Ctrl + F on the keyboard.
- To display more search options, click the drop-down arrow next to the search box.

II. Replace words or phrases
Sometimes, in some cases, you find that you have made many repetitive errors throughout the text - such as a spelling of a proper name, or you need to change a word or phrase. with another word or phrase. You can then use the Find and Replace feature in Word to quickly manipulate.
In the example below we use Find and Replace to change the name of a journal, so it is abbreviated.
1. From the Home tab, click the Replace command or press Ctrl + H.

2. At this time, the Find and Replace dialog box will appear.
3. Enter the word or phrase you want to find in the Find what: box .
4. Enter the word or phrase you want to replace in the Replace with: box . Then, click Find Next .
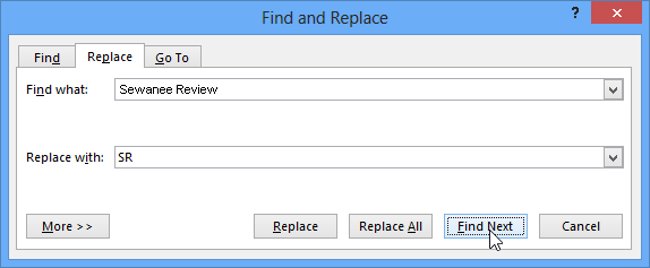
5. Word will find the word or phrase you entered in the Find what: box and mark the word or phrase in gray on the document.
6. Review the word or phrase you want to replace. In the example below, the phrase we searched for was part of the title of the article and so we didn't need to replace it. Click on Find Next again to switch to other objects.
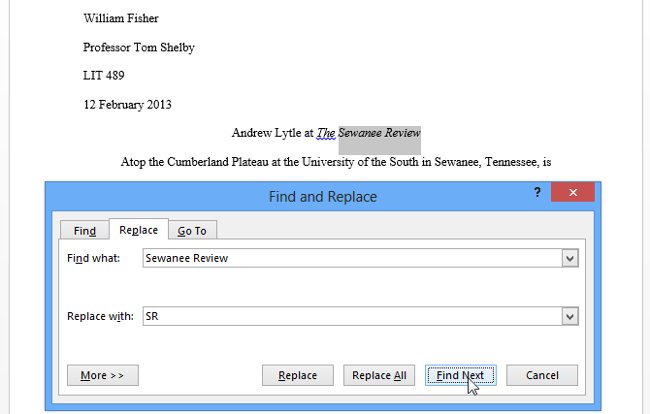
7. If you want to change a word or phrase, you can click Replace to change each word or phrase. Or alternatively you can click Replace All to replace all objects of the word or phrase in the entire text.
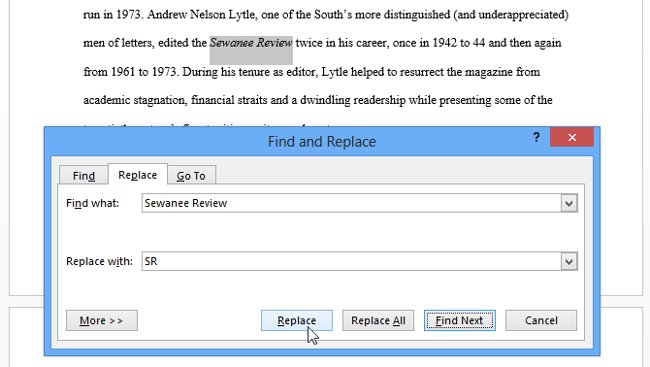
8. Those words or phrases will be replaced.

9. After finishing, click X to close the dialog box.
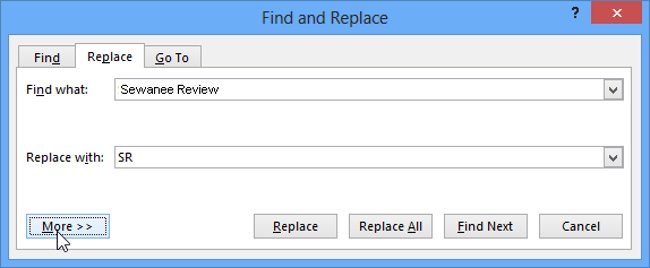
- To display more search options, click More in the Find and Replace dialog box. Here, you can set up additional search options such as Match Case or Ignore Punctuation .
See also: Word 2013: Instructions for using Microsoft and OneDrive accounts
Having fun!
You should read it
- ★ Word 2013 Complete Guide (Part 6): Aligning page layout
- ★ Word 2013 Complete Guide (Part 8): Using Indents and Tabs
- ★ Word 2013 Complete Guide (Part 7): Text printing operations
- ★ Create a new Word file, open the file in Word 2013
- ★ Word 2013 Complete Guide (Part 11): How to create hyperlink links

