Tip to save all images in Word file out
Want to save all the images in your Word file, but having too many images takes you too long? Follow the following article to know how to save images in Word files out extremely quickly.
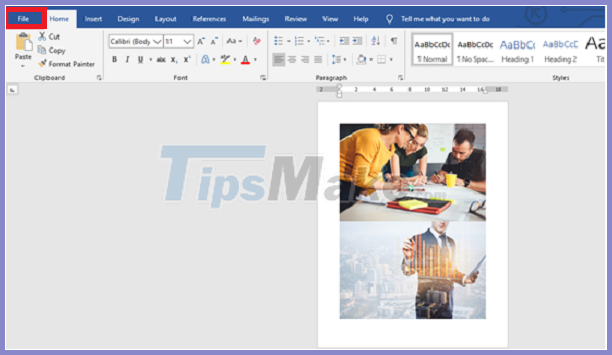
To save all the images in your Word file out, first you need to open the Word file. Then select the File tab on the ribbon toolbar.
Next, you choose Save As in the list on the left. Then select Browse to choose a save location.
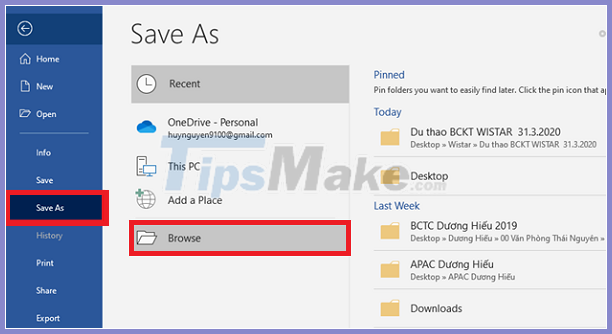
At this time, the Save As window appears. You proceed to name the folder and choose the location to save. Then you click on Save as type. Scroll bar appears, you select Web Page. Finally, click Save to Word to save the image in your Word file out.

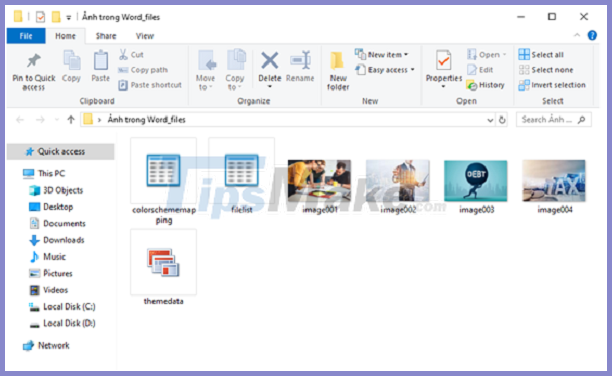
After you have finished clicking Save, you navigate to the location earlier and choose to save the folder. You can see a new folder with all the images in your Word file there. It's quick, isn't it.
Thus, the above article has guided you to quickly save all images in your Word file.
Hope the article will be useful to you in the working process.
Was this article helpful?
Your feedback helps us improve.
Related Articles
 No need to use software, here are 3 ways to get images from Word files fastest4 minutes read
 Insert images into Word 2016 and align images in Word 20165 minutes read
 Extract images from Word file fastest2 minutes read
 How to reduce Word file size25 minutes read
 Find a way to fix the error of Word files not displaying images quickly and effectively5 minutes read
 How to reduce the size and size of Word document files containing images2 minutes read
Reader Comments 0
Sign in with email or Google to join the discussion.